Corned Beef Hash Flavorful and Hearty Breakfast Dish

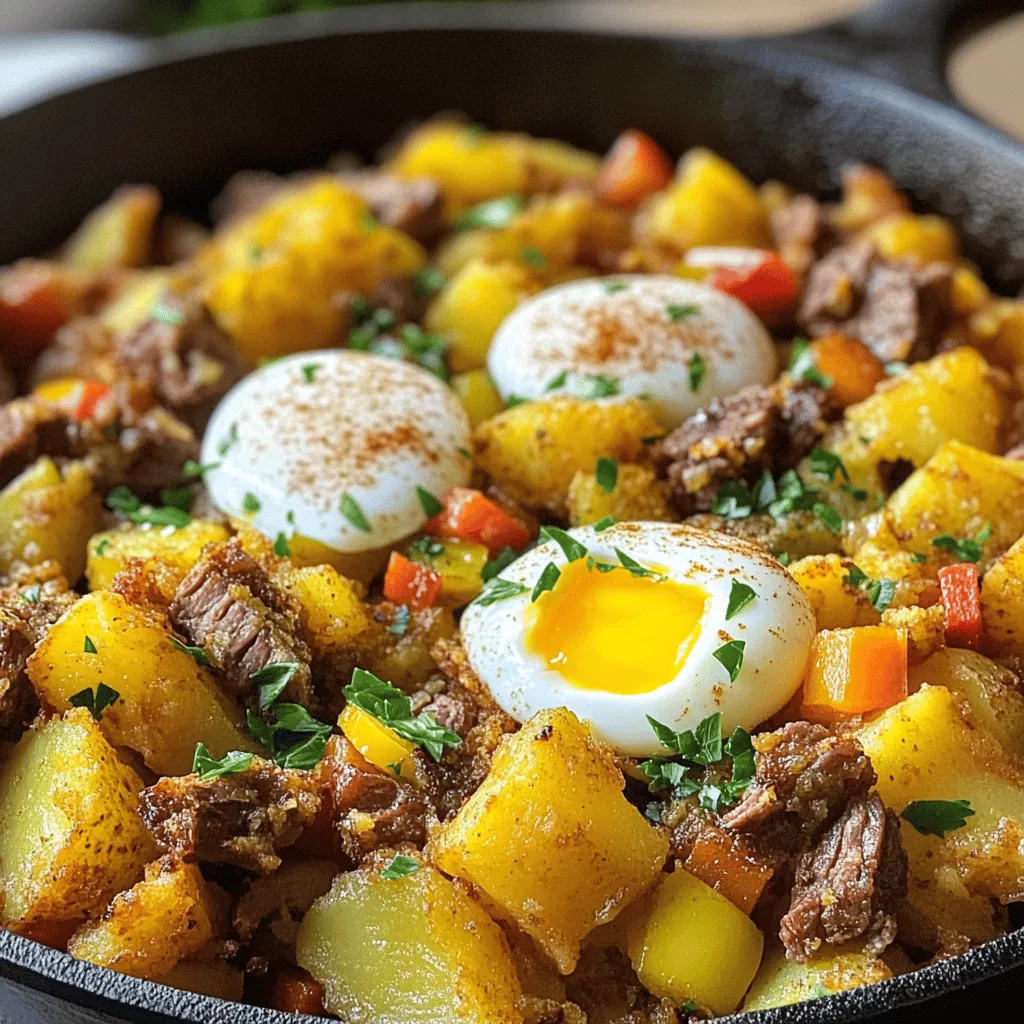
Looking for a tasty, hearty breakfast to kickstart your day? Corned beef hash is your perfect solution! This dish blends savory corned beef, crisp potatoes, and bold flavors. I’ll guide you through simple steps to create this classic comfort meal. Whether you’re a busy parent or a weekend chef, corned beef hash brings satisfaction to the table. Let’s dive in and explore how to make it unforgettable!
Ingredients
List of Essential Ingredients
– 2 cups cooked corned beef, finely chopped
– 3 medium potatoes, peeled and diced
– 1 medium onion, finely chopped
– 1 bell pepper, diced
– 2 cloves garlic, minced
– 2 tablespoons olive oil
– 1 teaspoon smoked paprika
– ½ teaspoon black pepper
– ½ teaspoon salt
– 2 large eggs (optional)
– Fresh parsley for garnish
When making corned beef hash, using the right ingredients is key. The star of the dish is the corned beef. It should be chopped finely. This lets it blend well with the other ingredients.
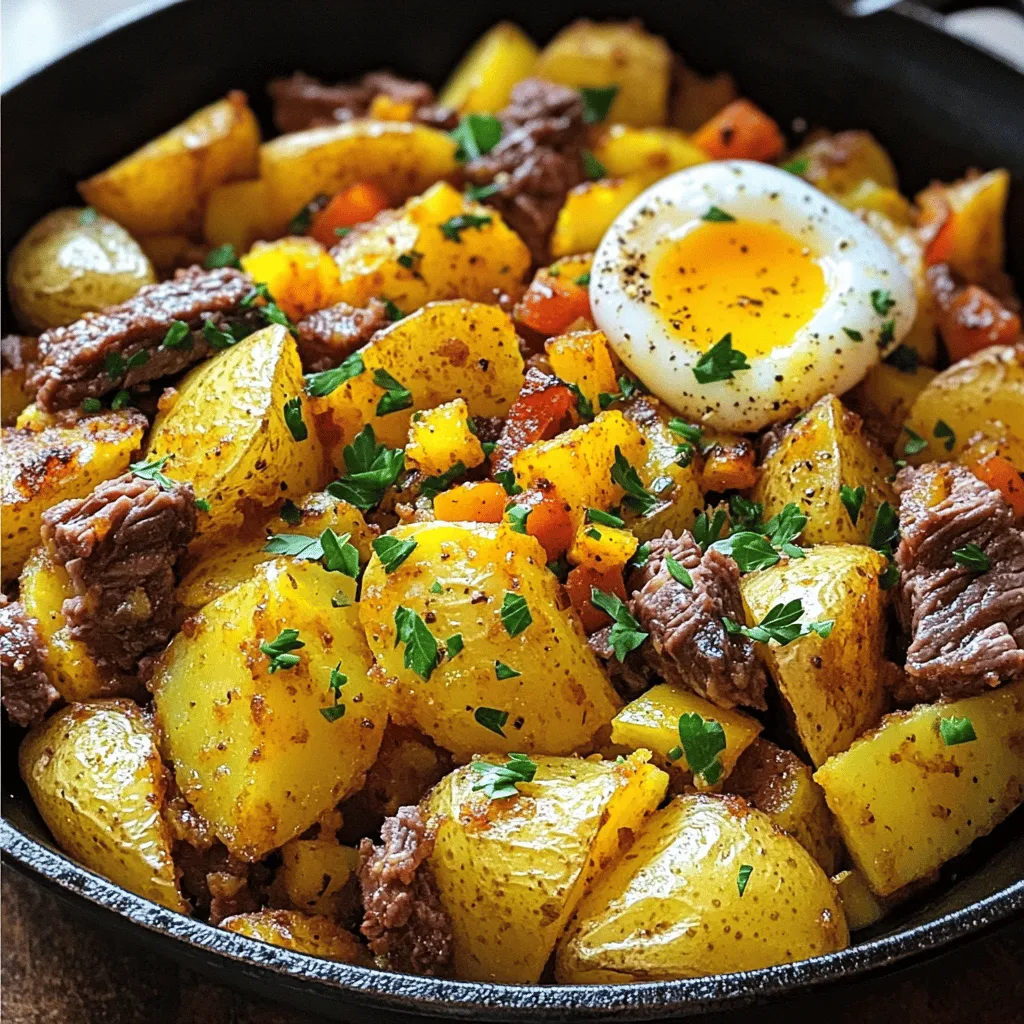
Next, potatoes are the base. I like using three medium potatoes. They add heartiness to the dish. Peel and dice them into small cubes. This helps them cook evenly and get nice and crispy.
Onions and bell peppers add sweetness and crunch. I prefer one medium onion and one bell pepper, but you can mix colors if you like. Garlic gives a nice flavor boost.
Don’t forget the olive oil! It helps everything cook and adds richness. I use smoked paprika for a touch of warmth and depth. Salt and black pepper round out the flavors.
Lastly, the eggs are optional but add a great touch. You can serve the hash with a sprinkle of fresh parsley for color and freshness. This adds a bright flavor to the dish.
Recommended Equipment
– Large pot for boiling
– Spacious skillet
– Cooking utensils
Using the right tools makes cooking easier. A large pot is best for boiling the potatoes. You want enough room to cook them all at once. A spacious skillet is key for frying the hash. It lets everything brown evenly.
Make sure you have good cooking utensils, like spatulas and spoons, to mix and serve. Having the right equipment makes the process smoother and more fun.
Step-by-Step Instructions
Preparing the Potatoes
Start by filling a large pot with water. Bring it to a rolling boil. Carefully add the diced potatoes. Boil them for about 10 minutes. The potatoes should be just tender. You can check this by poking them with a fork. Once done, drain the potatoes well. Set them aside to cool slightly.
Sautéing the Aromatics
Next, grab a spacious skillet and heat the olive oil over medium heat. Once the oil is hot, add the chopped onion and diced bell pepper. Sauté these for about 5 minutes. Stir them often until they become soft and translucent. This step builds a nice flavor base for your hash.
Adding Garlic and Seasonings
Now it’s time to add the minced garlic to the skillet. Also, sprinkle in the smoked paprika, black pepper, and salt. Stir everything together well. Cook for an additional 1-2 minutes. Enjoy the lovely aroma that fills your kitchen at this point.
Combining Ingredients
Carefully add the cooked potatoes and chopped corned beef to the skillet. Gently mix everything together. Ensure that the corned beef and potatoes are evenly distributed. Let them cook together for about 8-10 minutes. Stir occasionally until the corned beef is slightly caramelized and the potatoes are crispy.
Cooking the Optional Eggs
If you want to add eggs, create two small wells in the hash. Crack one egg into each well. Cover the skillet with a lid. Cook for about 3-5 minutes. Adjust the time based on how you like your eggs. Shorter for runny yolks, longer for firm yolks.
Serving and Garnishing
Once everything is cooked through, take the pan off the heat. Sprinkle freshly chopped parsley over the top. This adds a nice pop of color and fresh taste. For a rustic touch, serve the corned beef hash in a cast-iron skillet or in bowls. If you added eggs, top each serving with one. Enjoy with a side of hot sauce or your favorite condiment!
Tips & Tricks
Achieving the Perfect Texture
To get crispy potatoes and a tasty hash, start with the right potatoes. Use starchy potatoes like russets. They become fluffy inside. Boil them just until tender, but not mushy. Drain them well so they don’t steam in the pan. When you sauté, use enough oil. This helps achieve that golden crust we all love. Don’t stir too often. Let them sit a bit before flipping. This allows those crispy edges to form.
Adjusting Seasonings
Seasoning is key to a great corned beef hash. Smoked paprika adds a nice depth. You can change the spices to match your taste. Try adding cumin for warmth or cayenne for heat. Fresh herbs like thyme or rosemary can brighten the dish. Taste as you go! Don’t be afraid to adjust the salt and pepper to your liking. Each cook has their own flavor preference.
Cooking Techniques
You can cook corned beef hash in a few ways. The stovetop is most common, but you can also bake it. For a baked version, spread the hash in a baking dish and cover it. Bake at 375°F until heated through and crispy. If you want a quicker option, try using an air fryer. It cooks evenly and gives great texture. Just remember to not overcrowd the pan. This keeps the heat circulating and ensures even cooking.
Using these tips will help elevate your corned beef hash to a new level.

Variations
Adding Vegetables
You can really amp up your corned beef hash by adding veggies. Here are some great ideas:
– Carrots: Diced small, they add a nice sweetness.
– Spinach: Added near the end, it wilts down beautifully.
– Zucchini: Diced and sautéed, it brings moisture and flavor.
– Mushrooms: Sliced and cooked, they add a rich, earthy taste.
– Peas: Frozen peas can be added right at the end for a pop of color.
These veggies not only make your hash more colorful but also boost its nutrition.
Flavor Enhancements
To elevate your dish, consider using spices and sauces. Here are some handy tips:
– Hot Sauce: A splash can add heat and zest.
– Worcestershire Sauce: A few drops can deepen the flavor profile.
– Herbs: Fresh thyme or rosemary can bring a fragrant touch.
– Mustard: A dollop of Dijon gives a tangy kick.
– Cheese: Adding shredded cheese at the end creates a creamy layer.
These small changes can transform your corned beef hash into something special.
Alternative Proteins
If you want to switch things up, try different proteins. Here are some options:
– Turkey: Use cooked turkey for a leaner version.
– Chicken: Shredded chicken works well and keeps it light.
– Plant-Based: For a vegan option, use jackfruit or tempeh.
– Pork: Cooked pulled pork can add a smoky flavor.
These alternatives can suit various diets while keeping your meal hearty and satisfying.
Storage Info
How to Store Leftovers
To keep corned beef hash fresh, let it cool down first. Place it in an airtight container. Store it in the fridge for up to three days. If you want to keep it longer, consider freezing it.
Reheating Instructions
To reheat, use a skillet over medium heat. Add a splash of water or oil to help steam. Stir often to heat evenly. This keeps the hash nice and moist. You can also use the microwave for quick reheating. Just cover it and heat in 30-second bursts until warm.
Freezing Tips
To freeze corned beef hash, pack it tightly in a freezer-safe container. Be sure to leave some space for expansion. It will last for up to three months. When ready to eat, thaw it in the fridge overnight. Reheat as mentioned above. This method helps retain flavor and texture.
FAQs
What is Corned Beef Hash?
Corned beef hash is a tasty mix of chopped corned beef and potatoes. It often has onions and peppers for added flavor. This dish started as a way to use leftover corned beef, a popular meat from Ireland. People would chop it up with potatoes and fry it in a pan. Over time, it became a favorite breakfast dish in many homes. You can find it in diners and cafes across the country.
Can I make Corned Beef Hash ahead of time?
Yes, you can prepare corned beef hash ahead of time. Cook it fully and let it cool. Store it in the fridge in a sealed container. It will stay fresh for about three days. To save time, you can also chop the ingredients before cooking. Just keep them separate until you are ready to cook. For best results, reheat it in a skillet on the stove. This way, it will regain its crispy texture.
What can I serve with Corned Beef Hash?
Corned beef hash pairs well with many sides. Here are some great options:
– Toasted bread or English muffins
– Fresh fruit for a light touch
– A side salad for some greens
– Eggs cooked your way, like sunny-side up or scrambled
– Hot sauce for a spicy kick
These sides can balance the hearty nature of the hash. They also add color and variety to your plate. For a complete meal, feel free to mix and match!
This post walked you through making a delicious corned beef hash. You learned the essential ingredients, helpful equipment, and step-by-step instructions. Tips and tricks helped you get the perfect texture and flavors. You also discovered fun variations and how to store your leftovers.
Now you can enjoy this hearty dish any day. Trust your skills, and don’t hesitate to experiment with new flavors. Happy cooking!


![- 1 lb lobster tails, halved lengthwise - 1 lb fresh sea scallops - 4 tablespoons unsalted butter, divided - 4 cloves garlic, finely minced - 1 lemon, juiced (about 2 tablespoons) - 2 tablespoons fresh parsley, finely chopped - Salt and freshly ground black pepper, to taste - Lemon wedges, for serving When I prepare Easy Garlic Butter Lobster Scallops, I love how fresh ingredients shine. The lobster tails and scallops are the stars of this dish. Using fresh seafood makes all the difference. Each bite bursts with flavor. Butter brings richness to the dish. I use unsalted butter to control the saltiness. Garlic adds a lovely aroma and taste. It’s important to finely mince the garlic. This helps to spread its flavor evenly. I always squeeze fresh lemon juice for brightness. The juice balances the rich butter. Chopped parsley adds a nice touch. It gives the dish a pop of color and freshness. Don’t forget about seasoning! Salt and black pepper enhance the seafood’s natural flavor. I like to season both the lobster and scallops well before cooking. Lastly, lemon wedges are a must. They add a fresh hit of citrus when served. I find that a squeeze of lemon elevates the whole meal. For the full recipe, check out the details above. Enjoy creating this flavorful delight! First, take the lobster tails and scallops out of the package. Gently pat them dry with a paper towel. This step is key for a nice sear later. Next, season them with salt and black pepper. Make sure to cover all sides for even flavor. Now, let’s get cooking! In a large skillet, melt 2 tablespoons of unsalted butter over medium heat. Once the butter is melted and bubbly, add the minced garlic. Sauté the garlic for about one minute until it is fragrant. Be careful not to let it burn. Next, add the lobster tails to the skillet. Place them cut-side down first. Sear the tails for about 3-4 minutes until they turn golden brown. Then, carefully flip them over and cook for another 2-3 minutes. They should look opaque and fully cooked. Remove them and set aside. Now, it’s time for the scallops. Add them to the same skillet, making sure not to overcrowd them. Sear each side for about 2-3 minutes until they get a beautiful golden crust. Once done, remove the scallops and place them with the lobster. Return the cooked lobster to the skillet. Squeeze in the fresh lemon juice and sprinkle the chopped parsley over everything. Gently toss the lobster and scallops in the garlic butter sauce. This will help all the flavors blend nicely. Finally, serve the lobster and scallops on a large platter. Drizzle any remaining garlic butter sauce over the seafood. Garnish with more parsley and add lemon wedges on the side. For the full recipe, check the detailed instructions above. Enjoy your tasty dish! To make your lobster and scallops shine, start with good searing. Searing gives seafood a nice crust. Heat your skillet until it's hot. Add butter and let it melt before placing the seafood in. This helps lock in flavors and moisture. Drying your seafood before cooking is very important. Use paper towels to pat the lobster tails and scallops dry. Removing excess moisture helps achieve that perfect golden sear. Wet seafood will steam instead of sear. Adding herbs and spices can elevate your dish. Fresh thyme or basil can add great flavor. A pinch of red pepper flakes can give it a nice kick. Don't be afraid to experiment with flavors you love. For sauces, consider making a light citrus sauce. A mix of lemon juice and olive oil works well. You can also add a splash of white wine for depth. These additions can enhance the overall taste of your seafood. Presentation matters when serving seafood. Arrange the lobster tails and scallops on a large platter. Place them in a way that looks inviting. You can stack the scallops for a layered look. Garnishing makes your dish pop. Use chopped parsley for a fresh touch. Lemon wedges add color and a burst of flavor. A well-presented dish makes a great impression, so take your time with this step. Want to try this delicious dish? Check out the [Full Recipe]. {{image_4}} If you cannot find lobster or scallops, you have options. You can use shrimp instead of lobster. Shrimp cooks fast and adds great flavor. For scallops, try using firm fish like cod or halibut. Both will work well in this dish. For dairy-free butter, consider using olive oil or coconut oil. Both options will give a nice taste. You can also find plant-based butter in stores. Just make sure it melts well for your sauce. You can cook your seafood in different ways. Grilling is a fun option. It gives a smoky flavor that pairs well with garlic. Just brush the lobster and scallops with butter before grilling. Sautéing is great for a quick meal. It lets the garlic and butter shine through. Broiling is another method to try. It cooks the seafood from above. This method creates a crispy top while keeping the inside juicy. You will get a different flavor profile that is equally delicious. For side dishes, consider a fresh salad or garlic bread. A light pasta with lemon pairs well, too. These sides will balance the rich flavors of the seafood. As for drinks, a crisp white wine like Sauvignon Blanc is perfect. It cuts through the richness of the butter. If you prefer non-alcoholic drinks, try sparkling water with lemon. It refreshes the palate nicely. For the full recipe, check the Easy Garlic Butter Lobster Scallops 🦞🧄 section. To keep your Easy Garlic Butter Lobster Scallops fresh, place them in an airtight container. This helps avoid any unwanted smells in your fridge. Make sure to refrigerate them within two hours of cooking. They can last up to three days in the fridge. If you notice any off smell or discoloration, it's best to toss them out. When you want to enjoy your leftovers, the best way to reheat is on the stove. Use low heat to warm them gently. This keeps the seafood tender. You can also use the microwave, but do it in short bursts to avoid overcooking. Cover the dish with a damp paper towel to keep moisture in. Remember, seafood can dry out quickly. Yes, you can freeze lobster scallops! However, freezing may change their texture. To freeze, place them in a freezer-safe bag or container. Remove as much air as possible before sealing. They can stay frozen for up to three months. When you're ready to use them, thaw in the fridge overnight. Avoid thawing at room temperature to keep them safe. If you're looking for the full recipe, check out the Easy Garlic Butter Lobster Scallops recipe above! You can tell when scallops are done by their color and texture. They should be opaque and firm. A golden crust on the outside shows they are well-seared. Avoid cooking them too long. Overcooked scallops become rubbery and tough. Common mistakes include overcrowding the pan and not drying them well. Always dry scallops with paper towels. This helps them sear nicely and not steam. Yes, you can use frozen lobster tails and scallops. Just make sure to choose high-quality seafood. Look for ones that are flash-frozen for best taste. To thaw, place them in the fridge overnight. If you're in a hurry, seal them in a bag and submerge in cold water for about 30 minutes. Cook them right after thawing for the best flavor. Pair your dish with light sides. A fresh salad with lemon vinaigrette works well. Roasted asparagus or green beans add great color and flavor. For a complete meal, serve with garlic bread and a glass of white wine. This combination enhances the rich flavors of the lobster and scallops. You can find the full recipe for Easy Garlic Butter Lobster Scallops and create a delightful feast! This blog post highlighted key ingredients for an easy garlic butter lobster and scallops dish. I walked you through preparation, cooking, tips for perfect seafood, and variations to keep meals exciting. You now have practical storage info and answers to common questions. No matter how you serve this dish, it promises flavor. Enjoy crafting a meal that impresses everyone at your table. Happy cooking!](https://fastmealmate.com/wp-content/uploads/2025/06/dfec37c8-f7d2-4a99-9114-2c33cea5f0b3-768x768.webp)


![- 2 ripe mangoes - 1 large cucumber - 1 red bell pepper - 1/4 red onion - 1/4 cup fresh cilantro - 1 jalapeño - Honey or agave syrup - Fresh lime juice - Salt and pepper to taste When I make this salad, I start by gathering all the main ingredients. Ripe mangoes add sweetness and color. The cucumber gives a nice crunch. A red bell pepper brings brightness. I chop the red onion finely for a hint of sharpness. Fresh cilantro adds a burst of flavor. If you like heat, you can add a jalapeño. Just remember to remove the seeds. For sweetness, honey or agave syrup works well too. For the dressing, I use fresh lime juice. It brightens the salad and adds tang. I season it with salt and pepper. This combination makes the salad taste fresh and lively. The full recipe is easy to follow and takes just 15 minutes to prep. Enjoy making this delightful dish! First, you'll need to prep your fruits and veggies. Start with these steps: - Dice 2 ripe mangoes into bite-sized pieces. Make sure they are sweet and juicy. - Chop 1 large cucumber into small cubes. This adds a nice crunch. - Cut 1 red bell pepper into small pieces for color and taste. - Finely chop 1/4 red onion for a hint of sharpness. - If you like some heat, mince 1 jalapeño and set it aside. - Finally, chop 1/4 cup fresh cilantro for a burst of freshness. Now, it's time to combine everything. Follow these steps: - In a large mixing bowl, add the diced mangoes, cucumber, red bell pepper, and red onion. Give them a gentle stir to mix. - Next, fold in the chopped cilantro and minced jalapeño. Adjust the jalapeño based on how spicy you want your salad. - In a separate bowl, whisk together 2 tablespoons fresh lime juice and 1 tablespoon honey (or agave syrup) until smooth. - Drizzle the dressing over the salad mix in the large bowl. - Using a spatula or wooden spoon, toss everything together gently. You want all the ingredients to be coated in the dressing. To finish your salad, season it just right: - Sprinkle salt and pepper to taste over the salad. - Toss it again very gently to distribute the seasoning. - Let the salad rest for about 10 minutes before serving. This helps the flavors blend nicely. By following these steps, you create a Mango Cucumber Summer Salad that is not only refreshing but also full of vibrant flavors. For the complete details, refer to the Full Recipe. To make the best Mango Cucumber Summer Salad, choose ripe mangoes and fresh cucumbers. Look for mangoes that feel slightly soft when you gently press them. Their skin should have a rich color. A ripe cucumber should be firm and dark green, with no soft spots. For cilantro, pick bunches with bright green leaves. Avoid any that look wilted or yellowed. Fresh cilantro adds a burst of flavor to your salad. To boost the taste, let your salad marinate. Mix the diced fruits and veggies and let them sit for about 10 minutes. This helps the flavors blend well. Before serving, chill the salad in the fridge for about an hour. This makes it extra refreshing on warm days. How you serve your salad matters. Use a large, colorful bowl to show off those vibrant ingredients. For a fun touch, garnish with lime wedges and more cilantro on top. This adds color and makes your dish even more inviting. Enjoy your beautiful salad! For the complete recipe, check out the [Full Recipe]. {{image_4}} To make your Mango Cucumber Summer Salad even more fun, try these variations. You can add grilled chicken or shrimp for a protein boost. These options taste great with the fresh flavors. If you want a vegetarian choice, substitute tofu. Tofu soaks up the dressing well and adds a nice texture. Adding grains can change the salad's texture. Consider mixing in quinoa or couscous. Both grains work well and make the salad heartier. You can also explore using brown rice as a base. It adds a nutty flavor that pairs nicely with mango. Mix in other seasonal fruits or vegetables for variety. Try diced avocado or cherry tomatoes for added color. Experimenting with different herbs can also bring new flavors. Fresh mint or basil can add a refreshing twist. Nuts like almonds or walnuts add a nice crunch too. For a complete experience, check out the [Full Recipe]. To keep your Mango Cucumber Summer Salad fresh, store leftovers in airtight containers. This will lock in flavor and keep the salad crisp. Use the salad within three days for the best taste. If you wait too long, the ingredients may become soggy. You can prepare the ingredients ahead of time. Chop the mangoes, cucumber, red bell pepper, and red onion. Keep each ingredient separate in the fridge. When it's time to eat, simply mix them together. Assemble the salad just before serving for the freshest taste. This salad does not freeze well. Freezing can change the texture of the mango and cucumber. If you want to preserve the ingredients, consider freezing them separately. Use them in smoothies or soups instead. Always make sure to pack produce in freezer-safe bags or containers. You can use several fruits instead of mango. Pineapple adds a sweet, tangy flavor. Peaches bring a juicy touch. Papaya offers a mild sweetness. When you pick a fruit, think about how it will blend with cucumber and lime. You want a balance of sweetness and freshness. Typically, this salad lasts about two days. After that, the vegetables may get soggy. Look for signs of spoilage like a change in color or smell. If it smells off, it’s best to toss it out. Yes! To make it vegan, swap honey for agave syrup. You can also add more veggies like avocado or even black beans for extra nutrition. This way, you keep the flavor while making it plant-based. This mango salad blends fresh ingredients with simple steps. You start by preparing ripe fruits and vegetables. Mixing them with fresh lime juice brings out their flavor. Optional proteins and grains add variety. Store leftovers properly to enjoy later. Try different herbs or spices for unique tastes. This recipe is versatile and easy to adapt. Enjoy your colorful, healthy dish!](https://fastmealmate.com/wp-content/uploads/2025/07/d214d25a-b677-4b49-bd4c-02fe8092c0e1-768x768.webp)

