Looking for a cool treat that bursts with flavor? You’ve come to the right place! Today, I’ll share how to make Chocolate Raspberry Frozen Yogurt Pops. This simple recipe blends creamy yogurt with rich chocolate and tangy raspberries. It’s perfect for hot days or a fun dessert. Let’s dive into the ingredients and get started on this delightful recipe that will surely impress your friends and family!You only need a few key ingredients. This recipe makes six delicious pops.
Essential Ingredients
Here’s what you need for the base of your pops:
– 2 cups plain Greek yogurt
– 1 cup fresh raspberries (plus extra for garnish)
– 1/2 cup semi-sweet chocolate chips
– 1/4 cup honey or maple syrup
– 1 teaspoon vanilla extract
– A pinch of salt
These ingredients work together to form a creamy and tangy treat. The Greek yogurt gives a thick texture. The raspberries add a fruity burst. The chocolate brings sweetness and depth.
Optional Ingredients for Customization
You can personalize your pops with a few extra ingredients:
– Nuts for crunch
– Coconut flakes for a tropical twist
– Mint leaves for freshness
Feel free to mix and match. Experimenting is part of the fun. You can also adjust the sweetness by adding more or less honey or syrup. Enjoy creating your perfect frozen treat!
Step-by-Step Instructions
Preparation of Chocolate
Start by melting the chocolate. Take a microwave-safe bowl and add the semi-sweet chocolate chips. Heat them in the microwave. Use 30-second intervals, stirring well each time. This keeps the chocolate from burning. Once melted, let it cool a bit before using.
Blending the Yogurt Mixture
Now, it’s time to blend the yogurt mixture. Grab a blender or food processor. Add the plain Greek yogurt, honey or maple syrup, vanilla extract, and a pinch of salt. Blend it on medium-high speed. You want it smooth and creamy. Make sure everything is well mixed.
Assembling the Pops
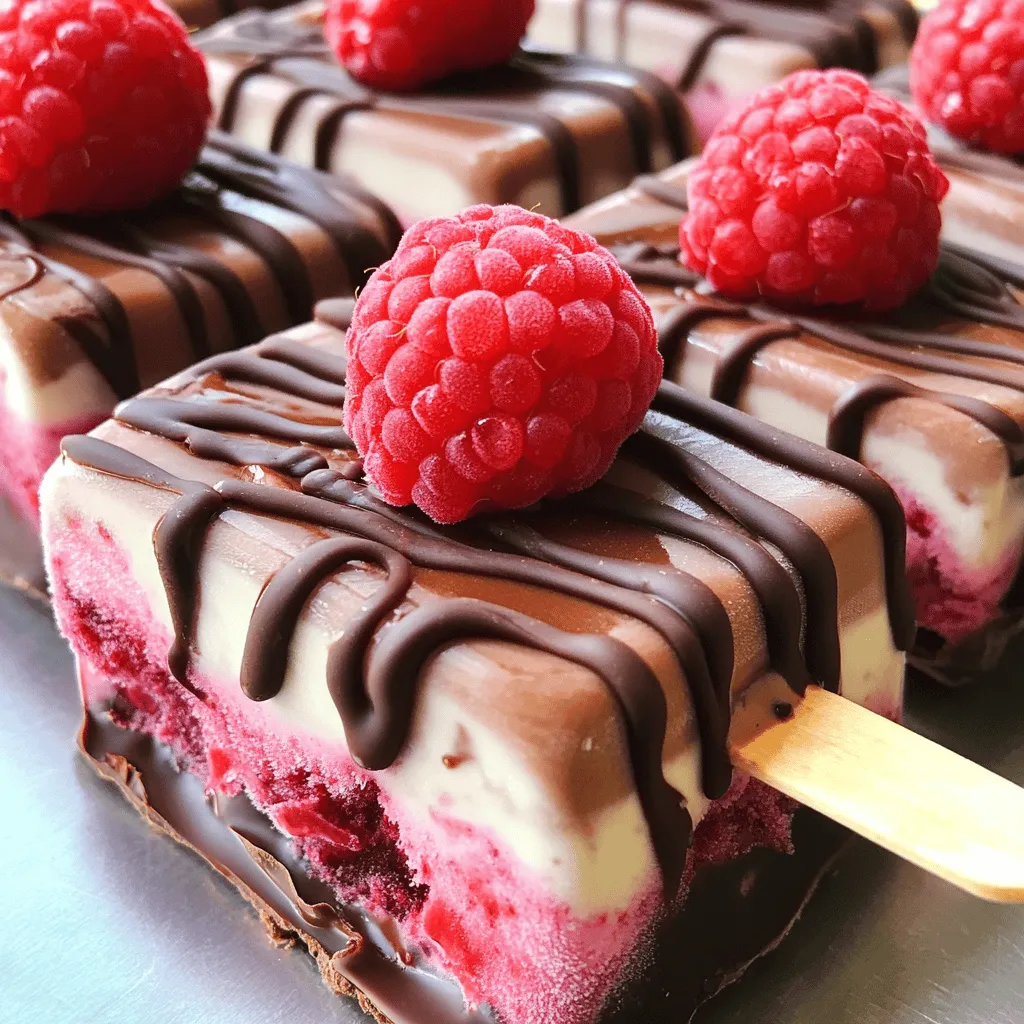
Next, fold in the raspberries. Carefully add the fresh raspberries to the yogurt mixture. Use a spatula to fold them in gently. You want some whole raspberry pieces for texture. Save a few for garnish.
Pour half of the yogurt mixture into popsicle molds. Then, drizzle a layer of melted chocolate on top. Finish by adding the rest of the yogurt mixture. Fill the molds almost to the top.
If you have popsicle sticks, insert them into the molds. If not, freeze the pops for a bit first, then add the sticks.
Finally, place the molds in the freezer. Let them freeze for 4-6 hours until set. When ready to enjoy, run warm water over the molds. This helps loosen the pops. Gently pull them out and garnish with reserved raspberries.
This simple process gives you a delightful treat that is fresh and tasty!
Tips & Tricks
Ensuring Perfect Texture
To get the right texture, use full-fat Greek yogurt. It gives a creamy base. Blend until smooth, but don’t overdo it. You want a thick, rich mix. When adding raspberries, fold them in gently. This keeps some whole for a nice bite. If too blended, you’ll miss that fresh fruit flavor.
Melting Chocolate Tips
Melting chocolate can be tricky. Always use a microwave-safe bowl. Heat chocolate chips in 30-second bursts. Stir well between each round. The goal is smooth and glossy chocolate. If it looks too thick, let it cool a bit. This helps in drizzling over the yogurt mix without clumping.
Garnishing Ideas
Garnishing adds fun and flair. Use extra fresh raspberries on top. They look bright and inviting. You can also sprinkle chocolate shavings for extra charm. A light drizzle of melted chocolate gives a nice touch. For something different, try crushed nuts or shredded coconut. These add a crunchy contrast to the pops.

Variations
Fruit Alternatives
You can change up the fruit in these pops. Try strawberries for a sweet twist. Blueberries also work well and add a nice color. Bananas can give a creamy texture. Mixing different fruits can make your pops even more exciting. Just remember to keep the yogurt base the same for creamy goodness.
Dairy-Free Options
If you want a dairy-free treat, use coconut yogurt. It has a lovely flavor and creamy texture. Almond yogurt is another great choice. It’s light and adds a nice taste. You can also try soy yogurt for a protein boost. Just make sure to pick a brand that tastes good to you.
Adding Mix-Ins
Mix-ins can take your pops to the next level. Consider adding chopped nuts for a crunchy bite. Crushed cookies can bring a fun texture and flavor. For a more decadent treat, swirl in more melted chocolate. You can even add a bit of mint or a sprinkle of cinnamon for a unique twist. Be creative and make these pops your own!
Storage Info
Freezing Techniques
To keep your Chocolate Raspberry Frozen Yogurt Pops fresh, follow these steps. First, ensure the pops are fully frozen before storing. This usually takes 4-6 hours. Once solid, they can last for a long time in the freezer. Wrap each pop in plastic wrap for extra protection. This will prevent freezer burn and keep them tasty.
Best Practices for Keeping Pops Fresh
Always store your pops in a consistent, cold temperature. Avoid opening the freezer often. This helps maintain the right conditions for your pops. Also, keep them away from strong-smelling foods. Yogurt can absorb odors, which might affect the flavor. Finally, enjoy your pops within 2-3 months for the best taste.
Recommended Storage Containers
Use airtight containers or freezer bags for best results. Choose containers that are the right size for your pops. If you have leftover yogurt mixture, store it in a jar with a lid. This can be saved for future pops or used in smoothies. Always label your containers with the date. This way, you know how long they’ve been stored.
FAQs
How long do Chocolate Raspberry Frozen Yogurt Pops last in the freezer?
Chocolate Raspberry Frozen Yogurt Pops last about 2 to 3 months in the freezer. After that time, they may lose their flavor and texture. For the best taste, enjoy them within the first month.
Can I use other types of yogurt?
Yes, you can use other types of yogurt. Greek yogurt gives a thick and creamy texture. You can also use regular yogurt, dairy-free yogurt, or even flavored yogurt. Just keep in mind that flavored yogurt may change the taste of your pops.
What’s the best way to get pops out of the molds?
The best way to remove the pops is to run warm water over the outside of the molds. Do this for about 10 seconds. This helps loosen the pops, making them easier to pull out. If you don’t have warm water, you can let them sit at room temp for a minute or two.
This post covered the fun of making Chocolate Raspberry Frozen Yogurt Pops. You learned about the key ingredients and how to mix and freeze them. I shared tips for getting the right texture and fun ways to customize your pops. Plus, I included storage advice to keep them fresh.
In the end, making these pops is easy and rewarding. Enjoy all the sweet options you can create!


