Looking for a quick, no-bake treat that combines two of your favorite flavors? Look no further! These Chocolate Peanut Butter Bars are easy to make and taste amazing. With just a few simple ingredients, you can whip up a delicious snack that satisfies your sweet tooth. Whether you’re at home or on the go, this treat is perfect for any occasion. Ready to learn how to make these irresistible bars? Let’s dive in!
Ingredients
Detailed Ingredient List
– Smooth natural peanut butter
– Pure maple syrup or honey
– Coconut oil (melted)
– Rolled oats
– Dark or semi-sweet chocolate chips
– Unsweetened cocoa powder
– Pure vanilla extract
– Fine sea salt
To make delicious chocolate peanut butter bars, you need these key ingredients. First, smooth natural peanut butter gives a creamy base. I love using peanut butter that has no added sugar or oils. It keeps the bars rich and healthy.
Next, pure maple syrup or honey sweetens the bars. Both options work well, but maple syrup has a unique flavor. Coconut oil adds a silky texture. Make sure it’s melted for easy mixing.
Rolled oats provide fiber and a chewy texture. They help hold everything together. Choose certified gluten-free oats if needed. Dark or semi-sweet chocolate chips add a sweet touch. They melt beautifully into the mixture.
Unsweetened cocoa powder brings a rich chocolate flavor. I recommend high-quality cocoa for the best taste. Pure vanilla extract enhances the overall flavor, while fine sea salt balances the sweetness.
Measurement Tips
When making these bars, accurate measurements are key. If you measure wrong, the texture may change. I suggest using a kitchen scale for best results. A scale gives exact amounts, which is very helpful.
Use measuring cups for dry ingredients and liquid measuring cups for liquids. Make sure to level off dry ingredients for accuracy. This helps achieve the perfect consistency in your bars.
Ingredient Substitutions
You can customize these bars easily. For sweeteners, try agave syrup or brown rice syrup. Both options work well if you want to change things up.
If you prefer a different nut butter, almond or cashew butter are great choices. Just remember that these may alter the taste a bit.
For gluten-free options, use certified gluten-free oats. This way, everyone can enjoy these tasty treats without worry. You can find many useful substitutions to fit your needs.
Step-by-Step Instructions
Preparation Step
Start by lining an 8×8 inch baking dish with parchment paper. This helps with easy removal later. Leave some paper overhang on two sides. It makes lifting the bars out simple.
Mixing Wet and Dry Ingredients
Next, grab a large mixing bowl. Combine 1 cup of smooth peanut butter, 1/2 cup of pure maple syrup, and 1/4 cup of melted coconut oil. Use a whisk or spatula to mix until you see a smooth blend. Now it’s time to add the dry ingredients. Toss in 1 cup of rolled oats, 1/2 cup of unsweetened cocoa powder, 1 teaspoon of pure vanilla extract, and 1/4 teaspoon of fine sea salt. Mix everything well until you get a thick batter.
Final Steps before Chilling
Now, gently fold in 1/2 cup of dark or semi-sweet chocolate chips. Make sure they spread evenly through the mix. Transfer this mixture into your lined baking dish. Use a spatula or your hands to press it down firmly. You want a compact, even layer. Once done, place the dish in the fridge. Chill it for at least 1 to 2 hours until the mixture feels firm.
Tips & Tricks
Perfecting Texture
To make the best chocolate peanut butter bars, focus on texture. You want a smooth, firm bar that holds together well. Use natural peanut butter for creaminess. If your bars turn out dry or crumbly, it often means too many dry ingredients. Stick to the recipe and measure carefully. Mixing well helps combine all the ingredients and avoids clumps.
Enhancing Flavor
You can boost flavor with simple add-ins. A splash of pure vanilla extract adds depth. A sprinkle of fine sea salt can enhance sweetness too. Consider adding a bit of cinnamon for warmth or even a few tablespoons of crushed nuts for crunch. Each small change can make your bars even better.
Presentation Suggestions
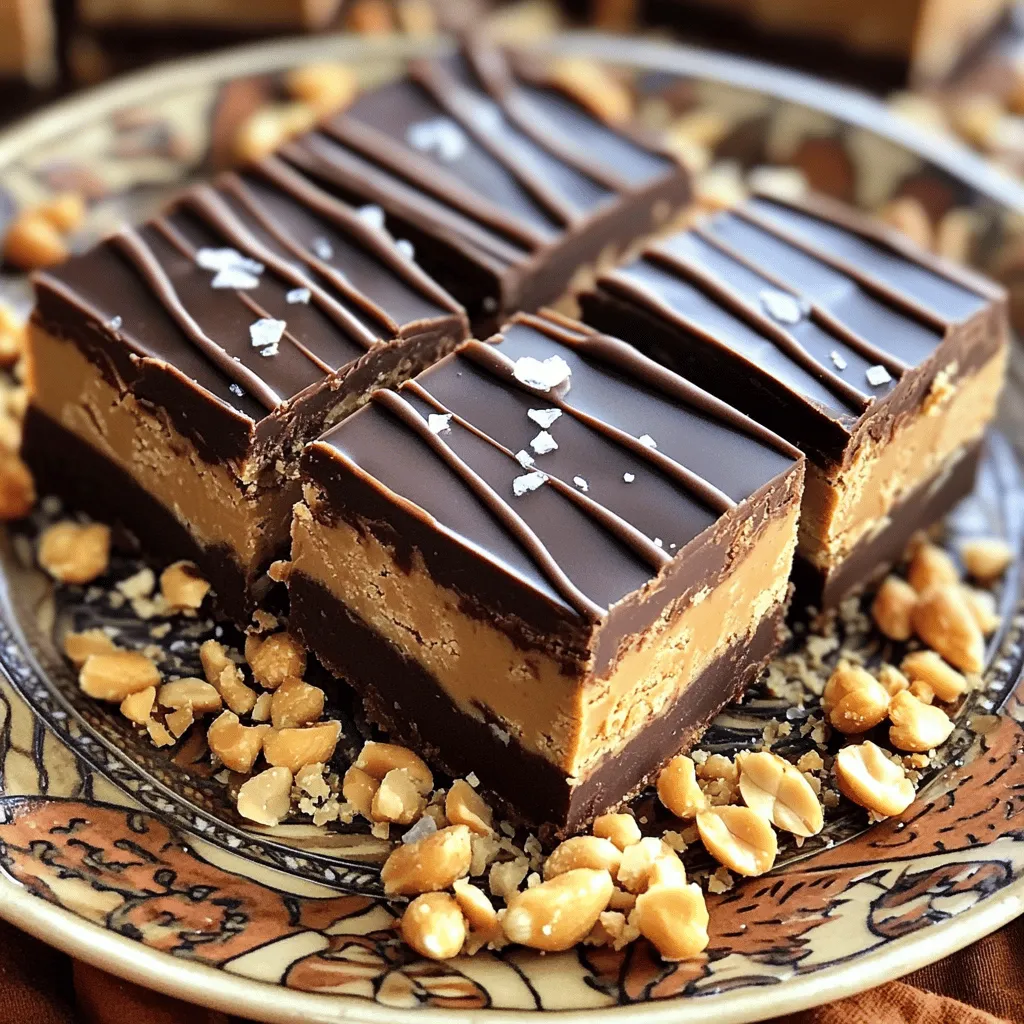
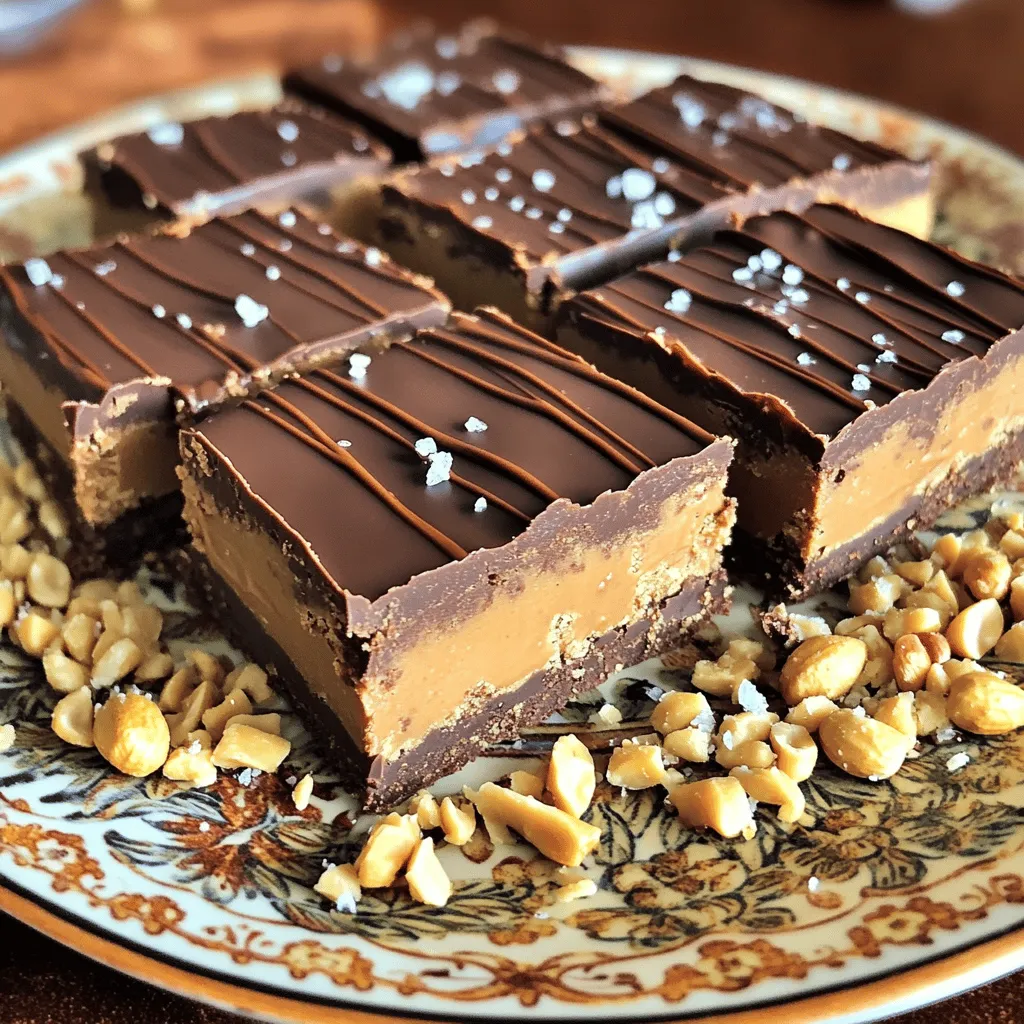
Presentation matters when serving these bars. Cut them into neat squares or rectangles. Arrange them on a colorful plate for a pop. Drizzling melted chocolate over the top makes them look fancy. You can also sprinkle some crushed peanuts or a pinch of sea salt on top for a rustic touch. These small efforts make your treat feel special.
Variations
Healthier Alternatives
If you want to make these bars healthier, you have options. You can use less sweetener. Try using only 1/4 cup of pure maple syrup. You can also replace coconut oil with unsweetened applesauce. This swap cuts calories and adds moisture.
Another great idea is to use a sugar substitute. Look for options like stevia or monk fruit. These can help you cut sugar without losing sweetness.
Flavor Infusion
Want to switch up the flavor? Add fruits like mashed bananas or shredded coconut. Bananas give a creamy texture, while coconut adds a tropical twist. You can even mix in some almond extract for a nutty flavor boost.
Experiment with different nut butters too! Almond butter or cashew butter can change the taste. Each nut butter brings a unique flavor. It’s fun to find your favorite blend.
Different Toppings
Toppings can make your bars even better. Try sprinkling crushed nuts on top. Walnuts or pecans add a nice crunch. You can also use coconut flakes for a chewy texture.
For a sweet finish, drizzle melted chocolate over the top. You can use dark, milk, or even white chocolate. This extra layer makes the bars look fancy and taste amazing.
Storage Info
Proper Storage Techniques
To keep your chocolate peanut butter bars fresh, use an airtight container. This helps prevent moisture and keeps them from drying out. You can store them in the refrigerator or freezer, depending on how long you want to keep them. If you plan to eat them within a week, the fridge is perfect. For longer storage, the freezer is your best option.
Shelf Life
In the fridge, these bars can last about one week. If you notice any changes in color or smell, it’s best to throw them away. Signs of spoilage include a dry texture or a strange odor. Always inspect your bars before enjoying them.
Freezing Instructions
You can freeze the bars either one by one or as a whole batch. If you freeze them individually, wrap each bar in plastic wrap or foil. This way, you can grab one whenever you want a treat. If you prefer to freeze the whole batch, just place the container in the freezer. When you’re ready to eat, let them thaw in the fridge for a few hours.
FAQs
Can I use crunchy peanut butter instead of smooth?
Yes, you can use crunchy peanut butter! It adds a fun texture. The bars will have a nice bite from the peanut pieces. Keep in mind, the flavor may be more intense with crunchy peanut butter. If you enjoy that nutty crunch, go for it!
How do I know when the bars are set?
To check if the bars are set, gently press the top with your finger. If it feels firm and springs back, they are ready. You can also look for a slight sheen on the surface. If it’s still soft, give it more time in the fridge. Patience makes perfect bars!
What’s the best way to cut the bars?
For clean cuts, use a sharp knife. Run the knife under hot water, then dry it off. This helps the knife glide through the bars easily. Cut them into squares or rectangles, depending on your preference. If they crumble, try chilling them longer before cutting.
Can I make these bars vegan?
Absolutely! To make these bars vegan, use maple syrup instead of honey. Ensure your chocolate chips are dairy-free. Check that your peanut butter has no added ingredients. With these swaps, you can enjoy a tasty vegan treat!
In summary, this guide covered how to make delicious no-bake bars. You learned about the key ingredients, measurement tips, and how to mix everything smoothly. We shared storage techniques to keep your bars fresh and variations to suit your taste.
Remember, small changes can lead to big flavor. Experiment with different add-ins and toppings to make these bars your own. By following these tips, you’ll enjoy tasty treats that fit your needs. Enjoy making your no-bake bars!


