Cherry Bomb Butterbeer Float Delightful Summer Treat

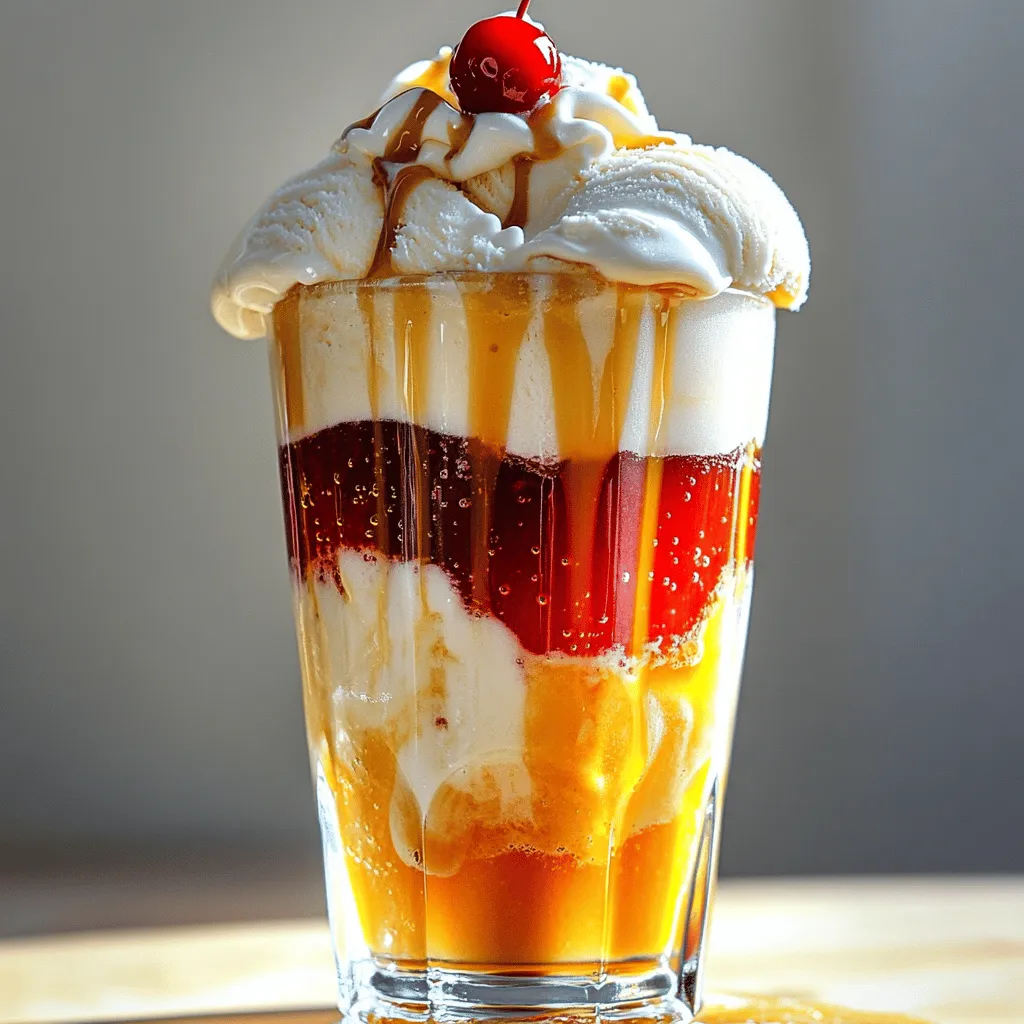
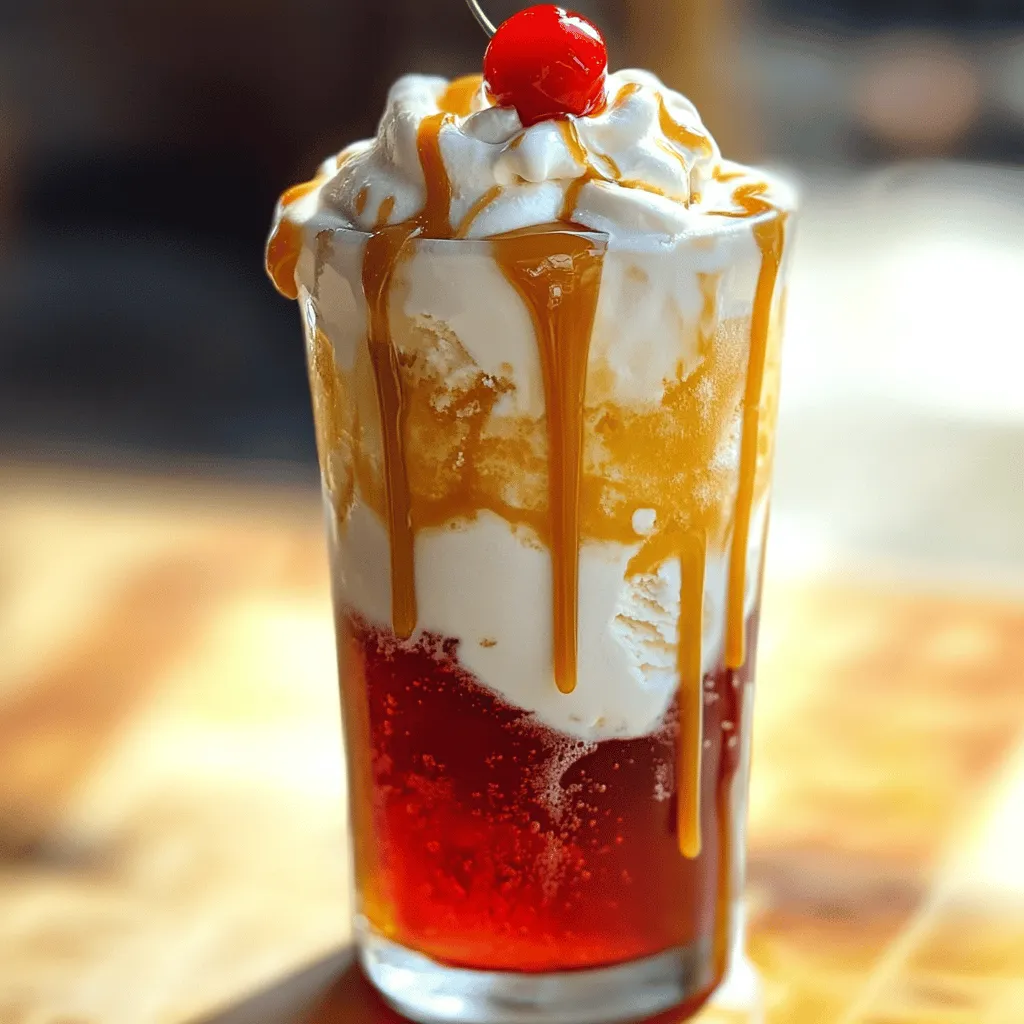
Looking for a fun and tasty summer treat? The Cherry Bomb Butterbeer Float is perfect for you! This delightful drink combines creamy ice cream, rich butterscotch, and a refreshing cherry twist. You won’t just sip this treat; you’ll savor every layer! I’ll guide you through each step and share tips for making it a hit at your summer gatherings. Get ready to impress your friends and family with this magical dessert!
Ingredients
List of Ingredients
For the Cherry Bomb Butterbeer Float, you will need:
– 2 cups vanilla ice cream
– 1 cup cream soda (chilled)
– 1/2 cup butterscotch sauce
– 1/2 cup cherry soda (chilled)
– 1/4 teaspoon pure vanilla extract
– Whipped cream (for topping)
– Maraschino cherries (for garnish)
– A pinch of sea salt (optional)
Importance of Fresh Ingredients
Using fresh ingredients makes a big difference in taste. Fresh vanilla ice cream gives a creamy base. Chilled cream soda and cherry soda add fizz and flavor. Fresh butterscotch sauce brings warmth and sweetness. Each ingredient plays a key role in the float’s flavor. When you use fresh ingredients, your float tastes better. It feels special and fun, perfect for summer.
Ingredient Substitutions
If you have allergies or preferences, you can swap some ingredients. For ice cream, try dairy-free options like coconut or almond. Instead of cream soda, you can use lemon-lime soda for a twist. You can make homemade butterscotch sauce if you want. Just use brown sugar, butter, and cream. If you don’t have maraschino cherries, fresh cherries work well too. These swaps let you tailor the float to your taste.
Step-by-Step Instructions
Preparation Overview
Making a Cherry Bomb Butterbeer Float is simple and fun. You will need just ten minutes. Gather your ingredients and tools before you start. This helps you stay organized and ready.
Detailed Instructions
1. Heat the Sauce: Take a small saucepan. Add the butterscotch sauce. Warm it on low heat. Stir in the vanilla extract. Mix well and remove it from heat. Let it cool for about five minutes.
2. Scoop the Ice Cream: In each glass or frosty mug, place a scoop of vanilla ice cream. Use a generous amount to fill the bottom.
3. Pour in Cream Soda: Slowly pour the chilled cream soda over the ice cream. Stop when it is just below the glass rim. This helps prevent spills.
4. Add Butterscotch Sauce: Drizzle the warm butterscotch sauce across the cream soda. Let it seep into the ice cream to boost flavor.
5. Layer with Cherry Soda: Carefully top the float with cherry soda. Pour it in a circular motion. This creates a lovely layered look.
6. Whipped Cream Time: Finish with a thick swirl of whipped cream on top. This adds a fluffy touch.
7. Garnish: Place a maraschino cherry on top. If you want, sprinkle a pinch of sea salt. This enhances the sweet taste.
8. Serve: Enjoy your Cherry Bomb Butterbeer Float right away. Use a colorful straw or a long spoon for fun.
Tips for Perfecting Layers
For a perfect layered float, pour gently. Start the cherry soda near the ice cream. This helps keep the layers from mixing. You can also chill your glasses beforehand. This keeps your float cold longer, making each sip delightful.
Tips & Tricks
Serving Suggestions
Serve your Cherry Bomb Butterbeer Float in tall glasses or frosty mugs. This makes each sip feel special. A colorful straw or a long spoon adds fun to your drink. For a twist, rim the glasses with colored sugar for added crunch and style.
How to Achieve the Best Flavor
To get the best flavor, use high-quality vanilla ice cream. Make sure your cream soda and cherry soda are chilled. This helps keep the float refreshing. Warm butterscotch sauce adds richness, so don’t skip this step. Mix it well with vanilla extract for depth.
Common Mistakes to Avoid
One common mistake is pouring the sodas too fast. Slow pouring helps create beautiful layers. Another mistake is using too much butterscotch sauce. A drizzle is enough to enhance the float without overpowering it. Lastly, avoid using warm ice cream. Cold ice cream will keep your float creamy and thick.

Variations
Seasonal Variations
You can change the Cherry Bomb Butterbeer Float for each season. In summer, use fresh cherries. They make the float taste bright and juicy. In fall, add pumpkin spice to the butterscotch sauce. This twist adds warmth and comfort. During winter, use peppermint extract instead of vanilla. It gives a festive flavor that feels cozy.
Alternative Flavor Combinations
You can mix flavors to make your float unique. Swap vanilla ice cream for chocolate ice cream. This change adds a rich taste. You can also use different sodas. Try root beer for a classic twist, or lemon-lime soda for a zesty kick. Each blend brings a new layer of fun to your float.
Child-Friendly Modifications
To make this float kid-friendly, skip the butterscotch sauce. Instead, use a fluffy marshmallow cream on top. This makes the float sweeter and lighter. You can also add fun toppings like sprinkles or mini chocolate chips. These small changes make the treat more exciting for kids.
Storage Info
How to Store Leftovers
If you have leftovers, store the Cherry Bomb Butterbeer Float in the fridge. Keep the float in an airtight container. Use it within 1 day for the best taste. The ice cream will melt, but the flavors will still be good.
Reheating Instructions for Butterscotch Sauce
To reheat the butterscotch sauce, pour it into a small saucepan. Heat over low heat. Stir it gently until warm. Do not boil, as this can change the texture. This step ensures your sauce stays smooth and tasty.
Best Practices for Ingredient Freshness
For the best flavor, use fresh ingredients. Buy ice cream and sodas close to your float-making time. Store the cream soda and cherry soda in the fridge. This keeps them cold and bubbly. Check the expiration dates on your sauces and creams to ensure freshness.
FAQs
What is a Cherry Bomb Butterbeer Float?
A Cherry Bomb Butterbeer Float is a sweet and fizzy drink. It mixes vanilla ice cream with cream soda and cherry soda. The drink gets its flavor from butterscotch sauce and vanilla. You can top it with whipped cream and a cherry for fun. This float is perfect for hot days. It brings joy to everyone who tries it.
Can I use different types of ice cream?
Yes, you can use different ice cream flavors! Chocolate or cherry ice cream can add a fun twist. You might try coffee ice cream for a richer taste. Each flavor will change the drink’s overall taste. Just keep the vanilla ice cream as a base for the float. You can mix and match to find your favorite.
How do I make this drink non-alcoholic?
The Cherry Bomb Butterbeer Float is already non-alcoholic! It uses soda and ice cream for flavor. You don’t need to add anything else to keep it alcohol-free. If you want a bit more fun, use flavored sodas. You can try root beer or orange soda too. This way, everyone can enjoy a yummy float!
You learned all the key steps to make a Cherry Bomb Butterbeer Float. Fresh ingredients matter for taste, so choose wisely. You can adapt the recipe with substitutions or variations to fit your needs. Remember to store leftovers properly for best flavor later. Avoid common mistakes for a smooth experience. Try new flavors or serve it in fun ways. Have fun with this recipe. Enjoy each sip of your drink and share it with friends!


![- 2 slices of rustic sourdough bread - 1 cup cooked chicken, shredded - 1 cup marinara sauce - 1 cup shredded mozzarella cheese - ¼ cup freshly grated Parmesan cheese - 1 tablespoon extra virgin olive oil - 1 teaspoon garlic powder - 1 teaspoon dried Italian seasoning - Salt and pepper, to taste Gathering the right ingredients is key to making a great Lazy Chicken Parmesan Grilled Cheese. Start with rustic sourdough bread. This bread gives your sandwich a hearty base. Next, grab cooked chicken. Shredded rotisserie chicken is a fantastic choice. It adds flavor and saves time. For the sauce, you can use homemade or store-bought marinara. Either way, it brings rich taste. Now, mozzarella cheese is a must for that gooey, stretchy texture. The Parmesan cheese adds a nice sharp bite too. You will also need some simple seasonings. Extra virgin olive oil helps achieve that golden crust. Garlic powder brings out depth in flavor. Italian seasoning adds a nice herbal note. Finally, don’t forget salt and pepper to taste. With these ingredients, you'll create a delightful twist on a classic dish. For the full recipe, check out the [Full Recipe]. First, preheat your skillet over medium heat. This gets the skillet hot and ready. Next, add a tablespoon of olive oil. This will coat the bottom of the skillet. The oil helps keep the bread from sticking and adds flavor. In a mixing bowl, combine your shredded chicken and marinara sauce. You can use any chicken you like, but rotisserie chicken is fast and tasty. Then, add garlic powder, Italian seasoning, and a pinch of salt and pepper. Mix everything well. You want all the chicken to be coated in sauce and spices. Take one slice of the sourdough bread and place it in the hot skillet. Layer half of the shredded mozzarella cheese on top. Spoon the chicken mixture onto the cheese, spreading it evenly. Add the rest of the mozzarella cheese on top of the chicken. Finish with a sprinkle of grated Parmesan cheese. Place the second slice of sourdough on top to make a sandwich. Grill it for about 3-4 minutes. You want the bottom to be golden brown and the cheese to begin melting. Carefully flip the sandwich using a spatula. Grill the other side for another 3-4 minutes. You want both sides crispy and the cheese fully melted. Once done, take it out and slice it in half. Let it cool for a minute before serving. This helps the cheese set a bit. Enjoy your Lazy Chicken Parmesan Grilled Cheese! For more details, check out the Full Recipe. Using rotisserie chicken makes this recipe quick and easy. You can find it at most grocery stores. It saves time, as it is already cooked and seasoned. To shred chicken quickly, use two forks to pull it apart. This method works well and takes just minutes. You can also use your hands if the chicken is cool enough. For the best grilled cheese, choose rustic sourdough bread. It has a great texture and flavor. You can also try a hearty Italian bread or whole grain. To achieve a crispy crust, heat your skillet over medium heat. Make sure to coat the pan with olive oil evenly. This will help the bread brown nicely and not stick. To ensure the cheese melts perfectly, use a mix of mozzarella and Parmesan. The mozzarella adds stretch, while Parmesan adds a sharp flavor. Place a lid on the skillet to trap heat and help the cheese melt faster. This prevents the sandwich from getting soggy. Grill the sandwich until the bread is golden brown and the cheese is gooey. {{image_4}} You can easily boost the health of your Lazy Chicken Parmesan Grilled Cheese by adding veggies. Spinach is a great choice. It adds color and nutrients. Just toss in a handful of fresh spinach when you layer the chicken. Bell peppers work well too. Slice them thin, and add them with the chicken. They give a nice crunch and a pop of flavor. Other ingredients can add texture and taste. Try sun-dried tomatoes for a tangy bite. You can also add mushrooms for an earthy note. Each veggie brings its own special twist. Experiment with what you like best! If you love heat, spice up your sandwich! One easy way is to use spicy marinara sauce. It adds warmth and flavor. You can also add jalapeños for an extra kick. Slice them thin and layer them on top of the chicken. Using pepper jack cheese is another fun option. This cheese melts beautifully and has a nice heat. Mix it with mozzarella to keep things gooey and flavorful. Your taste buds will thank you! For those who need a gluten-free choice, there are great alternatives. Instead of sourdough, try gluten-free bread. Look for brands that are soft and hearty. They will hold up well when grilling. You can adjust the recipe easily. Ensure your marinara sauce is gluten-free too. Many brands offer this option. Always check the labels when shopping. This way, everyone can enjoy this delicious meal! For the full recipe, be sure to check the complete guide. To keep your Lazy Chicken Parmesan Grilled Cheese fresh, wrap it tightly in foil or plastic wrap. Place it in an airtight container. This method helps keep the flavors and moisture inside. You can store it in the fridge for up to three days. If you want to keep it longer, consider freezing it. It can last in the freezer for about one month. Just remember to let it cool completely before storing. Reheating your grilled cheese needs care. I recommend using a skillet or toaster oven for the best results. Heat the skillet over low to medium heat. Add a small amount of butter or oil to keep it crispy. Place the sandwich in the skillet and cover it with a lid. This helps the cheese melt without burning the bread. Heat for about 3-4 minutes on each side. If using a toaster oven, set it to 350°F (175°C). Bake for around 10-15 minutes until warm and crispy. Enjoy that delicious, gooey goodness just like the first time! Yes, you can prepare this dish in advance. Here are some tips for prepping. - Cook the chicken: Shred and mix it with marinara sauce. Store it in the fridge. - Slice the bread: Cut the sourdough and keep it in a sealed bag. - Grate cheese: Pre-grate the mozzarella and Parmesan. Store these in airtight containers. - Assemble before cooking: You can layer the sandwich without grilling. Wrap it tightly in plastic wrap. Making these steps ahead helps save time. Just grill when you are ready to eat! Yes, you can freeze Lazy Chicken Parmesan Grilled Cheese. Here are the best practices. - Assemble without grilling: Build the sandwich fully, but do not cook it. - Wrap tightly: Use plastic wrap or aluminum foil to cover each sandwich. - Store in a freezer bag: Label with the date, then place in the freezer. When you want to eat it, thaw in the fridge overnight. Reheat in a skillet to keep it crispy. Pairing sides can enhance your meal. Here are some tasty suggestions. - Salad: A fresh mixed greens salad adds crunch. - Soup: Tomato or basil soup complements the sandwich well. - Fries: Crispy fries or sweet potato fries are a fun choice. - Veggies: Roasted or steamed veggies give a healthy balance. These sides will make your meal even more delightful. Enjoy your Lazy Chicken Parmesan Grilled Cheese! You learned how to make Lazy Chicken Parmesan Grilled Cheese. This dish is tasty and easy. We covered main ingredients, cooking steps, and useful tips. I shared fun variations to fit your taste. Now, you can store leftovers and reheat them without losing flavor. Enjoy your cooking and make this sandwich again. It’s a great meal for busy days or fun gatherings. Happy grilling!](https://fastmealmate.com/wp-content/uploads/2025/06/c9cbfd60-7ee3-4aef-9602-f6c93f96b3d1-768x768.webp)
![- 2 cups grated zucchini or yellow squash - 1 cup breadcrumbs (preferably seasoned) - 1/2 cup grated parmesan cheese - 1/4 cup finely chopped onion - 2 cloves garlic, minced - 2 large eggs - 1 teaspoon dried oregano - 1/2 teaspoon salt - 1/4 teaspoon black pepper - 1/4 cup fresh parsley, chopped (optional) - Skillet - Cooking oil - Mixing bowl - Kitchen towel Mom's squash patties use simple ingredients. The main ones are zucchini or yellow squash. You need seasoned breadcrumbs to add flavor. Parmesan cheese gives a nice touch. Onions and garlic boost the taste. Eggs help bind everything together. Spices like oregano, salt, and pepper add extra flavor. Fresh parsley adds color and freshness to the mix. For cooking, you will need a skillet and some oil. A mixing bowl helps combine all ingredients. A kitchen towel is handy for squeezing out squash moisture. This is part of the [Full Recipe]. Start by grating the zucchini or yellow squash. I use a box grater for this. Then, take the grated squash and put it in a clean kitchen towel or cheesecloth. Squeeze it hard to drain as much moisture as you can. This step is key. If there is too much moisture, the patties will be soggy. We want them crispy and delicious. In a large bowl, combine the drained squash with the other ingredients. Add breadcrumbs, grated parmesan cheese, chopped onion, minced garlic, eggs, dried oregano, salt, and black pepper. If you like, toss in some chopped parsley too. Mix everything well using your hands or a spoon. The mixture should feel a bit sticky and hold together well. This texture helps the patties stay intact while cooking. Next, heat a large skillet on medium heat. Pour in enough olive oil to cover the bottom of the pan. Wait until the oil shimmers, but don’t let it smoke. This shows it’s hot enough for frying. Scoop about 1/4 cup of the squash mix and shape it into a patty. Gently place it in the hot skillet. Don’t overcrowd the pan. Leave space between each patty for even cooking. Cook the patties for about 4 to 5 minutes on each side. They should turn golden brown and crispy. Keep an eye on the heat. Adjust it as needed to prevent burning. You might need to fry in batches, depending on your skillet size. Once cooked, take them out and place them on a plate lined with paper towels. This will soak up any extra oil and keep the patties crispy. Follow these steps, and you'll have lovely, golden squash patties ready to enjoy! For the full recipe, check out the earlier section. To get the best texture, you want your patties crispy, not soggy. Start by squeezing out moisture from the grated squash. Use a clean kitchen towel for this. If you skip this step, your patties may fall apart or become mushy. Keep the right ratio of ingredients. Too much squash can lead to sogginess. Aim for two cups of squash to one cup of breadcrumbs. This balance helps create a sturdy patty. Cooking time is key. Heat your skillet to medium. This temperature helps the patties cook evenly. If the heat is too low, they won’t crisp up. If it’s too high, they may burn. Fry each side for 4-5 minutes. Check for a golden brown color. Don’t rush this process. Undercooked patties can be mushy, while overcooked ones can taste dry. For serving, add tasty condiments. A dollop of yogurt or sour cream works great. Fresh herbs like parsley add color and flavor. You can also pair these patties with a salad or roasted veggies. They make a lovely side for grilled meats too. Explore different sauces like tzatziki or spicy ketchup for extra flavor. Enjoy making these patties your own! {{image_4}} You can change the squash for variety. Try using butternut squash or pattypan squash. Each type gives a unique taste and texture. You can also add more veggies. Grated carrots or bell peppers mix well. Fresh herbs, like basil or thyme, add a fresh kick. You can bake these patties instead of frying them. Just place them on a baking sheet and drizzle with olive oil. Bake at 400°F for 20 minutes, flipping halfway through. This method makes them a bit healthier. An air fryer is another option. It cooks them fast and gives a nice crisp without much oil. Set the air fryer to 375°F and cook for about 12-15 minutes. Adding cheese can elevate the flavor. Try feta, cheddar, or even goat cheese. Each brings a different taste. You can also play with spices. Add a pinch of cumin for warmth or smoked paprika for depth. Experimenting with flavors can lead to your perfect batch of patties. Check out the Full Recipe for more ideas! To store leftovers, let the patties cool first. Place them in an airtight container. This helps to keep them fresh. You can store them in the fridge for up to three days. To extend freshness, reheat only what you will eat. This avoids sogginess in the remaining patties. For freezing, make sure the patties are fully cooled. Arrange them in a single layer on a baking sheet. Place the sheet in the freezer until they are solid. Then transfer them to a freezer bag. This method helps prevent them from sticking together. When ready to eat, reheat frozen patties in the oven. Bake them at 350°F for about 15 minutes or until hot. The expected freshness duration is about three days in the fridge. Frozen patties can last up to three months. Signs of spoilage include a sour smell or a change in color. If you notice any of these, it’s best to discard them. Fry the patties for about 4 to 5 minutes on each side. This cooking time gives them a nice golden color and crispy texture. Make sure to keep an eye on them. If the heat is too high, they may burn. Adjust the heat as needed for even cooking. Yes, you can make these patties gluten-free. Instead of breadcrumbs, use gluten-free breadcrumbs or crushed gluten-free crackers. You can also use ground oats as a substitute. Just check the labels to ensure they're gluten-free. These patties pair well with many side dishes and sauces. Here are some great options: - A fresh salad with lemon vinaigrette - Creamy yogurt or sour cream for dipping - Applesauce for a sweet contrast - Grilled vegetables or a medley of roasted root veggies - A slice of lemon to brighten the dish For the full recipe, check out Mom's Heavenly Squash Patties. Enjoy! This blog post covered how to make delicious squash patties. We looked at key ingredients, preparation steps, and cooking tips. I shared ways to adjust the recipe and storage methods for leftovers. Making these patties can be fun and simple. You can explore new flavors and textures that suit your taste. Enjoy these tips, and I hope you create something tasty. Experimenting in the kitchen leads to great meals!](https://fastmealmate.com/wp-content/uploads/2025/06/c31883a2-1cc5-40ff-adb3-b1ed6b0d87a1-768x768.webp)


