Cheeseburger Sliders Juicy and Flavorful Delight

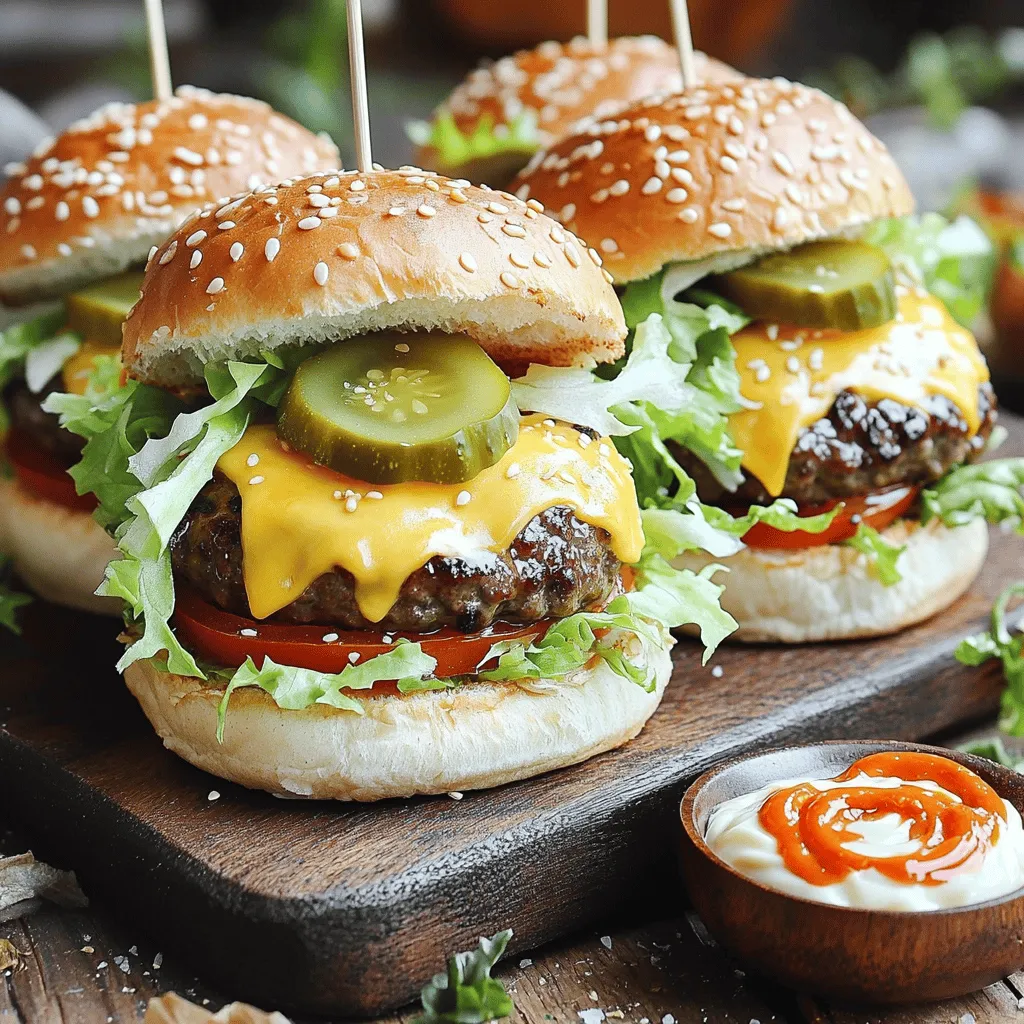
Get ready to elevate your next gathering with Cheeseburger Sliders! These juicy, flavorful bites bring classic comfort food to life. Using simple ingredients and step-by-step instructions, you’ll be amazed at how easy they are to make. Whether it’s a game day or a family dinner, these sliders will impress everyone at the table. Ready to bite into happiness? Let’s dive into making these delicious treats!
Ingredients
Main Ingredients
– 1 pound ground beef (80/20 blend)
– 8 slider buns
– 4 slices sharp cheddar cheese, halved
Spice Blends and Condiments
– 1 teaspoon garlic powder
– 1 teaspoon onion powder
– ½ teaspoon smoked paprika
– ¼ cup mayonnaise
– 2 tablespoons sriracha sauce
Fresh Toppings
– 1 cup shredded iceberg or romaine lettuce
– 1 large tomato, sliced
– Dill pickle slices as desired
When you gather your ingredients, choose high-quality ground beef. The 80/20 blend gives the best flavor and juiciness. I love using slider buns that are soft and slightly sweet. They hold the burgers well without falling apart. The sharp cheddar cheese adds a tasty kick, especially when melted over the patties.
For the spice blends, garlic powder and onion powder are must-haves. They give the beef great depth. Smoked paprika adds a rich, smoky flavor that sets these sliders apart. For the sauce, mix mayonnaise with sriracha for a creamy and spicy kick, but adjust the sriracha to suit your taste.
Fresh toppings make a big difference. Shredded lettuce adds crunch, while tomato slices bring freshness. Dill pickles add a nice, zesty bite. Feel free to add more toppings if you like. The balance of flavors and textures makes each bite a juicy delight.
Step-by-Step Instructions
Preparing the Patty Mixture
To make the best cheeseburger sliders, start by mixing ground beef with spices. Use 1 pound of beef with 80/20 fat for juicy results. In a large bowl, combine the beef with 1 teaspoon garlic powder, 1 teaspoon onion powder, and ½ teaspoon smoked paprika. Add salt and pepper to taste.
Next, form the mixture into 8 equal patties. Make a small dent in the center of each patty. This helps them cook evenly and prevents puffing.
Cooking the Sliders
Preheat your grill or skillet over medium-high heat. Add a little cooking oil to coat the surface. This keeps the sliders from sticking.
Place the patties on the grill or skillet. Cook them for about 3-4 minutes on one side. Flip them carefully with a spatula.
Melting the Cheese
Once you flip the patties, add half a slice of sharp cheddar cheese on top of each. Cover the grill or skillet with a lid. This traps steam and helps the cheese melt perfectly. Cook for another 2-3 minutes.
While the cheese melts, toast the slider buns until they turn golden brown.
Assembling the Sliders
Now it’s time to put everything together. In a small bowl, mix ¼ cup mayonnaise with 2 tablespoons sriracha sauce. Adjust the sriracha for your spice preference.
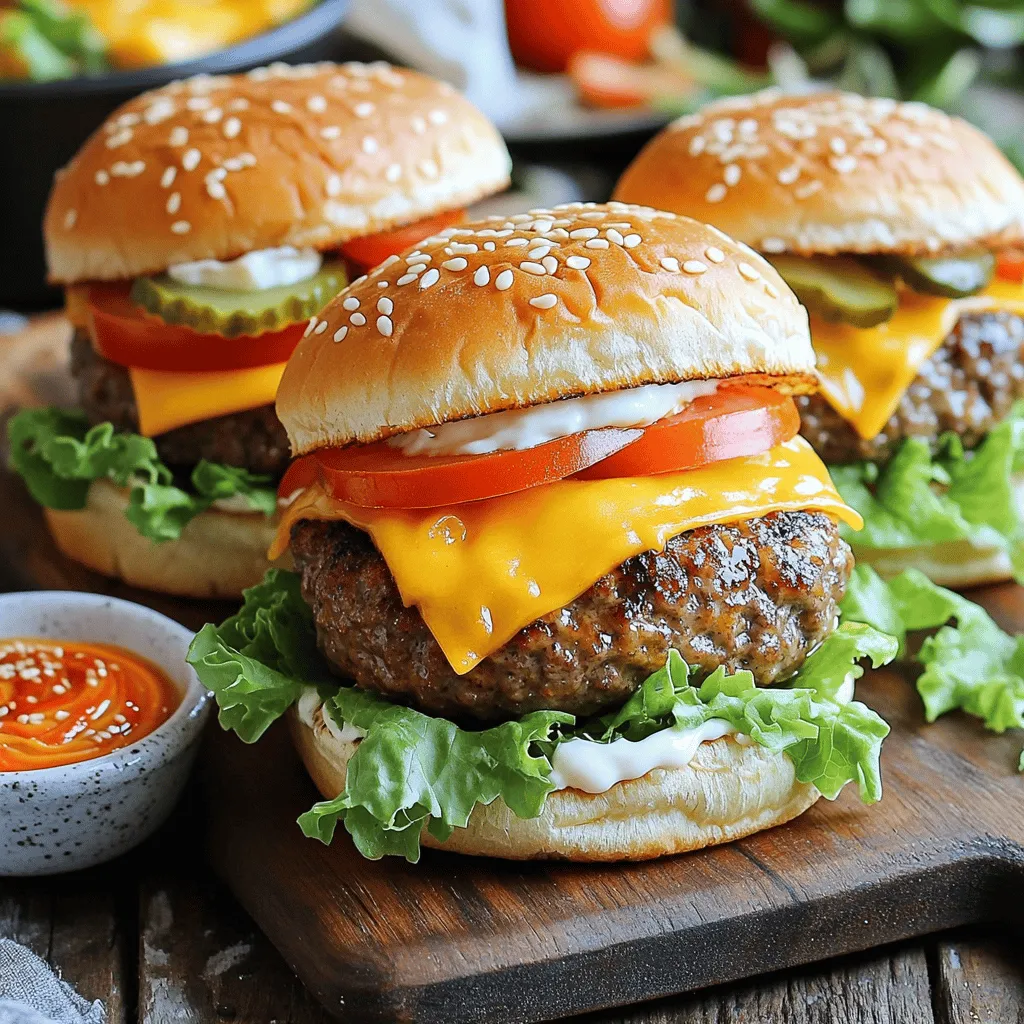
Spread this spicy mayo on the bottom half of each toasted bun. Place a cheesy patty on top. Add a handful of shredded lettuce, a slice of tomato, and dill pickle slices for crunch.
Finally, press the top half of the bun down gently. You can secure each slider with a toothpick if needed.
Tips & Tricks
Ensuring Juicy Sliders
To keep your sliders juicy, avoid overworking the beef mixture. When you mix the meat with spices, do this gently. This keeps the fat intact, leading to a moist patty. Make a slight indentation in each patty’s center. This helps them cook evenly and prevents puffing up while grilling.
Perfect Cheese Melting Techniques
To melt cheese perfectly on your sliders, use a lid or foil. Covering the patties traps steam, which makes the cheese melt quickly and evenly. You can also experiment with different types of cheese. Try Swiss for a nutty flavor, or pepper jack for a spicy kick. Each cheese brings its own delight to your sliders.
Presentation and Serving Suggestions
For a great look, serve your sliders on a rustic wooden board. This gives a warm, inviting feel. Include extra condiments and toppings on the side. Some ideas are pickles, ketchup, or spicy mayo. This lets guests customize their sliders. A small bowl of dipping sauce adds a fun touch too. For a gourmet feel, sprinkle sesame seeds on the buns.

Variations
Cheese Options
You can switch up the cheese for your sliders. Try Swiss for a nutty taste, blue cheese for a bold flavor, or pepper jack for some heat. Mixing different cheeses can create fun layers of flavor. Imagine a bite of cheddar and pepper jack together—so good!
Veggie and Plant-Based Alternatives
Not a meat fan? No problem! Black bean patties work great as a base. You can also try beyond meat options for a tasty swap. For veggie lovers, grilled mushrooms make a juicy and savory burger. They add a nice depth to your sliders without the meat.
Topping Ideas
Toppings can make your sliders even better! You can use sauces like barbecue, ranch, or garlic aioli. For extra crunch and flavor, add caramelized onions, spicy jalapeños, or creamy avocado. Each topping brings something special, turning a simple slider into a flavor-packed delight.
Storage Info
Leftover Storage
To keep leftover cheeseburger sliders fresh, store them in the fridge. Place the assembled sliders in an airtight container. This helps maintain their taste and texture. If you have leftover patties, store them separately. Wrap each patty in plastic wrap or foil. This keeps them juicy when you reheat.
Freezing Options
If you want to save sliders for later, freezing is great. For best results, freeze the patties and buns separately. Wrap each patty tightly in plastic wrap. Place the buns in a freezer bag, squeezing out air. When you’re ready to eat, thaw the patties in the fridge overnight.
Reheating Methods
Oven reheating keeps sliders crispy and tasty. Preheat the oven to 350°F. Place sliders on a baking sheet and cover with foil to prevent drying. Heat for about 10-15 minutes. The microwave is quicker but may make the buns soft. If you use the microwave, heat sliders in 30-second intervals. For crispy results, always check and adjust your heating time.
FAQs
How do I make cheeseburger sliders without ground beef?
You can use several tasty options if you want meatless sliders. Consider using black beans, lentils, or mushrooms. These ingredients are great for flavor and texture. For a simple veggie option, you can mash black beans and mix in spices. You can also use store-bought veggie patties, which are easy to find.
What is the best cheese for cheeseburger sliders?
Cheddar is a classic choice for cheeseburger sliders. It melts well and has a sharp flavor. Other good options include Swiss or pepper jack for a kick. If kids are eating, mild cheddar is a safe pick. It has a creamy taste that melts to perfection.
How can I make cheeseburger sliders spicier?
To add heat, mix spices like cayenne or chili powder into the meat. You can also add hot sauce to the patties before grilling. For toppings, consider adding jalapeños or spicy pickles. These will give your sliders an extra kick.
What is the total time to prepare cheeseburger sliders?
Making cheeseburger sliders takes about 30 minutes total. You can spend 15 minutes prepping the ingredients and 15 minutes cooking. For quick serving, grill the patties while toasting the buns. This keeps everything warm and ready for your guests.
You’ve learned how to make tasty cheeseburger sliders. We covered the right ingredients, cooking steps, and ways to enhance flavors. Remember, keep the beef mix gentle to ensure a juicy slider. Also, feel free to experiment with cheeses and toppings to suit your taste. Whether it’s for a party or a simple dinner, these sliders are sure to please. Enjoy making them for your friends and family!


![- Arugula (4 cups) - Cherry tomatoes (1 cup) - Cucumber (1 medium) - Red onion (1/2 medium) - Kalamata olives (1/2 cup) - Feta cheese (1/4 cup) - Sunflower seeds (1/4 cup, optional) - Extra virgin olive oil (1/4 cup) - Fresh lemon juice (2 tablespoons) - Dried oregano (1 teaspoon) - Salt and black pepper to taste Gathering fresh ingredients is key for this salad. Arugula gives it a peppery taste. Cherry tomatoes add sweetness and color. Cucumber brings crunch, while red onion gives a nice bite. Now, let’s talk about the add-ins. Kalamata olives add a briny flavor. Feta cheese gives creaminess and tang. If you want a crunch, add sunflower seeds. They work well with the other flavors. Next, we need the dressing. Extra virgin olive oil is rich and smooth. Fresh lemon juice brightens the salad. Dried oregano adds an earthy touch. Don’t forget salt and black pepper to finish. You can find the complete recipe in the [Full Recipe]. First, wash the arugula well. Rinse it under cold water to remove dirt. After washing, dry it gently with a salad spinner or a clean kitchen towel. This step helps the leaves stay crisp. Next, prepare the vegetables. Slice the cherry tomatoes in half. Dice the cucumber into half-inch cubes. For the red onion, cut it into thin rings. These steps add color and crunch to your salad. Now, it's time to mix the salad. In a large mixing bowl, add the fresh arugula, halved cherry tomatoes, diced cucumber, sliced red onion, and Kalamata olives. Use your hands to toss the salad gently. This method keeps the leaves from bruising. After mixing, sprinkle the crumbled feta cheese on top. This cheese adds a creamy texture and salty flavor. If you want extra crunch, you can also add sunflower seeds at this point. For the dressing, take a small bowl. Whisk together the extra virgin olive oil, fresh lemon juice, and dried oregano. Add a pinch of salt and pepper for taste. Whisk until everything combines well. Drizzle the dressing over the salad mixture. Use a large spoon or salad tongs to toss gently. This ensures every bite is flavorful without crushing the arugula. For a complete meal, check out the Full Recipe for all the details. To keep arugula fresh, handle it gently. Avoid squishing or bruising the leaves. When washing arugula, fill a bowl with cold water. Submerge the leaves and swish them around. This helps remove dirt without damaging them. Lift the arugula out and place it on a clean towel. Pat it dry carefully to keep the leaves crisp. To boost the flavor of your Mediterranean Arugula Salad, add fresh herbs like basil or parsley. These herbs bring bright notes to the dish. You can also sprinkle in a pinch of crushed red pepper for heat. When garnishing, use a few extra olives or a lemon wedge. This adds a pop of color and makes the salad look inviting. Serve your salad right after mixing for the best taste. The freshness of the arugula is key. If you need to prep ahead, wash and dry the arugula first. Store it in a container lined with paper towels. This keeps the leaves dry and crisp. You can chop the other veggies and store them separately. Just combine everything before serving. Enjoy the full flavors of your Mediterranean Arugula Salad! For the full recipe, refer to the earlier section. {{image_4}} You can make your Mediterranean arugula salad even more filling. Adding grilled chicken is a great choice. It brings a nice smoky flavor. If you prefer a plant-based option, try chickpeas. They add protein and a hearty texture. For a seafood twist, consider incorporating shrimp. Lightly sautéed or grilled shrimp works well. It adds a delightful taste that pairs nicely with the fresh ingredients. Feel free to adjust your salad based on the season. In summer, add ripe peaches or strawberries for sweetness. In fall, consider roasted butternut squash for warmth. You can also change up the dressing. Swap traditional vinegar for balsamic or apple cider vinegar. Each type will give the salad a unique flavor profile. If you want to make your Mediterranean arugula salad vegan, simply omit the cheese. The salad will still be fresh and tasty. For those needing gluten-free options, this salad is perfect. All ingredients are gluten-free, making it a safe choice for everyone. Enjoy your meal without worries! To store leftover Mediterranean Arugula Salad, place it in an airtight container. This helps keep the salad fresh and prevents it from drying out. Use glass or plastic containers with tight lids. If you have a lot of salad, consider dividing it into smaller portions. This makes it easy to grab just what you need. The salad stays fresh for about three days in the fridge. After this, the arugula may wilt, and the tomatoes might get mushy. Watch for signs like a slimy texture or off smells. If you see these, it's best to toss the salad. Fresh ingredients are key to a great taste. To refresh the salad, add a splash of lemon juice or olive oil. This can bring back some flavor and zest. You can also mix in fresh arugula or other greens. If you want to repurpose leftover salad, try using it as a filling for wraps or sandwiches. You can also stir it into cooked pasta for a quick meal. Arugula is low in calories but packed with nutrients. It has vitamins A, C, and K. Arugula also contains calcium and iron. These nutrients support bone health and boost immunity. Eating arugula can improve heart health due to its antioxidants. It's a great choice for a Mediterranean diet. This diet focuses on whole foods, healthy fats, and fresh produce. Arugula fits perfectly into this style of eating, enhancing flavors and health. Yes, you can prepare parts of the salad ahead of time. Wash and dry the arugula and veggies first. Store them separately to keep them fresh. Chop the tomatoes, cucumber, and onion in advance. Keep them in airtight containers in the fridge. You can make the dressing ahead too. Just whisk together olive oil, lemon juice, and seasonings. Store the dressing in a jar. When ready to serve, mix everything together for a fresh salad. You can try several dressings with this salad. A classic vinaigrette works well. Use olive oil, vinegar, salt, and pepper. A lemon-tahini dressing adds a creamy touch. You could also use balsamic vinaigrette for sweetness. Another tasty option is yogurt-based dressing for a tangy kick. Each dressing can enhance the salad’s flavors, so experiment to find your favorite. For the full recipe, check out the details above. In this blog post, we explored the Mediterranean Arugula Salad. We discussed fresh produce, flavorful add-ins, and the best dressing to bring it all together. You learned how to prepare, mix, and serve the salad with tips for freshness and flavor enhancement. Remember, this salad is versatile—you can change the protein or vegetables based on the season. Enjoy making your own tasty versions and store leftovers properly. With the right care, your salad can stay fresh and delicious for days.](https://fastmealmate.com/wp-content/uploads/2025/06/6fae422d-07df-4724-84de-c8edab5789ea-768x768.webp)
![- 1 pound ground beef (80/20 blend) - ½ teaspoon salt - ½ teaspoon black pepper - ½ cup cheddar cheese, shredded - ½ cup mozzarella cheese, shredded - 4 large flour tortillas - 4 tablespoons cream cheese, softened - ¼ cup dill pickles, diced - ¼ cup diced tomatoes - ¼ cup onion, minced - 2 tablespoons ketchup - 2 tablespoons mustard - Olive oil, for cooking Creating Cheeseburger Quesadilla Smash Sliders is a fun way to enjoy flavors. With the right ingredients, your sliders burst with taste. First, let’s start with the beef. I like using an 80/20 blend. This mix gives a juicy bite. Next, season it well with salt and pepper. Don't skip this step; flavor is key. For the cheese, I use both cheddar and mozzarella. The cheddar brings a sharp taste, while mozzarella melts beautifully. You can feel the cheese stretch in every bite. The flour tortillas are the base for these sliders. They hold everything together and crisp up nicely when cooked. I recommend using large tortillas for easier assembly. Cream cheese adds richness. Spread it on the tortillas for a creamy layer. Then, top it off with diced dill pickles, tomatoes, and onions. These toppings add crunch and freshness. Finally, drizzle some ketchup and mustard for that classic burger taste. Use olive oil to cook the quesadillas. It helps create a golden brown crust while keeping everything moist inside. For the full recipe, check the details above. This will guide you step by step to create your own Cheeseburger Quesadilla Smash Sliders. Enjoy the flavor explosion! To start, grab a medium mixing bowl. Add 1 pound of ground beef, ½ teaspoon of salt, ½ teaspoon of black pepper, and 1 teaspoon of garlic powder. Use your hands to mix everything gently. Once mixed, divide the beef into small patties, each about 2-3 ounces. Next, heat a skillet on medium heat. Add a drizzle of olive oil. When the pan is hot, place the patties in the skillet. Cook for 3-4 minutes until they turn brown. Flip them over and cook for another 3-4 minutes. Once done, remove the patties and set them aside on a plate. Now it's time to build your quesadilla! Lower the skillet heat to medium-low. Take 4 large flour tortillas and spread 1 tablespoon of softened cream cheese on one side of each tortilla. Place one tortilla in the skillet with the cream cheese-side facing up. Add a generous amount of cheddar cheese, then stack half of the cooked burger patties on top. Next, sprinkle on the diced pickles, diced tomatoes, and minced onions. Drizzle a bit of ketchup and mustard over this. Finish by adding a layer of shredded mozzarella cheese. Carefully place another tortilla on top, cream cheese-side down. Press it gently with a spatula to hold everything together. Cook the quesadilla for about 2-3 minutes. Look for a golden-brown color on the bottom tortilla and melted cheese. Now, flip the quesadilla gently and cook the other side for another 2-3 minutes. When both sides are browned, take the quesadilla off the heat. Let it cool for a minute, then slice it into quarters or sliders. Repeat this for the rest of your tortillas and filling ingredients. Serve the warm cheeseburger quesadilla sliders on a platter. I like to add extra diced pickles and some ketchup and mustard for dipping on the side. Enjoy this flavor explosion! For the full recipe, check out the [Full Recipe]. To make the best burger texture, use ground beef that is 80/20. This mix provides the right fat content for juicy patties. When you form the patties, handle the meat gently. Overworking it can make the burgers tough. Aim for small patties, about 2-3 ounces, for sliders. For seasoning, keep it simple. A mix of salt, black pepper, and garlic powder works great. These flavors enhance the beef without overpowering it. Be sure to season both sides of each patty before cooking. This will help lock in the taste. To get that perfect cheese melt, use a mix of cheeses. Cheddar and mozzarella are my go-tos. Cheddar adds sharpness, while mozzarella brings stretchiness. Spread cheese evenly, so it melts all the way through. For a fun twist, try pepper jack cheese for a spicy kick. You can also experiment with gouda or fontina. These will add richness and depth. Just remember to slice the cheese thinly for quicker melting. Cooking your quesadillas to a perfect golden brown is key. Use medium-low heat for even cooking. This prevents burning while letting the cheese melt fully. When flipping quesadillas, use a large spatula. Slide it under the quesadilla gently to avoid spills. If you're nervous about flipping, consider using a plate. Simply slide one side onto the plate, then flip it back into the pan. This method keeps your fillings intact. {{image_4}} You can switch up the meat in this dish. Ground turkey or chicken works well. Both have a lighter flavor but still taste great. For a plant-based option, try lentils or black beans. These give you a nice texture and flavor. Using these options can help you cater to different diets. To boost taste, add spices like paprika or cumin. These spices add warmth and depth. You can also mix in sauces, like barbecue or sriracha, for a kick. Experimenting with different cheeses can change the flavor too. Pepper jack adds heat, while gouda brings a smoky taste. Topping with fresh herbs, like cilantro or chives, can brighten each bite. You can serve these quesadilla sliders in many ways. They work as a classic quesadilla or as fun sliders. For parties, cut them into smaller pieces. Arrange them on a colorful platter to impress your guests. You might also serve them with dips, like guacamole or salsa, for extra flavor. Each style can make your meal exciting and unique. To keep your cheeseburger quesadilla sliders fresh, place them in an airtight container. This helps lock in flavor and moisture. Store them in the fridge for up to three days. After that, the taste may decline, and the texture could change. If you want to save them longer, freezing is a good option. Wrap each quesadilla slider tightly in plastic wrap. Then, place them in a freezer-safe bag or container. This keeps them safe from freezer burn. You can freeze them for up to three months. When you're ready to eat, let them thaw overnight in the fridge before reheating. For the best taste, reheat using the oven. Preheat it to 350°F (175°C). Place the quesadilla sliders on a baking sheet. Heat for about 10-15 minutes, until warm and crispy. If you use a microwave, put them on a plate. Heat for 30-60 seconds. This method is faster but may not keep the crunch. To restore crunchiness, consider finishing in a hot pan for a minute. Yes, you can prepare these sliders ahead. Make the patties and cook them. Let them cool. Then, store them in the fridge. When ready to serve, assemble the quesadillas. You can use either fresh tortillas or pre-made ones. If you use pre-made tortillas, spread cream cheese and layer the fillings. Cook them quickly in a hot skillet. This way, they stay crispy and warm. You can serve many tasty sides with these sliders. Consider some crispy fries or sweet potato fries. They pair well with the cheesy sliders. A fresh salad can balance the richness. You might also try dipping sauces like ranch or spicy mayo. These add extra flavor and fun. You could even serve a zesty salsa for a fresh kick. To make these sliders vegetarian, swap out the beef for a meat alternative. You could use black beans or lentils as a base. Another option is to use plant-based burger patties. Just season them like the beef. Add your favorite toppings, like cheese and veggies. You can still enjoy the same great flavors without meat. Just make sure all the other ingredients are vegetarian-friendly. You can make tasty Cheeseburger Quesadilla Smash Sliders easily. Start with classic ingredients and follow straightforward steps for delicious results. Don’t forget to try different proteins and toppings to suit your taste. Storing any leftovers is simple, and reheating them will keep them just as good. With these tips, you can impress guests or enjoy a fun meal at home. Making this dish lets you explore flavors while fitting right into your busy day. Enjoy your cooking adventure!](https://fastmealmate.com/wp-content/uploads/2025/07/3ea5f9d6-0f24-4765-99ee-1beab0673b04-768x768.webp)

