Skip to content
About
Contact
Cookie Policy
Copyright Policy
Disclaimer
Search
Home
Dinner
Appetizer
Desserts
Drinks
About
Contact
Privacy Policy
Toggle Menu
Home
/
Drinks
- Page 4
Drinks
Mango Lemonade Refreshing and Flavorful Recipe Guide
Pink Lemonade Refreshing and Simple Recipe Guide
Raspberry Ginger Fizz Mocktail Refreshing Drink Recipe
Cotton Candy Ice Drink Delightful and Easy Recipe
Frozen Limonada de Coco Refreshing Summer Drink
Peach Bellini Mocktail Refreshing Summer Delight
Whipped Pink Lemonade Refreshing Summer Drink Recipe
Creamy Lemonade Mocktail Refreshing Summer Drink
Mango Mojito Refreshing Drink for Summer Fun
Grape Mojito Refreshing Cocktail Recipe to Enjoy
Page navigation
Previous Page
Previous
1
2
3
4
5
6
…
9
Next Page
Next
Home
Dinner
Appetizer
Desserts
Drinks
About
Contact
Privacy Policy
Toggle Menu Close
Search for:
Search

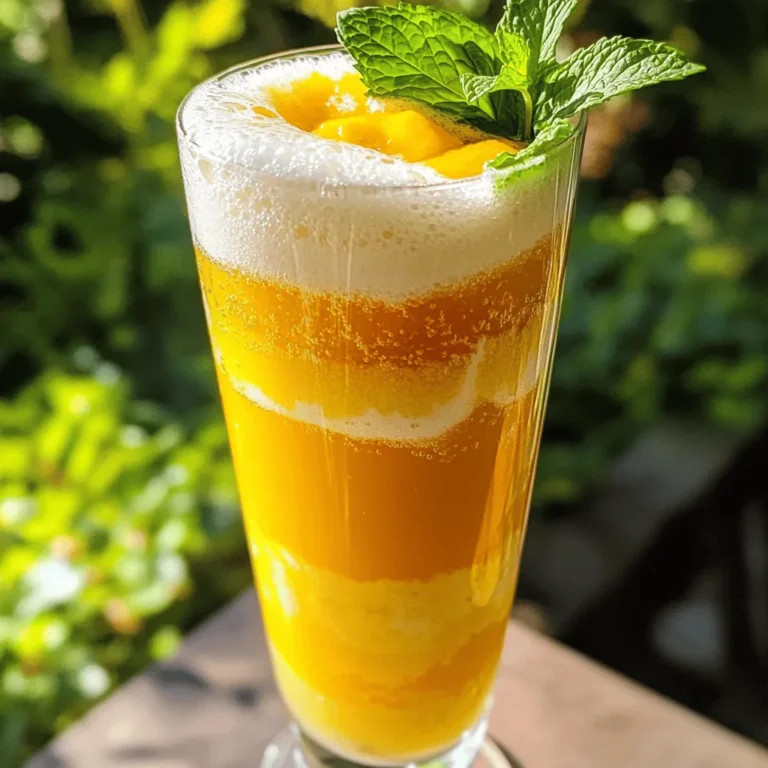
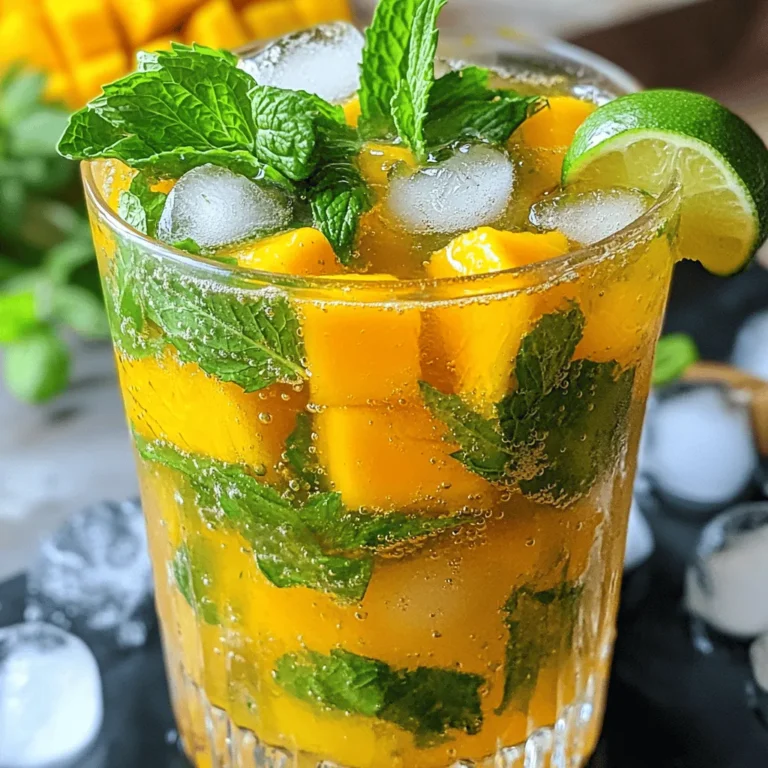
![- 2 ripe mangoes, peeled and diced - 1 cup freshly squeezed lemon juice (approximately 4-5 lemons) - 4 cups cold water - 1/2 cup honey or agave syrup (adjust for sweetness) - 1/4 teaspoon sea salt - Ice cubes - Fresh mint leaves and lemon slices for garnish In this recipe, ripe mangoes are key. They give the drink a rich, sweet flavor. Fresh lemon juice adds a tangy twist that balances the sweetness. I recommend using cold water for a refreshing drink. Honey or agave syrup allows you to control the sweetness level. Adding a pinch of sea salt enhances the taste and brings out the flavors. Don't forget the ice cubes! They keep your drink cool and refreshing. Lastly, fresh mint leaves and lemon slices make a beautiful garnish. They add a nice touch to your glass and make it look appetizing. For the complete recipe, check out the [Full Recipe]. To start, you need ripe mangoes. Peel and dice two mangoes. Place the diced mangoes in a blender. Add 1 cup of cold water. Blend on high until smooth and creamy. This mango puree gives your drink a rich flavor. Next, grab a large pitcher. Pour in 1 cup of freshly squeezed lemon juice. Use about 4-5 lemons for this. Add 3 cups of cold water. Mix in 1/2 cup of honey or agave syrup. Stir until everything is well combined. This mixture will be your refreshing lemonade base. Now, it’s time to combine. Gently pour the mango puree into the pitcher with the lemonade. Stir carefully until everything is mixed. You want the mango and lemonade to blend perfectly for a smooth taste. Take a moment to taste your mixture. If it’s too sweet, add more lemon juice. If you want it sweeter, mix in more honey or agave. Don't forget the salt! Stir in 1/4 teaspoon of sea salt to balance the flavors. Adjust until it tastes just right for you. It’s almost time to serve! Fill your glasses with ice cubes. Carefully pour the mango lemonade over the ice. Each glass should be full of that bright, fruity goodness. For a nice touch, garnish with fresh mint leaves and a lemon slice on the rim. This makes your drink look inviting and fresh. For the full recipe, check out the detailed steps above! To make your mango lemonade sweet, you can adjust the honey or agave syrup. Start with the half cup stated in the recipe. After mixing, taste it. If it’s not sweet enough, add more sweetener a little at a time. This way, you control the flavor. Remember, mangoes also add some natural sweetness. So, your lemonade may not need much more. Want to add some extra flavor? Fresh herbs like mint or basil work great. Just chop them up finely and mix them into the lemonade. You can also try adding a pinch of ginger or a dash of cinnamon. These spices bring a new twist to your drink. They can brighten the mango's flavor and make it even more refreshing. Mango lemonade pairs well with light snacks. Think about serving it with fresh fruit or a light salad. It also goes perfectly with grilled chicken or fish. For a fun twist, try it with spicy tacos. The sweet and tangy lemonade cools down the heat. Serve it over ice for a refreshing treat. Enjoy the colorful look with mint and lemon slices on top, making your table even more inviting. {{image_4}} You can make mango lemonade even better by adding other fruits. Try mixing in fresh berries like strawberries or blueberries. Pineapple also works great. These fruits add extra color and fun flavors. To do this, simply blend the fruits with the mango before mixing with the lemonade. Each fruit brings its own unique taste, making your drink more exciting. Want to spice things up? You can turn mango lemonade into a fun adult drink. Add rum or vodka for a spiked version. Use about 1 to 2 ounces of your favorite spirit per glass. This addition gives the drink a kick, perfect for parties or summer gatherings. Just remember to drink responsibly! Get creative by using flavored teas or herbal infusions in your mango lemonade. You can brew a light green tea or a refreshing mint tea. Once it cools, mix it into your lemonade base. This adds a whole new layer of flavor. You can even try herbal infusions like chamomile for a soothing twist. Explore these options to find your favorite mix. The full recipe will guide you through making this delightful drink. To keep your mango lemonade fresh, store it in an airtight container. A glass jar or a pitcher works well. Make sure to seal it tightly to prevent any odors from the fridge from mixing in. Always place it in the coldest part of the fridge, usually towards the back. This helps keep it cool and refreshing. Your mango lemonade will stay fresh for about 3 to 5 days. After that, the flavors may start to fade. If it starts to taste less vibrant, you might want to add a little more lemon juice or honey to revive it. Always check for any changes in smell or color before drinking. If you want to save some for later, freezing is a great option. Pour the mango lemonade into ice cube trays or freezer-safe bags. Leave a little space at the top, as liquids expand when frozen. When you want to enjoy it again, just thaw it in the fridge overnight. You can also blend the frozen cubes into smoothies for an instant fruity treat. For the full recipe, check out the [Full Recipe]. Mango lemonade is packed with vitamins. Mangoes are rich in vitamin C, which helps boost your immune system. They also contain vitamin A, good for your eyes and skin. The lemon juice adds more vitamin C and antioxidants. Together, they help you stay hydrated and healthy. Drinking mango lemonade can also support digestion due to its natural enzymes. Yes, you can use frozen mangoes! They make a great substitute. When you use frozen mango, it still blends well into a smooth puree. You do not need to thaw them first. Just add them to the blender with some water and blend until smooth. This makes it easy for you to enjoy mango lemonade anytime, even when fresh mangoes aren't available. To make your mango lemonade less tart, add more sweetness. You can increase the honey or agave syrup. Start with a little, then taste and add more if needed. If it’s still too sour, you can add more mango puree. A pinch of salt can also help balance the flavors. This way, you will enjoy a sweeter, more balanced drink. This mango lemonade recipe is sure to refresh you. We covered the ingredients, step-by-step instructions, and variations to try. Don't forget to adjust sweetness and explore fun combos. You can enjoy this drink fresh or store it for later. Whether you sip it by itself or with snacks, it's a bright treat. I hope you’re excited to make this delicious drink and share it with others!](https://fastmealmate.com/wp-content/uploads/2025/07/c517a603-1516-4e83-8a0a-b9bae852f1a0-768x768.webp)
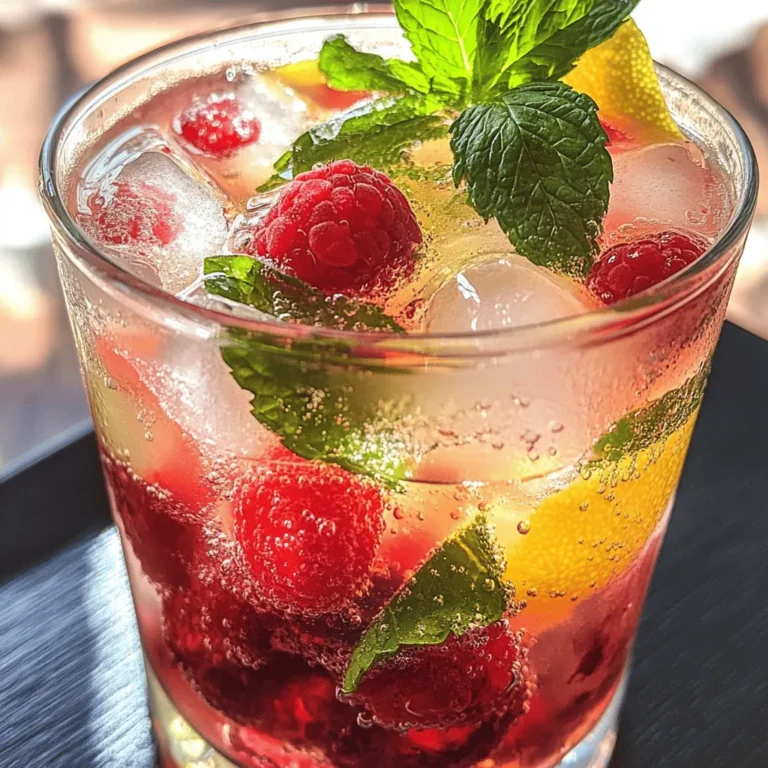
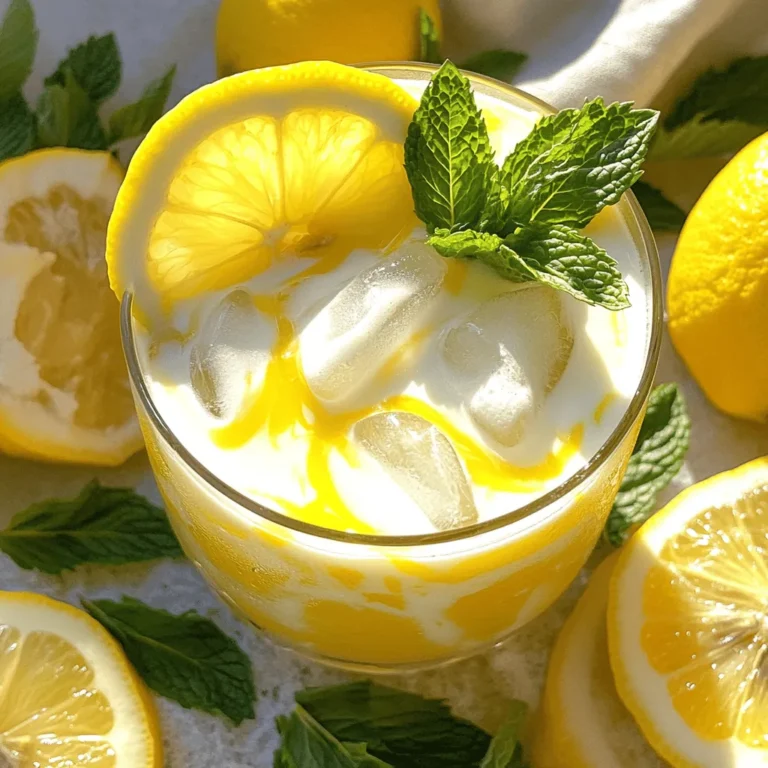
![- 1 cup freshly squeezed lemon juice - 3/4 cup granulated sugar - 4 cups cold water - 1/2 cup cranberry juice - Ice cubes - Fresh mint leaves - Lemon slices Pink lemonade is a fun and tasty drink. It packs a punch of flavor, but it's good to know what’s in it. - Calories: A serving has about 100 calories. - Sugars: Each glass has around 24 grams of sugar. - Vitamins: It provides vitamin C from the lemon juice. Using fresh ingredients is key. Fresh lemon juice gives bright flavor and important nutrients. Plus, it has no added preservatives. The cranberry juice adds a nice touch of sweetness and color. This drink not only refreshes but nourishes your body too. Make it with care, and you’ll taste the difference. For the full recipe, check out [Full Recipe]. To make simple syrup, start by cooking sugar in water. In a medium saucepan, mix 1 cup of water with 3/4 cup of granulated sugar. Set the heat to medium. Stir the mixture as it heats up. Keep stirring until the sugar fully dissolves and the liquid looks clear. This means your syrup is ready! Once done, remove it from the heat and let it cool completely. Now for the fun part! Grab a large pitcher. Pour in 1 cup of freshly squeezed lemon juice. This juice gives your pink lemonade its bright flavor. Next, add 1/2 cup of cranberry juice. This juice adds a lovely pink color and a hint of sweetness. Stir gently to blend both juices. Once your simple syrup has cooled, it's time to combine. Pour the syrup into the pitcher with the juices. Stir well to mix everything together. Next, add 3 cups of cold water to the pitcher. Stir again until everything is fully combined. Now, it's time to taste your lemonade. Take a sip! If you want it sweeter, add more sugar slowly. Stir until it dissolves. If it’s too strong, add a bit more water. To make your drink extra refreshing, chill it in the fridge for at least 30 minutes. This step is key! When ready to serve, fill glasses with ice cubes. Pour the chilled lemonade over the ice. Garnish each glass with a lemon slice and a sprig of fresh mint. Your refreshing pink lemonade is ready to enjoy! For the full recipe, check out the [Full Recipe]. To get the right taste, you can adjust the sweetness and tartness of your pink lemonade. Start with the basic recipe, but feel free to tweak it. If you want it sweeter, add more sugar slowly and stir. If it tastes too sweet, squeeze in more lemon juice. This balance makes a drink that everyone enjoys. Using fresh lemon juice is key to good flavor. When you squeeze lemons, use a citrus juicer to get the most juice. Choose ripe lemons that feel heavy for their size. This means they are juicy and full of flavor. Avoid using bottled lemon juice, as it lacks the fresh taste that makes pink lemonade special. Garnishing adds fun and flair to your pink lemonade. A simple slice of lemon on the glass rim looks nice. You can also add fresh mint leaves on top. This not only makes your drink pretty but gives it a burst of fresh aroma. For serving, consider the occasion. Use clear glasses to show off the lovely pink color. At a picnic, add ice to keep it cool. For parties, consider a large pitcher with a ladle for easy serving. Each guest can fill their glass and enjoy this refreshing drink. {{image_4}} You can make pink lemonade even more fun by adding different fruit juices. For example, try mixing in fresh raspberry or strawberry juice. These fruits add a bold taste and deep color. You can also mix in other juices like peach or watermelon for unique flavors. Sweeteners are another area to explore. Instead of regular sugar, try honey or agave syrup. These options can give your drink a distinct taste. Adjust the sweetness to fit your own preference. Play around until you find the perfect mix for you! If you want a cool treat, make a frozen pink lemonade slush. Here’s what you need: - 1 batch of pink lemonade (from the Full Recipe) - 2 cups ice cubes To prepare, start by blending the pink lemonade and ice in a blender. Blend until the ice is finely crushed and the mixture is smooth. You may need to add more ice or lemonade to reach your desired consistency. Serve it in a tall glass with a straw for a fun twist on this classic drink. Enjoy the refreshing chill! To keep your leftover pink lemonade fresh, use an airtight container. Glass jars or plastic pitchers work well. Make sure to seal it tightly to avoid any odors from your fridge. You can store it for up to five days in the refrigerator. Always check for signs of spoilage before you drink it. If you want to save pink lemonade for later, freezing is a great choice. Pour the lemonade into ice cube trays or freezer-safe bags. Leave some space in the containers for expansion. When you’re ready to enjoy your drink, take out the lemonade and thaw it in the fridge overnight. For a fun twist, serve the thawed lemonade over ice. You can also blend it with fresh fruit for a slushy treat. You can sweeten pink lemonade with sugar, honey, or agave. Each sweetener has its perks. Sugar is the most common choice. It dissolves easily in water. Honey adds a floral taste. It also provides some health benefits. Agave syrup is sweeter than sugar. You use less of it, making it a smart choice for those cutting calories. Remember, you can mix and match sweeteners to find your perfect balance. Yes, you can use bottled lemon juice. However, fresh lemon juice tastes better. Fresh juice has a bright flavor. Bottled juice often lacks that vibrant taste. It may also have preservatives. These can change the flavor a bit. If you have time, always go for fresh lemons. They make your pink lemonade taste just right. Pink lemonade can stay fresh for about 5 to 7 days in the fridge. Make sure to keep it in a sealed container. This helps to lock in the flavor. Always check for signs of spoilage. If it smells off or shows changes in color, toss it out. Enjoy your pink lemonade fresh for the best taste! You learned how to make a tasty pink lemonade from fresh ingredients. We covered the key steps, from making simple syrup to mixing flavors. You now know how to customize it for any event. Remember to taste and adjust for the right sweetness. Store leftovers properly and enjoy them later. With this guide, you can create a delightful drink everyone will love. Have fun experimenting with different flavors and serving ideas!](https://fastmealmate.com/wp-content/uploads/2025/07/2b3f39fc-3ccf-4ffd-a241-1286b33a74a3-768x768.webp)