Skip to content
About
Contact
Cookie Policy
Copyright Policy
Disclaimer
Search
Home
Dinner
Appetizer
Desserts
Drinks
About
Contact
Privacy Policy
Toggle Menu
Home
/
Dinner
- Page 20
Dinner
Garlic Butter Shrimp Savory and Quick Weeknight Meal
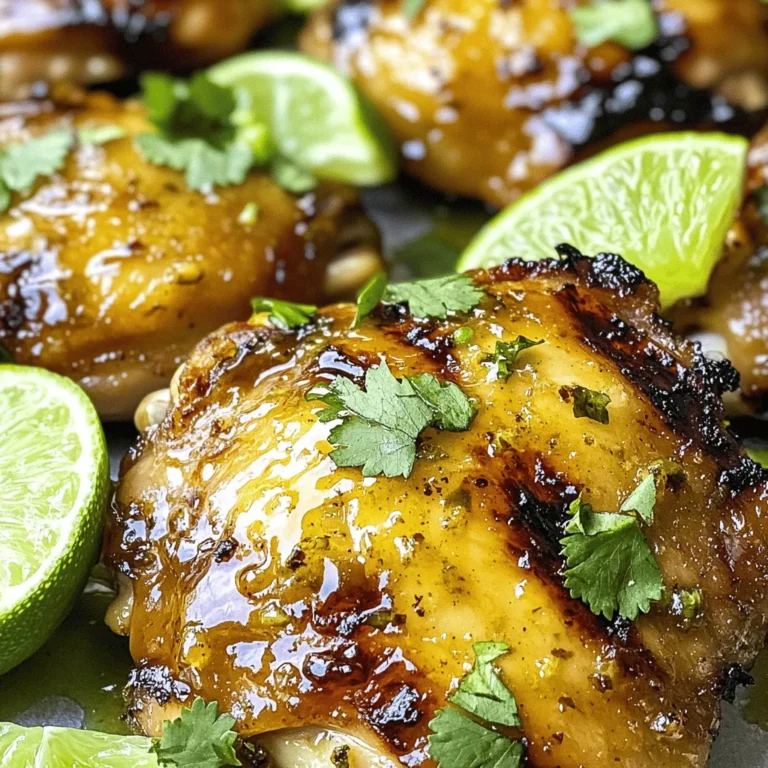
Honey Lime Chicken Thighs Flavorful and Juicy Meal
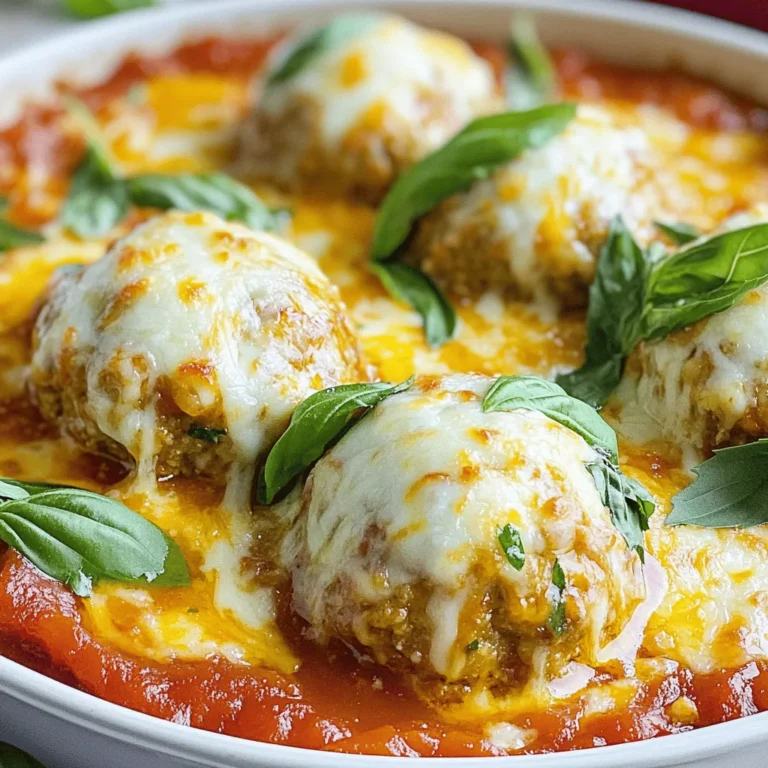
Hearty Meatballs and Cheese Bake Comfort Food Delight
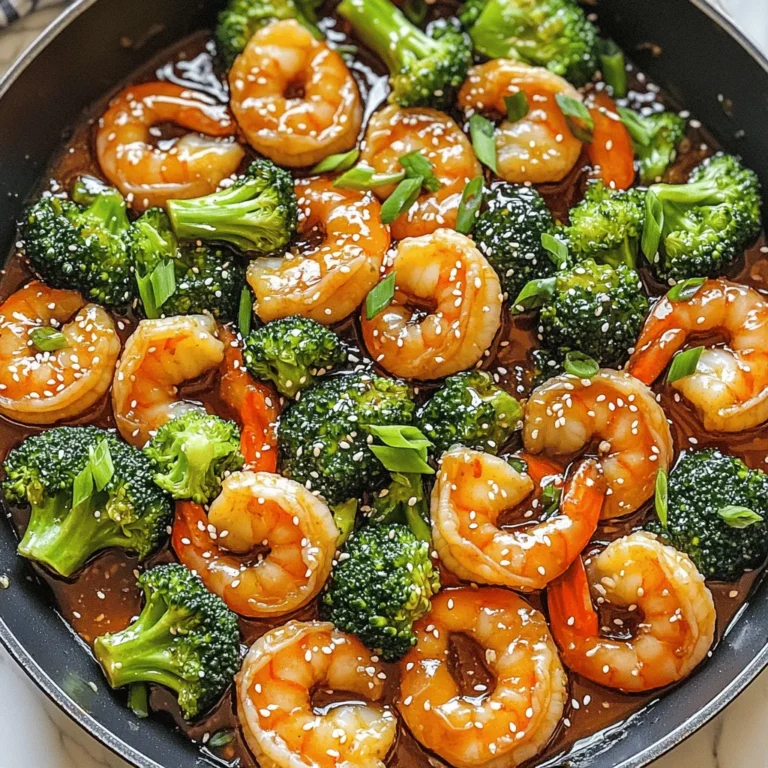
Honey Garlic Shrimp & Broccoli Flavorful Quick Dish
Lemon Garlic Butter Chicken Bites Flavorful Delight
Kielbasa Sheet Pan Dinner with Sauerkraut Delight
Parmesan Spinach Couscous Flavorful and Simple Dish
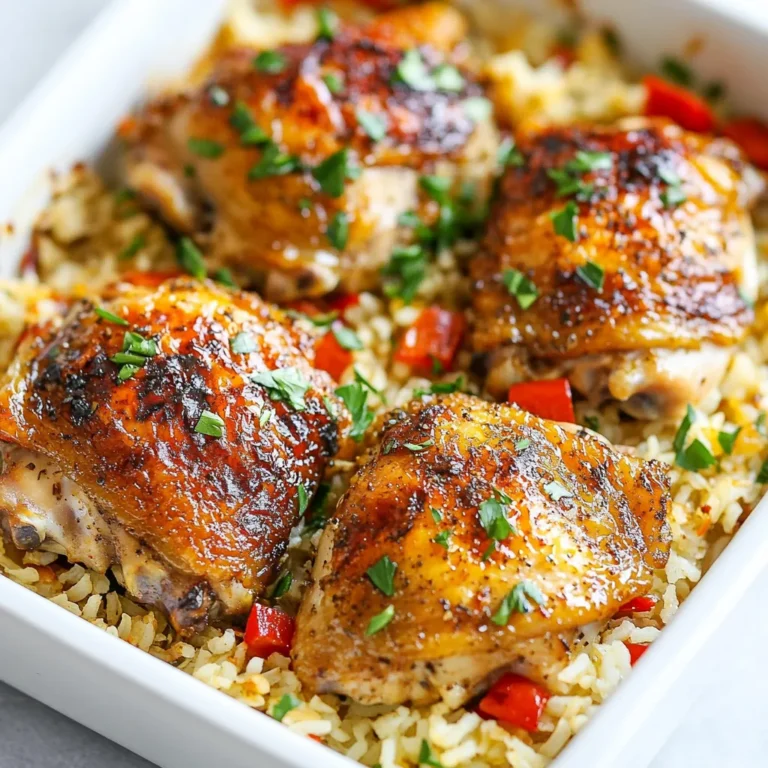
Oven Baked Chicken and Rice Tasty Family Meal
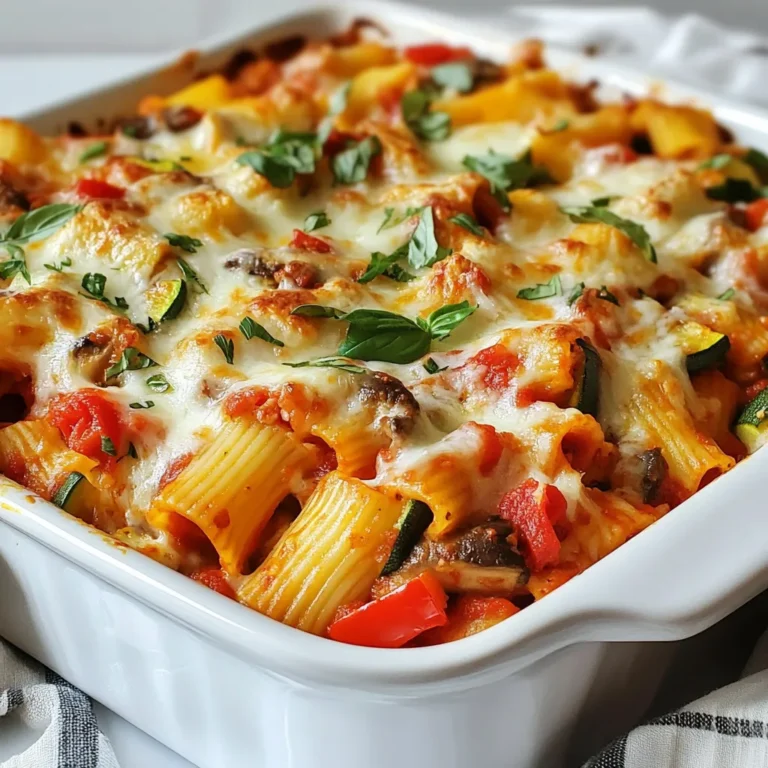
Loaded Veggie Baked Ziti Flavorful Family Dinner
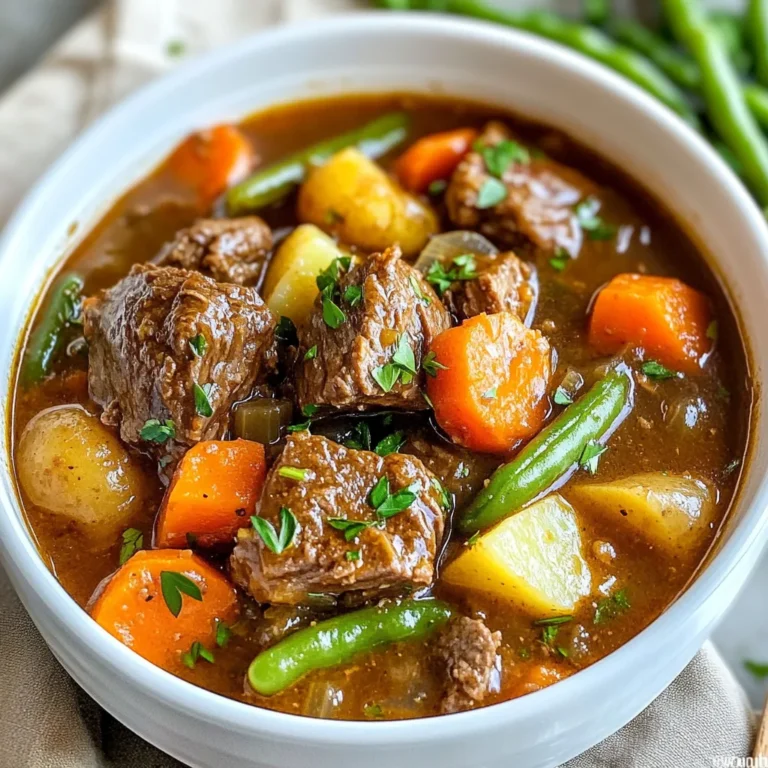
Instant Pot Beef Stew Flavorful and Hearty Meal
Page navigation
Previous Page
Previous
1
…
18
19
20
21
Next Page
Next
Home
Dinner
Appetizer
Desserts
Drinks
About
Contact
Privacy Policy
Toggle Menu Close
Search for:
Search

![To make garlic butter shrimp, gather these simple ingredients: - 1 lb large shrimp, deveined and peeled - 6 tablespoons unsalted butter - 5 cloves garlic, finely minced - 1 teaspoon red pepper flakes - 1 lemon, zested and juiced - 2 tablespoons fresh parsley, finely chopped - Salt and freshly ground black pepper, to taste - Optional: 1 tablespoon extra virgin olive oil These ingredients create a dish full of flavor. The shrimp give a sweet and briny taste. The garlic brings a warm, earthy aroma. Butter adds richness and a smooth texture. Lemon juice brightens the dish and balances the flavors. Fresh parsley gives a pop of color and freshness. Feel free to adjust the red pepper flakes. If you like heat, add more! If you prefer a milder flavor, use less. The optional olive oil helps prevent butter from burning. It adds depth to the dish. Once you gather these ingredients, you're ready to dive into the world of garlic butter shrimp. For a full recipe, check out the section above. To start, heat a large skillet over medium heat. Add 3 tablespoons of unsalted butter and, if you like, 1 tablespoon of extra virgin olive oil. This oil helps keep the butter from burning and adds flavor. Once the butter melts, add 5 cloves of minced garlic along with 1 teaspoon of red pepper flakes. Sauté for about 1-2 minutes. Stir often until the garlic smells great and turns light golden brown. Watch closely, so the garlic doesn’t burn. Now, it’s time for the shrimp. Carefully add 1 pound of peeled and deveined shrimp to the skillet. Spread them out in a single layer. Season with salt and freshly ground black pepper. Let the shrimp cook for about 2-3 minutes without stirring. You will see them change color to pink and opaque. When they look good, gently flip the shrimp over. Add the zest and juice from 1 lemon along with the remaining 3 tablespoons of butter. Cook for another 2-3 minutes until the shrimp are fully cooked and coated in the buttery sauce. When the shrimp are done, take the skillet off the heat. Stir in 2 tablespoons of finely chopped parsley. Taste the dish and adjust seasoning by adding more salt or pepper if needed. Serve the garlic butter shrimp hot to enjoy the best flavor. For more details, check the Full Recipe. To make your garlic butter shrimp shine, focus on two key areas: garlic and seasoning. - Avoid burning garlic: Garlic burns fast. Keep your heat at medium. Stir it often. You want it golden, not dark. Burnt garlic tastes bad. - Adjust seasoning to preference: Taste is personal. Start with salt and pepper. Add more to match your liking. You can also play with red pepper flakes for heat. Now, let’s talk about how to serve your dish. Presentation matters, and there are tasty ways to enjoy it. - Pairing with rice or bread: Serve your shrimp over fluffy rice. Jasmine or basmati works great. If you prefer, slice some warm bread. It soaks up the sauce well. - Garnishing ideas: Fresh parsley adds color. A few lemon wedges brighten your plate. A sprinkle of extra red pepper flakes adds a kick. Need more help? Here are some useful tools. - Suggested video tutorial or high-quality images: Look for a video that shows the steps in action. It helps to see the cooking process. - Nutritional information: Check out the calories and nutrients in this dish. It’s good to know what you're eating. For the full recipe, click [Full Recipe]. Enjoy cooking! {{image_4}} You can play with the flavors in garlic butter shrimp. For a kick, try Spicy Garlic Butter Shrimp. Just add more red pepper flakes. Adjust the heat to your taste. This gives the dish a nice kick that many love. Another great option is Lemon Herb Garlic Shrimp. Add fresh herbs like thyme or basil for a fresh twist. You can also squeeze extra lemon juice for more brightness. This variation makes the dish feel light and refreshing. You can swap some ingredients for different flavors. Instead of butter, try using olive oil. This gives a different taste and is a healthier choice. You can also use ghee for a rich flavor. Adding vegetables can change the dish too. Toss in asparagus or cherry tomatoes. These add color and nutrients. They cook quickly and soak up the garlic butter sauce. If you need gluten-free options, this recipe is easy. Just make sure your red pepper flakes and any other spices are gluten-free. For a dairy-free option, use olive oil instead of butter. You can also try vegan butter. This keeps the flavor while making it suitable for those avoiding dairy. By making these small adjustments, you can enjoy garlic butter shrimp in many ways. For the full recipe, check out the details above. To store leftovers, place the garlic butter shrimp in an airtight container. Ensure the shrimp cool down first. This keeps them fresh and tasty. You should eat the leftovers within 2 days. The flavors stay best within this time. For reheating, I suggest using a skillet. Heat it on low and add a little butter. This method keeps the shrimp moist. Stir gently to avoid overcooked shrimp. If you use the microwave, heat in short bursts. Check every 30 seconds until warm. You can freeze cooked shrimp for later use. Place them in a freezer-safe bag and remove as much air as possible. They can last up to 3 months in the freezer. To defrost, place the shrimp in the fridge overnight. For a faster method, submerge the bag in cold water. This way, you can enjoy your garlic butter shrimp whenever you want. For the full recipe, check out the [Full Recipe]. Cook shrimp for about 2-3 minutes on each side. They turn pink and opaque. This short time keeps them tender and juicy. Overcooking makes them tough. Always check their texture before serving. Yes, you can use frozen shrimp. Thaw them first in cold water. It takes about 15-20 minutes. Pat them dry before cooking. This helps them sear nicely in the pan. Cooking frozen shrimp directly may not give the best results. You can pair garlic butter shrimp with many sides. Rice is a great choice, like jasmine or basmati. You can also serve it with crusty bread. A fresh salad or steamed veggies work well too. They balance the rich flavors of the shrimp. This recipe is very flexible. You can adjust the spice level by adding more or less red pepper flakes. Want a different flavor? Try adding fresh herbs like basil or cilantro. You can even add veggies like asparagus or bell peppers. The choice is yours! For the full recipe, check the earlier section. This blog post covered a simple garlic butter shrimp recipe with step-by-step instructions. You learned about key ingredients, cooking tips, and variations for flavor. Storing and reheating shrimp was also discussed. This dish is not only easy to make, but it’s also delicious too. Experiment with the ingredients or try new sides to make it your own. Enjoy your cooking, and have fun exploring different flavors and options!](https://fastmealmate.com/wp-content/uploads/2025/05/4326bcb2-842f-4d6f-96a8-35ed43fbf561-768x768.webp)
![- 1 lb (450g) boneless, skinless chicken thighs, cut into bite-sized pieces - 4 tablespoons unsalted butter, divided - 4 cloves garlic, minced finely - 1 large lemon, zested and juiced - 1 teaspoon dried thyme - 1 teaspoon paprika - Salt and freshly ground black pepper to taste - Fresh parsley, chopped (for garnish) These ingredients make the dish shine. The chicken thighs give a tender bite. Garlic adds a strong aroma. Lemon brings brightness and tang. Butter makes everything rich and smooth. Thyme and paprika add depth and warmth. - Red pepper flakes for heat - Fresh herbs like basil or cilantro - A splash of white wine for extra richness - Honey for a touch of sweetness Adding some of these can make your dish unique. Red pepper flakes can spice things up. Fresh herbs can add a pop of freshness. A splash of wine creates a deeper flavor. Honey can balance the tartness of lemon. - Large skillet for cooking - Cutting board for prepping the chicken - Sharp knife for cutting the chicken - Measuring spoons for accuracy - Tongs for turning the chicken These tools will help you cook efficiently. A large skillet allows even cooking. A cutting board keeps the workspace tidy. A sharp knife ensures safe and quick cutting. Measuring spoons keep your flavors balanced. Tongs help with easy flipping and serving. For the detailed cooking steps and more, check the Full Recipe. Start by gathering your ingredients. You will need: - 1 lb boneless, skinless chicken thighs, cut into bite-sized pieces - 4 tablespoons unsalted butter, divided - 4 cloves garlic, minced finely - 1 large lemon, zested and juiced - 1 teaspoon dried thyme - 1 teaspoon paprika - Salt and freshly ground black pepper to taste - Fresh parsley, chopped (for garnish) Next, melt 2 tablespoons of butter in a skillet over medium heat. As it melts, season the chicken thighs with paprika, salt, and pepper. This step adds great flavor. Once the butter is bubbling, add the chicken pieces to the skillet. Spread them out evenly for the best sear. Sear the chicken for 5-7 minutes. Turn the chicken occasionally until it turns golden brown on all sides. This browning adds depth to the dish. When done, remove the chicken and set it aside on a plate. In the same skillet, melt the remaining 2 tablespoons of butter. Add the minced garlic and sauté it for about 30 seconds. Stir constantly to prevent burning. Once fragrant, stir in the lemon juice and zest, along with the dried thyme. Let this simmer for 1-2 minutes. This step melds all the flavors together. Now, return the cooked chicken to the skillet. Toss it in the lemon garlic butter sauce until well coated. Cook everything together for another 2 minutes. This helps the chicken absorb the sauce and heat through completely. Once finished, remove the skillet from the heat. Sprinkle fresh parsley over the chicken bites for a vibrant look. Serve the chicken bites in a large dish or individual bowls. Drizzle any remaining garlic butter sauce over the top. Add lemon wedges and extra parsley for an inviting presentation. For the full recipe, check the earlier section. To get juicy chicken, use boneless, skinless thighs. They cook faster and stay moist. Cut the chicken into even pieces for uniform cooking. Sear the chicken in a hot skillet. This gives a nice brown crust. Cook it for 5-7 minutes, flipping halfway through. Always check for doneness; the chicken should reach 165°F (75°C) inside. For a richer sauce, use high-quality butter. Add fresh herbs like rosemary or basil. If you like heat, toss in red pepper flakes. A splash of white wine adds depth, too. For extra zing, use fresh lemon juice instead of bottled. Don’t forget to taste and adjust seasoning. Every bite should burst with flavor. Prep your ingredients before you start cooking. Chop garlic and zest the lemon ahead of time. Use a sharp knife for quick cutting. Consider using a pre-made garlic butter if you’re short on time. You can also marinate the chicken a few hours before cooking. This step adds flavor and cuts down on cooking time. Feel free to explore the [Full Recipe] for complete instructions! {{image_4}} You can swap chicken thighs for other proteins. Try shrimp for a quick cook. Just sauté until they turn pink. You can use pork tenderloin, cut into small pieces. It cooks fast and absorbs flavor well. Even beef cubes work if you like a heartier bite. Adjust cooking time to match the protein you choose. For a vegetarian version, use mushrooms or tofu. Both soak up flavors like a sponge. Sauté mushrooms until golden brown. For tofu, press to remove water, then cut into cubes. Cook until crispy on all sides. Toss these in the lemon garlic butter sauce just like the chicken. If you have allergies, there are easy swaps. Use olive oil instead of butter for a dairy-free option. You can replace garlic with garlic powder if you're sensitive to fresh garlic. For a low-sodium version, use less salt and a salt substitute. Adjust the recipe to fit your taste and needs. Check out the Full Recipe for more ideas and details! To keep your leftover chicken bites fresh, place them in an airtight container. Make sure to let them cool to room temperature first. Store the container in the refrigerator. They will stay good for up to three days. Label the container with the date for easy tracking. Reheating is simple! You can use a skillet or microwave. For the skillet, heat a little butter over medium heat. Add the chicken bites and stir until warmed through. This keeps the flavors intact. If using a microwave, place the chicken in a microwave-safe dish. Cover it with a damp paper towel and heat in 30-second intervals until hot. If you want to freeze the chicken bites, make sure they are cool first. Place them in a freezer-safe bag or container. Remove as much air as possible to avoid freezer burn. They can last for up to three months in the freezer. When ready to eat, thaw them in the fridge overnight. Then reheat them as mentioned above. Enjoy your Lemon Garlic Butter Chicken Bites again! For the full recipe, check out the earlier section. Yes, you can use chicken breast instead of thighs. Chicken breast is leaner and will cook faster. Just make sure to cut it into similar bite-sized pieces. You may need to adjust the cooking time to keep it juicy. Lemon Garlic Butter Chicken Bites pair well with many sides. Here are a few ideas: - Steamed rice - Pasta with olive oil - Roasted vegetables - A fresh green salad - Garlic bread These options balance the rich flavors of the chicken and add variety to your meal. This recipe is not spicy. It focuses on lemon, garlic, and herbs for flavor. If you want some heat, you can add red pepper flakes. Start with a small amount and taste as you go. To keep the chicken juicy, follow these tips: - Do not overcook the chicken. Use a meat thermometer to check for doneness. - Let the chicken rest for a few minutes after cooking. This helps keep the juices inside. - Use the butter and garlic sauce generously. It adds moisture and flavor. Following these steps will help you achieve tender and juicy chicken bites. For the complete recipe, check out the [Full Recipe]. This blog covered how to make Lemon Garlic Butter Chicken Bites. We looked at key and optional ingredients, as well as the tools you need. I provided step-by-step cooking instructions and tips for perfect chicken. We explored variations, storage methods, and answered common questions. Now, you have all the tools to whip up this dish with ease. Enjoy cooking and share your tasty results!](https://fastmealmate.com/wp-content/uploads/2025/05/97cbb791-292c-4238-a79b-781f43956dc5-768x768.webp)

![To make this tasty Parmesan Spinach Couscous, you need a few simple items. - 1 cup couscous - 2 cups vegetable broth - 2 cups fresh spinach, finely chopped - 1 cup cherry tomatoes, halved - 1/2 cup freshly grated Parmesan cheese - 2 tablespoons extra virgin olive oil - 1 tablespoon freshly squeezed lemon juice - 1 garlic clove, minced - Salt and freshly ground black pepper to taste - Fresh parsley, finely chopped, for garnish (optional) Each ingredient adds a layer of flavor. Couscous is light and fluffy. Spinach brings a fresh taste. Cherry tomatoes add sweetness and color. Parmesan cheese gives a rich, creamy finish. Olive oil smooths everything out. Lemon juice adds a bright zing. Garlic gives it a warm aroma. Salt and pepper enhance all the flavors. This recipe is easy to follow. You can find the Full Recipe above to make it at home. Enjoy cooking! - Start by boiling 2 cups of vegetable broth in a medium saucepan. - Once it boils, add 1 cup of couscous. Stir it well. - Cover the saucepan and take it off the heat. - Let it rest for 5 minutes, so the couscous soaks up the broth. - In a large skillet, heat 2 tablespoons of extra virgin olive oil over medium heat. - Add 1 minced garlic clove and sauté for about 1 minute. - Toss in 2 cups of finely chopped spinach and 1 cup of halved cherry tomatoes. - Cook for 3-4 minutes, stirring until the spinach wilts and tomatoes soften. - After the couscous rests, fluff it with a fork. - Gently mix the fluffy couscous with the sautéed vegetables. - Sprinkle in 1/2 cup of freshly grated Parmesan cheese. - Drizzle 1 tablespoon of freshly squeezed lemon juice over the mix. - Stir until the cheese melts and coats everything. - Season with salt and black pepper to your taste. - Serve warm, and if you like, garnish with fresh parsley. For the complete recipe, check out the [Full Recipe]. To avoid mushy couscous, use the right liquid-to-couscous ratio. Stick to 2 cups of broth for every 1 cup of couscous. This keeps it fluffy. When cooking, bring your broth to a boil first. Then add the couscous quickly. Cover it and let it rest for five minutes. This lets the couscous absorb the flavors without overcooking. Spices can take your dish to the next level. I like adding a pinch of red pepper flakes for heat. Fresh herbs like basil or thyme also add a nice touch. If you want to mix it up, try using feta cheese instead of Parmesan. Feta gives a tangy twist. You can also explore vegan cheese options for a dairy-free dish. Parmesan spinach couscous pairs well with grilled chicken or fish. You can also serve it alongside a fresh salad. The dish tastes best warm. Serve it right after cooking for the best flavor and texture. If you let it sit, the couscous may clump together. For the full recipe, check the earlier section. {{image_4}} You can add protein to make your Parmesan spinach couscous heartier. Grilled chicken works well. Simply slice it and mix it in just before serving. It adds a nice flavor and texture. If you want a vegetarian option, try incorporating chickpeas or beans. They boost the protein and add fiber. Just rinse and drain them, then fold them into the couscous. Feel free to swap spinach for kale. Kale adds a different bite and is very nutritious. You can also use seasonal vegetables. Try bell peppers in summer or butternut squash in fall. Each option gives a new taste to the dish and keeps it fresh. You can experiment with different cheeses too. Feta or goat cheese can be great choices. They add a tangy twist. For those who prefer vegan options, look for vegan cheese. There are many great brands that melt well and taste delicious. Each cheese brings its own flavor, making the dish unique each time. To store leftovers, let the couscous cool first. Place it in an airtight container. This keeps it fresh for later use. I recommend glass or BPA-free plastic containers. These options help keep food safe and tasty. You can freeze Parmesan Spinach Couscous if you have extra. Scoop the cooled dish into freezer-safe bags. Press out as much air as you can before sealing. This helps prevent freezer burn. When you're ready to eat, thaw it overnight in the fridge. Reheat in a skillet over low heat. Add a splash of broth to help it warm up nicely. In the fridge, the couscous lasts about 3 to 5 days. Check for any off smells or mold, which are signs of spoilage. If it looks dry or hard, it's best to toss it out. Always trust your senses when it comes to food safety. You can easily make Parmesan Spinach Couscous gluten-free. Just swap regular couscous for gluten-free couscous. Brands like Bob's Red Mill or Trader Joe's offer great options. Make sure to check the label for any hidden gluten. The cooking method stays the same, and you will still enjoy all the flavors! Yes, you can prep this dish ahead of time. Make the couscous and sauté the veggies earlier in the day. Store them separately in the fridge. When you’re ready to eat, just combine them with the cheese and heat everything gently. This keeps the dish fresh and tasty! Parmesan Spinach Couscous pairs well with many dishes. Here are some great options: - Grilled chicken for protein - Roasted vegetables like zucchini or bell peppers - A fresh garden salad with a light vinaigrette - Sautéed shrimp for a seafood twist Feel free to mix and match based on your taste! For the full recipe, check out the section above. This recipe for Parmesan Spinach Couscous is both simple and tasty. You learned the ingredient list, step-by-step cooking methods, and tips for a great dish. Plus, we explored fun variations and storage ideas. With these insights, you can make a meal that pleases everyone. Experiment with different flavors and ingredients to match your taste. Enjoy every bite and feel good about your cooking!](https://fastmealmate.com/wp-content/uploads/2025/05/f4ccb392-4fc5-4f37-838a-261a9f2c6c95-768x768.webp)