Skip to content
About
Contact
Cookie Policy
Copyright Policy
Disclaimer
Search
Home
Dinner
Appetizer
Desserts
Drinks
About
Contact
Privacy Policy
Toggle Menu
Home
/
Dinner
- Page 14
Dinner
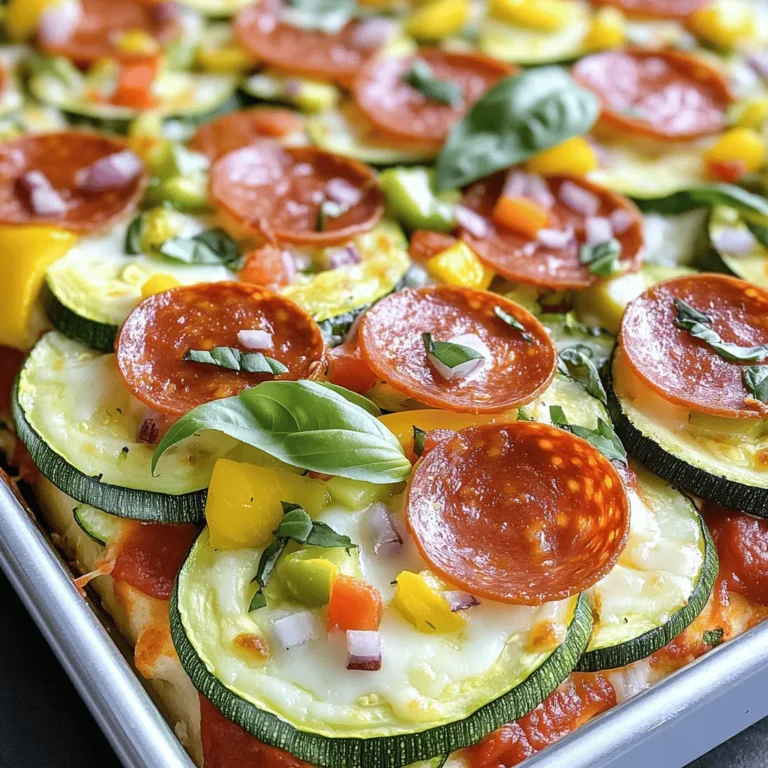
Quick Zucchini Pizza Casserole Flavorful and Easy Dish
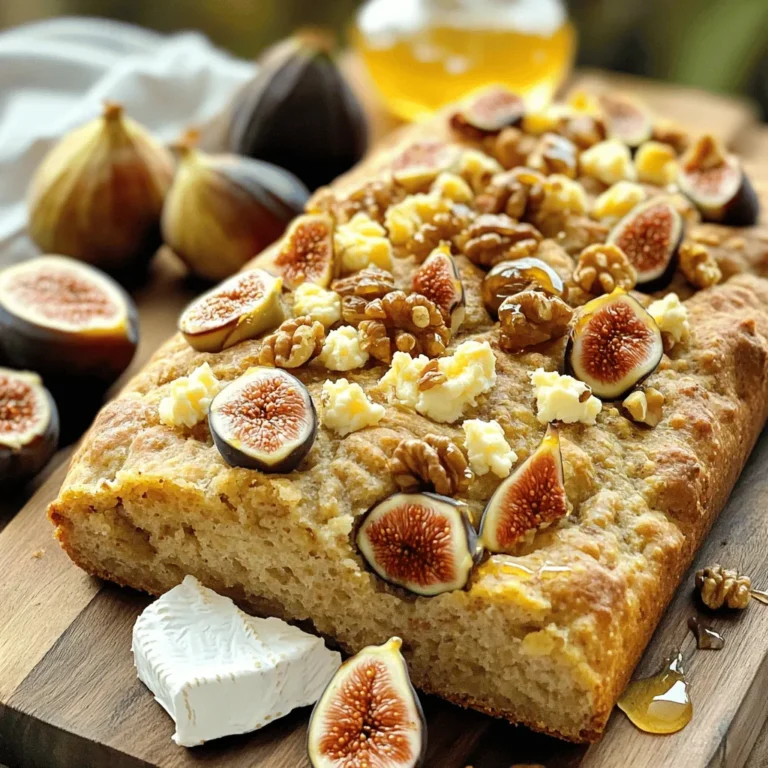
Fresh Fig and Walnut Soda Bread Delightful Recipe
Classic Italian Zucchini Pasta Casserole Delight
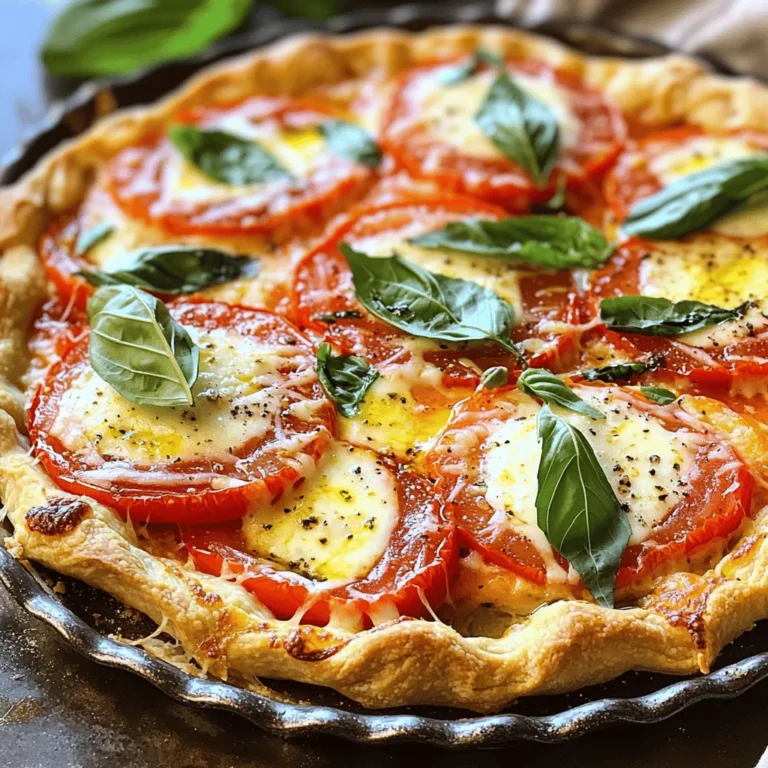
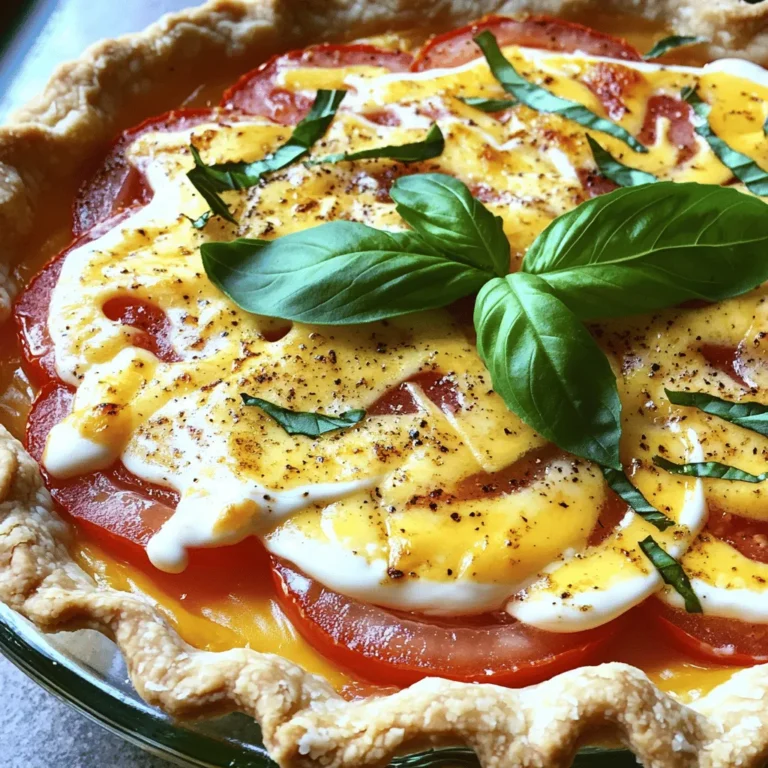
Savory Tomato Pie Irresistible Flavor in Every Bite
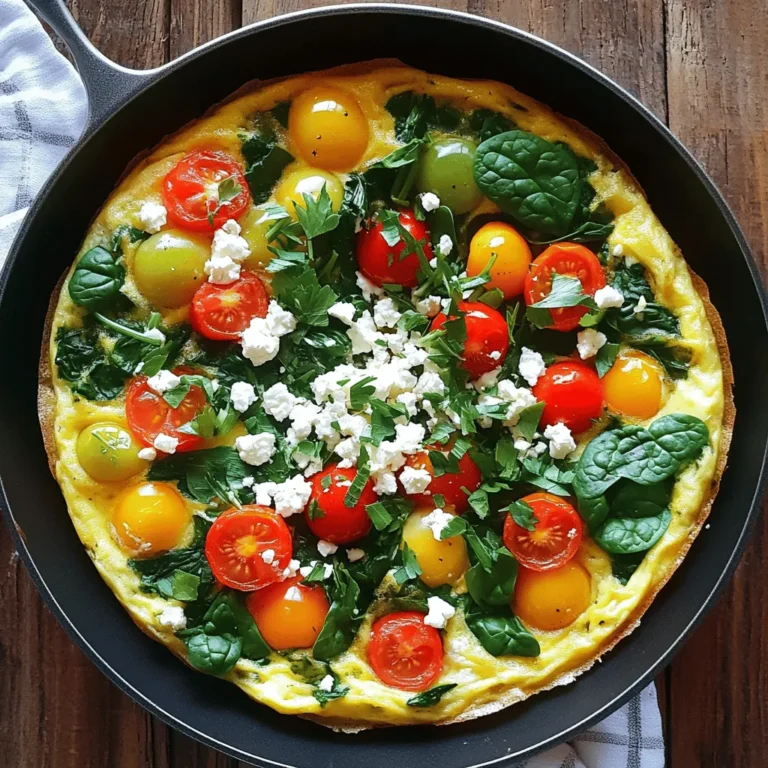
Easy Breakfast Frittata Quick and Healthy Recipe
Savory Southern Tomato Pie Flavorful and Easy Recipe
Easy Zucchini Jack Casserole Simple and Delicious Meal
Cheesy Zucchini Casserole Simple and Tasty Dish
Sweet Chili Salmon Bowl Flavorful and Easy Meal
Savory Summer Pasta Salad with Lemon Vinaigrette
Page navigation
Previous Page
Previous
1
…
12
13
14
15
16
…
36
Next Page
Next
Home
Dinner
Appetizer
Desserts
Drinks
About
Contact
Privacy Policy
Toggle Menu Close
Search for:
Search

![To make a classic Italian zucchini pasta casserole, you will need the following ingredients: - 3 medium zucchinis, sliced into thin, even rounds - 2 cups cooked pasta (choose your favorite like penne or fusilli) - 1 cup marinara sauce (preferably homemade or high-quality store-bought) - 1 cup creamy ricotta cheese - 1 cup shredded mozzarella cheese, plus extra for topping - 1/2 cup grated Parmesan cheese - 1 large egg, lightly beaten - 2 cloves garlic, minced - 1 teaspoon dried oregano - 1 teaspoon dried basil - Sea salt and freshly cracked black pepper, to taste - Olive oil, for drizzling and greasing - Fresh basil leaves, for garnish Each ingredient plays a key role in building flavor and texture. The zucchini adds a fresh crunch, while the pasta provides a hearty base. The cheeses bring creaminess and richness. Marinara sauce ties everything together with its robust flavor. When I make this dish, I focus on using fresh ingredients. It makes a big difference. Quality marinara or homemade sauce enhances the taste. I also love to mix different cheeses for added depth. You can switch up the cheeses based on your preference. Using good olive oil is essential for greasing the dish and drizzling on top. It adds a lovely finish. As for herbs, oregano and basil deliver classic Italian flavor. Feel free to personalize this recipe. Adjust the seasonings to suit your taste. This dish is forgiving, making it easy to put your spin on it. For the full recipe, check out the complete instructions. 1. Preheating the Oven and Sautéing Zucchini - First, set your oven to 375°F (190°C). This temperature works well for baking. - Next, grab a skillet and drizzle some olive oil into it. Heat it over medium heat. - Add the sliced zucchinis and minced garlic to the skillet. Sauté them for about 5-7 minutes. - Keep stirring until the zucchinis become soft and slightly golden. - Season with sea salt, black pepper, oregano, and basil. This adds a punch of flavor. - Once done, remove the skillet from the heat and let it cool for a few moments. 2. Mixing Ingredients for the Casserole - While the zucchini cools, take a large mixing bowl and combine the cooked pasta, marinara sauce, ricotta cheese, and the lightly beaten egg. - Add half of the mozzarella and half of the Parmesan cheese to the bowl. - Stir everything together until well mixed. This will create a creamy base. - Now, gently fold the sautéed zucchini into the pasta mixture. Make sure it blends without mashing the veggies. 1. Assembling the Casserole - Grease a 9x13 inch baking dish with olive oil. This keeps the casserole from sticking. - Pour the pasta and zucchini mixture into the greased dish. Spread it out evenly with a spatula. - To finish, sprinkle the remaining mozzarella and Parmesan on top. This creates a cheesy crust. 2. Baking and Best Practices - Cover the dish tightly with aluminum foil and place it in the preheated oven. - Bake for 20 minutes. This helps all the flavors mix well. - After 20 minutes, carefully take off the foil. Bake for another 10-15 minutes. Watch for the cheese to melt and turn golden brown. - Once it’s done, remove the casserole from the oven. Let it cool for a few minutes before serving. - For a lovely touch, garnish with fresh basil leaves. This adds color and flavor to your dish. For the complete recipe, refer to [Full Recipe]. - Seasoning Suggestions: I love using fresh herbs. Basil and oregano add a lovely taste. Don’t forget to season with sea salt and black pepper. These simple touches make a big difference. Consider adding a pinch of red pepper flakes for a bit of heat. - Achieving the Perfect Cheese Crust: To get that golden crust, use a mix of mozzarella and Parmesan on top. When you bake the casserole, keep it covered for the first part of cooking. This helps the cheese melt nicely. Uncover it towards the end to allow browning. - Sautéing Tips: When sautéing zucchini, cut it into thin, even rounds. This ensures even cooking. Don’t overcrowd the pan; this can lead to steaming instead of browning. Give them enough space to caramelize. - Alternative Pasta Cooking Methods: You can use different pasta shapes, like penne or fusilli. You don’t need to cook it all the way. Make it al dente, as it will cook more in the oven. This keeps the pasta from getting mushy in the casserole. Make sure to check out the Full Recipe for all the steps and details! {{image_4}} Different Cheese Options Cheese makes this dish rich and creamy. You can swap ricotta for cottage cheese if you like. For a sharper taste, use aged provolone or gouda. If you want a bit of tang, try feta cheese. Each cheese brings its unique flavor to the casserole. Meat Additions and Alternatives For meat lovers, ground beef or turkey can add protein. Cook the meat first and mix it with the pasta. If you prefer a lighter option, add cooked chicken or sausage. You can also use plant-based meats for a tasty, hearty dish. Gluten-Free Options To make this casserole gluten-free, choose gluten-free pasta. Many brands offer great options that hold up well in baking. Just check the package for cooking times to ensure perfect texture. Vegan Adaptations For a vegan version, swap all cheeses for cashew cream or tofu ricotta. You can also use a flax egg instead of the beaten egg for binding. Use your favorite marinara sauce that is dairy-free, and you’ll have a delicious vegan casserole. Experimenting with these swaps and modifications can make the Classic Italian Zucchini Pasta Casserole fit any diet or taste. For the full recipe, check out the details above. After enjoying your Classic Italian Zucchini Pasta Casserole, let’s talk storage. First, cool the casserole completely. This helps prevent condensation, which can make it soggy. Once cool, place leftovers in an airtight container. Store them in the fridge for up to three days. If you want to save it for longer, freezing works too. Cut the casserole into portions. Wrap each slice tightly in plastic wrap, then place them in a freezer-safe bag. This way, you can enjoy it for up to three months. When ready to enjoy your casserole again, reheating is key. The best method is using an oven. Preheat it to 350°F (175°C). Place the casserole in a baking dish and cover it with foil. Heat for 20-25 minutes. This helps keep the texture nice and creamy. If you’re in a hurry, a microwave works too. Use a microwave-safe plate and cover it with a damp paper towel. Heat in short bursts, stirring in between, until hot. This method may not keep the texture as good as the oven. For the best flavor and texture, always let it cool slightly before serving. Enjoy! Can I use other vegetables? Yes, you can use other veggies. Try bell peppers, spinach, or mushrooms. Just chop them small so they cook well. Mixing different vegetables adds flavor and color to your dish. How to make it ahead of time? You can make this casserole a day ahead. Just prepare it like normal, but do not bake it. Cover it and store it in the fridge. When ready, bake it as instructed, adding a few extra minutes if needed. What types of pasta work best? I love using penne or fusilli for this dish. Both types hold sauce well and stay firm while baking. You can also use gluten-free pasta if you prefer. How long can it be stored in the fridge? You can keep leftovers in the fridge for about three days. Make sure to cover it well. To reheat, just warm it in the oven or microwave until hot. Recommended Side Dishes Serve this casserole with a fresh salad or garlic bread. A simple mixed greens salad adds a crisp touch. Garlic bread brings a nice crunch and flavor. Pairing Wine with Casserole A light red wine like Chianti pairs well with this dish. It balances the flavors of the zucchini and cheese. If you prefer white, try a crisp Pinot Grigio. How to Garnish and Serve Garnish with fresh basil leaves for a pop of color. You can also sprinkle extra Parmesan on top before serving. This adds flavor and looks great on the table. For the full recipe, check the details above. Enjoy your cooking! In this blog post, we explored a delicious zucchini pasta casserole. We covered ingredients like zucchini, pasta, marinara, and various cheeses. You learned step-by-step instructions for preparation and baking. We included helpful tips for flavor and texture enhancement. You also discovered variations to suit different diets and preferences. In closing, this casserole is versatile and easy to make. Enjoy the cooking process and share it with loved ones.](https://fastmealmate.com/wp-content/uploads/2025/07/1e9eddde-dee0-4a9c-92bd-9b0350c13af8-768x768.webp)
![- 3 medium zucchinis, thinly sliced - 1 cup corn kernels (fresh, frozen, or canned) - 1 cup cherry tomatoes, halved - 1 cup shredded cheddar cheese - 1 cup shredded Monterey Jack cheese - 1 medium onion, diced - 2 cloves garlic, minced - 3 large eggs - 1 cup milk (dairy or non-dairy) - 1 teaspoon dried oregano - 1 teaspoon paprika - Salt and black pepper to taste - Olive oil for greasing In this recipe, zucchini shines as the main ingredient. It adds a fresh taste and soft texture. The Monterey Jack cheese provides a creamy melt that perfectly blends with the other veggies. I love how the corn adds a sweet crunch, while the tomatoes burst with juiciness. - 1 cup cooked quinoa or rice (for added texture, optional) - Different cheese options like feta or gouda If you want to add more texture, quinoa or rice works great. They make the dish heartier and more filling. You can also switch out the cheese. Try feta for a tangy kick or gouda for a smoky flavor. Each option adds something unique to the casserole. - Dairy-free alternatives using almond or oat milk - Gluten-free options with quinoa instead of rice You can easily adapt this dish for different diets. For dairy-free options, use almond or oat milk and dairy-free cheese. If you need it to be gluten-free, just swap rice for quinoa. This way, everyone can enjoy this yummy meal without worry! 1. Preheat the oven and grease the dish: Start by setting your oven to 375°F (190°C). This step is key to ensure even baking. Use olive oil to grease a 9x13 inch casserole dish. This helps the casserole come out easily after baking. 2. Sautéing garlic and onion: In a large skillet, pour a tablespoon of olive oil. Heat it over medium heat. Once hot, add the diced onion and minced garlic. Sauté them for about 5 minutes. You want the onion to be soft and clear. 1. Combining vegetables and seasonings: In a big mixing bowl, add the sliced zucchini, corn, and halved cherry tomatoes. Toss in the sautéed onion and garlic. If you are using quinoa or rice, add it now. Sprinkle in the dried oregano, paprika, salt, and black pepper. Mix everything well. This ensures all flavors blend nicely. 2. Preparing the egg and cheese mixture: In another bowl, whisk together the eggs and milk until smooth. Then, fold in half of the shredded cheddar and Monterey Jack cheese. This will make the egg mix creamy and rich. 1. Layering the ingredients: Pour half of the veggie mix into the greased dish. Next, take half of the egg and cheese mixture and pour it over the veggies. Repeat with the rest of the vegetable and egg mixtures. This layering builds great flavor. 2. Adding cheese on top: Finish by sprinkling the remaining cheddar and Monterey Jack cheese on top. This creates a cheesy crust that everyone will love. Now, your casserole is ready to bake. For the full recipe, check out the details provided earlier. To avoid sogginess in your Easy Zucchini Jack Casserole, make sure to salt the zucchini first. This draws out excess water. Let it sit for about 10 minutes, then pat it dry with a paper towel. This simple step helps keep the casserole firm. Adjusting the cooking time is important too. If you add more vegetables or grains, the casserole may need extra time in the oven. Keep an eye on it. Look for a golden top and a firm center as signs that it’s done. If you want to swap the cheese, consider using feta or goat cheese. Both add a unique flavor. You can also try vegan cheese for a dairy-free version. For vegetable variations, you can add bell peppers or spinach. These options add color and nutrients to your dish. Don't be afraid to mix and match your favorite veggies! Garnishing your casserole can make it pop. Fresh herbs like basil or parsley add color and flavor. You can add a sprinkle of red pepper flakes for a bit of heat. Pair your casserole with a fresh side salad. This adds crunch and balances the meal. A simple green salad or coleslaw works great. For something heartier, serve it with crusty bread or garlic knots. For the full recipe, check out the [Full Recipe]. {{image_4}} You can easily make this casserole vegetarian or vegan. For vegetarians, just keep the eggs and dairy. If you want a vegan dish, replace the eggs with flaxseed meal or a chia seed mix. Mix 1 tablespoon of flaxseed meal or chia seeds with 2.5 tablespoons of water. Let it sit for 5 minutes to thicken before adding it to your mix. Adding plant-based proteins is also a great idea. Consider using lentils or chickpeas. They boost protein and add texture to your casserole. You can mix them with the veggies before baking. Cheese lovers can experiment with flavors. Instead of Monterey Jack, use sharp cheddar or spicy pepper jack. They add a nice kick to your dish. You can also explore other melting cheeses like Gouda or Gruyère. Each cheese gives the casserole a unique taste. Just make sure to mix and match to find your favorite combo. To elevate the flavor, add spices and herbs. Consider garlic powder, cumin, or basil. These give your casserole a nice twist. You can also incorporate proteins like chicken or beans. Shredded chicken adds heartiness, while black beans provide fiber. Mix them in with the veggies for a satisfying meal. For the full recipe, check out the [Full Recipe]. After you make your Easy Zucchini Jack Casserole, let it cool completely. Place it in an airtight container or cover it with plastic wrap. Store it in the fridge for up to 3-5 days. When reheating, use the oven for the best results. Preheat the oven to 350°F (175°C) and heat for about 15-20 minutes. This will keep it warm and tasty. If you want to keep the casserole longer, freezing is a great option. First, let it cool completely. Cut it into portions and wrap each piece tightly in plastic wrap. Then, place the wrapped pieces in a freezer-safe bag or container. This will help keep the flavors fresh. You can freeze it for up to 2-3 months. To thaw, move it to the fridge overnight. Reheat in the oven the same way, at 350°F (175°C) for 15-20 minutes. In the fridge, your casserole lasts for about 3-5 days. Look for signs of spoilage before eating. If you see any mold or smell something off, it’s best to toss it. A fresh casserole should smell cheesy and inviting. If it looks dry or hard, it may be time to say goodbye. Enjoy your casserole while it tastes its best! You can find the full recipe to make it again later. To make this casserole, start by preheating your oven to 375°F (190°C). Grease a 9x13 inch dish with olive oil. Next, sauté diced onion and minced garlic in olive oil until soft. In a large bowl, mix sliced zucchini, corn, cherry tomatoes, and the sautéed onion and garlic. If you want, add cooked quinoa or rice. Sprinkle in dried oregano, paprika, salt, and pepper, and mix well. In another bowl, whisk together eggs and milk. Fold in half of the shredded cheddar and Monterey jack cheese. In your greased dish, layer half the veggie mix, then pour on half the egg mixture. Repeat these layers with the remaining ingredients. Top with the rest of the cheese. Bake for 35-40 minutes until golden brown and set. Let it cool for 5-10 minutes before serving. You can find the full recipe details above. Yes, you can prepare the casserole ahead of time. Simply assemble it up to the baking step. Cover it with plastic wrap or foil and store it in the fridge overnight. When you are ready to eat, just bake it straight from the fridge. You may need to add a few extra minutes to the baking time. If you want to store leftovers, allow the casserole to cool completely. Then, cover it and keep it in the fridge for up to 3 days. To reheat, pop it back in the oven at 350°F (175°C) until warmed through. This casserole pairs well with a variety of side dishes. A fresh garden salad adds a nice crunch. You might also serve it with garlic bread or a simple pasta dish. If you want something heartier, consider grilled chicken or roasted veggies. For a fun twist, try serving it with salsa or hot sauce for some extra flavor. Feel free to mix and match sides to fit your meal! In this post, we explored the easy way to make a tasty Zucchini Jack Casserole. You learned about key ingredients, step-by-step instructions, and helpful tips to ensure success. We also shared ideas for dietary needs and creative variations. Remember, cooking is fun and allows you to experiment. Enjoy making this dish your own and sharing it with loved ones. Happy cooking!](https://fastmealmate.com/wp-content/uploads/2025/07/8604bb3f-9fea-4d3d-b4ff-32cbded89348-768x768.webp)
. {{image_4}} You can boost the protein in your cheesy zucchini casserole easily. Try adding cooked ground turkey, chicken, or beef. For a meatless option, chickpeas or lentils work great. Just mix your chosen protein into the ricotta mixture before layering. This addition makes the dish heartier and fills you up more. This casserole is a fantastic vegetarian dish. To make it gluten-free, just swap regular breadcrumbs for gluten-free ones. You can also use crushed nuts for a crunchy topping. Using a mix of veggies, like bell peppers or spinach, instead of just zucchini can add flavor and color. This makes the dish even more fun and healthy. Herbs and spices can take this casserole to the next level. You can add fresh herbs like thyme or parsley for a garden taste. A pinch of red pepper flakes gives a nice kick if you like heat. Don’t forget to adjust the garlic powder to your taste. These small changes create a unique flavor each time you make it. For the full recipe, you can refer to the detailed instructions provided above. After enjoying your cheesy zucchini casserole, let it cool. Then, cover it tightly with plastic wrap or foil. You can also transfer it to an airtight container. This keeps it fresh and tasty. Store it in the fridge for up to three days. Keeping it sealed helps prevent any unwanted odors from other foods. When you're ready to enjoy the leftovers, preheat your oven to 350°F (175°C). Remove the casserole from the fridge and let it sit for about 10 minutes. This helps it warm evenly. Cover it with foil to keep it moist as it heats. Bake for about 20 minutes or until it’s hot throughout. You can also microwave individual portions for about 1-2 minutes, but the oven gives a better texture. If you want to save your casserole for a later date, freezing is a great option. Before freezing, let the casserole cool completely. Cut it into portions for easier thawing. Wrap each piece tightly in plastic wrap, then place it in a freezer bag. Be sure to label the bags with the date. Your casserole can last up to three months in the freezer. When you’re ready to eat, thaw it overnight in the fridge and follow the reheating steps. This way, you can enjoy a tasty meal anytime! For the full recipe, check out the details above. Yes, you can use other veggies. Carrots, bell peppers, and spinach work well. Just chop them small. This adds color and nutrients. Mix and match to suit your taste. The casserole lasts about 3 to 5 days in the fridge. Make sure to cover it well. This keeps it fresh and tasty. If it smells off, throw it out. Cottage cheese is a great substitute for ricotta. You can also blend soft tofu for a dairy-free option. Just mix it smoothly to mimic ricotta’s texture. This keeps your dish creamy and delicious. For the full recipe, check the earlier section. This blog post covered everything you need for a delicious zucchini casserole. We explored the essential ingredients, tips for selecting fresh produce, and the best cheeses. I provided clear steps to prep and bake the dish. We also discussed ways to avoid a watery casserole and how to store leftovers properly. In closing, whether you're adding protein or trying a veggie twist, this recipe is versatile. Enjoy the process, get creative, and savor each bite. Your homemade zucchini casserole will impress everyone!](https://fastmealmate.com/wp-content/uploads/2025/07/5ddfaaa2-5596-48f1-a1cf-d08d639fc95a-768x768.webp)
![- Salmon fillets - Sweet chili sauce - Jasmine rice - Mixed vegetables - Soy sauce - Sesame oil - Avocado - Green onions - Sesame seeds - Fresh cilantro (optional) - Baking sheet - Mixing bowl - Medium pot - Non-stick skillet In this Sweet Chili Salmon Bowl, you need fresh salmon fillets as the star. The sweet chili sauce adds a rich flavor that pairs well with the fish. Jasmine rice provides a soft base. Mixed vegetables add color and crunch to the bowl. For added flavor, include soy sauce and sesame oil. Sliced avocado gives a creamy touch. Green onions and sesame seeds serve as tasty garnishes. If you want, sprinkle fresh cilantro for a pop of freshness. To prepare this dish, you will need a few kitchen tools. Use a baking sheet to cook the salmon. A mixing bowl helps combine the marinade. Cook the rice in a medium pot. Lastly, a non-stick skillet is perfect for sautéing the vegetables. You can find the [Full Recipe] to follow these steps easily! With these ingredients and tools, you are set for a delicious meal. - Combine sweet chili sauce, soy sauce, and sesame oil in a bowl. - Place salmon fillets in the bowl and marinate for 15 minutes. Marinating the salmon gives it a rich flavor. The sweet chili sauce adds a nice sweetness. The soy sauce brings some saltiness, while sesame oil adds a nutty taste. This step is key for a tasty salmon bowl. - Bring vegetable broth or water to a boil in a pot. - Add jasmine rice and let it simmer until fluffy. Using vegetable broth adds extra flavor to the rice. Jasmine rice is fragrant and pairs well with the salmon. Once cooked, it should be light and fluffy. - Sauté mixed vegetables in a non-stick skillet. - Cook until they are tender yet crisp. I like to use bell peppers, snap peas, and carrots. These veggies add color and crunch. Sautéing keeps them bright and fresh, which balances the dish. - Preheat the oven to 400°F (200°C). - Bake marinated salmon for 12-15 minutes. Baking the salmon helps it stay moist. It should flake easily with a fork when done. This cooking method keeps the flavors intact. - Fluff the cooked rice and distribute it into bowls. - Top with vegetables, salmon, and avocado slices. Assembling the bowl is fun and creative. You can layer the ingredients however you prefer. The avocado adds creaminess, making every bite delicious. - Sprinkle green onions and sesame seeds on top. - Drizzle remaining marinade if desired. Adding garnishes makes the dish look pretty. Green onions bring a mild onion flavor, while sesame seeds add crunch. The extra marinade enhances the taste, so don’t skip this step! For the complete recipe, check out the Full Recipe. To get the best salmon, focus on the cooking temperature. Aim for 400°F (200°C) when baking. This heat cooks the fish evenly. It keeps the salmon moist and tender. Use a thermometer to check the internal temperature. It should reach 145°F (63°C) for safe eating. Next, look for flakiness to know when it is done. Gently press the salmon with a fork. If it flakes easily, it is ready. Don't overcook it, as this can make the salmon dry. To boost the taste, try different sauces. You can use teriyaki or garlic sauce instead of sweet chili. Each sauce adds a new twist to the dish. Also, add spices to the vegetables before sautéing. A pinch of garlic powder or ginger can elevate the flavor. This simple step makes your veggies pop. Pair your bowl with side salads or crispy wontons for crunch. This adds a nice texture balance. You can also serve it with extra avocado for creaminess. The creamy avocado complements the salmon well. It makes each bite even better. Feel free to explore the [Full Recipe] for more tips and ideas! {{image_4}} You can swap the salmon for chicken or tofu. Chicken works well with the sweet chili sauce. Marinate it just like you do the salmon. Tofu absorbs flavors nicely, making it a great option, too. You can also try different fish like trout or tilapia. Each fish will give your bowl a unique taste. Seasonal vegetables can really change your bowl. Think fresh corn in summer or pumpkin in fall. You can also add leafy greens like spinach or kale. Broccoli offers a nice crunch and pairs well with the sauce. Mix and match to keep it exciting! Want more kick? Try a spicy chili sauce instead of sweet chili sauce. This will give your bowl a bold flavor. You can also add citrus zest, like lime or lemon, for a fresh twist. These small changes can make a big difference in taste. For the full recipe, check out the details above! After you enjoy your Sweet Chili Salmon Bowl, store any leftovers in airtight containers. This keeps the food fresh and tasty. Place the containers in the fridge. Your meal will stay good for 2-3 days. Make sure to cool the food first before sealing it up. If you want to save your meal for longer, freezing is a great option. Freeze the cooked salmon separately to keep its quality. Salmon can lose its texture if frozen with rice and veggies. Store your rice and mixed vegetables in separate containers. This way, they stay fresh and tasty when you thaw them. When you're ready to eat, reheating is easy. You can use the microwave or stovetop for quick reheating. Just be careful not to overcook the salmon. Overcooking can make it dry and tough. Heat it gently to keep the flavor and texture intact. Enjoy your delicious meal again! Yes, you can prepare the ingredients in advance. Store each item separately in the fridge. This way, you save time when you are ready to cook. Just mix and heat everything when you want to eat. If you want a change, you can substitute jasmine rice with brown rice or quinoa. Both options are healthy and add a nice flavor. Quinoa is a great choice if you want extra protein. Absolutely! You can make this bowl spicy by adding fresh chili peppers or a dash of hot sauce. Adjust the heat to your liking. This adds a fun kick to the dish. To make the Sweet Chili Salmon Bowl healthier, reduce the amount of sauce you use. You can also add more veggies, like leafy greens or broccoli. This boosts nutrition and flavor. Yes, this bowl can be enjoyed cold too! It makes a refreshing salad dish. Just let it cool before serving. Enjoy it as a light meal on a warm day. For the full recipe, check out the detailed steps above. This guide showed how to make a tasty salmon bowl using sweet chili sauce and veggies. You learned about the key ingredients, tools, and steps. Remember, marinating the salmon and choosing the right veggies can boost flavor. Feel free to experiment with proteins and spices. Finally, you can store leftovers for quick meals later. Enjoy making this dish your own!](https://fastmealmate.com/wp-content/uploads/2025/07/c95c4cfe-a415-4c4e-8f12-f828502a92fe-768x768.webp)
. - Bring salted water to a boil. - Add rotini pasta and cook until al dente. - This usually takes about 7 to 9 minutes. - Drain the pasta and rinse it under cold water to cool. - Chop the cherry tomatoes in half. - Dice the cucumber and red bell pepper. - Finely chop the red onion. - If you use fresh corn, cook it lightly for 2-3 minutes. - Cool the corn under cold water. - In a bowl, combine olive oil and lemon juice. - Add Dijon mustard and minced garlic. - Whisk the mixture until it is smooth. - Season it with salt and pepper to taste. - In a large bowl, mix the cooled pasta with the chopped vegetables. - Add crumbled feta cheese, basil, and parsley. - Drizzle the lemon vinaigrette over the pasta mixture. - Toss gently to coat all the ingredients evenly. - Cover the salad with plastic wrap. - Chill in the refrigerator for at least 30 minutes. - This helps the flavors blend together nicely. This refreshing summer pasta salad with lemon vinaigrette is perfect for hot days. For the complete recipe, check the [Full Recipe]. - Use fresh, seasonal vegetables for better flavor. Fresh veggies taste brighter and more delicious. They also add color and crunch. Look for ripe tomatoes, crisp cucumbers, and sweet bell peppers. - Adjust dressing ingredients according to personal preference. This salad is flexible. If you like tangy, add more lemon juice. If you prefer creamy, a bit of yogurt can work wonders. - Serve in a chilled bowl and garnish with basil leaves and lemon wedges. This adds a lovely touch and makes your dish pop. - Consider colorful serving dishes to enhance visual appeal. Bright colors make the salad inviting. Use a vibrant bowl to catch the eye and draw people in. {{image_4}} You can make your summer pasta salad even more filling. Adding proteins boosts nutrition and flavor. Grilled chicken, shrimp, or chickpeas work well. Grilled chicken adds a smoky taste. Shrimp gives a fresh ocean flavor. Chickpeas offer a hearty, plant-based option. Each choice makes your salad special and satisfying. While lemon vinaigrette is zesty, you can switch it up. Try balsamic vinaigrette for a sweet-tangy twist. A yogurt-based dressing adds creaminess and a slight tang. Both options change the salad's vibe while keeping it fresh. Feel free to experiment to find your favorite taste. Using seasonal vegetables makes your salad vibrant. Swap in zucchini for a crunchy bite. Asparagus adds a touch of elegance. Bell peppers bring sweetness and color. You can mix and match based on what’s fresh and available. This keeps your salad exciting and full of flavor. For the full recipe, check out the detailed instructions above. After enjoying your summer pasta salad, store any leftovers in an airtight container. This keeps the salad fresh. You can keep it in the refrigerator for up to 3 days. Freezing this pasta salad is not a good idea. The texture of the pasta and vegetables changes when frozen. They become mushy when thawed, which affects the taste. I recommend eating the salad cold straight from the fridge. This keeps the flavors bright and fresh. Don’t reheat it, as it tastes best when chilled. For more details, check out the Full Recipe. Use a gluten-free pasta option available in stores. Many brands offer good choices. Just check the label to ensure it's truly gluten-free. This way, everyone can enjoy the dish without worry. Yes, it’s best to make the salad a few hours before serving for best flavor. This time lets the ingredients blend together. You can chill it in the fridge, which enhances the taste. Just remember to toss it gently before serving. Try goat cheese, mozzarella, or skip cheese entirely for a dairy-free option. Each cheese gives a different flavor. Goat cheese adds creaminess, while mozzarella is mild and stretchy. Picking one that fits your taste makes the salad even better! This summer pasta salad is fresh, simple, and easy to make. You learned how to prepare a tasty dish with rotini pasta, colorful vegetables, and a zesty lemon vinaigrette. We discussed tips to enhance flavor and presentation. Remember, you can add proteins or swap ingredients for variety. This salad makes a great side or light meal. Enjoy making your own version and impress your guests this warm season!](https://fastmealmate.com/wp-content/uploads/2025/07/167fa52b-6c37-4fee-aa24-5fa64edc3341-768x768.webp)