Skip to content
About
Contact
Cookie Policy
Copyright Policy
Disclaimer
Search
Home
Dinner
Appetizer
Desserts
Drinks
About
Contact
Privacy Policy
Toggle Menu
Home
/
Dinner
- Page 12
Dinner
Minute Cajun Shrimp and Corn Chowder Delight Recipe
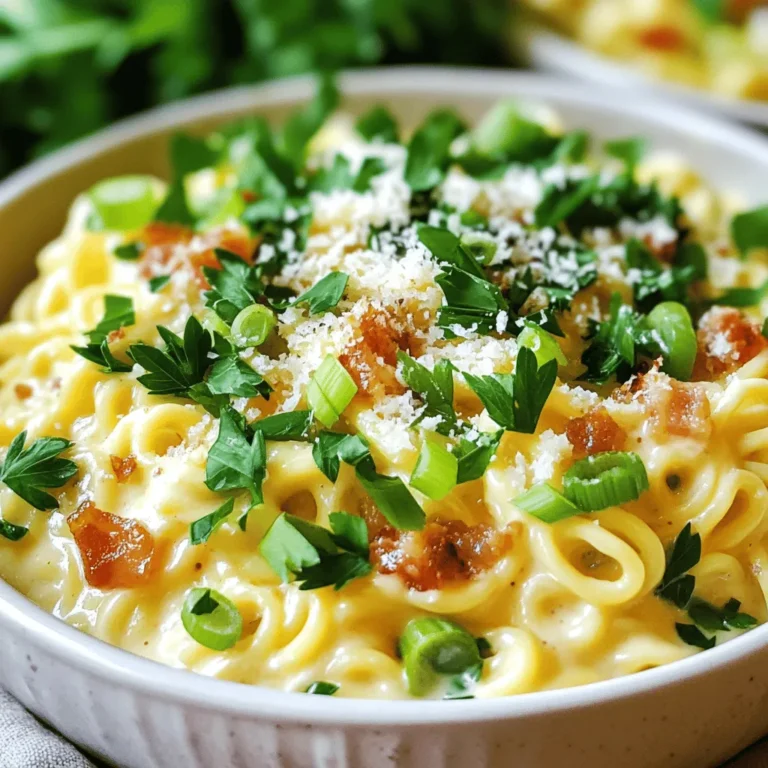
Slow Cooker Butternut Squash Mac and Cheese Delight
One Pan Harvest Chicken and Maple Veggies Delight
Cheeseburger Quesadilla Smash Sliders Flavor Explosion
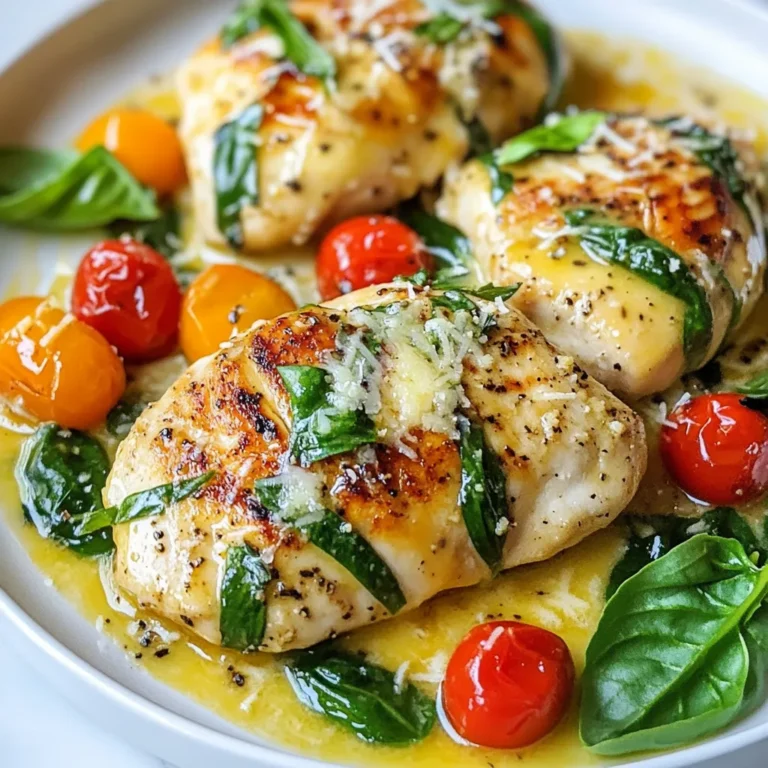
Creamy Garlic Tuscan Chicken Delightful Dinner Recipe
Classic Flaky Crust Quiche Divine and Tasty Recipe
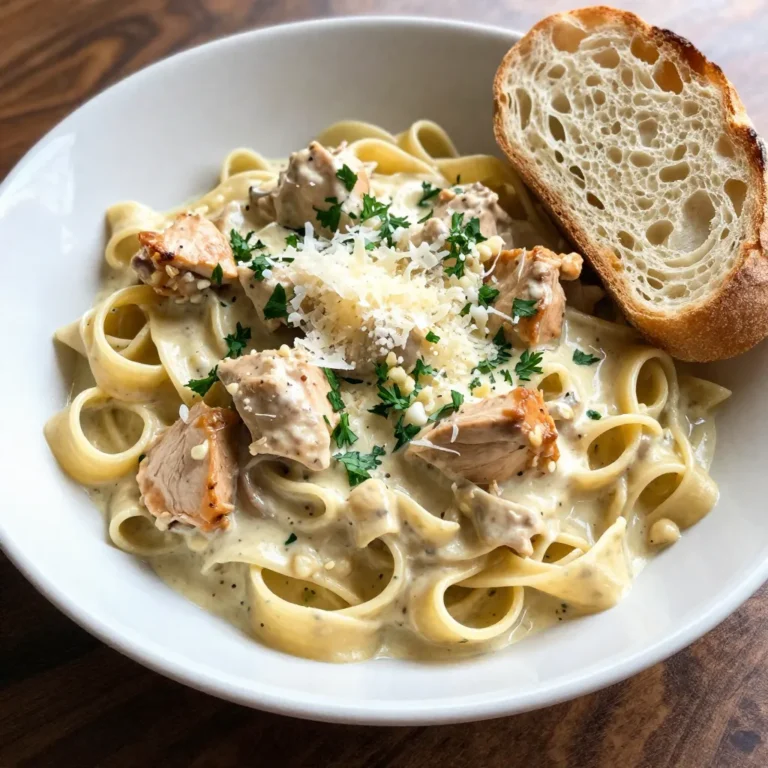
Creamy Cowboy Butter Chicken Pasta Delightful Dish
Creamy Carbonara Ramen Bowls Simple and Tasty Meal
Minute Cajun Shrimp and Corn Chowder Quick Delight
Savory Slow Cooker Butternut Squash Mac and Cheese
Page navigation
Previous Page
Previous
1
…
10
11
12
13
14
…
36
Next Page
Next
Home
Dinner
Appetizer
Desserts
Drinks
About
Contact
Privacy Policy
Toggle Menu Close
Search for:
Search

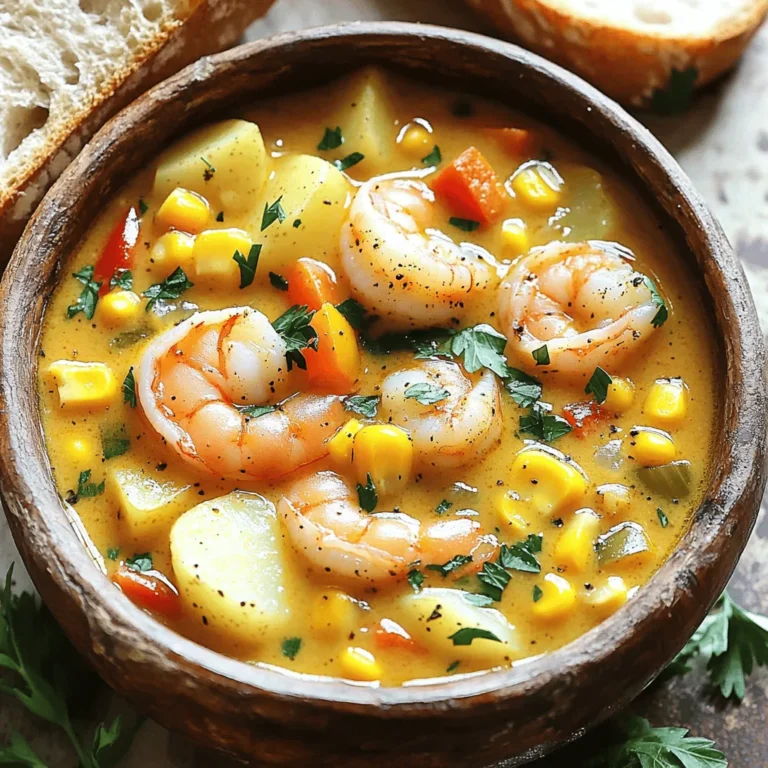
![To make Minute Cajun Shrimp and Corn Chowder, you need some key ingredients: - 1 lb large shrimp, peeled and deveined - 2 cups corn kernels (fresh or frozen) - 1 medium onion, diced - 2 cloves garlic, minced - 1 red bell pepper, diced - 2 medium potatoes, peeled and diced These ingredients form the base of your chowder. The shrimp give it a nice protein punch. The corn adds sweetness, while the onion and garlic bring out savory flavors. Next, we need our liquids to make this chowder rich and tasty: - 4 cups chicken or vegetable broth - 1 cup coconut milk The broth adds depth, while coconut milk gives creaminess. You can use chicken broth for a richer taste, or vegetable broth if you want a lighter option. Now, let's spice things up! - 2 tablespoons Cajun seasoning - 1 teaspoon smoked paprika - Salt and fresh cracked pepper to taste - 2 tablespoons olive oil - Fresh parsley, chopped (for garnish) Cajun seasoning brings the heat and flavor. Smoked paprika adds a nice touch, giving a warm, smoky flavor. Salt and pepper are essential for balance. Olive oil helps to sauté the veggies, and parsley makes it pretty. For the full recipe, check out [Full Recipe]. 1. Heat 2 tablespoons of olive oil in a large pot over medium heat. 2. Once the oil shimmers, add 1 diced onion, 2 minced garlic cloves, and 1 diced red bell pepper. 3. Sauté these ingredients for about 4-5 minutes until the onions are soft and fragrant. 4. Next, add 2 diced potatoes to the pot. Cook for another 5 minutes, stirring often. 1. Sprinkle in 2 tablespoons of Cajun seasoning and 1 teaspoon of smoked paprika. 2. Stir well to coat the vegetables with the spices. 3. Pour in 4 cups of chicken or vegetable broth and bring the mixture to a gentle simmer. 4. Cook for 10-15 minutes until the potatoes are fork-tender. 1. Add 2 cups of corn and 1 pound of peeled shrimp to the pot. 2. Gradually stir in 1 cup of coconut milk until blended. 3. Cook for an additional 5 minutes until the shrimp turn pink and opaque. 4. Taste the chowder and adjust the seasoning with salt and fresh cracked pepper as needed. 5. Let it rest for a few minutes to thicken before serving. This process ensures you create a delicious and comforting chowder that captures the essence of Cajun cooking. For the full recipe, check the earlier section. For this chowder, I recommend sautéing the vegetables rather than boiling them. Sautéing brings out the sweet flavors in the onion and red bell pepper. Use medium heat and keep an eye on them. Avoid letting them brown too much, as this can change the taste. To avoid overcooking the shrimp, add them near the end of cooking. They only need about five minutes to cook through. When they turn pink and opaque, they are done. Remove them from the heat right away to keep them tender. To boost the taste, consider adding a pinch of cayenne pepper or paprika. Both will add depth without overwhelming the dish. Fresh herbs like thyme or cilantro can also brighten the chowder. If you want a different creamy texture, you can swap coconut milk for heavy cream or even Greek yogurt. Each option adds richness while changing the flavor slightly. Serve the chowder in deep bowls for a cozy feel. A sprinkle of fresh parsley on top adds color and freshness. You could also add a dash of extra Cajun seasoning for a nice touch. Pair your chowder with crusty bread or cornbread. Both make great sides for dipping. They also complement the rich flavors of the chowder. For a refreshing twist, serve with a light salad on the side. {{image_4}} You can easily make this chowder fit your diet. - Gluten-free options: Use gluten-free broth and check labels on your seasonings. They should not have gluten. - Dairy alternatives: Swap coconut milk with almond milk or oat milk. This keeps it creamy without dairy. Feeling creative? Here are some fun swaps. - Other seafood options: You can use crab or lobster instead of shrimp. Both add a rich flavor. - Additional vegetables to include: Try adding diced carrots or celery. They add crunch and more flavor. Adjusting the flavors can make this dish your own. - Changing the spice level: If you like it mild, use less Cajun seasoning. For a spicy kick, add more! - Using different types of broth for variations: Chicken broth gives a warm taste, but vegetable broth offers a lighter flavor. Try both to see which you prefer. For the full recipe, refer to the original instructions to get started! To store leftovers, let the chowder cool first. Pour it into an airtight container. This keeps it fresh longer. I recommend using glass or BPA-free plastic containers. They seal well and do not absorb odors. If you want to freeze the chowder, follow these steps: 1. Cool the chowder completely. 2. Divide it into portions in freezer-safe bags or containers. 3. Remove as much air as possible before sealing. For reheating frozen chowder, thaw it in the fridge overnight. Heat it gently on the stove over low heat. Stir often to prevent sticking. In the fridge, you can keep the chowder for about 3 to 4 days. If you freeze it, it lasts for up to 3 months. Always check for freshness before eating. Making Minute Cajun shrimp and corn chowder takes just 30 minutes. You spend about 10 minutes prepping the ingredients. Then, you cook everything for 20 minutes. It's a quick meal for busy days. Yes, you can use frozen shrimp. Just make sure to thaw them first. Frozen shrimp are often easier to find and save time. They cook just as well in the chowder. If you don't have Cajun seasoning, you can use a mix of spices. Try paprika, cayenne pepper, garlic powder, and onion powder. You can also make a simple blend at home. This helps you customize the flavors to your taste. For a milder chowder, reduce the cayenne pepper. This blog post shared a simple recipe for Cajun shrimp and corn chowder. You learned about the main ingredients, broths, and seasonings that bring flavor. I also outlined step-by-step instructions for perfect results. Helpful tips and dietary variations enhance your chowder experience. In the end, this chowder is flexible and easy to make. Enjoy experimenting with flavors and ingredients your way. Make it your own, and savor every bite.](https://fastmealmate.com/wp-content/uploads/2025/07/c6449679-e116-43ab-bcba-93cf12d2671e-768x768.webp)

![- 1 pound ground beef (80/20 blend) - ½ teaspoon salt - ½ teaspoon black pepper - ½ cup cheddar cheese, shredded - ½ cup mozzarella cheese, shredded - 4 large flour tortillas - 4 tablespoons cream cheese, softened - ¼ cup dill pickles, diced - ¼ cup diced tomatoes - ¼ cup onion, minced - 2 tablespoons ketchup - 2 tablespoons mustard - Olive oil, for cooking Creating Cheeseburger Quesadilla Smash Sliders is a fun way to enjoy flavors. With the right ingredients, your sliders burst with taste. First, let’s start with the beef. I like using an 80/20 blend. This mix gives a juicy bite. Next, season it well with salt and pepper. Don't skip this step; flavor is key. For the cheese, I use both cheddar and mozzarella. The cheddar brings a sharp taste, while mozzarella melts beautifully. You can feel the cheese stretch in every bite. The flour tortillas are the base for these sliders. They hold everything together and crisp up nicely when cooked. I recommend using large tortillas for easier assembly. Cream cheese adds richness. Spread it on the tortillas for a creamy layer. Then, top it off with diced dill pickles, tomatoes, and onions. These toppings add crunch and freshness. Finally, drizzle some ketchup and mustard for that classic burger taste. Use olive oil to cook the quesadillas. It helps create a golden brown crust while keeping everything moist inside. For the full recipe, check the details above. This will guide you step by step to create your own Cheeseburger Quesadilla Smash Sliders. Enjoy the flavor explosion! To start, grab a medium mixing bowl. Add 1 pound of ground beef, ½ teaspoon of salt, ½ teaspoon of black pepper, and 1 teaspoon of garlic powder. Use your hands to mix everything gently. Once mixed, divide the beef into small patties, each about 2-3 ounces. Next, heat a skillet on medium heat. Add a drizzle of olive oil. When the pan is hot, place the patties in the skillet. Cook for 3-4 minutes until they turn brown. Flip them over and cook for another 3-4 minutes. Once done, remove the patties and set them aside on a plate. Now it's time to build your quesadilla! Lower the skillet heat to medium-low. Take 4 large flour tortillas and spread 1 tablespoon of softened cream cheese on one side of each tortilla. Place one tortilla in the skillet with the cream cheese-side facing up. Add a generous amount of cheddar cheese, then stack half of the cooked burger patties on top. Next, sprinkle on the diced pickles, diced tomatoes, and minced onions. Drizzle a bit of ketchup and mustard over this. Finish by adding a layer of shredded mozzarella cheese. Carefully place another tortilla on top, cream cheese-side down. Press it gently with a spatula to hold everything together. Cook the quesadilla for about 2-3 minutes. Look for a golden-brown color on the bottom tortilla and melted cheese. Now, flip the quesadilla gently and cook the other side for another 2-3 minutes. When both sides are browned, take the quesadilla off the heat. Let it cool for a minute, then slice it into quarters or sliders. Repeat this for the rest of your tortillas and filling ingredients. Serve the warm cheeseburger quesadilla sliders on a platter. I like to add extra diced pickles and some ketchup and mustard for dipping on the side. Enjoy this flavor explosion! For the full recipe, check out the [Full Recipe]. To make the best burger texture, use ground beef that is 80/20. This mix provides the right fat content for juicy patties. When you form the patties, handle the meat gently. Overworking it can make the burgers tough. Aim for small patties, about 2-3 ounces, for sliders. For seasoning, keep it simple. A mix of salt, black pepper, and garlic powder works great. These flavors enhance the beef without overpowering it. Be sure to season both sides of each patty before cooking. This will help lock in the taste. To get that perfect cheese melt, use a mix of cheeses. Cheddar and mozzarella are my go-tos. Cheddar adds sharpness, while mozzarella brings stretchiness. Spread cheese evenly, so it melts all the way through. For a fun twist, try pepper jack cheese for a spicy kick. You can also experiment with gouda or fontina. These will add richness and depth. Just remember to slice the cheese thinly for quicker melting. Cooking your quesadillas to a perfect golden brown is key. Use medium-low heat for even cooking. This prevents burning while letting the cheese melt fully. When flipping quesadillas, use a large spatula. Slide it under the quesadilla gently to avoid spills. If you're nervous about flipping, consider using a plate. Simply slide one side onto the plate, then flip it back into the pan. This method keeps your fillings intact. {{image_4}} You can switch up the meat in this dish. Ground turkey or chicken works well. Both have a lighter flavor but still taste great. For a plant-based option, try lentils or black beans. These give you a nice texture and flavor. Using these options can help you cater to different diets. To boost taste, add spices like paprika or cumin. These spices add warmth and depth. You can also mix in sauces, like barbecue or sriracha, for a kick. Experimenting with different cheeses can change the flavor too. Pepper jack adds heat, while gouda brings a smoky taste. Topping with fresh herbs, like cilantro or chives, can brighten each bite. You can serve these quesadilla sliders in many ways. They work as a classic quesadilla or as fun sliders. For parties, cut them into smaller pieces. Arrange them on a colorful platter to impress your guests. You might also serve them with dips, like guacamole or salsa, for extra flavor. Each style can make your meal exciting and unique. To keep your cheeseburger quesadilla sliders fresh, place them in an airtight container. This helps lock in flavor and moisture. Store them in the fridge for up to three days. After that, the taste may decline, and the texture could change. If you want to save them longer, freezing is a good option. Wrap each quesadilla slider tightly in plastic wrap. Then, place them in a freezer-safe bag or container. This keeps them safe from freezer burn. You can freeze them for up to three months. When you're ready to eat, let them thaw overnight in the fridge before reheating. For the best taste, reheat using the oven. Preheat it to 350°F (175°C). Place the quesadilla sliders on a baking sheet. Heat for about 10-15 minutes, until warm and crispy. If you use a microwave, put them on a plate. Heat for 30-60 seconds. This method is faster but may not keep the crunch. To restore crunchiness, consider finishing in a hot pan for a minute. Yes, you can prepare these sliders ahead. Make the patties and cook them. Let them cool. Then, store them in the fridge. When ready to serve, assemble the quesadillas. You can use either fresh tortillas or pre-made ones. If you use pre-made tortillas, spread cream cheese and layer the fillings. Cook them quickly in a hot skillet. This way, they stay crispy and warm. You can serve many tasty sides with these sliders. Consider some crispy fries or sweet potato fries. They pair well with the cheesy sliders. A fresh salad can balance the richness. You might also try dipping sauces like ranch or spicy mayo. These add extra flavor and fun. You could even serve a zesty salsa for a fresh kick. To make these sliders vegetarian, swap out the beef for a meat alternative. You could use black beans or lentils as a base. Another option is to use plant-based burger patties. Just season them like the beef. Add your favorite toppings, like cheese and veggies. You can still enjoy the same great flavors without meat. Just make sure all the other ingredients are vegetarian-friendly. You can make tasty Cheeseburger Quesadilla Smash Sliders easily. Start with classic ingredients and follow straightforward steps for delicious results. Don’t forget to try different proteins and toppings to suit your taste. Storing any leftovers is simple, and reheating them will keep them just as good. With these tips, you can impress guests or enjoy a fun meal at home. Making this dish lets you explore flavors while fitting right into your busy day. Enjoy your cooking adventure!](https://fastmealmate.com/wp-content/uploads/2025/07/3ea5f9d6-0f24-4765-99ee-1beab0673b04-768x768.webp)