Skip to content
About
Contact
Cookie Policy
Copyright Policy
Disclaimer
Search
Home
Dinner
Appetizer
Desserts
Drinks
About
Contact
Privacy Policy
Toggle Menu
Home
/
Desserts
- Page 13
Desserts
Vegan Mango Cheesecake Bars Easy and Creamy Treat
S’mores Brownies Delightful and Easy Dessert Recipe
Summer Berry Peach Cheesecake Delightful and Refreshing
No-Bake Orange Creamsicle Cheesecake Delight
Raspberry Lemon Loaf Delightful and Simple Recipe
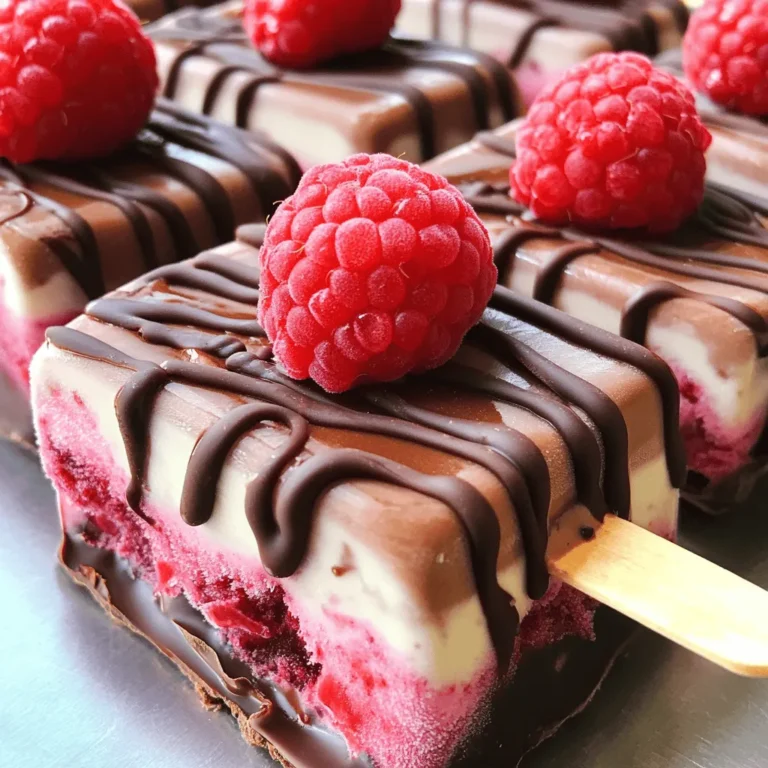
Chocolate Raspberry Frozen Yogurt Pops Delightful Treat
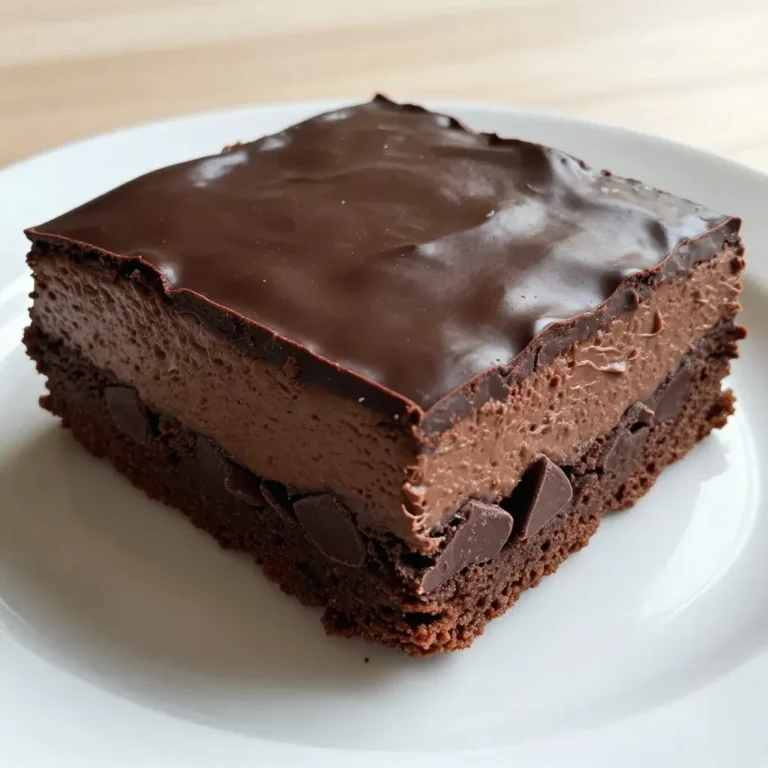
Chocolate Mousse Brownies Irresistible Dessert Recipe
Matcha Brûlée Boba Delightful and Creamy Recipe
Baked Pears with Honey Berries & Blue Cheese Delight
Soft and Chewy Lemon Cookies Simple and Delicious Recipe
Page navigation
Previous Page
Previous
1
…
11
12
13
14
15
…
27
Next Page
Next
Home
Dinner
Appetizer
Desserts
Drinks
About
Contact
Privacy Policy
Toggle Menu Close
Search for:
Search


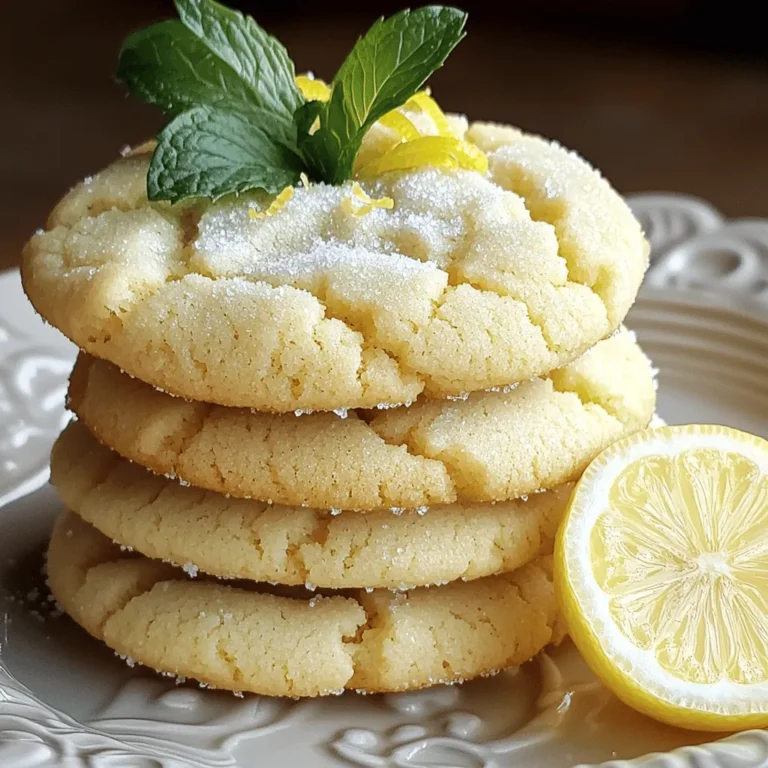
![To make a delightful Raspberry Lemon Loaf, you will need the following ingredients: - 1 ½ cups all-purpose flour - 1 teaspoon baking powder - ½ teaspoon baking soda - ¼ teaspoon salt - ½ cup unsalted butter, softened to room temperature - 1 cup granulated sugar - 2 large eggs, at room temperature - 1 teaspoon pure vanilla extract - Zest of 1 lemon - ½ cup buttermilk, at room temperature - 1 cup fresh raspberries (or frozen, thawed and drained) - 1 tablespoon fresh lemon juice Using quality ingredients makes a big difference. The all-purpose flour gives the loaf a soft texture. Baking powder and baking soda help it rise well, creating a light loaf. The butter and sugar add richness and sweetness. Eggs provide structure and moisture. The vanilla extract enhances the flavor, while lemon zest adds a fresh, bright note. Buttermilk helps keep the loaf moist and tender. Fresh raspberries bring a burst of flavor and color. You can find the full recipe linked above, which includes details on preparation and baking. Each ingredient plays a role in making this loaf a tasty treat. Enjoy the process of gathering and mixing these lovely items! 1. Preheat your oven to 350°F (175°C). This step is key for even baking. 2. Grab a 9x5-inch loaf pan. Grease the sides and line the bottom with parchment paper. This makes removing the loaf easy later. 3. In a medium bowl, whisk together 1 ½ cups of all-purpose flour, 1 teaspoon baking powder, ½ teaspoon baking soda, and ¼ teaspoon salt. Mix well and set aside. 4. In a large bowl, cream ½ cup of softened unsalted butter with 1 cup of granulated sugar. Whip until light and fluffy, which takes about 3-4 minutes. 1. Add 2 large eggs, one at a time. Mix well after each addition. This helps the batter blend smoothly. 2. Stir in 1 teaspoon of pure vanilla extract and the zest of 1 lemon. These flavors are what make this loaf special. 3. Now, pour in half of the dry mixture from earlier. Gently fold it into the butter mix. 4. Add ½ cup of buttermilk and mix until just combined. Avoid over-mixing, as it can make the loaf tough. 5. Gradually fold in the rest of the dry ingredients until no flour streaks are left. 6. Carefully fold in 1 cup of fresh raspberries. Be gentle to keep them whole. 1. Transfer the batter into your prepared loaf pan. Smooth the top with a spatula. 2. Drizzle 1 tablespoon of fresh lemon juice over the batter. This boosts lemon flavor. 3. Bake for 55-60 minutes. Check for doneness by inserting a toothpick into the center. It should come out clean. 4. Once baked, let the loaf cool in the pan for about 10 minutes. After that, move it to a wire rack to cool completely. Enjoy making your Raspberry Lemon Loaf! For detailed measurements, check the Full Recipe. To start, use room temperature ingredients. This helps the batter mix well. Cold butter or eggs can lead to a dense loaf. When mixing, be gentle. Over-mixing can make the loaf tough. Mix just until you see no dry flour. To boost raspberry flavor, try adding a bit of lemon zest. This will brighten the taste. You can also use a splash of raspberry juice if you want more flavor. For slicing, use a sharp knife. This will give you clean cuts. Place the slices on a beautiful platter for a nice look. Garnish with fresh raspberries and a dusting of powdered sugar. This adds color and makes your loaf look appealing. Serve each slice with whipped cream or vanilla ice cream. This makes it feel special and adds a creamy touch. Enjoy every bite! For the full recipe, check the [Full Recipe]. {{image_4}} You can change up the recipe with fun ingredient swaps. - Using different types of berries: Raspberries are great, but try blueberries or strawberries. Each berry adds its own taste and color. - Alternative flours for gluten-free options: If you need a gluten-free loaf, use almond flour or a gluten-free blend. This keeps the loaf soft and tasty. - Variations with citrus zest: Want to switch it up? Use lime or orange zest instead of lemon. This brightens the flavor and gives a twist to the loaf. You can also add extra flavors to make your loaf unique. - Adding spices like cinnamon or nutmeg: A pinch of cinnamon gives warmth. Nutmeg adds a hint of spice. Just a little can change the whole taste. - Incorporating chocolate or nuts: Mix in chocolate chips for a sweet touch. Chopped nuts, like walnuts or pecans, add crunch and richness. - Options for a lemon glaze or icing: Drizzle a lemon glaze on top for added sweetness. Mix powdered sugar with lemon juice to create a simple icing. This makes the loaf even more special. For the complete recipe, check the [Full Recipe]. To keep your raspberry lemon loaf fresh, store it at room temperature. Place it in an airtight container. This helps lock in moisture and flavor. If you have leftovers, the loaf can last about three days on the counter. For longer freshness, you can refrigerate the loaf. Wrap it tightly in plastic wrap or foil. This adds a little chill and keeps it soft. In the fridge, it can last up to a week. If you want to save it for later, freezing is a great option. Slice the loaf first for easy serving. Wrap each slice in plastic wrap and then in foil. This keeps the flavor and texture intact. You can freeze it for up to three months. On the counter, your loaf will stay fresh for about three days. After that, it may start to dry out or lose taste. Look for signs of spoilage, like a change in smell or mold. If the loaf feels hard or dry, it's best to toss it. For thawing frozen slices, take them out of the freezer. Let them sit at room temperature for about 30 minutes. You can also warm them up in a toaster. This brings back that soft texture. For the full recipe, check the link provided. Enjoy your baking! Can I use frozen raspberries? Yes, you can use frozen raspberries. Just thaw and drain them first. This helps keep the batter from getting too wet. How do I know when the loaf is done baking? To check if the loaf is done, insert a toothpick in the center. If it comes out clean, your loaf is ready! What can I serve with Raspberry Lemon Loaf? You can serve it with whipped cream or a scoop of vanilla ice cream. Fresh raspberries on the side add a nice touch too. Why does my loaf sink in the middle? A loaf may sink if you overmix the batter or if the oven is too cool. Ensure to mix just until blended. How to fix dry loaf or dense texture? If your loaf is dry, it may have too much flour. Measure flour carefully and add a bit more buttermilk next time. Adjusting for high-altitude baking differences At high altitudes, reduce sugar and increase liquid. Bake the loaf a bit longer to ensure it cooks through. This raspberry lemon loaf combines bright flavors with simple steps. We discussed the ingredients, from flour to fresh raspberries. Following easy instructions, you can create a delightful loaf. I shared tips to perfect your bake and enhance presentation. You even learned about ingredient swaps and storage methods to keep it fresh. With these insights, you can bake with confidence. Enjoy your delicious raspberry lemon loaf!](https://fastmealmate.com/wp-content/uploads/2025/07/33c21139-c12e-4c78-b65a-e6904fdb8542-768x768.webp)
![Here are the key ingredients for making Matcha Brûlée Boba: - 2 cups whole milk (or your preferred dairy alternative) - 2 tablespoons matcha powder - 3 tablespoons granulated sugar - 1 teaspoon vanilla extract - 1 cup cooked tapioca pearls - 2 tablespoons brown sugar (for the brûlée topping) - Optional: whipped cream, fresh mint leaves Each ingredient plays a vital role in making this treat delicious and smooth. Whole milk gives a creamy base, while matcha powder brings that unique green tea flavor. Granulated sugar sweetens the mix, and vanilla adds a lovely aroma. The cooked tapioca pearls add a fun texture that makes this drink special. The brown sugar forms a crunchy top that contrasts with the creamy brûlée underneath. Feel free to add whipped cream and mint for extra flair! For the complete recipe, check out the [Full Recipe]. 1. Heating the milk: Start by pouring 2 cups of whole milk into a small saucepan. Heat it gently over medium-low. Stir the milk often to keep it from boiling. You want it warm but not too hot. 2. Mixing matcha with sugar and vanilla: In a medium mixing bowl, combine 2 tablespoons of matcha powder, 3 tablespoons of granulated sugar, and 1 teaspoon of vanilla extract. Whisk these together until no lumps are left. This step is key for a smooth texture. 3. Combining milk with matcha: Once your milk is warm, slowly pour it into the matcha mixture. Whisk continuously as you pour. This makes sure the matcha blends well into the milk, creating a creamy mix. 1. Pouring into ramekins: Carefully pour your matcha mixture into ramekins or small cups. Fill each one halfway. This leaves space for the sweet brûlée topping. 2. Chilling and setting time: Put the filled ramekins in the refrigerator. Chill them for at least 4 hours. The mixture should feel firm when you touch it. This chilling time helps the flavors set. 1. Using a kitchen torch: After chilling, take the ramekins out. Evenly sprinkle 2 tablespoons of brown sugar on top of each one. Use a kitchen torch to caramelize the sugar. Move the flame gently until the sugar turns golden and crunchy. 2. Alternative broiler method: If you don’t have a torch, place the ramekins under a broiler. Watch them closely to prevent burning. It only takes a few minutes to get that nice, crispy layer. 1. Layering tapioca pearls: In a tall glass, add a layer of cooked tapioca pearls. Make sure you have enough for each serving. These give the drink a fun, chewy texture. 2. Adding matcha brûlée: Spoon the chilled matcha brûlée over the tapioca pearls. This creates a beautiful layer effect. Optional: Add a dollop of whipped cream on top. Fresh mint leaves also add a nice touch and flavor. Now you have a delightful and creamy matcha brûlée boba to enjoy! For the full recipe, check out the complete details. - Selecting high-quality matcha: Choose matcha that is bright green. This color shows freshness and quality. Look for matcha labeled as "ceremonial grade" for the best taste. - Tips for mixing without lumps: Always sift your matcha powder before mixing. This step breaks up clumps. When combining matcha with other ingredients, whisk it slowly to make a smooth mixture. - Best practices for caramelizing sugar: Use a kitchen torch for even heat. Hold the torch about 6 inches away from the sugar. Move it in small circles to avoid burning one spot. If using a broiler, keep a close eye. Sugar can burn quickly. - Common mistakes to avoid: Don’t add too much sugar for the brûlée top. A thin layer works best. Also, avoid caramelizing too long. You want a crisp layer, not a hard shell. - Choosing the right garnishes: Fresh mint leaves are a great choice. They add color and a fresh taste. You can also use edible flowers for a beautiful touch. - Tips for serving: Serve in clear glasses to show off the layers. This makes your matcha brûlée boba look stunning. If you add whipped cream, use a piping bag for a fancy look. {{image_4}} You can make your Matcha Brûlée Boba even more fun! Start by adding fruits or syrups. Try fresh strawberries or mango for a fruity twist. You can also drizzle some honey or maple syrup on top. This will add sweetness and flavor to your drink. If you want to switch up the sweetness, use alternative sweeteners. Stevia or agave syrup are great choices. They can make your drink lower in calories while keeping it tasty. Just remember to adjust the amount, as these sweeteners can be stronger than regular sugar. Want a dairy-free version? Simply swap whole milk for almond or coconut milk. These options still keep the drink creamy and delicious. You can also use oat milk for a rich flavor. Just pick what you like best! For a sugar-free version, you can use sugar substitutes. Look for brands that fit your diet. They can help you enjoy your treat without added sugar. Now, let’s talk about how to serve your Matcha Brûlée Boba! Jar presentations are super cute. Layer the tapioca pearls and matcha in small jars. They look great and are easy to grab. If you’re hosting a party, make a big batch. Serve it in a large bowl and let guests help themselves. Add fun straws and garnishes like mint leaves. This makes your drink fun and festive for everyone! Store your matcha brûlée in the fridge. Place it in an airtight container. This keeps it fresh and tasty. It will last for up to four days. After that, it may lose its creamy texture. Always check for any strange smells or changes in color before serving. Keep unused matcha powder in a cool, dark place. A sealed bag or jar works best. This protects it from light and air. For tapioca pearls, store them in water in the fridge. Change the water daily to keep them fresh. They can last up to three days this way. To refresh tapioca pearls, heat them in warm water. Let them soak for about ten minutes. This helps them regain their texture. Serve your matcha brûlée cold. If it has been in the fridge, just scoop and serve. It tastes great straight from the fridge! Matcha Brûlée Boba is a fun drink that mixes matcha and creamy flavors. It has layers of cooked tapioca pearls and a smooth matcha brûlée on top. The brûlée has a crunchy, caramelized sugar layer, adding a nice texture. The drink is both sweet and slightly earthy, making it unique and tasty. To make matcha less bitter, choose high-quality matcha powder. This type has a smoother taste. You can also use less matcha or add more sugar. Mixing matcha with warm milk can also help. Whisking well breaks up clumps, making it creamy. Yes, you can make this recipe vegan easily. Use almond milk, oat milk, or coconut milk instead of whole milk. For the brûlée, skip the whipped cream or use a dairy-free version. These swaps keep the drink just as tasty and creamy. Look for ceremonial grade matcha for the best flavor. It has a vibrant green color and rich taste. I recommend brands like Matcha Konomi or Encha. These brands are well-known for their quality and taste, ensuring a great matcha brûlée boba experience. For the full recipe, check out Matcha Brûlée Boba . In this post, we covered how to make Matcha Brûlée Boba. We explored essential ingredients, from whole milk to matcha powder. I shared easy steps, from preparing the mix to caramelizing sugar. You learned tips for perfect flavor and creative serving ideas. Matcha Brûlée Boba brings joy and flavor to drinks. Try different variations to find your favorite. Enjoy making this treat at home!](https://fastmealmate.com/wp-content/uploads/2025/06/afbc723c-5cf3-4754-a0d3-2d99f4abcad5-768x768.webp)