Skip to content
About
Contact
Cookie Policy
Copyright Policy
Disclaimer
Search
Home
Dinner
Appetizer
Desserts
Drinks
About
Contact
Privacy Policy
Toggle Menu
Home
/
Appetizer
- Page 8
Appetizer
Cheesy Garlic Chicken Wraps Flavorful and Simple Meal
Roasted Beet Goat Cheese Salad Healthy and Tasty Dish
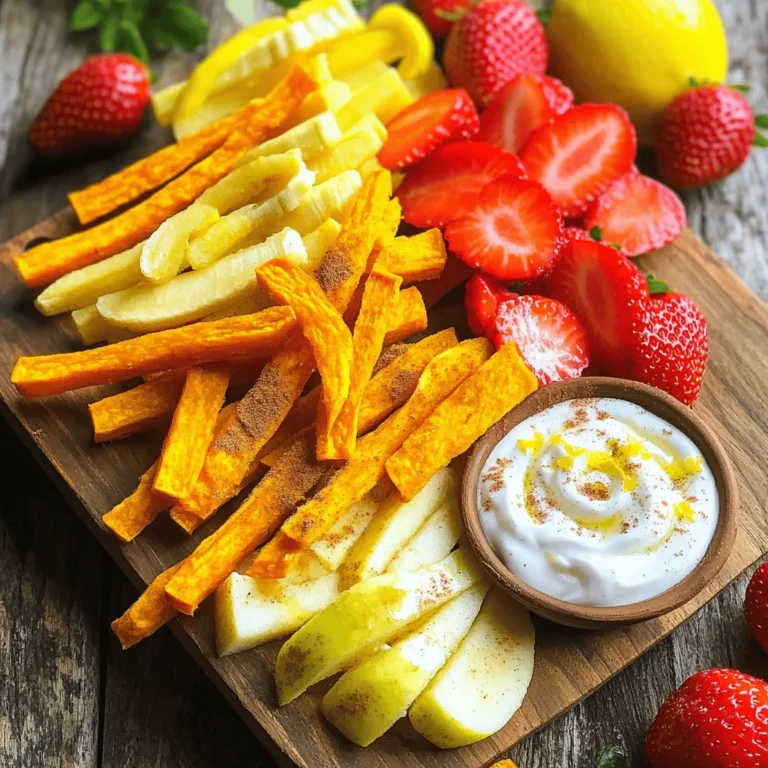
Fruit Fries with Lemon Dip Perfect for Snacking
Pineapple Cucumber Salad Fresh and Flavorful Delight
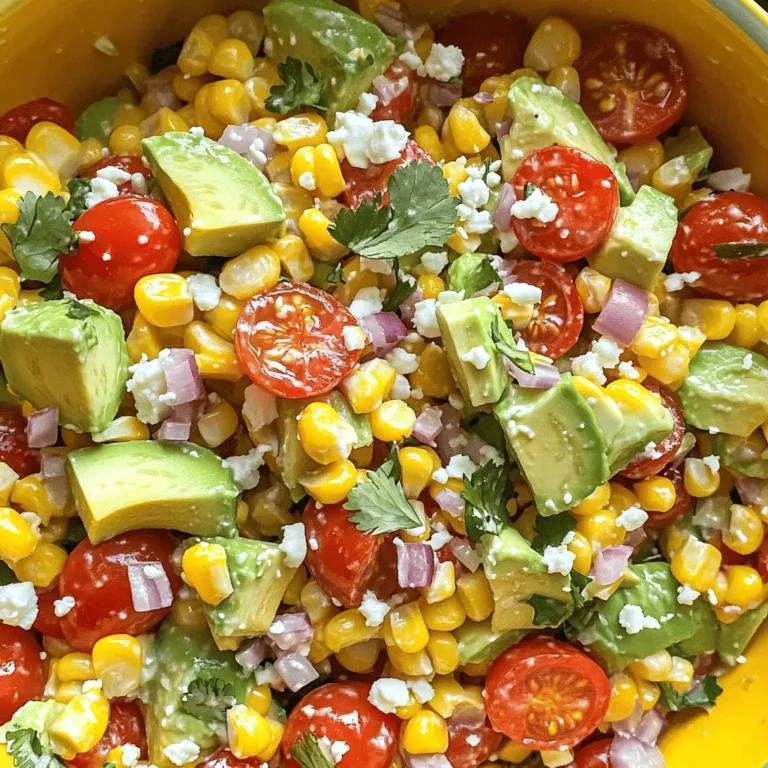
Flavorful Summer Corn Salad with Avocado Delight
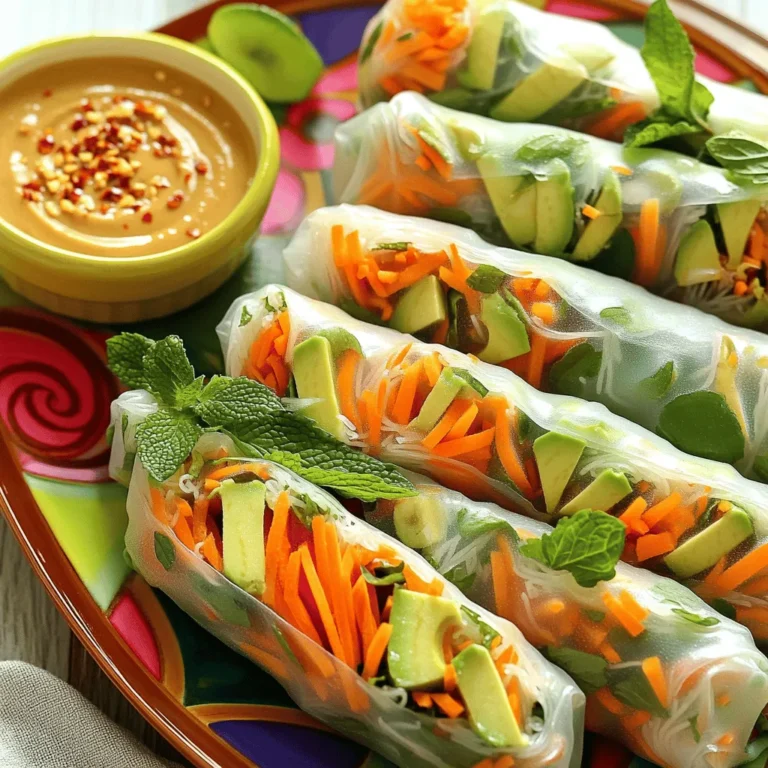
Vegetable Spring Rolls with Peanut Sauce Delight
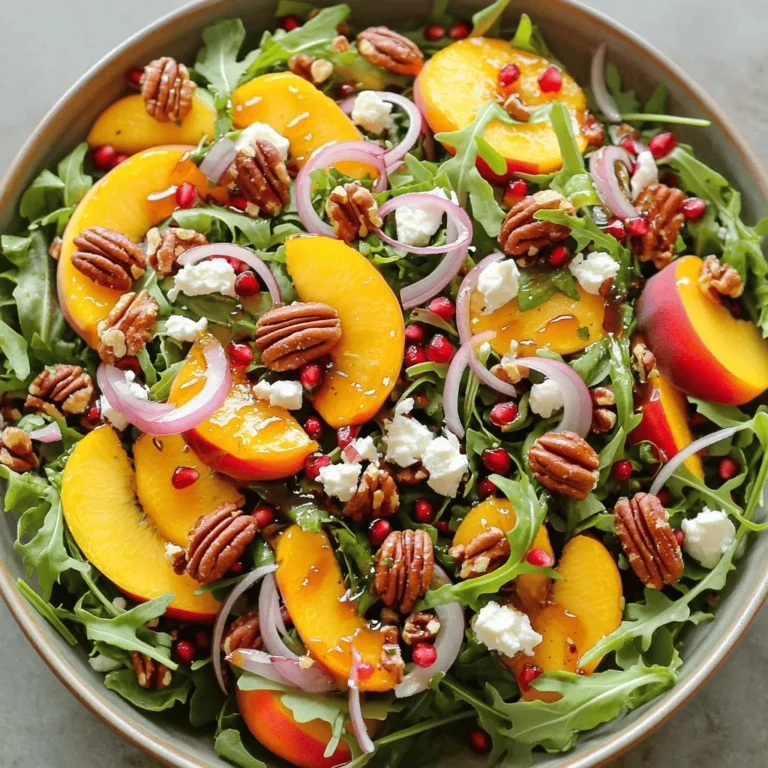
Millionaire Peach Salad Delightful and Fresh Recipe
Mini Chicken Wraps Flavorful and Healthy Snack Idea
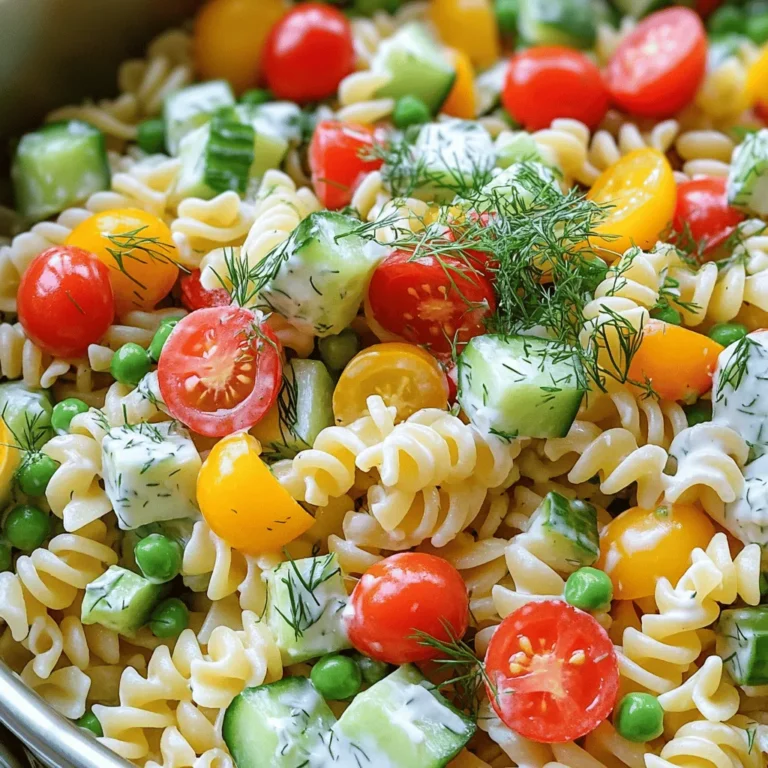
Creamy Pasta Salad Tasty and Refreshing Dish
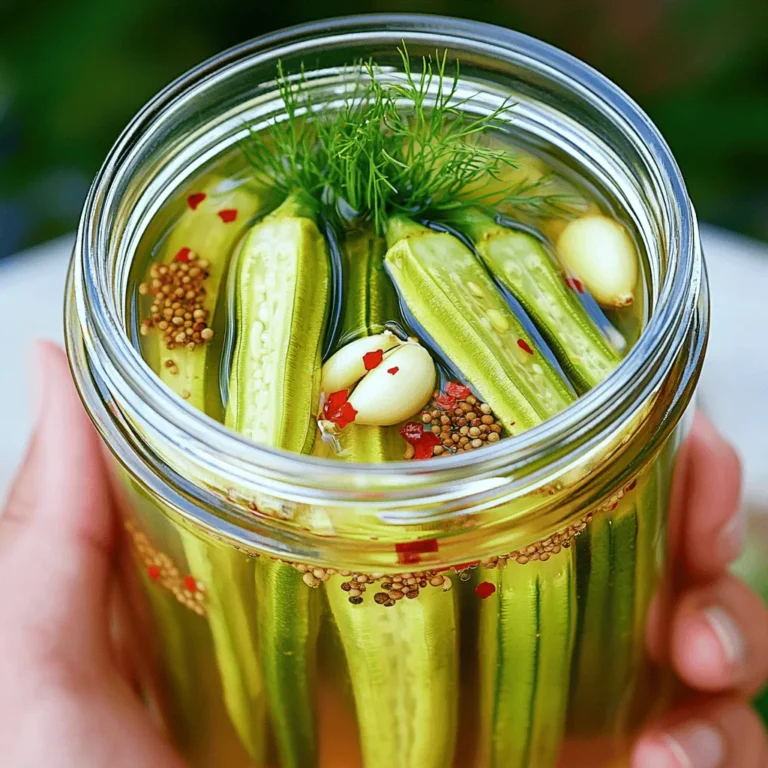
Quick Refrigerator Pickled Okra Easy Flavorful Snack
Page navigation
Previous Page
Previous
1
…
6
7
8
9
10
…
16
Next Page
Next
Home
Dinner
Appetizer
Desserts
Drinks
About
Contact
Privacy Policy
Toggle Menu Close
Search for:
Search


![- 3 medium-sized beets, thoroughly scrubbed to remove dirt - 4 cups of mixed salad greens (a blend of arugula, spinach, and romaine for texture) - 1/2 cup goat cheese, crumbled into small pieces - 1/4 cup walnuts, toasted and roughly chopped for a crunchy contrast - 1/4 cup dried cranberries for a sweet burst of flavor - 2 tablespoons extra virgin olive oil - 1 tablespoon aged balsamic vinegar for depth - 1 teaspoon Dijon mustard to add tang - Salt and freshly ground black pepper to taste - Fresh herbs for garnish (such as chopped parsley or finely sliced chives) When measuring, use a dry measuring cup for solid ingredients like walnuts and cranberries. For liquids, a liquid measuring cup works best. Make sure to level off dry ingredients for accuracy. This helps you get the right taste and texture. Choose fresh, firm beets. Look for greens that are vibrant and crisp. For goat cheese, select a soft, creamy variety. Fresh herbs should be fragrant and bright. High-quality olive oil and balsamic vinegar make a big difference in flavor. This salad shines when you use the best ingredients. For the full recipe, check out the details above. To start, preheat your oven to 400°F (200°C). This heat helps the beets cook well. Take 3 medium-sized beets and scrub them clean to remove dirt. Wrap each beet in aluminum foil. This keeps them moist while roasting. Place the wrapped beets on a baking sheet. Roast them for 45 to 60 minutes. They are done when a fork can pierce them easily. After roasting, let them cool for a few minutes. Unwrap, peel off the skin, and cut them into wedges. In a large bowl, mix the roasted beet wedges with 4 cups of mixed salad greens. I love using arugula, spinach, and romaine for varied texture. Next, add 1/2 cup of crumbled goat cheese for creaminess. For crunch, toss in 1/4 cup of toasted walnuts. Finally, sprinkle in 1/4 cup of dried cranberries for a sweet touch. This mixture looks colorful and inviting. In a small bowl, whisk together 2 tablespoons of extra virgin olive oil and 1 tablespoon of aged balsamic vinegar. Add 1 teaspoon of Dijon mustard to give it a nice tang. Season it with salt and freshly ground black pepper to taste. Mix until all ingredients blend well. Drizzle the dressing over the salad. Toss gently so that the beets and cheese stay intact. Taste and adjust the seasoning if needed. Serve on a platter or individual plates, and garnish with fresh herbs for a beautiful finish. Enjoy this delicious and healthy dish! For the complete recipe, refer to the Full Recipe. Roasting beets is easy. Start by preheating your oven to 400°F. Wrap each beet in foil. This helps them cook evenly. Roast for 45 to 60 minutes until they’re soft. A fork should slide in with ease. Let them cool before peeling. The skin comes off easily when they are warm. This salad is great as a meal or a side. Serve it with grilled chicken or fish for protein. You can even add chickpeas for a plant-based option. Pair it with crusty bread for a complete meal. This dish shines at dinner parties or casual lunches. Presentation matters in cooking. Use a shallow bowl or a large platter for a stunning look. Start with greens, then add beet wedges. Sprinkle goat cheese and walnuts on top. Add a few dried cranberries for color. Finish with fresh herbs, like parsley or chives. This creates a bright and inviting dish that everyone will love. Check out the Full Recipe for more details on making this delightful salad! {{image_4}} To make your roasted beet goat cheese salad even more filling, you can add protein. Grilled chicken is an easy choice. It adds flavor and heartiness. You can also use chickpeas for a plant-based option. They add great texture and nutrition. If you like seafood, try adding shrimp or smoked salmon. Each protein brings a new twist to your dish. While the balsamic dressing is delicious, you can mix things up. A honey mustard dressing pairs well with the sweet beets. For a creamier option, try a yogurt-based dressing. You could even use a simple lemon vinaigrette for a fresh taste. Each dressing will change the flavor profile and keep things exciting. This salad is versatile! In spring, you might add fresh peas or asparagus. In summer, ripe tomatoes or cucumbers can brighten the dish. Fall brings apples or pears, adding sweetness and crunch. In winter, consider using roasted squash or pomegranate seeds for color and flavor. These swaps keep your salad fresh and aligned with the season. To keep your roasted beet goat cheese salad fresh, store it in an airtight container. Make sure to separate the dressing from the salad to prevent sogginess. You can keep the salad in the fridge for up to three days. If you want to enjoy it later, store the leftovers without the dressing. This way, the flavors stay bright and fresh. Understanding how long your ingredients last can help prevent waste. Here’s a quick guide: - Roasted Beets: Last about 5 days in the fridge when stored properly. - Mixed Greens: Usually stay fresh for 3 to 5 days if kept cool and dry. - Goat Cheese: Can last up to a week after opening, but check for any signs of spoilage. - Walnuts: Store in an airtight container. They stay fresh for about 1 month. - Dried Cranberries: These can last up to a year if kept in a cool, dry place. Typically, you won’t need to reheat this salad. It tastes best cold. If you do want to warm it slightly, use a microwave. Heat on low for about 10-15 seconds. Be careful not to overdo it, as it may change the texture and flavor. Enjoy your salad fresh for the best experience! For the full recipe, check out the section above. Yes, you can use canned beets. They save time and are easy to find. However, fresh roasted beets give a better taste and texture. Canned beets may be softer and less vibrant. If you choose canned beets, rinse them under cold water to remove excess brine. Slice them into wedges and add them directly to your salad. If you need a substitute for goat cheese, try feta or ricotta cheese. Feta has a similar tangy flavor. Ricotta is creamier and milder. You can also use dairy-free cheese for a different taste. Cream cheese can work too, but it is denser. Choose based on your flavor preference and dietary needs. To make this salad vegan, skip the goat cheese. Replace it with vegan cheese or avocado for creaminess. Use maple syrup or agave in the dressing instead of honey. Check that your balsamic vinegar is vegan, as some brands may add honey. This way, you keep all the flavors while making it plant-based. You can find the full recipe here: [Full Recipe]. In this post, I covered how to create a delicious beet salad. We explored the best ingredients, measuring tips, and quality recommendations. You learned step-by-step instructions for prepping beets, assembling the salad, and making the dressing. I shared tips for perfect roasting, serving, and presentation. We also discussed variations like protein options and seasonal swaps. Lastly, I provided storage info and answered common questions. Enjoy crafting your own unique beet salad, and let your creativity shine!](https://fastmealmate.com/wp-content/uploads/2025/06/466f3db8-9be5-4235-af51-29d034f8c92e-768x768.webp)
![To make a delicious Pineapple Cucumber Salad, gather the following ingredients: - Ripe pineapple - Large cucumbers - Red bell pepper - Red onion - Fresh mint leaves - Fresh cilantro - Lime juice - Honey (optional) - Salt and pepper This list has all you need for a fresh and tasty salad. The ripe pineapple brings sweetness, while the cucumbers add crunch. The red bell pepper adds a nice pop of color and flavor. Red onion gives a sharp taste that balances the sweet and fresh notes. Fresh mint and cilantro boost the herb flavor, making every bite refreshing. Lime juice ties everything together with a zesty kick. If you like a touch of sweetness, add honey. Finally, season with salt and pepper to bring out all the flavors. When you have everything ready, you can create a vibrant and healthy dish. This salad is perfect for a quick snack or as a side. For the full recipe, check the earlier section. Enjoy making this simple yet flavorful dish! To make the pineapple cucumber salad, start by cutting the pineapple. You want it ripe and juicy. Peel it, then cut it into bite-sized cubes. This makes each piece easy to eat. Next, take the cucumbers. Wash them well, then cut them into similar-sized dice. This helps the salad look nice and makes every bite fresh. Now, let’s chop some vegetables and herbs. Grab the red bell pepper and red onion. Cut the red bell pepper into small pieces. This adds a sweet crunch to the mix. For the red onion, chop it finely for a hint of sharpness. Finally, take fresh mint and cilantro. Chop them finely as well. They bring a burst of flavor and freshness to our salad. In a large mixing bowl, place the diced pineapple and cucumbers. Add the chopped red bell pepper and red onion. Make sure to distribute everything evenly. This will give you a perfect mix of flavors in every bite. Then, sprinkle in the fresh mint and cilantro. Their bright flavors will really make the salad pop. Now it's time to prepare the dressing. In a small bowl, whisk together the lime juice and honey, if you choose to use it. Mix until the honey dissolves completely. This creates a tangy-sweet dressing that will add a lovely zing. Drizzle the dressing over your salad. Use a large spoon to gently toss everything together. Make sure all the ingredients are well coated with the dressing. This is key to bringing out the flavors. Next, season with salt and pepper to taste. Start with a little and adjust based on your preference. This simple step elevates the flavor of your salad. After mixing, cover the bowl tightly with plastic wrap. Place it in the fridge for at least 30 minutes. This chilling time allows the flavors to meld together beautifully. Enjoy this refreshing dish as a bright addition to any meal. You can find the full recipe to make this salad at any time. To make your pineapple cucumber salad shine, focus on freshness. Select ripe fruits and vegetables. A ripe pineapple smells sweet at the base and feels slightly soft when pressed. For cucumbers, look for firm ones with smooth skin. These choices boost your salad's flavor. When seasoning, use salt and pepper to taste. Start with a little. You can always add more. Lime juice adds brightness, while honey can sweeten it up. Mix well to blend all flavors. Serve your salad in a clear glass bowl. This highlights the bright colors of the pineapple, cucumber, and peppers. For added charm, layer the ingredients. This creates a beautiful effect. Garnish with fresh mint leaves right before serving. This enhances the salad's look and adds a lovely scent. You can also sprinkle some lime zest on top for extra flair. This salad pairs well with grilled chicken or fish. The fresh flavors complement the smoky taste of grilled meats. You can also enjoy it with tacos or rice dishes. For drinks, a refreshing mint lemonade or iced tea suits this salad perfectly. Serve it at summer barbecues, picnics, or family gatherings. It adds a tropical vibe to any meal. Don't forget to check the Full Recipe for all the details! {{image_4}} You can change this salad in fun ways. Start by adding other fruits. Consider using mango, kiwi, or strawberries. Each fruit brings its sweet twist. You can also add a little crunch with diced apples. They pair well with the pineapple and cucumber. Next, incorporate different herbs. Besides mint and cilantro, try basil or parsley. These herbs will give the salad a fresh feel. Each herb adds its own flavor, making the salad unique. Experiment and find your favorite mix! Many people want meals that fit their diet. This salad is easy to tweak for vegan or gluten-free diets. All the main ingredients are naturally vegan. Just skip the honey for a vegan option. If you want a low-sugar version, leave out the honey. The pineapple will add enough sweetness. You can also swap lime juice with lemon juice for a tart taste. Adjust these ingredients to suit your health needs. Enjoy the fresh flavors without worry! For the full recipe, check out [Full Recipe]. To keep your leftover salad fresh, store it in the fridge. Use an airtight container to prevent moisture loss. This helps the flavors stay vibrant. If you don’t have one, plastic wrap works too but may not seal as well. Avoid storing in a glass bowl without a lid, as this can lead to quicker spoilage. The salad stays fresh for about 2 days when stored correctly. After that, the flavors might fade. Check for signs of spoilage, such as a sour smell or mushy cucumbers. If you notice these signs, it's best to toss the salad. Keeping an eye on freshness ensures you enjoy the best taste and texture. For the full recipe, refer back to the beginning! What can I substitute for honey? You can use agave syrup or maple syrup instead of honey. Both add sweetness. You can also skip it if you prefer a tart taste. Can I make the salad ahead of time? Yes, you can make this salad a few hours ahead. Chill it in the fridge. This allows the flavors to blend nicely. How do I keep the cucumbers from becoming soggy? To prevent soggy cucumbers, salt them first. Let them sit for a bit, then rinse and dry. This removes extra water. What are the nutritional benefits of this salad? This salad is low in calories and high in vitamins. Pineapple adds vitamin C, while cucumbers hydrate. Mint and cilantro provide antioxidants. Can I serve it warm? This salad is best served cold. Serving it warm may change the texture. Enjoy it fresh for the best taste! This blog post covered how to make a refreshing pineapple cucumber salad. I shared the key ingredients and provided step-by-step instructions. You learned tips to enhance flavor and options for meal pairings. We also explored variations and important storage tips. Remember, this salad is versatile and easy to customize. Enjoy experimenting with different fruits and herbs. Fresh flavors make this dish a winner for any occasion.](https://fastmealmate.com/wp-content/uploads/2025/06/6ff9bfd2-b4bb-4aa9-9811-0e757a52e6a8-768x768.webp)
![- Cooked chicken breast - Greek yogurt - Dijon mustard - Garlic powder - Smoked paprika - Black pepper - Mixed greens - Cherry tomatoes - Cucumber - Whole wheat tortillas - Garnishing options The key to tasty Mini Chicken Wraps lies in the right ingredients. First, use cooked chicken breast. It is tender and full of protein. I recommend shredding the chicken for easy mixing. Next, Greek yogurt adds creaminess. It also gives a nice tang. Adding Dijon mustard brings a zesty kick to the wraps. Now, let's add some flavor! Garlic powder enhances the taste. Smoked paprika gives a subtle smokiness. Finally, a dash of black pepper adds warmth without being too spicy. For fresh fillings, I like to use mixed greens. They add color and crunch. Cherry tomatoes bring sweetness, and cucumber offers a refreshing bite. These fresh ingredients balance the rich flavors of the chicken mixture. Don’t forget the wraps! Whole wheat tortillas work best. They are healthy and keep everything together. You can also garnish your wraps with fresh herbs like cilantro. This adds a pop of color and flavor. For the full recipe, check out the [Full Recipe]. You will love how easy it is to make these delicious snacks! To start, gather your ingredients. In a large bowl, mix the chicken and other items. Combine 2 cups of shredded chicken, 1/2 cup of creamy Greek yogurt, and 1 tablespoon of Dijon mustard. Add 1 teaspoon of garlic powder, 1 teaspoon of smoked paprika, and 1/4 teaspoon of black pepper. Stir well until every piece is coated. You want a thick, creamy mix that sticks to the chicken. Next, lay out your whole wheat tortillas on a clean surface. Each tortilla should be flat and ready for filling. Scoop about 1/4 cup of the chicken mixture into the center of each tortilla. Spread it evenly, leaving a little space at the edges. Then, add a handful of mixed greens, halved cherry tomatoes, and thin cucumber slices. This creates a bright and tasty filling. Now it’s time to roll your wraps. First, fold the sides of the tortilla in. Then, roll it tightly from the bottom up. This secures all the yummy fillings inside. Once rolled, take a sharp knife and slice each wrap in half diagonally. This makes it easy to serve and looks great on a plate. For a fresh touch, sprinkle cilantro on top before serving. For the full recipe, refer to the earlier section. Enjoy making these tasty mini chicken wraps! Marinating chicken boosts its flavor. A simple marinade can include Greek yogurt, Dijon mustard, and spices. Let the chicken sit for at least 30 minutes. This adds depth and taste. You can also try adding fresh herbs like cilantro or basil. These herbs bring a burst of freshness to the wraps. You can prepare the wraps ahead of time. Simply make the chicken mixture and store it in the fridge. You can assemble the wraps just before serving. For a fun twist, serve with dips like hummus or salsa. These dips add more flavor and excitement to your meal. Pair with crunchy veggies like carrot sticks or bell peppers for a complete snack. Always ensure your chicken is fully cooked. It should reach an internal temperature of 165°F. Use a meat thermometer for accuracy. When handling raw chicken, wash your hands and surfaces. This keeps food safe from bacteria. Store leftovers in an airtight container in the fridge. Enjoy your mini chicken wraps fresh or as a quick snack later! For the full recipe, check out the section above. {{image_4}} You can switch things up by using beef or shrimp instead of chicken. Beef adds a rich flavor, while shrimp brings a nice bite. For a vegetarian option, try beans and cheeses. Black beans or chickpeas work great. They add protein and keep the wraps filling. The sauce you choose can change everything. For creamy options, you can use ranch or tzatziki. Both add a cool touch to your wraps. If you want heat, go for spicy sauces like sriracha or a tangy hot sauce. These add a kick that makes each bite exciting. Using lettuce leaves instead of tortillas gives a fresh twist. Lettuce wraps are crunchy and light. They are perfect for a low-carb meal. If you need gluten-free options, look for rice paper or corn tortillas. These wraps still hold all the tasty fillings while being friendly to different diets. For the full recipe, check out Savory Mini Chicken Wraps . You can store mini chicken wraps in the fridge for up to three days. This time frame helps keep them fresh and safe to eat. Use airtight containers to keep the wraps moist and tasty. Glass or plastic containers work well. Avoid using containers that allow air inside, as this can make the wraps dry. To freeze mini chicken wraps, wrap each one tightly in plastic wrap or foil. This step helps keep them from getting freezer burn. Place the wrapped wraps in a freezer-safe bag or container. Label the bag with the date so you know when you made them. You can freeze them for up to three months. To reheat frozen wraps, take them out and let them thaw in the fridge overnight. If you want a quicker option, you can microwave them for about one to two minutes. Make sure to check that they are hot all the way through before eating. Enjoy these tasty wraps any time, even after freezing! For the full recipe, check out the previous sections. To make Mini Chicken Wraps healthier, swap some ingredients. Here are a few low-calorie options: - Use low-fat Greek yogurt instead of regular. - Replace whole wheat tortillas with lettuce wraps. - Add more fresh veggies, like bell peppers or carrots. - Use less mustard or choose a lighter dressing. These swaps keep the flavor while cutting calories. Yes, using leftover chicken is a great idea! Here are best practices: - Ensure the chicken is fully cooked before using it. - Shred or chop the leftover chicken for easy mixing. - Store leftover chicken in the fridge no longer than 3-4 days. Using leftovers saves time and reduces waste, making your wraps quick and tasty. Mini Chicken Wraps go well with various dips. Here are some tasty suggestions: - Hummus adds a creamy and flavorful touch. - Salsa gives a fresh and zesty kick. - Ranch dressing adds a classic flavor. - Tzatziki sauce brings a cool, tangy element. Experiment with these dips to find your perfect match! Mini chicken wraps are tasty, easy to make, and full of flavor. We discussed key ingredients, like chicken, Greek yogurt, and fresh veggies. You learned how to prepare and assemble these wraps while keeping safety in mind. You also have tips for flavor enhancement and storage. Remember, you can customize these wraps in many ways. Think about using different proteins or sauces to suit your taste. Enjoy your cooking and create delicious meals that everyone will love!](https://fastmealmate.com/wp-content/uploads/2025/06/124e56a0-f478-4b5e-be65-4c059dfc39c0-768x768.webp)