Skip to content
About
Contact
Cookie Policy
Copyright Policy
Disclaimer
Search
Home
Dinner
Appetizer
Desserts
Drinks
About
Contact
Privacy Policy
Toggle Menu
Home
/
Appetizer
- Page 12
Appetizer
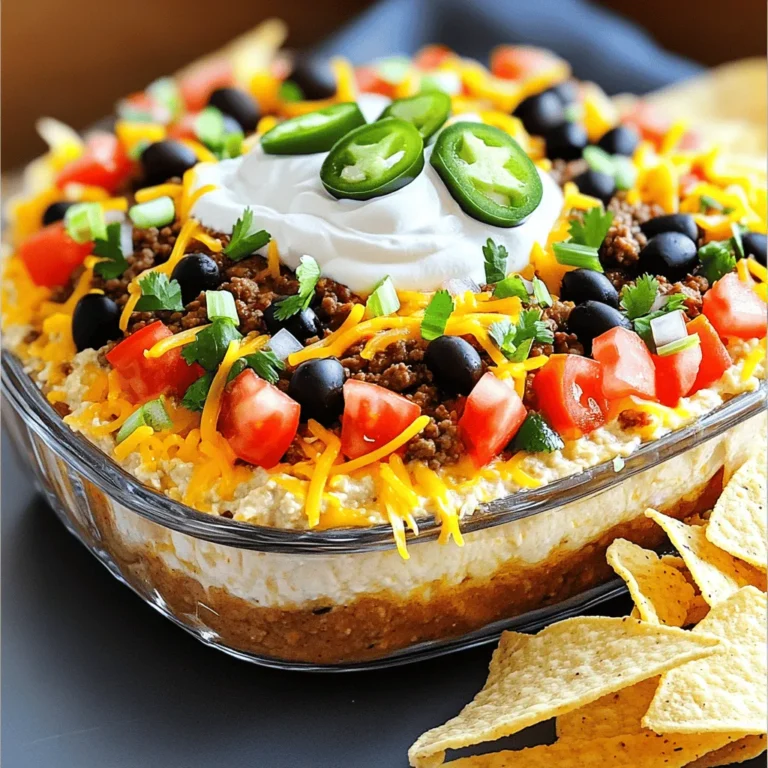
Taco Dip with Ground Beef Delicious and Easy Recipe
Grilled Shrimp Skewers Fresh and Flavorful Recipe
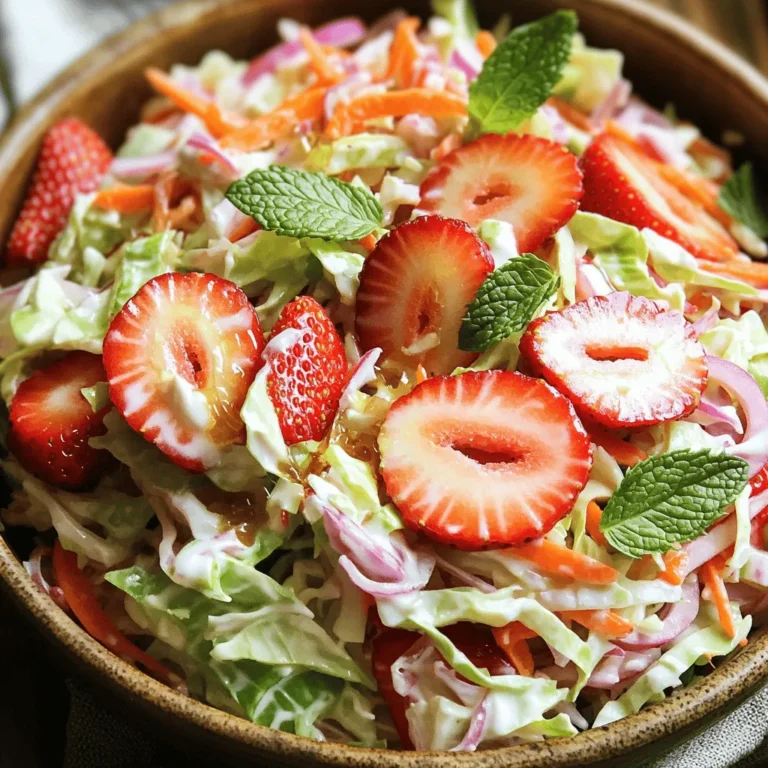
Crisp Strawberry Coleslaw Refreshing Flavor Burst
Garlic Parmesan Chicken Tenders Tasty and Simple Dish
Crispy Potato Pancakes Tasty and Easy Recipe
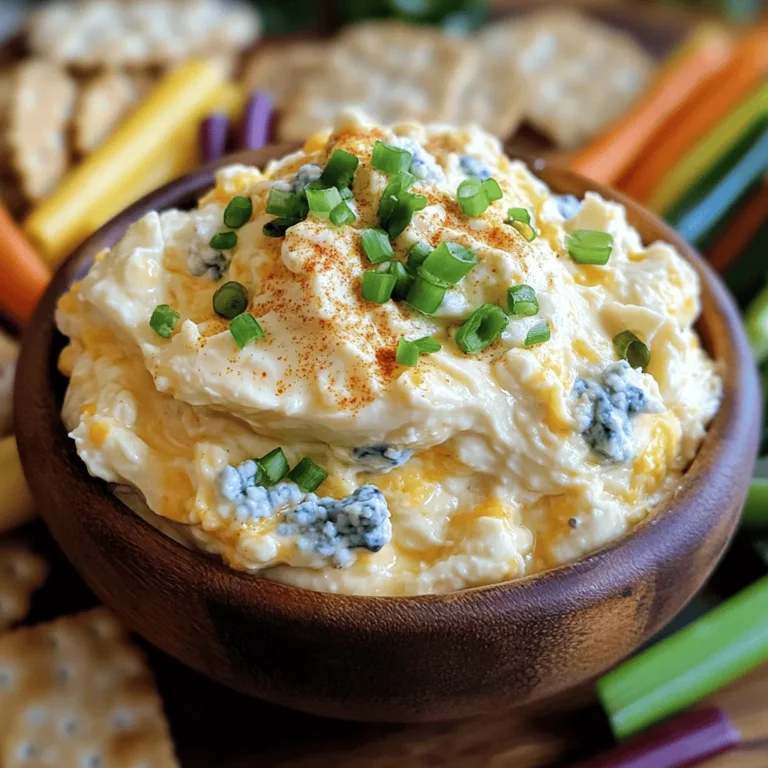
French Quarter Cheese Spread Irresistible Flavor Boost
Vegan Nashville Hot Tofu Nuggets Crispy and Spicy Treat
Strawberry Coleslaw Fresh and Flavorful Delight
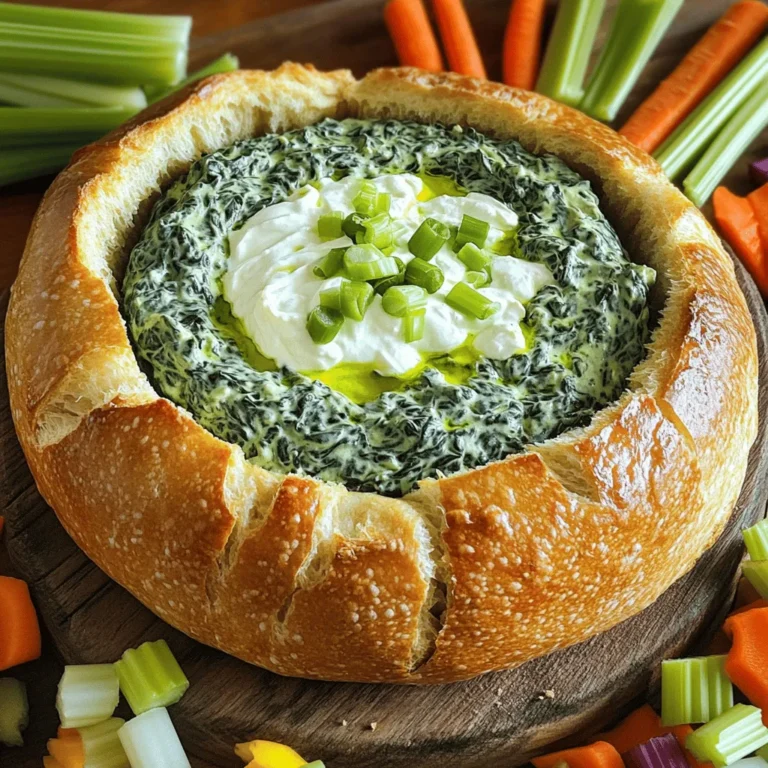
Spinach Dip Bread Bowl Irresistible Appetizer Delight
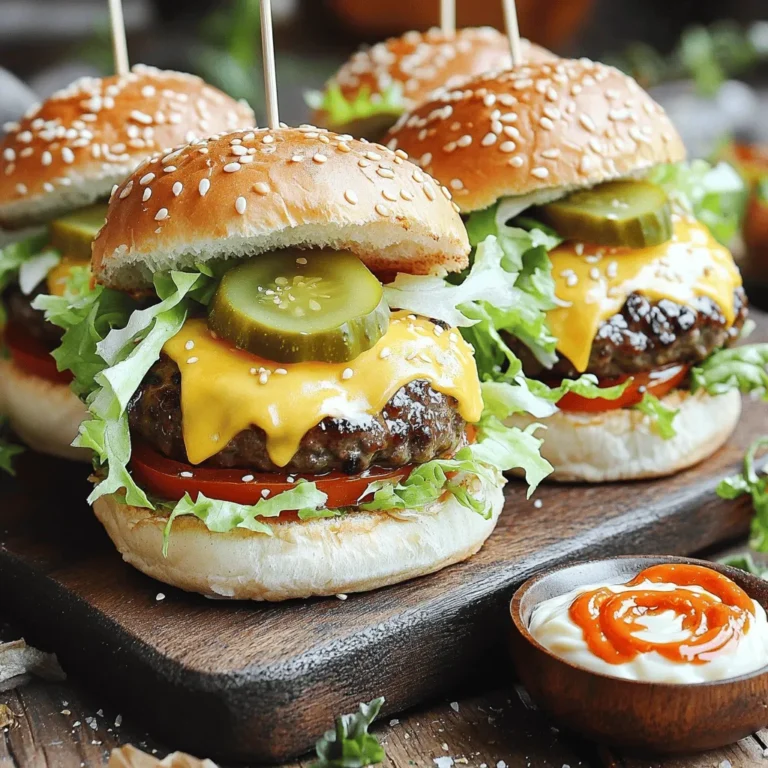
Cheeseburger Sliders Juicy and Flavorful Delight
Page navigation
Previous Page
Previous
1
…
10
11
12
13
14
…
16
Next Page
Next
Home
Dinner
Appetizer
Desserts
Drinks
About
Contact
Privacy Policy
Toggle Menu Close
Search for:
Search


![- 4 medium-sized russet potatoes - 1 small onion - 2 large eggs - 1/4 cup all-purpose flour - 1 teaspoon baking powder - 1 teaspoon garlic powder - Salt and pepper to taste - 1/4 cup fresh parsley - Vegetable oil for frying Gather these simple ingredients. They are key to making crispy potato pancakes. The russet potatoes give a nice texture. The onion adds flavor. Eggs help bind everything together. Next, we need some dry ingredients. The flour gives structure. Baking powder helps them rise a bit. Garlic powder adds a tasty kick. For seasoning, use salt and pepper to taste. Fresh parsley brings a pop of color and freshness. Finally, vegetable oil is essential for frying. It helps achieve that golden crispiness. To see the full recipe, you can refer to the [Full Recipe]. Start by peeling four medium-sized russet potatoes. Grate them finely using a box grater. Next, do the same with one small onion. After grating, you need to remove moisture. Place the grated potatoes and onions in a clean kitchen towel. Wring out the mixture gently until it is dry. This step is key for crispy pancakes. In a large bowl, combine the grated potatoes and onions. Now, add two large beaten eggs. Stir until the eggs mix well with the potatoes and onions. In a separate bowl, whisk together the dry ingredients. You need 1/4 cup of all-purpose flour, 1 teaspoon of baking powder, and 1 teaspoon of garlic powder. Add salt and pepper to taste. Once well mixed, gradually fold this dry mixture into the potato mixture. Be gentle when folding to keep the texture light. Finally, stir in 1/4 cup of freshly chopped parsley for a burst of flavor. Heat a generous amount of vegetable oil in a skillet over medium-high heat. You want the oil to shimmer. Using a tablespoon or ice cream scoop, take the potato mixture and drop it into the hot oil. Flatten each scoop slightly with a spatula. Fry the pancakes for about 3-4 minutes on each side. Look for a golden brown color to know they are ready. Avoid overcrowding the skillet; cook them in batches if needed. Once done, transfer the pancakes to a plate lined with paper towels to absorb excess oil. Enjoy the crispy potato pancakes hot! For the full recipe, check out the [Full Recipe]. To make crispy potato pancakes, moisture control is key. After grating the potatoes and onion, place the mixture in a clean kitchen towel. Wring it out to remove extra moisture. This step is vital for crispiness. Next, heat your oil properly. Aim for medium-high heat. If the oil is too cool, the pancakes will absorb it and become soggy. If it's too hot, they may burn. You want that perfect shimmer before frying. When you cook your pancakes, avoid overcrowding the skillet. If you add too many at once, the temperature drops. This can lead to soggy pancakes. Cook them in small batches for the best results. To keep the pancakes warm, place them on a plate in an oven set to low heat. This way, they stay crispy while you finish cooking the rest. For garnishes, I love serving crispy potato pancakes with sour cream or applesauce. These toppings add a nice contrast to the crispy texture. You can also sprinkle fresh parsley on top for a pop of color. As for side dishes, consider serving them with a simple salad or sautéed greens. These pair well and balance the meal. For the full recipe, check out the detailed instructions. {{image_4}} You can boost your crispy potato pancakes with cheese. Cheddar adds a sharp bite, while feta gives a tangy twist. Just mix in some crumbled cheese before frying. Herbs and spices also enhance flavor. Chives add a mild onion taste, while dill brings a fresh note. Feel free to experiment with your favorite herbs. You can use different types of potatoes for unique flavors. Yukon Gold potatoes offer a buttery taste, while sweet potatoes add sweetness. If you want gluten-free options, try almond flour or chickpea flour. These swaps keep the pancakes crispy while adding new flavors. Serving styles can change the whole vibe of your dish. Make mini pancakes for appetizers at parties. They are easy to grab and enjoy. For brunch, stack them high and serve with toppings like sour cream or applesauce. This adds a fun twist to your meal. For the full recipe, check out the Crispy Potato Pancakes section above. To keep your crispy potato pancakes fresh, store them in an airtight container. Place parchment paper between each layer to avoid sticking. They stay good in the fridge for about 3 to 5 days. Always let them cool down before storing. This helps keep them crispy for later. If you want to save some for later, freezing is a great option. Let the cooked pancakes cool first. Then, place them in a single layer on a baking sheet. Freeze until solid, then transfer them to a freezer bag. They last about 2 to 3 months in the freezer. To reheat frozen pancakes, you can use an oven or a skillet. For the oven, preheat to 400°F and bake for about 10 to 15 minutes. If using a skillet, heat a bit of oil over medium heat and cook each pancake until warm and crispy. Enjoy them again with your favorite toppings! To keep your potato pancakes crispy, the key is moisture control. Always wring out the grated potatoes and onions to remove excess water. Use a hot pan with enough oil. Fry in small batches so the pancakes don't steam. After frying, place them on a wire rack instead of paper towels. This lets air circulate and keeps them from getting soggy. Yes, you can make potato pancakes ahead of time. Cook them, then store them in an airtight container. They will last up to two days in the fridge. To reheat, place them in a hot skillet for a few minutes on each side. This brings back their crispiness. You can also bake them in the oven at 375°F for about 10 minutes. Crispy potato pancakes pair well with many sides. Sour cream and applesauce are classic choices. You can also try Greek yogurt or a spicy sauce for a twist. Fresh herbs like chives or parsley add color and flavor. For a heartier meal, serve with a side salad or smoked salmon. You can customize potato pancakes in many ways. Add cheese like cheddar or feta for a rich taste. Fresh herbs like dill or chives add a nice touch. You can even mix in grated vegetables, like carrots or zucchini, for extra nutrition. Feel free to play with spices too, like paprika or cumin. Yes, you can bake potato pancakes. Preheat your oven to 425°F. Place the pancakes on a baking sheet lined with parchment paper. Brush them lightly with oil. Bake for about 20 minutes, flipping halfway through. They will be less greasy but still tasty. You may not get the same crispiness as frying, but they will still be good. Check the [Full Recipe] for more tips. Making crispy potato pancakes is simple and fun. We covered the key ingredients, like russet potatoes and eggs, and the steps for perfecting the mixture. I shared tips for achieving that golden, crispy texture and serving suggestions to elevate your dish. Remember, you can always customize your pancakes with different flavors or serving styles. Enjoy your cooking adventure and make these delicious pancakes your own. They’re sure to impress at any meal!](https://fastmealmate.com/wp-content/uploads/2025/06/8dba9489-4fe0-451f-83c3-8d1f72bb8948-768x768.webp)
![- 16 oz firm tofu, pressed and cubed - 1 cup plant-based milk (almond or soy) - 1 tablespoon apple cider vinegar - 1 cup all-purpose flour - 1 cup cornmeal - 2 teaspoons garlic powder - 2 teaspoons onion powder - 1 teaspoon smoked paprika - 1 teaspoon cayenne pepper (adjust to your spice preference) - 1 teaspoon salt - 1 teaspoon black pepper - 1 tablespoon maple syrup - ¼ cup hot chili oil - Fresh pickles and sliced bread for serving I love using firm tofu for this recipe. It holds its shape and gives a nice bite. Pressing the tofu is key. It removes excess water and helps the nuggets get crispy. The buttermilk mixture is easy to make. Just mix plant-based milk with apple cider vinegar. Let it sit for five minutes. It thickens and works well for coating. For the dry ingredients, I use all-purpose flour and cornmeal. The cornmeal adds a crunchy texture. The spices pack on the flavor. Garlic powder and onion powder make the nuggets taste savory. Smoked paprika adds a lovely depth. Cayenne pepper is what brings the heat. Adjust it to make it milder or spicier based on your taste. Maple syrup in the hot oil glaze gives a sweet touch. It balances the spice perfectly. Don't forget the fresh pickles! They add a refreshing crunch when served with the nuggets. Sliced bread is optional but makes a great sandwich. Enjoy your Vegan Nashville Hot Tofu Nuggets! For the complete step-by-step guide, check out the Full Recipe. - Preheat the oven to 400°F (200°C). - Press the tofu to remove water, then cut it into nugget-sized pieces. - In a bowl, combine 1 cup of plant-based milk with 1 tablespoon of apple cider vinegar. - Let it sit for 5 minutes. This thickens and curdles the milk. - In one dish, mix 1 cup of flour with garlic powder, onion powder, smoked paprika, salt, and black pepper. - In another dish, pour in 1 cup of cornmeal and mix in cayenne pepper. - Dip each nugget in the flour mix, coating it well. - Next, dip it in the buttermilk, letting excess drip off. - Finally, roll it in the cornmeal mix, pressing gently for a thick coating. - Arrange the coated nuggets on a baking sheet lined with parchment paper. - Lightly oil the nuggets to help them crisp up. - Bake for 25-30 minutes, flipping them halfway for even browning. - In a small bowl, mix hot chili oil with 1 tablespoon of maple syrup for the glaze. - Toss the baked nuggets in the glaze to coat them evenly. Enjoy these spicy treats with fresh pickles for extra flavor! To get the best texture with tofu, pressing is key. Start by using a tofu press or a simple method. Wrap your tofu in a clean towel and place a heavy object on top. Let it press for at least 30 minutes. This step gets rid of extra moisture. It helps your nuggets become crispy. For that perfect crisp, ensure a solid coating. After you coat each nugget in the flour mix, dip it in the buttermilk mixture. Then, roll it in the cornmeal mix. The cornmeal gives a crunchy bite. Lightly spray the nuggets with oil before baking. This adds to their crispiness. Adjusting spice levels is easy. If you want more heat, add more cayenne pepper. Just remember, start small. You can always add more later. For milder nuggets, reduce the cayenne to suit your taste. You can also mix in other spices. Try smoked paprika for a deep flavor. Add some cumin for a warm touch. Garlic powder and onion powder boost the taste without extra heat. Experiment to find your perfect blend. Presentation matters! Arrange your nuggets on a large, colorful platter. Add fresh pickles on top for a pop of color. A sprig of parsley also brightens the dish. You can serve with a side of dipping sauce for added flavor. Consider using sliced bread or buns for a sandwich. It makes for a fun meal. This way, your Vegan Nashville Hot Tofu Nuggets look as good as they taste. {{image_4}} You can change the flavor of your Vegan Nashville Hot Tofu Nuggets by using different spices. Try adding cumin for a warm taste or chili powder for a kick. You can also mix in herbs like thyme or oregano. Fresh herbs add brightness and depth to each bite. These nuggets pair well with many sides. Serve them with crispy fries or a fresh salad. You can also create a delicious sandwich. Place the tofu nuggets in a bun and add your favorite toppings. Think lettuce, tomatoes, and a drizzle of vegan mayo for extra flavor. If you need a gluten-free version, swap out the all-purpose flour and cornmeal. Use almond flour instead of regular flour for the breading. For cornmeal, try using gluten-free breadcrumbs. These changes keep the nuggets tasty and the texture just right. To keep your Vegan Nashville Hot Tofu Nuggets fresh, cool them first. Let them sit at room temperature for about 30 minutes. This helps avoid steam buildup, which makes them soggy. Once cooled, pack them in airtight containers. Glass or BPA-free plastic works best. Make sure to store them in the fridge. They stay good for up to four days. To reheat your tofu nuggets, the oven is best. Preheat it to 375°F (190°C). Place the nuggets on a baking sheet. Bake them for about 10-15 minutes. This method keeps them crispy. You can also use an air fryer. Set it at 350°F (175°C) and cook for about 5-8 minutes. Avoid microwaving as it makes them soft and chewy. You can freeze these nuggets, both baked and unbaked. For unbaked nuggets, arrange them on a baking sheet. Freeze until solid, then transfer to a freezer bag. This saves space. For baked nuggets, let them cool first. Then, place them in a freezer-safe container. They last up to three months. When ready to eat, thaw overnight in the fridge. Bake or air fry them again for best results. You should use firm or extra-firm tofu. Silken tofu is too soft for nuggets. Firm tofu holds its shape well. Extra-firm tofu gives a nice texture. Press it to remove moisture for the best results. This step helps the nuggets get crispy. Yes, this recipe is nut-free. The main ingredients do not include nuts. If you want to add a creamy dip, use tahini or sunflower seed butter. Both options are safe and tasty. Always check labels to ensure all ingredients are nut-free. To kick up the heat, add more cayenne pepper. You can also mix in hot sauce for extra spice. Try using a spicy chili oil instead of regular oil. Red pepper flakes are another good option. Adjust the heat to fit your taste. Yes, you can fry the nuggets! Heat oil in a deep pan for frying. Coat the tofu nuggets well for a crispy crust. Fry in batches to keep the oil hot. This method gives a crunchy texture and rich flavor. Just be careful with hot oil. These nuggets pair well with fresh pickles and sliced bread. You can also serve them with coleslaw for a cool crunch. Dipping sauces like ranch or hot sauce add more flavor. Sweet potato fries make a great side, too! You can find the [Full Recipe] for Vegan Nashville Hot Tofu Nuggets online. In this blog post, we explored how to make Vegan Nashville Hot Tofu Nuggets. We covered key ingredients, like firm tofu and spices, and detailed how to prepare, bread, and bake them to get that perfect crunch. I shared tips for adjusting spice levels and achieving great texture. You now have ideas for serving and storing leftovers too. Enjoy creating this tasty dish, and don’t be afraid to experiment with new flavors! Dive in and make these nuggets your own.](https://fastmealmate.com/wp-content/uploads/2025/06/1c2352f9-cf3e-44e9-8ce8-a5cbad64ddd1-768x768.webp)