Welcome to the world of desserts! Today, I’m excited to share my recipe for Caramel Apple Cheesecake, a delightful blend of creamy cheesecake and sweet apples. This dessert is perfect for any occasion, from holidays to family gatherings. With simple ingredients like cream cheese, fresh Granny Smith apples, and rich caramel sauce, this dish will impress your friends and family. Let’s dive into the world of baking and make this tasty treat together!
Ingredients
List of Key Ingredients
– 1 ½ cups graham cracker crumbs
– ½ cup unsalted butter, melted
– 2 tablespoons granulated sugar
– 3 packages (8 oz each) cream cheese, softened
– 1 cup granulated sugar
– 3 large eggs, at room temperature
– 1 teaspoon pure vanilla extract
– 1 teaspoon ground cinnamon
– 2 cups apples, peeled, cored, and thinly sliced (preferably Granny Smith)
– 1 cup caramel sauce (plus extra for drizzling)
– ¼ cup chopped pecans (optional for garnish)
When making caramel apple cheesecake, you want the best ingredients. Start with graham cracker crumbs. They give the crust a nice crunch. Use unsalted butter to blend with the crumbs for a rich base.
Cream cheese is the star of this dessert. Choose high-quality cream cheese for a smooth filling. Fresh apples add a wonderful tartness. Granny Smith apples work best, but you can use others too.
Ground cinnamon adds warmth and flavor. Caramel sauce is a must for that sweet, sticky finish. Lastly, chopped pecans can give a lovely crunch on top.
Necessary Kitchen Tools
– 9-inch springform pan
– Mixing bowls
– Electric mixer
– Spatula
To make this recipe, you need a few key tools. A 9-inch springform pan holds the cheesecake well. Mixing bowls help you combine ingredients easily. An electric mixer makes it simple to beat the cream cheese until smooth. A spatula helps fold in the apples and spread the filling evenly.
Alternative Ingredient Options
– Substitutes for cream cheese: Use dairy-free cream cheese for a vegan option.
– Gluten-free crumb options: Look for gluten-free graham cracker crumbs.
– Sugar alternatives: Try using coconut sugar or agave syrup for a healthier option.
These swaps make this dessert fit your dietary needs. They allow you to enjoy caramel apple cheesecake without worry. Whether you need gluten-free or vegan options, you can still enjoy this sweet treat.
Step-by-Step Instructions
Preparing the Crust
1. Preheat your oven to 325°F (160°C). This helps the crust bake evenly.
2. In a medium bowl, mix 1 ½ cups of graham cracker crumbs, ½ cup of melted butter, and 2 tablespoons of sugar. Stir until it looks like wet sand.
3. Press this mixture firmly into the bottom of a 9-inch springform pan. Make it even and compact.
4. Bake this crust for 10 minutes. When done, take it out and let it cool.
Making the Cream Cheese Filling
1. In a large bowl, beat 3 packages of softened cream cheese with 1 cup of sugar. Use an electric mixer on medium speed. Mix until smooth and creamy.
2. Add 3 large eggs, one at a time. Make sure to mix well after each egg.
3. Then, mix in 1 teaspoon of vanilla extract and 1 teaspoon of ground cinnamon. Don’t over-mix; you want it airy.
Combining Apples and Assembly
1. Take 2 cups of thinly sliced apples. Fold these gently into the cream cheese filling. Make sure the apples spread evenly.
2. Pour this mixture over your cooled crust. Use a spatula to smooth the top.
3. Drizzle about ½ cup of caramel sauce over the surface. Use a knife to swirl it in for a pretty look.
4. Place the cheesecake into the oven and bake for 60-70 minutes. The center should be set but a bit jiggly.
5. Turn off the oven and leave the door slightly open. Let the cheesecake cool inside for 1 hour to avoid cracks.
6. Finally, chill your cheesecake in the fridge for at least 4 hours, or overnight for best results.
Tips & Tricks
Achieving the Perfect Cheesecake Texture
To get a smooth and creamy cheesecake, avoid over-mixing. Mix just until smooth and fluffy. Over-mixing can add too much air, causing cracks.
When cooling your cheesecake, follow these steps to prevent cracks:
– After baking, leave the oven door slightly open for about an hour.
– This helps the cheesecake cool slowly and evenly.
Baking Tips for Best Results
For great results, bake your cheesecake for 60-70 minutes. The center should look set but still jiggle slightly.
To check for doneness, gently shake the pan. If the edges are firm and the center wiggles, it is ready.
After baking, cool the cheesecake properly by:
– Turning off the oven and leaving the door ajar.
– Allowing it to cool for at least an hour in the oven.
Chill the cheesecake in the fridge for at least 4 hours or overnight for the best flavor and texture.
Presentation Suggestions
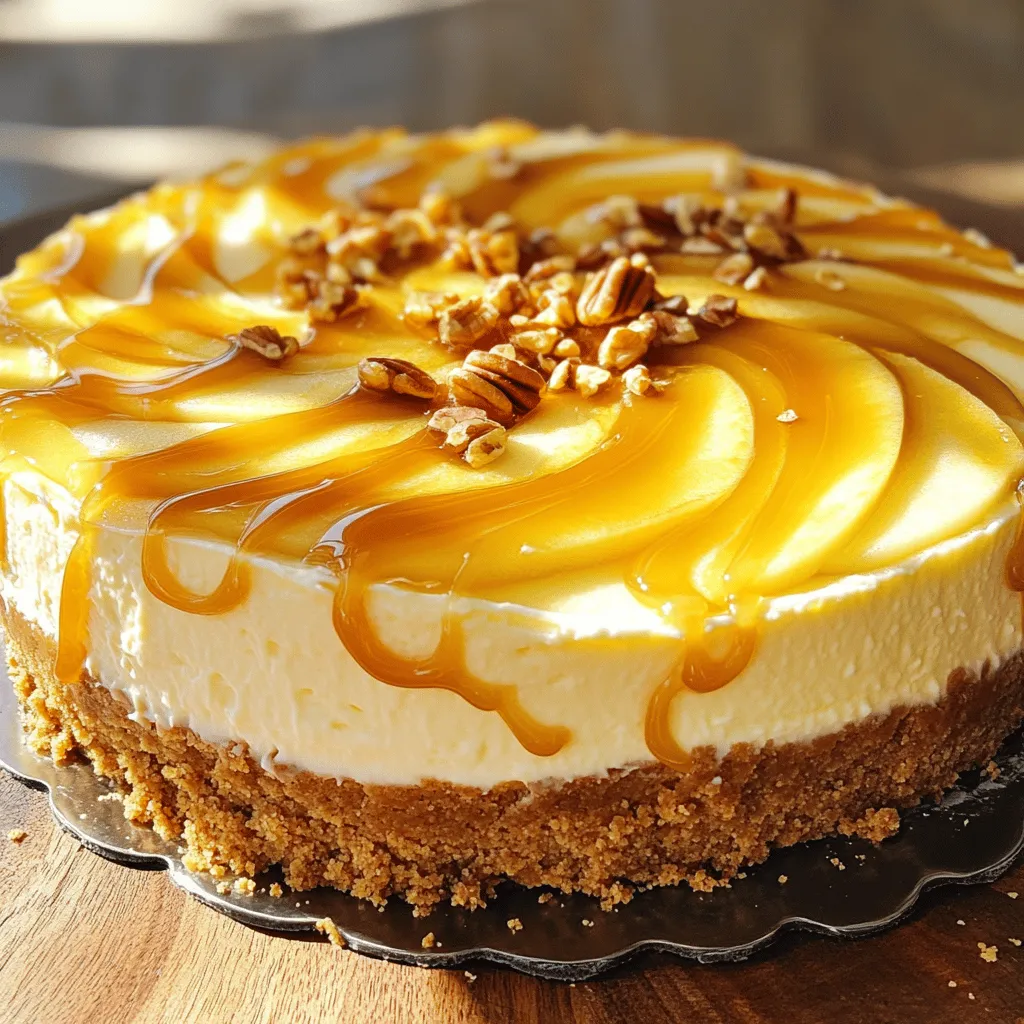
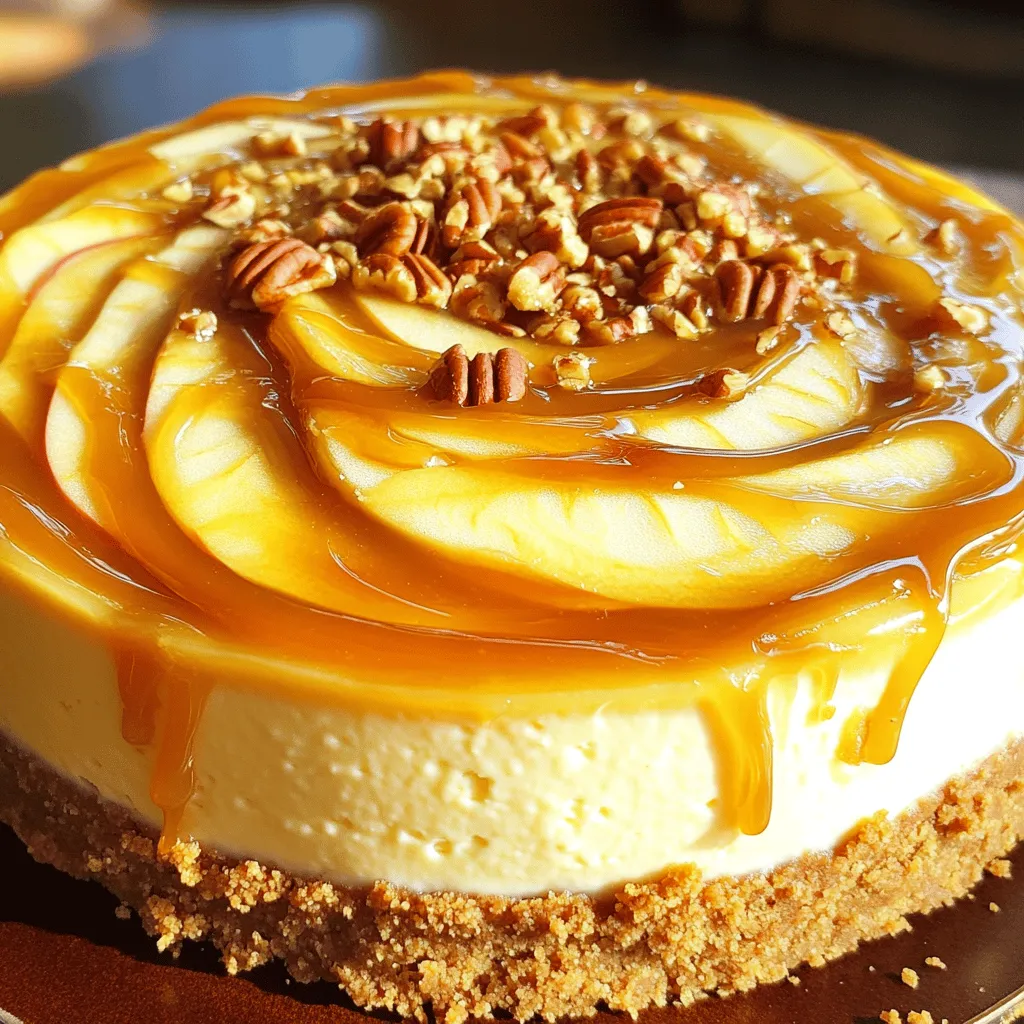
To make your cheesecake shine, drizzle caramel sauce on top. This adds a sweet touch and makes it look inviting.
For a crunchy finish, sprinkle chopped pecans over the caramel. This adds texture and a nice nutty flavor.
These tips will help you serve a beautiful caramel apple cheesecake that everyone will love!
Variations
Flavor Enhancements
You can make your caramel apple cheesecake even better. Try adding spices like nutmeg or allspice. A little nutmeg gives warmth to the flavors. Allspice adds a hint of depth. You can also mix in different fruits. Pears work great with the apples. They add sweetness and a unique twist.
Dietary Adjustments
If you want a vegan version, use dairy-free cream cheese. It gives the same creamy taste without dairy. You can also swap regular sugar for sugar-free alternatives. This way, you make a lighter version without losing taste.
Serving Suggestions
Serve your cheesecake with whipped cream or a scoop of ice cream. The creaminess pairs well with the rich flavors. This dessert shines during holidays and special events. It impresses guests and brings joy to gatherings. For the best experience, drizzle extra caramel sauce on top just before serving.
Storage Info
How to Store Leftover Cheesecake
To keep your caramel apple cheesecake fresh, store it in the fridge. Use an airtight container or cover it with plastic wrap. This will help it stay moist and delicious. The cheesecake will last for about 5 days in the fridge.
Freezing Caramel Apple Cheesecake
If you have extra cheesecake, freezing is a great option. First, cut the cheesecake into individual slices. Wrap each slice tightly in plastic wrap. Then, place the wrapped slices in a freezer-safe bag or container. This helps keep the cheesecake fresh for up to 3 months.
When you want to eat it, move the cheesecake to the fridge for a few hours. Let it thaw slowly. Avoid using the microwave, as it can change the texture.
Reheating Tips
If you want to enjoy a warm slice, you can reheat it safely. Use an oven set to 250°F (120°C). Place the slice on a baking sheet and warm it for about 10-15 minutes. This method helps keep the cheesecake creamy.
Avoid reheating if the cheesecake has been frozen for too long. It may lose its taste and texture. Enjoy each slice fresh for the best experience.
FAQs
Common Questions about Caramel Apple Cheesecake
Can I make this cheesecake ahead of time?
Yes, you can make this cheesecake a day in advance. It tastes even better after sitting. Just chill it in the fridge overnight. This helps the flavors blend well.
How do I prevent my cheesecake from cracking?
To avoid cracks, don’t over-mix your batter. Mix just until smooth. Also, cool the cheesecake slowly in the oven after baking. Leaving the oven door ajar helps a lot.
Specifics on Serving
What should I serve with caramel apple cheesecake?
I love to serve this cheesecake with whipped cream or a scoop of vanilla ice cream. A drizzle of extra caramel sauce adds a nice touch. You can also sprinkle some chopped nuts for extra crunch.
How long should I chill the cheesecake?
Chill the cheesecake for at least four hours. For the best results, let it sit overnight. This makes it firm and easy to slice.
Recipe Customization
Can I change the flavor profile of this cheesecake?
Of course! You can add spices like nutmeg or ginger for a warm flavor. You can even mix in chocolate chips or swap apples for pears.
What are the best apple varieties for baking?
Granny Smith apples work best for this recipe. Their tartness balances the sweet caramel. You can also try Honeycrisp or Braeburn for a different taste.
This post covered how to make a delicious caramel apple cheesecake. You learned about key ingredients, necessary tools, and steps for success. I shared tips for texture and baking for great results. You discovered fun variations and ways to store leftovers.
Remember, cheesecake is a versatile treat. Have fun customizing your recipe. Enjoy sharing this dessert with family and friends!


