
Classic Christmas Fruitcake Festive and Flavorful Treat

Christmas isn’t complete without the rich and flavorful classic fruitcake. With its blend of dried fruits, nuts, and spices, this festive treat warms the heart and home. In this article, I’ll guide you through each step of making a traditional fruitcake. You’ll discover tips, tricks, and variations for a cake that fits your taste. Ready to create a delicious centerpiece for your holiday table? Let’s get started!
Why I Love This Recipe
- Festive Flavor Explosion: This fruitcake is packed with a delightful blend of dried fruits and nuts, making each bite a celebration of flavors that truly embodies the spirit of Christmas.
- Moist and Delicious: The addition of applesauce and fresh orange juice ensures that this cake is moist and tender, unlike traditional fruitcakes that can often be dry.
- Easy to Make: With simple steps and easily accessible ingredients, this recipe is perfect for bakers of all levels, making it a great addition to holiday traditions.
- Perfect for Sharing: Cut into generous slices, this cake is perfect for sharing with family and friends during holiday gatherings, bringing everyone together over a delicious treat.
Ingredients
List of Ingredients
– 2 cups mixed dried fruits (raisins, currants, chopped apricots, cranberries)
– 1 cup walnuts, chopped
– 1 cup pecans, chopped
– 1 cup unsweetened applesauce
– 1 cup fresh orange juice
– 1/2 cup packed brown sugar
– 1/2 cup granulated sugar
– 1/2 cup unsalted butter, softened
– 3 large eggs, at room temperature
– 2 cups all-purpose flour
– 1 teaspoon baking powder
– 1 teaspoon ground cinnamon
– 1/2 teaspoon ground nutmeg
– 1/4 teaspoon ground cloves
– 1 teaspoon pure vanilla extract
– 1/2 teaspoon salt
– Zest of 1 orange
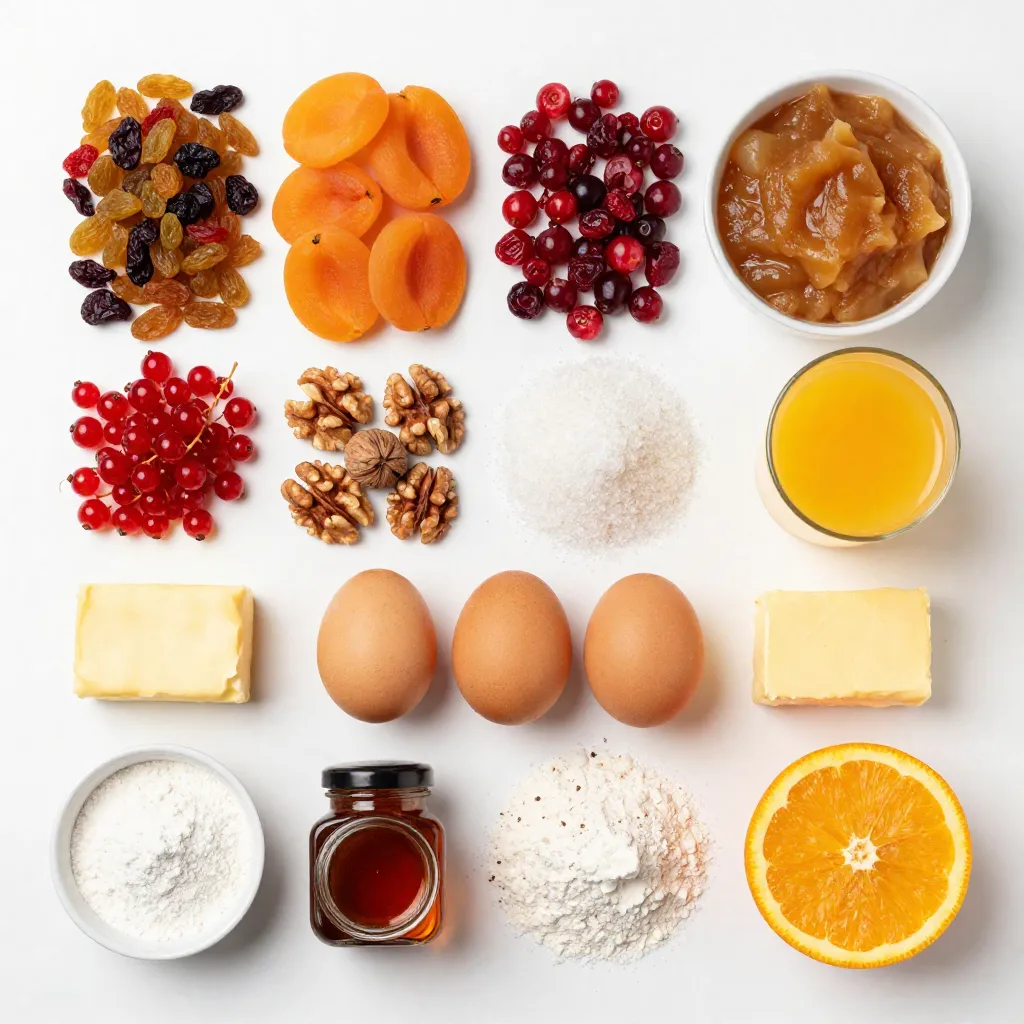
Fruitcake is a blend of many tasty ingredients. First, the dried fruits add sweetness and texture. I love using raisins, currants, apricots, and cranberries. Each fruit gives a unique flavor. Then, we mix in nuts for crunch. Walnuts and pecans are my favorites. They add a rich taste that pairs well with fruit.
Next, we have core ingredients. Unsweetened applesauce makes the cake moist. Fresh orange juice brings brightness. The sugars, both brown and granulated, give the cake its sweetness. Softened butter adds richness, while eggs provide structure and help it rise.
Finally, we need dry ingredients. All-purpose flour is the base. Baking powder helps the cake rise. Spices like cinnamon, nutmeg, and cloves add warmth and depth. Salt balances the sweetness and enhances all flavors. Lastly, orange zest adds a fresh, fragrant touch.
Gather these ingredients, and you’re on your way to making a delightful Christmas fruitcake!
Step-by-Step Instructions
Preparation Steps
1. Preheating and preparing the cake pan: Start by heating your oven to 325°F (160°C). Grab a 9-inch round cake pan and grease it well. Line the bottom with parchment paper to stop sticking.
2. Creaming butter and sugars: In a large mixing bowl, combine softened unsalted butter, brown sugar, and granulated sugar. Use a hand mixer or stand mixer to mix until light and fluffy for about 3-4 minutes.
3. Incorporating eggs and applesauce: Add the eggs one at a time. Mix well after each egg. Next, stir in unsweetened applesauce and pure vanilla extract until everything blends together nicely.
Combining Ingredients
1. Mixing dry ingredients: In a separate bowl, whisk together flour, baking powder, salt, ground cinnamon, ground nutmeg, and ground cloves. This helps the spices mix evenly for great flavor.
2. Folding wet and dry mixtures: Gradually fold the flour mixture into the wet mixture using a spatula. Mix just until combined. Be careful not to overmix, or the cake may turn out dense.
3. Adding fruits and nuts: Gently fold in the mixed dried fruits, chopped walnuts, chopped pecans, fresh orange juice, and orange zest. Ensure everything is evenly distributed throughout the batter.
Baking and Cooling
1. Pouring batter and baking guidelines: Pour the batter into the prepared cake pan, smoothing the top with a spatula. Place the pan in your preheated oven.
2. Testing for doneness: Bake for about 60-70 minutes. To check if it’s done, insert a toothpick into the center of the cake. It should come out clean or with a few moist crumbs.
3. Cooling procedures: Once baked, take the cake out of the oven. Let it cool in the pan for 10 minutes. Then, carefully move it to a wire rack to cool completely.
Tips & Tricks
Baking Tips
To ensure even baking, I recommend these steps:
– Oven Thermometer: Check your oven’s temperature with a thermometer. This helps avoid under or over-baking.
– Rotate the Pan: Halfway through baking, rotate the cake pan. This ensures even cooking on all sides.
– Baking Tools: Use a 9-inch round cake pan. I prefer using a non-stick one for easy removal. A spatula helps spread the batter evenly.
Flavor Enhancement
Letting the cake rest is key. This allows flavors to mix and deepen. I suggest wrapping the cooled cake in plastic wrap. Leave it at room temperature for a few days.
For extra flavor, consider adding:
– Spices: A pinch of ground ginger or allspice gives a warm kick.
– Fruit Zest: Try adding lemon zest for a bright note.
– Liqueurs: A splash of brandy or rum enhances richness.
These tips can help you create a festive and flavorful treat that everyone will love during the holidays!
Pro Tips
- Soak Your Fruits: For an even deeper flavor, soak the mixed dried fruits in orange juice or rum for a few hours or overnight before adding them to the batter.
- Room Temperature Ingredients: Ensure all your wet ingredients, especially eggs and butter, are at room temperature for a smoother batter and better rise.
- Prevent Overbaking: Keep an eye on the cake during the last 10 minutes of baking. If the top starts to brown too much, cover it loosely with aluminum foil.
- Storage for Flavor: Wrap the cooled cake tightly in plastic wrap and store it in a cool, dark place for a few days to enhance the flavors before serving.
Variations of Classic Fruitcake
Alternative Ingredients
You can swap some ingredients to make your fruitcake unique. For instance, if you want fresh flavors, try using fresh fruits. Chopped apples or pears can be great choices. They add moisture and a nice texture.
You can also use different nuts in your fruitcake. Instead of walnuts or pecans, try almonds or hazelnuts. These nuts bring a different crunch and taste. You can mix and match to find what you like best.
Dietary Modifications
If you want gluten-free options, there are simple swaps. Use gluten-free flour instead of all-purpose flour. This keeps the taste while making it safe for those who cannot have gluten.
For vegan variations, replace eggs with flaxseed or chia seeds mixed with water. Use plant-based butter instead of regular butter. Applesauce works well here too, as it adds moisture and sweetness.
Unique Twists
To give your cake a unique flavor, consider adding spices or extracts. Cardamom or ginger can add warmth. You can also use almond or coconut extract for a new twist.
Adding liqueurs or alcohol can enhance the flavor even more. Rum or brandy can add depth to your fruitcake. Just a splash will do the trick. The cake will be festive and flavorful, perfect for the holiday season.
Storage Information
Best Storage Practices
To keep your fruitcake fresh, store it in a cool, dry place. Wrap it tightly in plastic wrap or foil. This keeps moisture in and prevents it from drying out. You can also place it in an airtight container for added protection.
– Avoid direct sunlight and heat, which can spoil the cake.
– Check it weekly for any signs of mold or spoilage.
Freezing Instructions
If you want to save your fruitcake for later, freezing works well. Here are the steps:
1. Wrap the Cake: Once the cake is completely cool, wrap it tightly in plastic wrap.
2. Add a Layer: For extra protection, wrap it again in aluminum foil.
3. Label the Bag: Write the date on the wrapping. This helps you remember when you froze it.
For thawing, take the cake out of the freezer and leave it at room temperature. This keeps the texture and taste. It’s best to eat it within a few months for optimal flavor.
– Do not refreeze once thawed; this can change the cake’s texture.
FAQs
Common Questions
How long does homemade fruitcake last?
Homemade fruitcake can last for several weeks. If stored properly, it can last up to three months. Wrap it tightly in plastic wrap and keep it in a cool, dark place. For even longer storage, consider freezing it.
Can I make fruitcake ahead of time?
Yes, making fruitcake ahead of time is a great idea! In fact, it often tastes better after resting. You can prepare it a few weeks before Christmas. Just wrap it well and let the flavors blend.
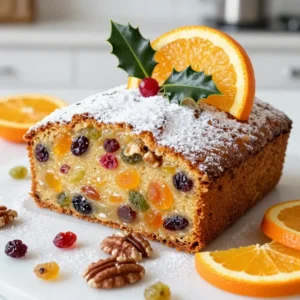
What is the best way to serve fruitcake?
Serve fruitcake in thin slices. It tastes great on its own or with a dollop of whipped cream. For a festive touch, add fresh orange slices or a sprinkle of powdered sugar.
Buying Options
Best places to buy classic Christmas fruitcakes
You can find classic Christmas fruitcakes at local bakeries, specialty shops, and online. Farmers’ markets often have unique options too. Don’t forget to check out gourmet grocery stores.
Recommendations for buying high-quality fruitcake
Look for fruitcakes made with real fruit and nuts. Check the ingredient list for natural items, avoiding those with artificial flavors. A good fruitcake should have a rich aroma and a moist texture.
This blog post covered how to make a delicious fruitcake. We discussed the key ingredients, from dried fruits to nuts, and core elements like applesauce and eggs. The step-by-step guide helped you prepare, mix, and bake your cake. Tips for even baking and unique variations added extra flavor. Remember to store your fruitcake properly for the best taste. With these methods, baking your next fruitcake will be easy and fun. Enjoy sharing your tasty creation with friends and famil
Christmas Cheer Fruitcake
Ingredients
- 2 cups mixed dried fruits (raisin, currants, chopped apricots, and cranberries)
- 1 cup walnuts, chopped
- 1 cup pecans, chopped
- 1 cup unsweetened applesauce
- 1 cup fresh orange juice
- 0.5 cup packed brown sugar
- 0.5 cup granulated sugar
- 0.5 cup unsalted butter, softened to room temperature
- 3 large eggs, at room temperature
- 2 cups all-purpose flour
- 1 teaspoon baking powder
- 1 teaspoon ground cinnamon
- 0.5 teaspoon ground nutmeg
- 0.25 teaspoon ground cloves
- 1 teaspoon pure vanilla extract
- 0.5 teaspoon salt
- 1 unit zest of 1 orange
Instructions
- Preheat the Oven: Start by heating your oven to 325°F (160°C). Prepare a 9-inch (23 cm) round cake pan by greasing it and lining the bottom with parchment paper to prevent sticking.
- Cream the Butters and Sugars: In a large mixing bowl, combine the softened unsalted butter, packed brown sugar, and granulated sugar. Use a hand mixer or stand mixer to cream these together until the mixture becomes light and fluffy, which should take about 3-4 minutes.
- Incorporate Eggs and Applesauce: Add the large eggs to the creamed mixture one at a time, ensuring you mix well after each addition. Then, stir in the unsweetened applesauce and pure vanilla extract until thoroughly combined.
- Mix Dry Ingredients: In a separate bowl, whisk together the all-purpose flour, baking powder, salt, ground cinnamon, ground nutmeg, and ground cloves. This will even out the spices and ensure a consistent flavor throughout the cake.
- Combine Wet and Dry Mixtures: Gradually fold the flour mixture into the wet mixture using a spatula, mixing just until combined – don’t overmix!
- Add Fruits and Nuts: Gently fold in the mixed dried fruits, chopped walnuts, chopped pecans, fresh orange juice, and orange zest until everything is evenly incorporated into the batter.
- Prepare for Baking: Pour the completed batter into the prepared cake pan, spreading it evenly with a spatula for a smooth top.
- Bake: Place the pan in your preheated oven and bake for approximately 60-70 minutes. To test for doneness, insert a toothpick into the center of the cake; it should come out clean or with a few moist crumbs attached.
- Cool the Cake: Once baked, take the cake out of the oven and allow it to cool in the pan for about 10 minutes. Afterward, carefully transfer it to a wire rack to cool completely.
- Flavor Enhancement (Optional): For enhanced flavor, once the cake is completely cool, wrap it tightly in plastic wrap and let it rest for a few days at room temperature before serving. This will allow the wonderful flavors to meld beautifully.
![- 1 cup pumpkin puree - 1/2 cup unsalted butter, softened - 1 cup brown sugar and 1/2 cup granulated sugar These ingredients form the base of your chewy pumpkin spice cookies. Pumpkin puree provides moisture and flavor. Softened butter helps create that melt-in-your-mouth texture. Mixing brown and granulated sugar gives sweetness and a lovely depth. - 1/2 cup chocolate chips - 1/2 cup chopped pecans or walnuts If you want to elevate your cookies, consider adding chocolate chips. They bring a rich sweetness that pairs well with pumpkin spice. Chopped pecans or walnuts add a nice crunch and nutty flavor. Feel free to mix and match based on your taste. - 2 cups all-purpose flour - 1 teaspoon baking soda, baking powder, pumpkin spice, and sea salt All-purpose flour is your main structure builder. Baking soda and baking powder help the cookies rise and stay soft. Pumpkin spice adds warmth and that classic fall flavor. Sea salt enhances the sweetness and balances the spices. For the full recipe, check out the details above. Each ingredient plays a key role in creating these irresistibly soft treats! - Preheat your oven to 350°F (175°C). This step ensures even baking. - Line a baking sheet with parchment paper. This helps the cookies not stick. - In a large bowl, cream together softened butter and both sugars. - Use an electric mixer for the best results. Mix until light and fluffy. - Next, add the pumpkin puree, egg, and vanilla extract. - Beat well until everything is smooth and combined. - In a separate bowl, whisk together the flour, baking soda, baking powder, pumpkin spice, and salt. - Gradually add this dry mix to the wet ingredients. Stir gently and avoid overmixing. - Use a tablespoon or cookie scoop to portion the dough onto the lined baking sheet. - Leave enough space between each cookie to allow for spreading. - Bake in the preheated oven for 10-12 minutes. The edges should be golden brown. - The centers might look a bit soft but will set as they cool. For the full recipe, refer to the earlier sections. Enjoy the process! To make your cookies chewy, do not overmix the dough. Mix just until the flour disappears. Overmixing makes cookies tough. The right baking time and temperature are key. Bake at 350°F (175°C) for 10-12 minutes. Watch for golden edges and soft centers. They will harden as they cool. You can use homemade pumpkin puree or canned. Homemade puree adds a fresh taste. Canned options are quick and easy. Also, try different spices. While pumpkin spice is great, adding a pinch of cardamom or allspice can elevate the flavor. Experiment until you find your favorite blend. For a stunning display, stack your cookies on a rustic platter. This adds charm to your table. To make them look even nicer, dust with powdered sugar. Add some cinnamon sticks beside the cookies for a cozy touch. These small details impress guests and enhance enjoyment. For the full recipe, check the complete instructions above. {{image_4}} You can make fun swaps for your chewy pumpkin spice cookies. One easy change is to use coconut oil instead of butter. This makes the cookies dairy-free and adds a light coconut flavor. If you want a vegan option, replace the egg with flax eggs. To make a flax egg, mix one tablespoon of ground flaxseed with three tablespoons of water. Let it sit for five minutes to thicken. This keeps your cookies soft and chewy, just like the original recipe. Want to add more flavor? Try adding dried fruits like cranberries or raisins. They bring a sweet chewiness that pairs well with pumpkin spice. For a fresh twist, you can also add a hint of citrus zest. A little orange or lemon zest brightens the cookies and gives them a fun taste. These small changes can make your cookies stand out during the fall season. Frosting can take your cookies to another level. Cream cheese frosting pairs perfectly with the warm spices in these cookies. To make it, mix cream cheese with powdered sugar and a splash of vanilla. If you want something lighter, consider a simple glaze. Just mix powdered sugar with a bit of milk until smooth. Drizzle it over the cookies for added sweetness. These frosting options make each bite even more delightful. To keep your chewy pumpkin spice cookies fresh, use an airtight container. This helps lock in moisture. Store them at room temperature, away from sunlight. A cool, dry place works best. To maintain their soft and chewy texture, place a slice of bread in the container. The cookies absorb moisture from the bread, keeping them soft. You can also wrap each cookie in plastic wrap for extra protection. Freezing cookies is easy and a great way to save them for later. First, let the cookies cool completely. Then, arrange them in a single layer on a baking sheet. Freeze them for about one hour. This step prevents them from sticking together. After freezing, transfer the cookies to a freezer-safe bag. Remove as much air as possible before sealing. They can last for up to three months in the freezer. When you're ready to eat them, thaw cookies at room temperature. For a warm treat, pop them in the microwave for about 10-15 seconds. Chewy pumpkin spice cookies last about a week at room temperature. Store them in an airtight container to keep them fresh. Look out for signs of spoilage. If they become hard or dry, they may be past their prime. Also, check for any off smells or mold. If you see or smell anything unusual, it’s best to throw them away. These tips will help you enjoy your chewy pumpkin spice cookies even longer! For the full recipe, check out the [Full Recipe]. You can use pumpkin pie filling, but it is not the same. Pumpkin puree is pure pumpkin with no added sugar or spices. Pumpkin pie filling has sugar and spices mixed in. If you use it, cut back on the sugar in your recipe. It may make your cookies sweeter than you want. To reduce sweetness, cut down on the sugar. You can use 3/4 cup of brown sugar instead of 1 cup. You can also skip the granulated sugar. Another option is to add more pumpkin puree. This can balance the sweetness while keeping the texture. To reheat your cookies, use the oven for the best results. Preheat your oven to 350°F (175°C). Place the cookies on a baking sheet. Heat them for about 5 minutes. This keeps them soft and chewy. You can also use the microwave. Heat them for 10-15 seconds. This works, but they may not be as chewy. Enjoy your chewy pumpkin spice cookies warm! These chewy pumpkin spice cookies are simple to make with the right ingredients. Start with pumpkin puree, butter, and sugars for the best taste. Follow the steps to create a delightful treat and use my tips for the perfect chewy texture. Experiment with flavors to make your cookies unique. Store them well to keep that freshness. Enjoy sharing these cookies, as they are sure to impress!](https://fastmealmate.com/wp-content/uploads/2025/07/8de16806-55b5-45ec-964c-13b68a3ec1a0-768x768.webp)


. - Set temperature to 325°F (160°C) - Prepare a 9-inch springform pan Start by preheating your oven to 325°F (160°C). This will ensure that your carrot cake cheesecake bakes evenly. Next, grab a 9-inch springform pan. Grease it well and line the bottom with parchment paper. This will help the cheesecake come out easily after baking. - Mix dry ingredients and combine with wet ingredients - Fold in grated carrots, walnuts, and crushed pineapple In a medium bowl, mix the dry ingredients. You need flour, baking powder, baking soda, cinnamon, nutmeg, and salt. In a large bowl, whisk together the sugars, vegetable oil, eggs, and vanilla extract. Once it is smooth, slowly add the dry mix to the wet mix. Stir gently until just combined. Now, fold in the grated carrots, walnuts, and crushed pineapple. This gives your cake great texture and flavor. - Pour batter into the springform pan - Bake for 25-30 minutes until a toothpick comes out clean Pour the carrot cake batter into the prepared springform pan. Bake for 25-30 minutes. To check if it's done, insert a toothpick into the center. If it comes out clean, it's ready. Let the carrot layer cool in the pan on a wire rack. - Beat the cream cheese until smooth - Gradually add sugar and eggs while mixing In a large bowl, beat the softened cream cheese with an electric mixer on medium speed. Keep mixing until it's smooth. Gradually add in the sugar. Then, add the eggs one at a time, mixing on low speed after each one. Finally, mix in the vanilla extract, lemon juice, and sour cream. Your cheesecake batter should be creamy and well blended. - Pour cheesecake batter over the cooled carrot layer - Smooth the surface with a spatula Once the carrot layer is cool, pour the cheesecake batter over it. Use a spatula to spread it out evenly. This will create a nice, smooth top for your cake. - Bake for 45-50 minutes or until center slightly jiggles - Cool gradually in the oven Put the cake back in the oven. Bake for 45-50 minutes. The center should jiggle slightly when done. After baking, turn off the oven and crack the door open. This helps the cheesecake cool slowly, reducing the chance of cracks. - Chill in the refrigerator for at least 4 hours - Top with walnuts and shredded coconut before serving After an hour, take the cheesecake out and place it in the fridge. Chill for at least 4 hours, or overnight for the best taste. Before serving, sprinkle the top with walnuts and shredded coconut for extra flavor and crunch. Enjoy your delicious creation! For the full recipe, check the details above. - Use room temperature ingredients for better mixing. This helps all the flavors blend well. - Avoid overmixing the cheesecake batter to prevent cracks. Mix until just smooth for a perfect texture. - Serve with whipped cream or a scoop of vanilla ice cream. This adds a creamy touch to each bite. - Garnish with fresh carrots or edible flowers for decoration. This makes the dish look extra special and fun. - A springform pan is great for easy removal. It helps keep your cheesecake intact when serving. - An electric mixer ensures a smooth cheesecake batter. This saves time and effort, making mixing a breeze. {{image_4}} You can change the flavor of your carrot cake cheesecake. Try adding raisins or shredded coconut to the carrot layer. Both add sweetness and texture. You can also mix in spices like cardamom for a warm, spicy kick. This makes each bite more exciting. If you want a lighter version, use whole wheat flour instead of all-purpose flour. This swap adds fiber and nutrients. You can also replace sour cream with Greek yogurt. It gives creaminess with less fat. For a gluten-free option, use a gluten-free flour blend. This way, everyone can enjoy your cheesecake. If you need a vegan version, use dairy-free cream cheese. It works just as well in the cheesecake layer. These variations allow you to make this dessert fit your taste and dietary needs. Feel free to explore and enjoy the process! For the complete recipe, check the Full Recipe section. Store your carrot cake cheesecake in the refrigerator for up to 5 days. To keep it fresh, cover it tightly with plastic wrap or foil. This will help prevent it from drying out and absorbing other fridge odors. You can freeze carrot cake cheesecake for up to 2 months. Be sure to wrap it well in plastic wrap and then place it in an airtight container. When you're ready to enjoy it, thaw it in the refrigerator overnight before serving. This cheesecake is best enjoyed chilled. However, if you like it warm, you can briefly heat it in the oven. Just a few minutes at a low temperature will do. This method can enhance its creamy texture, making it even more delightful. The center should slightly jiggle and not look wet when finished. This means it has set properly. You can also check with a toothpick. Insert it into the center; it should come out mostly clean. Yes, it can be prepared a day in advance for optimal flavor. Making it ahead allows the flavors to blend better. Just remember to chill it in the fridge until you’re ready to serve. Slice with a sharp knife and serve chilled, topped as desired. You can add whipped cream or extra nuts for fun. A nice touch is a sprinkle of cinnamon on top. Absolutely! Pecans or almonds can be great substitutes for walnuts. They will add different flavors and textures. You can also skip the nuts if you prefer a nut-free version. This post covered everything you need to make a delicious Carrot Cake Cheesecake. We discussed the ingredients for both layers, how to bake, and tips for the best results. Remember, use room-temperature items and avoid overmixing the cheesecake. Feel free to try variations to fit your taste and dietary needs. This cake is perfect for any occasion and is easy to store. Now, grab your ingredients and impress your family or friends with this treat!](https://fastmealmate.com/wp-content/uploads/2025/06/33af2c91-c02f-4d6c-a85e-840ab017cd6c-768x768.webp)