No-Bake Christmas Cookie Medley Festive Holiday Treat

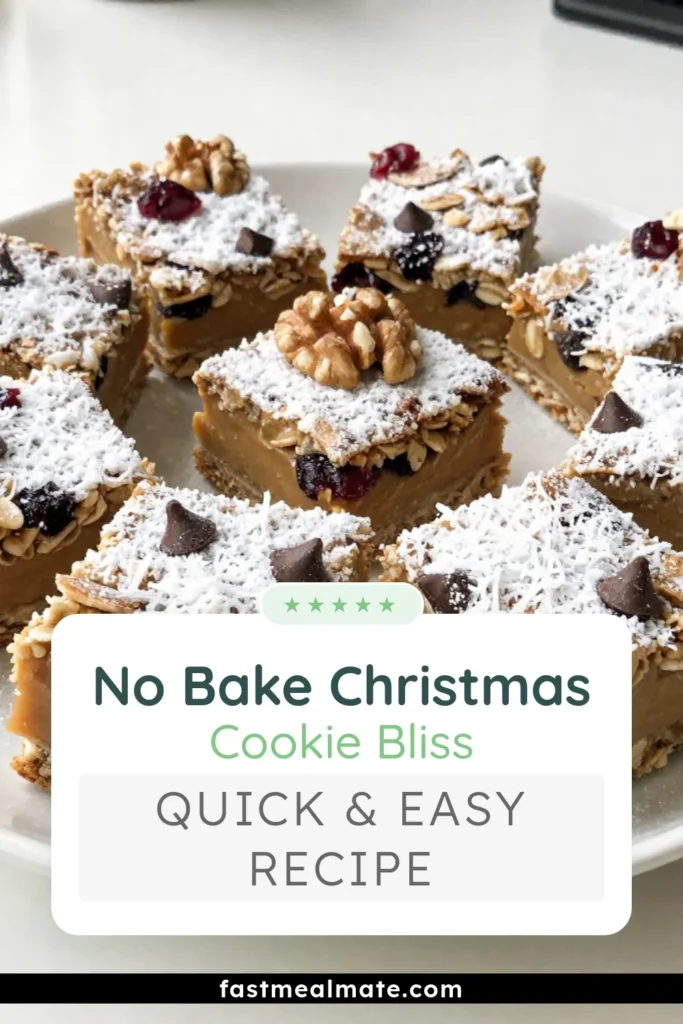
Get ready to delight your taste buds with my No-Bake Christmas Cookie Medley! These simple, festive treats are perfect for busy holiday schedules. You won’t need an oven, and they’re quick to whip up, making them a great project for kids and adults alike. Join me as I share easy steps, ingredient options, and creative variations to customize your cookie medley. Your holiday dessert table will never be the same!
Why I Love This Recipe
- Easy to Make: This no-bake recipe requires minimal prep and no oven, making it perfect for busy holiday schedules.
- Healthy Ingredients: Packed with nutritious oats, nuts, and natural sweeteners, these cookies are a guilt-free treat.
- Customizable: You can easily swap ingredients based on your preferences, whether it’s different nut butters or mix-ins.
- Festive Feel: The combination of cranberries and chocolate adds a holiday touch that’s perfect for sharing with loved ones.
Ingredients
Main Ingredients List
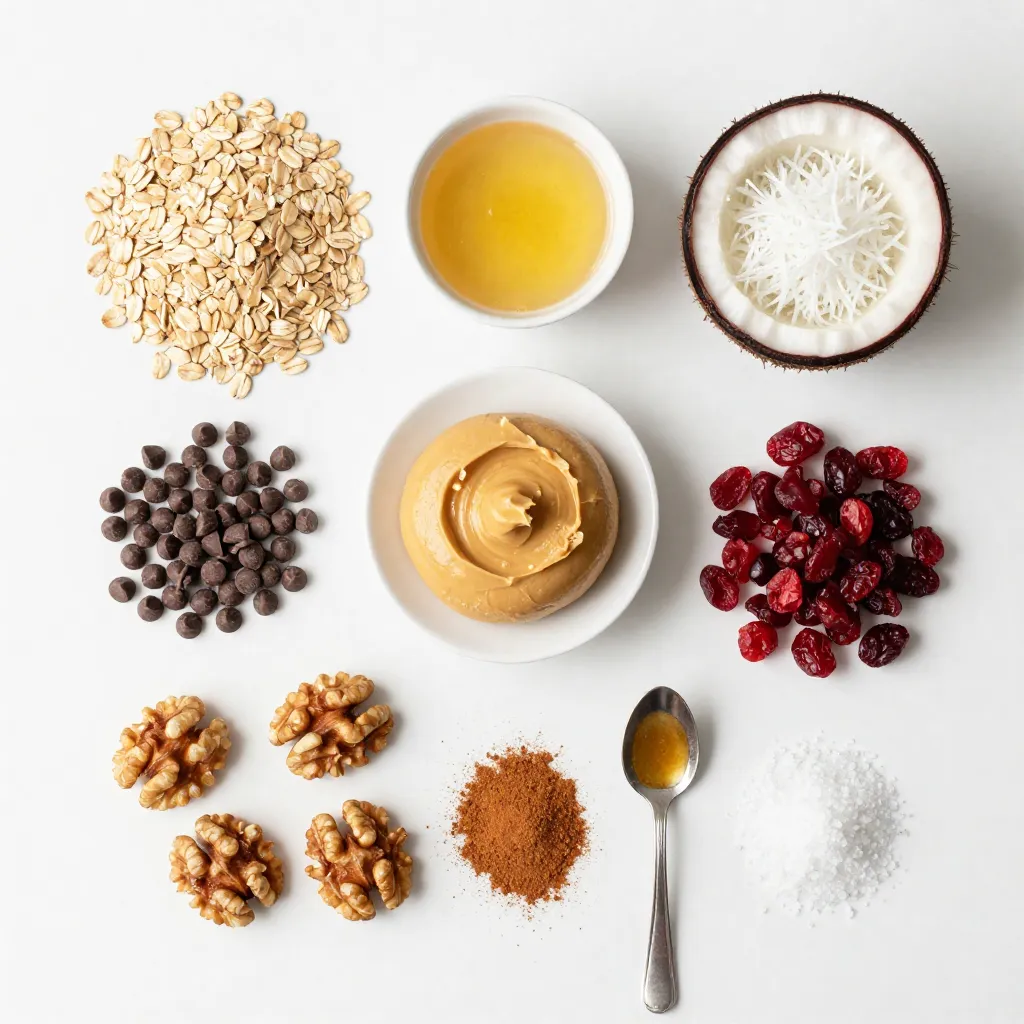
– 1 cup rolled oats
– 1 cup almond butter (or your favorite nut butter)
– 1/2 cup honey or maple syrup
– 1/2 cup unsweetened shredded coconut
– 1/4 cup mini chocolate chips
– 1/4 cup dried cranberries, roughly chopped
– 1/4 cup chopped nuts (such as walnuts or pecans)
– 1 teaspoon pure vanilla extract
– 1/2 teaspoon ground cinnamon
– A pinch of sea salt
These ingredients create a tasty mix. The oats give it texture. Nut butter adds creaminess and protein. Honey or maple syrup acts as a sweetener and binder. Shredded coconut brings flavor and chewiness. Mini chocolate chips add fun and sweetness. Dried cranberries offer a fruity bite. Chopped nuts add crunch. Vanilla extract and cinnamon enhance the overall taste. The sea salt balances all the flavors.
Optional Ingredients for Customization
You can switch up the recipe to make it your own. Here are some ideas:
– Use peanut butter or cashew butter instead of almond butter.
– Swap honey for agave syrup for a vegan option.
– Add dried fruits like raisins or apricots for more flavor.
– Mix in seeds like chia or flax for added nutrition.
– Try different types of chocolate, like white or dark.
These options let you play with flavors and textures. Feel free to get creative!
Recommended Substitutions for Dietary Needs
If you have dietary needs, here are some easy swaps:
– For gluten-free, make sure to use certified gluten-free oats.
– For nut-free, use sunflower seed butter instead of nut butter.
– If you want a lower sugar option, use a sugar substitute like stevia.
These substitutions help everyone enjoy the cookie medley. Just remember to adjust cooking times if needed. Enjoy making this festive treat!
Step-by-Step Instructions
Mixing the Base Ingredients
First, grab a big mixing bowl. Add 1 cup of rolled oats, 1 cup of almond butter, and 1/2 cup of honey or maple syrup. Use a sturdy spoon to stir these three ingredients together. Keep stirring until the mixture clumps together. Make sure everything is well mixed. This is the base for your cookie medley.
Incorporating Add-Ins
Now it’s time to make it fun! Add 1/2 cup of unsweetened shredded coconut, 1/4 cup of mini chocolate chips, 1/4 cup of chopped dried cranberries, and 1/4 cup of chopped nuts. Don’t forget to drizzle in 1 teaspoon of pure vanilla extract, sprinkle in 1/2 teaspoon of ground cinnamon, and add a pinch of sea salt. Mix everything well. You want to see all the yummy bits spread out evenly.
Packing and Chilling the Cookie Medley
Next, prepare an 8×8-inch baking dish. Line it with parchment paper, leaving some paper hanging over the edges. This will help you lift the cookies out later. Spoon the cookie mixture into your dish. Use a spatula or your hands to press it down firmly. Make it nice and compact. Cover the dish with plastic wrap or a lid. Place it in the fridge for at least 2 hours. This helps the cookies set up. After chilling, lift the cookie medley out using the parchment paper. Cut it into squares or bars. For a festive touch, drizzle some melted dark chocolate over the top before serving!
Tips & Tricks
Best Practices for Binding Ingredients
To make your no-bake cookies stick, use the right amount of nut butter. I recommend one cup of almond butter or your favorite nut butter. Honey or maple syrup also helps bind the mix. Use half a cup for best results. Be sure to mix these ingredients well. This ensures everything combines evenly and holds together.
How to Achieve Perfect Texture
Texture is key for no-bake cookies. You want them chewy but firm. Start with one cup of rolled oats for a great base. Adding shredded coconut gives a nice chewiness, too. For a bit of crunch, include chopped nuts. I like walnuts or pecans. Mix everything until it feels sticky. If it’s too crumbly, add a little more nut butter.
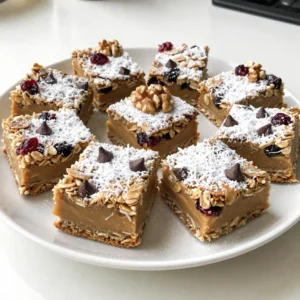
Presentation and Decoration Tips
Presentation makes a big difference. After cutting your cookie medley into squares, place them on a pretty platter. For a festive touch, sprinkle some powdered sugar on top. You can also add extra dried cranberries for color. Drizzling melted dark chocolate over the squares adds a tasty flair. Enjoy your beautiful holiday treat!
Pro Tips
- Use Different Nut Butters: Experiment with various nut butters like cashew or peanut for unique flavors.
- Customize Your Mix-ins: Feel free to swap in your favorite dried fruits, seeds, or spices to match your taste preferences.
- Storage Tips: Keep the cookie squares in an airtight container in the refrigerator for up to a week for optimal freshness.
- Chocolate Drizzle Variations: Try white chocolate or flavored chocolate for an exciting twist on the traditional dark chocolate drizzle.
Variations
Seasonal Flavor Variations
You can change the flavors of your no-bake Christmas cookie medley. Add pumpkin spice for fall vibes or peppermint extract for a winter twist. Use dried fruits like apricots or figs for a unique taste. You can even try adding orange zest for a citrusy kick. These small changes make your cookies feel festive and fresh.
Alternative Dietary Versions (Vegan, Gluten-Free, etc.)
Want a vegan version? Swap honey for maple syrup. Use a nut butter that is vegan-friendly, like almond or cashew butter. For gluten-free cookies, make sure your oats are labeled gluten-free. You can enjoy these treats without worry, making them great for everyone at your holiday table.
Creative Add-Ins and Toppings
Get creative with add-ins! Try adding chia seeds or flaxseeds for extra nutrition. You can also mix in dark chocolate chunks or white chocolate chips for a sweet surprise. For toppings, consider melting white chocolate or drizzling caramel over your squares. These fun ideas can make your no-bake cookies more exciting and delicious!
Storage Info
How to Store No-Bake Cookies
To store your no-bake cookies, place them in an airtight container. You can layer the squares with parchment paper to prevent sticking. Keep them in the fridge for the best taste and texture. They will stay fresh and firm this way.
Freezing Instructions for Longer Storage
If you want to save some for later, freezing works great. Wrap each cookie square in plastic wrap. Place them in a freezer-safe bag or container. They can last for up to three months in the freezer. Just thaw them in the fridge before you enjoy them.
Shelf Life of the Cookie Medley
These no-bake cookies are perfect for sharing and gifting. In the fridge, they last about a week. If you have any left after a week, check for any signs of spoilage. If stored properly, they maintain their taste and texture for quite some time.
FAQs
Can I use different nut butters?
Yes, you can use different nut butters. Almond butter is great, but peanut butter works well too. Cashew butter adds a nice flavor. Choose your favorite nut butter to make it your own.
How long do no-bake cookies last?
No-bake cookies last about one week in the fridge. Store them in an airtight container to keep them fresh. If you freeze them, they can last up to three months.
What can I substitute for honey or maple syrup?
You can use agave syrup or brown rice syrup instead of honey or maple syrup. These options add sweetness and keep the cookies moist. You can also try using date syrup for a unique flavor.
Can I make these cookies ahead of time?
Yes, you can make these cookies ahead of time. Prepare them a few days in advance and store them in the fridge. They taste great after chilling, so they are perfect for holiday planning.
This blog post covered how to make no-bake cookies with ease. You learned about key ingredients, step-by-step mixing, and tips for great texture and looks. We also explored fun variations for all diets and how to store your cookies.
No-bake cookies are simple and fun to make. You can personalize them in many ways. Enjoy sharing your cookie medley with friends and family for smiles and satisfied taste bud
No-Bake Christmas Cookie Medley
Ingredients
- 1 cup rolled oats
- 1 cup almond butter (or your favorite nut butter)
- 1/2 cup honey or maple syrup
- 1/2 cup unsweetened shredded coconut
- 1/4 cup mini chocolate chips
- 1/4 cup dried cranberries, roughly chopped
- 1/4 cup chopped nuts (such as walnuts or pecans)
- 1 teaspoon pure vanilla extract
- 1/2 teaspoon ground cinnamon
- a pinch sea salt
Instructions
- In a spacious mixing bowl, combine the rolled oats, almond butter, and honey (or maple syrup). Stir these ingredients vigorously until they blend together fully, and you notice the mixture starting to clump.
- Next, add the shredded coconut, mini chocolate chips, chopped cranberries, and chopped nuts to the mixture. Drizzle in the vanilla extract, sprinkle in the cinnamon, and add a pinch of sea salt. Mix everything thoroughly to ensure an even distribution of all ingredients.
- Prepare an 8x8-inch baking dish by lining it with parchment paper, ensuring that there’s some overhang on the edges for easy removal later.
- Spoon the cookie mixture into the lined baking dish. Using a spatula or your hands, firmly press the mixture down to pack it evenly. Make sure it’s compact to help it hold together once set.
- Cover the baking dish with plastic wrap or a lid, and refrigerate the mixture for a minimum of 2 hours, allowing it to firm up nicely.
- After chilling, carefully lift the cookie medley out of the dish using the parchment paper overhang. Transfer it to a cutting board and slice it into squares or bars, based on your preference.
- For an additional festive flair, melt some dark chocolate and drizzle it over the top of the squares before serving.
![To make honey garlic chicken breasts, gather these items: - 4 boneless, skinless chicken breasts - 1/3 cup honey - 1/4 cup low-sodium soy sauce - 4 cloves garlic, finely minced - 1 tablespoon fresh ginger, grated - 1 tablespoon olive oil (for cooking) - 1 teaspoon sesame oil - 1 teaspoon apple cider vinegar - Salt and freshly cracked black pepper, to taste - Chopped green onions (for garnish) - Sesame seeds (for garnish) If you want to switch things up, you can make some simple changes: - Use chicken thighs instead of breasts for more flavor and tenderness. - Swap honey for maple syrup for a different sweet taste. - Choose coconut aminos instead of soy sauce for a gluten-free option. - Replace fresh ginger with powdered ginger in a pinch. - Use canola oil instead of olive oil for frying. Measuring helps your dish taste just right. Here are some tips: - Use a liquid measuring cup for honey and soy sauce. Pour slowly for accuracy. - Use a dry measuring cup for solid ingredients like ginger and garlic. - Level off dry ingredients with a straight edge for a perfect measure. - For sticky ingredients like honey, spray the measuring cup with cooking oil first. This makes it easier to pour out. Get ready for a flavorful dinner delight with these simple ingredients! For the full recipe, check the details above. To start, gather all your ingredients. You need four boneless, skinless chicken breasts, honey, soy sauce, garlic, ginger, olive oil, sesame oil, apple cider vinegar, salt, and pepper. Chop the garlic and grate the ginger. In a medium bowl, mix the honey, soy sauce, garlic, ginger, olive oil, sesame oil, and apple cider vinegar. Whisk the mixture until it is smooth and well combined. Pat the chicken dry with paper towels. Season both sides with salt and freshly cracked black pepper. This step adds flavor to the chicken. Heat a drizzle of olive oil in a large skillet over medium-high heat. Once the oil is hot and shimmering, place the seasoned chicken breasts in the skillet. Cook each side for about 5-7 minutes. You want a rich, golden-brown crust. Use a meat thermometer to check if the chicken has reached 165°F (75°C). When the chicken is golden, pour the honey garlic sauce over the top. Reduce the heat to medium-low and cover the skillet. Let it simmer for 10-15 minutes. This allows the sauce to thicken and flavor the chicken. To check if your chicken is done, use a meat thermometer. Insert it into the thickest part of the chicken. It should read 165°F (75°C). If you don’t have a thermometer, you can cut into the chicken. The juices should run clear, not pink. Make sure to check all pieces, as they can cook unevenly. After cooking, let the chicken rest for a few minutes before serving. This helps keep it juicy. For a great presentation, drizzle extra sauce on top and garnish with green onions and sesame seeds. Enjoy this flavorful dinner delight from the Full Recipe! To make your honey garlic chicken truly shine, use fresh ingredients. Fresh garlic and ginger pack a punch and enhance the dish's flavor. If you want more depth, let the chicken marinate. A 30-minute soak in the sauce will increase flavor. You can also add a splash of lime juice to brighten the taste. Remember, balance is key! Use salt to enhance sweetness and acidity to cut through richness. Cooking chicken breasts can be tricky. To keep them juicy, avoid overcooking. Use a meat thermometer to check for an internal temperature of 165°F (75°C). Start on high heat to get a nice crust, then lower the heat. This helps the inside cook without drying out. Covering the skillet while simmering allows the chicken to absorb sauce flavors. Here are some tools that can help you cook like a pro: - Large skillet - Meat thermometer - Whisk for mixing - Cutting board - Sharp knife for slicing These tools make cooking smoother and more enjoyable. Having the right equipment allows you to focus on creating a delicious meal. For the full recipe, check out the details above! {{image_4}} You can add more colors and flavors to your honey garlic chicken. Try mixing in vegetables like bell peppers, broccoli, or snap peas. Cut them into bite-sized pieces. Add them to the skillet after the chicken has cooked for about 5 minutes. This way, the veggies soak up the sauce and stay crisp. It makes the dish healthy and fun. If you like heat, spice up your honey garlic chicken. Add red pepper flakes or chili paste to the sauce. Start with half a teaspoon and adjust to your taste. This spicy kick pairs well with the sweetness of honey. It gives you a nice balance of flavors. You can also use sriracha for a different heat profile. You don’t have to cook the chicken on the stove. Grilling gives it a smoky flavor. Marinate the chicken in the honey garlic sauce for at least one hour. Then, grill it on medium heat for about 6-8 minutes per side. If you prefer baking, preheat your oven to 400°F (200°C). Place the chicken in a baking dish, pour the sauce over it, and bake for 20-25 minutes. This keeps the chicken juicy and full of flavor. For the full recipe, check the [Full Recipe]. After your meal, let the chicken cool down. Place leftovers in an airtight container. This keeps them fresh and tasty. Store the container in the fridge. Honey garlic chicken can last for up to four days. If you plan to eat it later, consider freezing it. To reheat, you have a few options. The best way is to use the oven. Preheat it to 350°F (175°C). Place the chicken in a baking dish and cover it. Heat for about 15-20 minutes. Check that the chicken is hot all the way through. You can also use a microwave. Heat in short bursts, checking often. This keeps the chicken juicy. If you want to freeze the chicken, it’s simple. Wrap each piece tightly in plastic wrap. Then, place them in a freezer bag. Squeeze out as much air as possible. This helps prevent freezer burn. You can freeze the chicken for up to three months. When you’re ready to eat, thaw it overnight in the fridge. Then, reheat using the oven or microwave. This way, you enjoy a delicious meal later. You can serve many sides with honey garlic chicken breasts. Here are some great options: - Steamed rice: This absorbs the sauce well and adds a nice balance. - Sautéed vegetables: Try broccoli, bell peppers, or carrots for color and crunch. - Mashed potatoes: Creamy potatoes enhance the meal and add comfort. - Quinoa: A healthy grain that pairs perfectly with the sauce. - Salad: A fresh green salad can lighten up the meal. These sides complement the flavors of the chicken and make a complete meal. Yes! You can prepare honey garlic chicken breasts ahead of time. Here’s how: - Marinate: You can marinate the chicken in the sauce for up to 24 hours. This adds flavor and tenderizes the meat. - Cook and store: After cooking, let the chicken cool. Store it in an airtight container in the fridge for up to 3 days. - Reheat: When you’re ready to eat, simply reheat in a skillet or microwave. Add a splash of water if the sauce thickens too much. This method saves time and keeps dinner stress-free. You can easily change the sweetness of the honey garlic sauce. Here are some tips: - Add more honey: For a sweeter sauce, increase the honey a bit. - Use less honey: If you prefer less sweetness, reduce the honey. - Try other sweeteners: Maple syrup or agave can be good substitutes. They offer a different flavor while keeping it sweet. - Balance with acid: If it gets too sweet, add a splash of apple cider vinegar for a tangy touch. Adjusting the sweetness helps you tailor the dish to your taste. You learned about the ingredients, steps, and tips for cooking honey garlic chicken. We covered ingredient substitutions, measuring tips, and how to check doneness. I shared best practices for enhancing flavor and cooking juicy chicken. You also saw variations and how to store leftovers properly. Cooking can be simple and fun. Use these tips to make your meals taste great. Enjoy your cooking experience!](https://fastmealmate.com/wp-content/uploads/2025/06/7fed451b-ca95-459f-be21-3e50f3436304-768x768.webp)