Candy Cane Slice-and-Bake Cookies Easy Holiday Treat
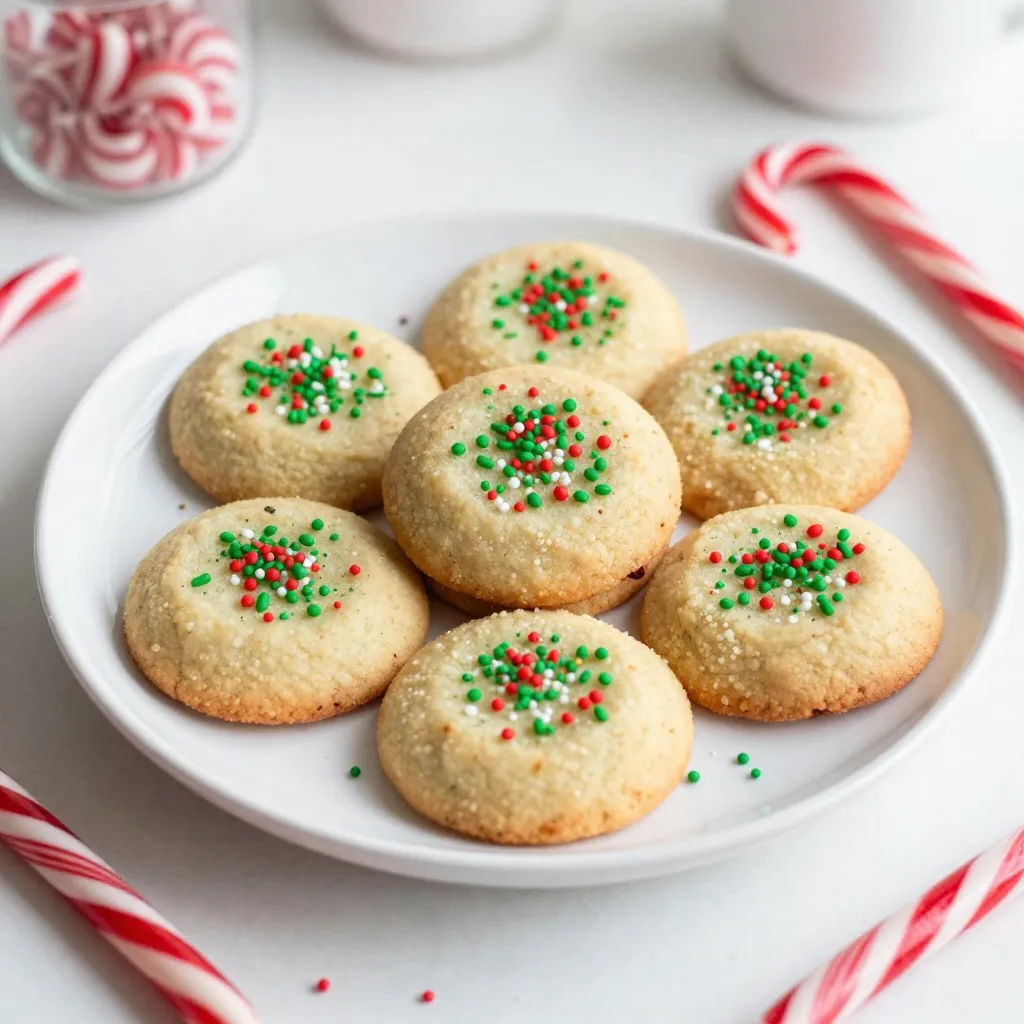

Get ready to spice up your holiday baking with Candy Cane Slice-and-Bake Cookies! These easy treats are festive, fun, and perfect for sharing. You’ll love how simple they are to make, with just a few ingredients and steps. Whether you’re a baking newbie or a seasoned pro, this recipe will help you create delicious cookies that everyone will enjoy. Let’s dive in and make your holiday season extra sweet!
Why I Love This Recipe
- Festive Flavor: The combination of vanilla and peppermint makes these cookies a delightful treat that captures the essence of the holiday season.
- Easy to Make: This slice-and-bake method simplifies the cookie-making process, allowing you to prepare the dough ahead of time and bake when you’re ready.
- Perfect for Gifting: These cookies are not only delicious but also visually appealing, making them an excellent homemade gift during the holiday season.
- Fun for Kids: Involving children in the cookie-making process, from crushing candy canes to decorating, makes this recipe a fun family activity.
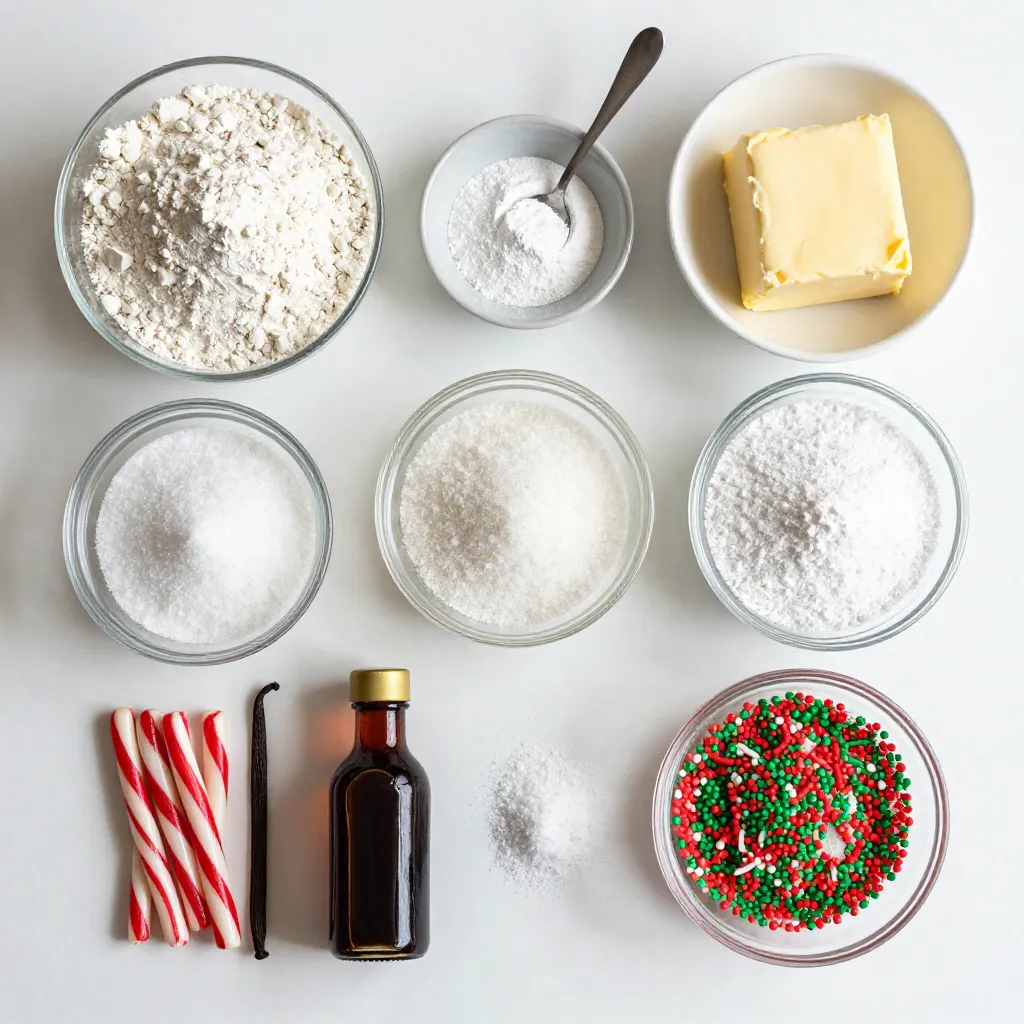
Ingredients
List of Ingredients
– 2 ½ cups all-purpose flour
– 1 teaspoon baking powder
– ½ teaspoon baking soda
– 1 cup unsalted butter, softened
– ¾ cup granulated sugar
– ¾ cup powdered sugar
– 1 teaspoon pure vanilla extract
– 1 teaspoon peppermint extract
– ½ teaspoon salt
– 1 cup crushed candy canes (about 4-5 mini candy canes)
– Red and green sprinkles (for decoration)
Measurement Details
Using the right measurements is key. I use dry measuring cups for flour and sugar. For sticky ingredients like butter, I pack them into the cup. A kitchen scale can help with accuracy too. It’s best to measure flour by scooping lightly and leveling off with a knife. This prevents dense cookies. When crushing candy canes, place them in a bag and gently smash them with a rolling pin. This gives a nice texture and flavor.
Tips for Selecting Quality Ingredients
Always choose fresh ingredients for the best taste. Look for flour that is not expired and has a fine texture. Unsalted butter should be fresh, with a creamy color. For extracts, I prefer pure vanilla and peppermint over imitation for a richer flavor. When picking candy canes, go for ones that are bright and not broken. This ensures your cookies look great and taste even better!
Step-by-Step Instructions
Preparation of Dry Ingredients
Start by gathering your dry ingredients. In a medium bowl, mix these items:
– 2 ½ cups all-purpose flour
– 1 teaspoon baking powder
– ½ teaspoon baking soda
– ½ teaspoon salt
Whisk them together until they blend well. This step is key for a uniform cookie texture. Set the bowl aside for later.
Making the Cookie Batter
Now it’s time to make the batter. In a large mixing bowl, use an electric mixer to combine:
– 1 cup unsalted butter, softened
– ¾ cup granulated sugar
– ¾ cup powdered sugar
Beat these on medium speed for about 2-3 minutes. You want the mix to look light and fluffy. Next, add:
– 1 teaspoon pure vanilla extract
– 1 teaspoon peppermint extract
Mix until the flavors meld. Then, gradually add the dry mixture. Mix gently until just combined. Avoid over-mixing to keep the cookies tender. Finally, fold in:
– 1 cup crushed candy canes
Make sure the candy pieces are spread evenly.
Baking and Cooling Process
After your dough is ready, shape it into two logs, each about 2 inches wide. Wrap these logs tightly in plastic wrap. Chill in the fridge for at least 2 hours until firm.
When you’re ready to bake, preheat your oven to 350°F (175°C). Prepare a baking sheet with parchment paper. Unwrap the chilled logs and slice them into ¼-inch rounds. Place them on the sheet, leaving space between each cookie.
Sprinkle the tops with red and green sprinkles for a festive look. Bake for 10-12 minutes, until the edges are lightly golden. Once done, cool the cookies on the sheet for 5 minutes. Then, move them to a wire rack to cool completely. Enjoy your lovely holiday treats!
Tips & Tricks
Achieving the Perfect Cookie Texture
For the best cookie texture, start with room-temperature butter. This makes it easier to cream with sugars. Beat until light and fluffy; this adds air, making your cookies soft. Avoid over-mixing when you add dry ingredients to keep them tender. Chilling the dough is key too. After shaping, let it sit in the fridge for at least two hours. This helps the cookies hold their shape while baking.
Cookie Dough Handling Tips
When you handle cookie dough, keep your hands clean and dry. If the dough is sticky, lightly dust with flour. Use plastic wrap to shape logs easily. Once wrapped, press gently to form a tight cylinder. If you want perfect slices, ensure the dough is really cold before cutting. A sharp knife works best. Slice slowly to avoid crumbling.
Decoration Ideas for Festive Appeal
To make your cookies festive, use colorful sprinkles. Red and green sprinkles work perfectly for the holidays. After slicing the cookies, sprinkle the tops generously before baking. You can also add more crushed candy canes for a fun touch. For serving, arrange cookies on a lovely plate. Scatter extra crushed candy canes around them. This adds a wintry vibe and makes them look special.
Pro Tips
- Chill the Dough: For best results, ensure the dough is well-chilled before slicing. This helps maintain the shape of the cookies during baking.
- Uniform Slices: Use a sharp knife and slice the dough into even rounds to ensure consistent baking and a uniform appearance.
- Experiment with Flavors: Feel free to mix in different extracts like almond or orange for a twist on the traditional peppermint flavor.
- Storage Tips: Store baked cookies in an airtight container at room temperature for up to a week, or freeze for longer shelf life.
Variations
Alternative Flavorings to Try
You can mix up the flavors of these cookies. Instead of peppermint, try using orange or almond extract. These will give your cookies a unique twist. Want a richer taste? Add a bit of cocoa powder for a chocolate version. You can also mix in some nutmeg or cinnamon for a warm spice flavor. Each option brings a new joy to your holiday baking.
Different Types of Sprinkles and Toppings
Sprinkles add a fun touch to the cookies. You can use colorful nonpareils, or swap for silver or gold sprinkles for an elegant look. If you love chocolate, try adding mini chocolate chips or drizzling melted chocolate on top. Edible glitter can also make these cookies sparkle. Get creative and choose sprinkles that match your festive mood!
Substitutions for Dietary Preferences
If you need to make substitutions, there are options. Use gluten-free flour to make these cookies gluten-free. For a dairy-free version, swap the butter for coconut oil or a dairy-free spread. If you want to cut sugar, try using a sugar substitute like stevia. You can still enjoy these treat cookies no matter your dietary needs!
Storage Info
How to Store Baked Cookies
Store your baked Candy Cane Slice-and-Bake Cookies in an airtight container. This keeps them fresh and soft. You can stack the cookies with parchment paper between layers to prevent sticking. They last up to one week at room temperature. For longer storage, place them in the fridge for up to two weeks.
Freezing Cookie Dough for Later Use
Freezing the cookie dough is a great way to enjoy these treats later. After shaping the dough into logs, wrap each log tightly in plastic wrap. Then, place them in a freezer bag or airtight container. The dough can stay frozen for up to three months. When you’re ready to bake, thaw the logs in the fridge overnight. Then slice and bake as usual.
Best Practices for Keeping Fresh
To keep your cookies fresh, avoid exposing them to air. The airtight container is key. Keep the cookies in a cool, dark place. If you notice any staleness, a slice of bread in the container can help soften them again. Remember, the faster you store them after baking, the fresher they will taste when you enjoy them later!
FAQs
How long do Candy Cane Slice-and-Bake Cookies last?
These cookies stay fresh for about 1 week at room temperature. Store them in an airtight container. For longer storage, place them in the fridge. They can last up to 2 weeks when chilled. You can also freeze them for up to 3 months. Just remember to wrap them well to prevent freezer burn.
Can I use other types of candy for this recipe?
Yes, you can! Feel free to swap out candy canes for other crushed candies. Peppermint chocolate, butterscotch, or even toffee bits work great. Each option adds a unique twist to your cookies. Just make sure the candy is crushed into small pieces for even mixing.
What is the best way to cut slice-and-bake cookies?
To cut the cookies evenly, use a sharp knife. Chill the dough well for a firm texture. When slicing, keep the thickness around ¼ inch. This helps them bake evenly. If the dough is too soft, pop it back into the fridge for a bit. This makes cutting much easier and cleaner.
This blog post covered how to make perfect Candy Cane Slice-and-Bake Cookies. We discussed choosing quality ingredients and the steps to prepare and bake cookies. I shared tips for the right texture, handling dough, and adding fun decorations. You learned about variations and how to store your cookies effectively.
Remember, baking is a fun adventure. Enjoy customizing your cookies to fit your taste and share them with other

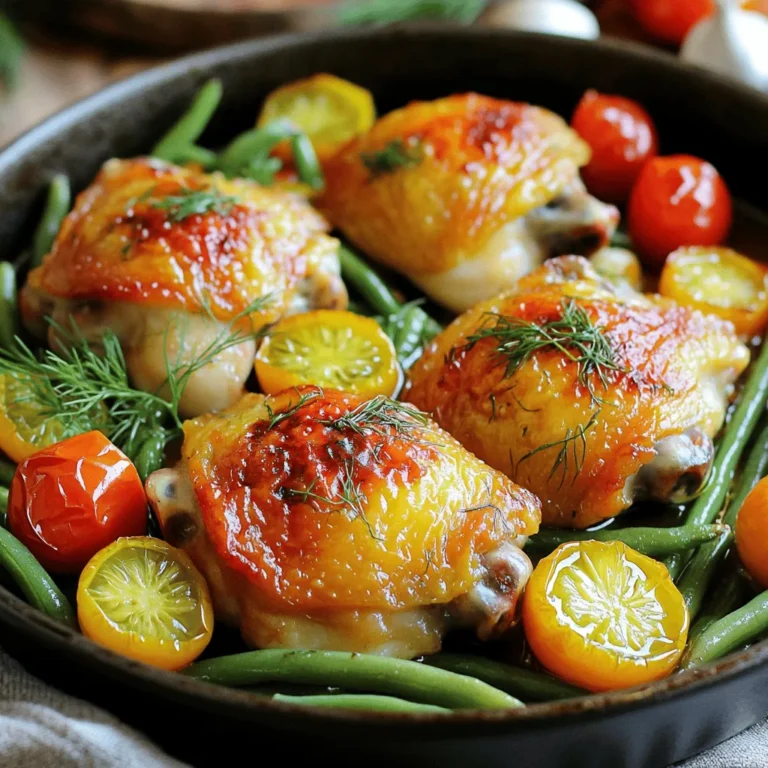
![To make Honey Garlic Chicken, gather these simple ingredients: - 4 boneless, skinless chicken thighs - 1/4 cup honey - 3 tablespoons soy sauce - 4 cloves garlic, finely minced - 1 tablespoon fresh ginger, freshly grated - 1 tablespoon apple cider vinegar - 1 tablespoon sesame oil - Salt and freshly cracked pepper to taste - 2 green onions, thinly sliced (for garnish) - 1 tablespoon sesame seeds (for garnish) You will need a few kitchen tools for this recipe: - Medium mixing bowl - Whisk - Sealable plastic bag or shallow dish - Baking dish - Parchment paper - Small saucepan If you don’t have some items, here are easy swaps: - Chicken thighs can be replaced with chicken breasts for a leaner option. - Maple syrup can replace honey for a vegan choice. - Tamari works in place of soy sauce for a gluten-free meal. - Fresh garlic can swap for garlic powder, but use less. - Rice vinegar can replace apple cider vinegar if needed. For the full recipe, check out the instructions above! First, gather your ingredients. You will need honey, soy sauce, garlic, ginger, apple cider vinegar, and sesame oil. In a medium bowl, mix the honey, soy sauce, minced garlic, grated ginger, apple cider vinegar, and sesame oil. Whisk these items until they blend well. This creates a tasty marinade that adds flavor to your chicken. Next, take the chicken thighs and pat them dry with paper towels. This step helps the marinade stick better. Season the chicken with salt and freshly cracked pepper. Place the seasoned chicken in a sealable bag or shallow dish. Pour the marinade over the chicken. Make sure each piece is well coated. Seal the bag or cover the dish, then place it in the fridge. Let it marinate for at least 30 minutes or up to 2 hours. This helps the chicken soak up all those great flavors. Now, preheat your oven to 375°F (190°C). Line a baking dish with parchment paper. This makes cleanup easy. After marinating, remove the chicken from the marinade and set the excess marinade aside. Arrange the chicken in a single layer in the baking dish. Bake for about 25-30 minutes. The chicken is done when its internal temperature reaches 165°F (75°C) and has a lovely golden color. While the chicken bakes, pour the reserved marinade into a small saucepan. Bring it to a boil over medium heat. Then, reduce the heat to low and let it simmer for about 5 minutes. This thickens the sauce and boosts the flavor. Once the chicken is cooked, take it out of the oven and brush the thickened marinade over each piece. This adds extra flavor and a shiny look. Garnish the chicken with thinly sliced green onions and a sprinkle of sesame seeds. These add a nice crunch and make the dish look pretty. You can find the full recipe above to guide you through the whole process. Enjoy your Honey Garlic Chicken! To cook chicken just right, choose thighs instead of breasts. Thighs stay moist during cooking. Always pat the chicken dry before seasoning. This step helps the marinade stick better. Use a meat thermometer to check the temperature. Aim for 165°F (75°C) for safe eating. Let the chicken rest for a few minutes after cooking. This helps keep it juicy. You can boost the flavor of your honey garlic chicken easily. Add a splash of lime juice for a zesty kick. Fresh herbs, like cilantro or basil, work well too. For a bit of heat, include red pepper flakes or chili paste. If you want a deeper taste, use dark soy sauce instead of light. Don’t skip the reserved marinade; brush it on after cooking for extra flavor. Serve honey garlic chicken over rice for a hearty meal. Steamed vegetables add color and nutrition. You can also pair it with a fresh salad. For a fun twist, serve it in lettuce wraps. This adds crunch and freshness. Garnish with green onions and sesame seeds for a beautiful touch. Enjoy your delicious creation! Check out the Full Recipe for more details. {{image_4}} You can turn Honey Garlic Chicken into a stir-fry. Start by cutting the chicken into bite-sized pieces. Use a hot pan with a bit of oil. Cook the chicken until it is golden. Add your favorite vegetables, like bell peppers and broccoli. Pour in the honey garlic sauce. Stir until everything is coated and tender. Serve it over rice or noodles for a quick meal. Grilling adds a smoky flavor to Honey Garlic Chicken. Marinate the chicken thighs as usual. Preheat your grill to medium-high heat. Place the chicken on the grill and cook for about 6-7 minutes on each side. Brush with the marinade while grilling. This gives a nice glaze. Check the chicken's doneness with a meat thermometer. It should reach 165°F (75°C). Enjoy with a fresh salad or grilled veggies. For a one-pan meal, add vegetables to your baking dish. Use carrots, zucchini, or snap peas. Toss them with a little oil, salt, and pepper. Arrange them around the chicken in the dish. Bake as directed in the recipe. The veggies soak up the sauce and cook perfectly. This way, you get a full meal in one go. You can find the full recipe here: [Full Recipe]. To keep your Honey Garlic Chicken fresh, place leftovers in an airtight container. Make sure the chicken cools down first. Store it in the fridge for up to three days. This way, you can enjoy it later without losing flavor. When you're ready to eat your leftovers, preheat your oven to 350°F (175°C). Place the chicken in a baking dish, cover it with foil, and heat for about 15-20 minutes. This keeps the chicken moist. You can also use a microwave, heating in short bursts of 30 seconds. Stir between intervals to ensure even heating. If you want to save some for later, you can freeze the chicken. First, let it cool down completely. Then, wrap it tightly in plastic wrap or place it in a freezer-safe bag. Remove as much air as possible. It can stay in the freezer for up to three months. When you’re ready to eat, thaw it in the fridge overnight before reheating. This method helps maintain the taste and texture. For the full recipe, check out the earlier section! You can serve Honey Garlic Chicken with many sides. I love pairing it with steamed rice. The rice soaks up the tasty sauce well. You can also add sautéed vegetables, like broccoli or bell peppers. A fresh salad works great too. Try including some pickled vegetables for a nice crunch. All these sides make a colorful and tasty meal. Yes, you can use other meats! Chicken is great, but pork works well too. I have made this with pork chops, and they turn out juicy. You can also use shrimp for a quick meal. Just remember to adjust the cooking time. Shrimp cooks fast, so watch it closely. Each meat gives a different flavor, but all can be delicious. To check if the chicken is done, use a meat thermometer. The chicken should reach 165°F (75°C). Insert the thermometer into the thickest part of the thigh. If you don’t have one, cut into the chicken. The meat should be white and the juices clear. If you see pink, keep cooking it. Always ensure the chicken is safe to eat. For the full recipe, check out the detailed instructions. You’ve learned about the key ingredients and tools needed. I shared how to prepare the marinade and marinate the chicken. You now know cooking tips to ensure perfect results. We discussed variations like stir-fry and grilling for added flavor. Lastly, I covered how to store and reheat your meals. Enjoy trying these recipes and tips in your kitchen. With practice, you’ll make a delicious dish every time. Happy cooking!](https://fastmealmate.com/wp-content/uploads/2025/06/07de3b66-fdce-4709-a69c-db5538c90d7b-768x768.webp)