Cranberry Christmas Bars Festive and Flavorful Treat
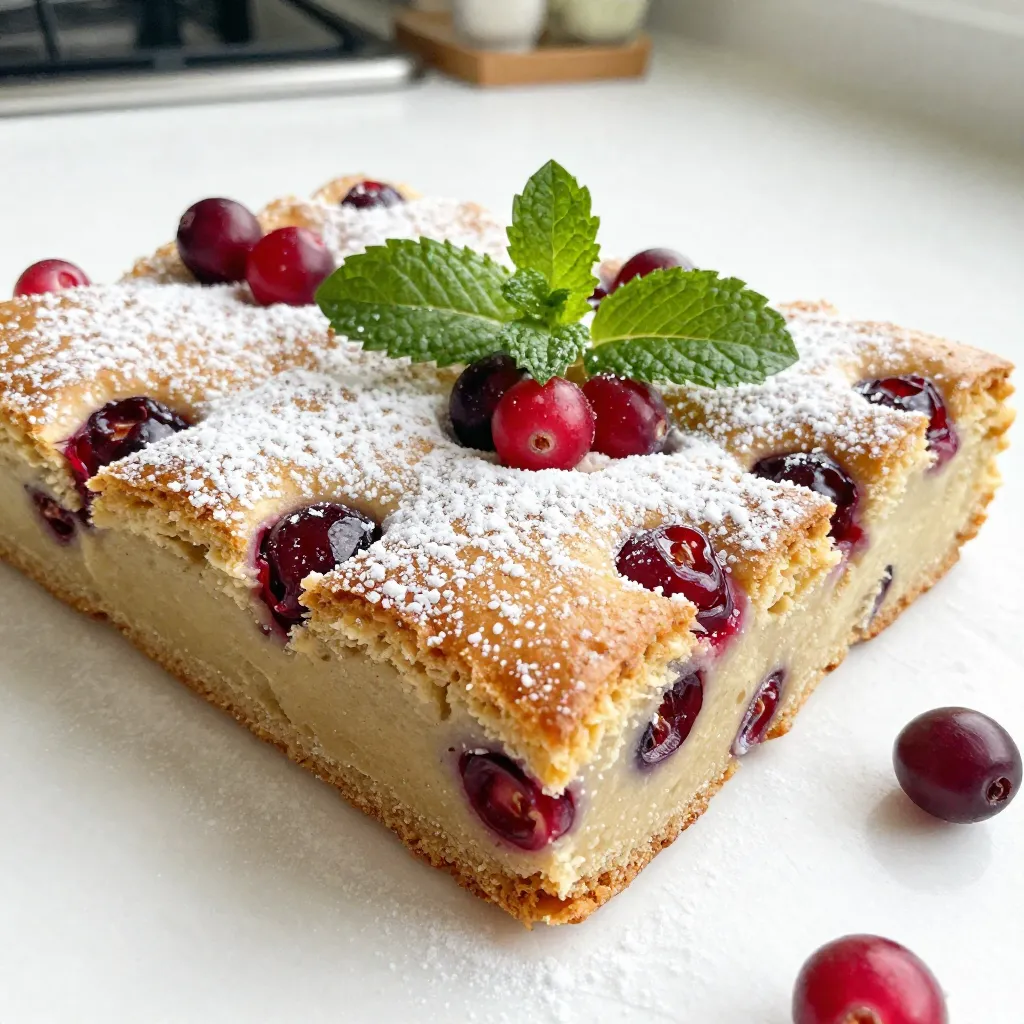

Get ready to delight your holiday guests with my Cranberry Christmas Bars! These treats are packed with the tartness of fresh cranberries, the sweetness of sugar, and the warmth of spices. In just a few steps, you can create a festive and flavorful dessert perfect for any gathering. Follow my easy recipe, tips, and variations to make your holiday season even brighter. Let’s dive into this delicious creation together!
Why I Love This Recipe
- Festive Flavor: The combination of tart cranberries and sweet sugar creates a delightful balance, making these bars a perfect treat for the holiday season.
- Easy Preparation: This recipe is simple to follow, making it accessible for bakers of all skill levels, and perfect for last-minute holiday gatherings.
- Beautiful Presentation: The layers of cranberry and batter, dusted with powdered sugar, make these bars visually appealing and a great centerpiece for any festive table.
- Customizable Crunch: With the option to add walnuts or pecans, you can cater to your taste preferences and add an extra layer of texture to the bars.
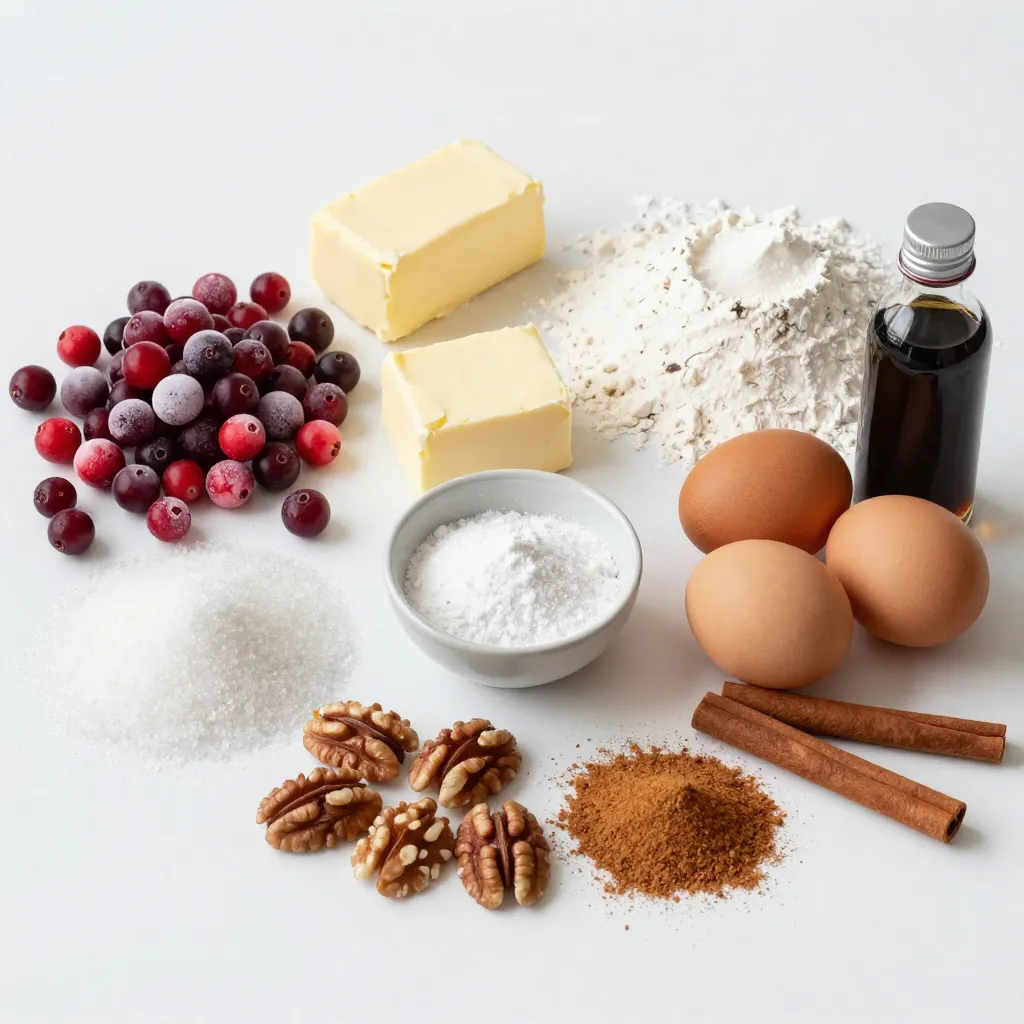
Ingredients
Fresh or Frozen Cranberries
You can use 2 cups of fresh or frozen cranberries. Fresh cranberries add a bright flavor. Frozen cranberries work well too. They are easy to find and save time.
Sweetening Agents
You need 1 cup of granulated sugar. This helps balance the tartness of the cranberries. You can add more sugar for serving if you like sweeter bars.
Baking Essentials
Gather these key items:
– 1 cup unsalted butter, softened
– 2 cups all-purpose flour
– 1/2 teaspoon baking powder
– 1/4 teaspoon salt
– 2 large eggs
– 1 teaspoon pure vanilla extract
– 1/2 teaspoon ground cinnamon
These ingredients create a rich, soft base for the bars.
Optional Add-ins
For added crunch, you can fold in 1 cup of chopped walnuts or pecans. They give a nice texture and flavor to the bars. If you want to skip nuts, that’s fine too!
Step-by-Step Instructions
Preparing the Baking Pan
First, preheat your oven to 350°F (175°C). Grab a 9×13-inch baking pan. Grease the pan with butter or non-stick spray. This will help the bars come out easily after baking.
Making the Cranberry Filling
In a medium saucepan, add 2 cups of cranberries and 1 cup of sugar. Cook this mixture over medium heat. Stir it often until the cranberries burst and the mix thickens. This takes about 5-8 minutes. Once it’s thick, take it off the heat and let it cool a bit.
Combining Wet Ingredients
Now, take a large mixing bowl. Beat 1 cup of softened butter with an electric mixer. Add in another cup of sugar. Mix this for about 2-3 minutes until it’s light and fluffy. Next, add 2 large eggs one at a time. Mix well after each egg. Finally, stir in 1 teaspoon of vanilla extract.
Mixing Dry Ingredients
In a separate bowl, whisk together 2 cups of flour, 1/2 teaspoon of baking powder, 1/4 teaspoon of salt, and 1/2 teaspoon of ground cinnamon. This helps to distribute all the dry ingredients evenly.
Assembling the Bars
Pour the dry mixture into the wet mixture. Mix gently until just combined. Be careful not to overmix. If you want a crunch, fold in 1 cup of chopped walnuts or pecans. Spread half of the batter into the greased pan. Pour the cooled cranberry mixture on top, spreading it evenly. Finally, dollop the rest of the batter on top, leaving some cranberries visible.
Baking and Cooling Process
Place the pan in the oven. Bake for about 30-35 minutes. The bars should turn golden brown. A toothpick inserted in the center should come out clean. When done, take them out and let them cool completely in the pan on a wire rack. Once cool, cut into squares or rectangles. Dust with powdered sugar before serving for a festive look.
Tips & Tricks
Ensuring Perfect Texture
To get the best texture in your cranberry bars, pay attention to your mixing. When you blend the wet and dry ingredients, mix just until combined. Overmixing makes the bars tough. Keep the batter fluffy. This gives the bars a light feel. Also, avoid using cold butter. Softened butter works best. It helps create a smooth batter that rises well in the oven.
Flavor Enhancements
Boost the flavor of your bars with simple tweaks. Add a pinch of nutmeg alongside the cinnamon for warmth. Fresh orange zest brings a bright taste. You can also swap out some sugar for brown sugar. This adds a rich, caramel-like flavor. If you love nuts, use toasted walnuts or pecans. Toasting brings out their flavor. Feel free to experiment with spices to find your favorite mix.
Presentation Ideas
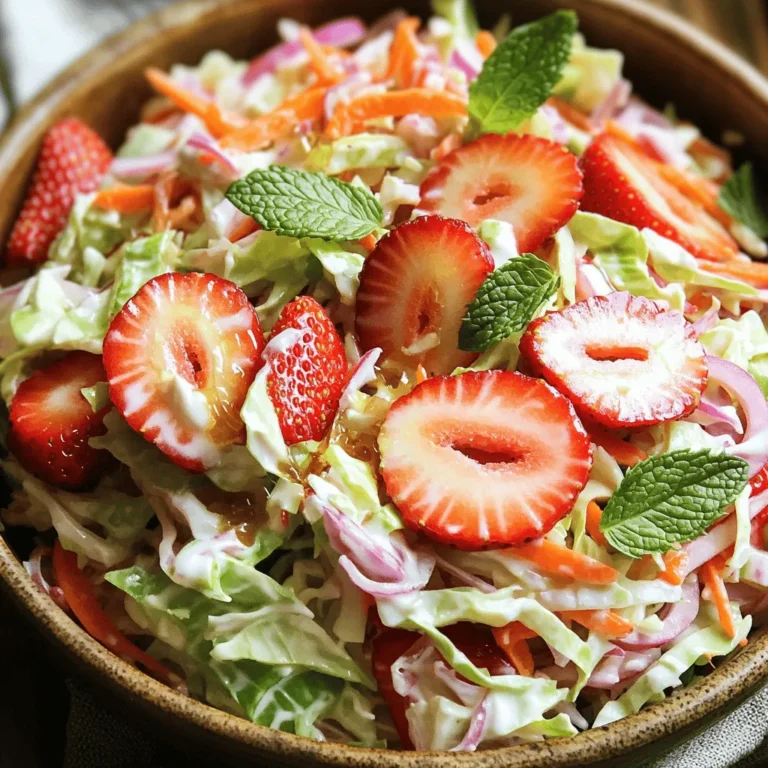
Make your cranberry bars look as good as they taste. Dust the top with powdered sugar before serving. This adds a festive touch. Serve the bars on a colorful platter for a bright display. Garnish with fresh cranberries or mint leaves for a pop of color. You can even place a few sprigs of rosemary for a lovely aroma. These small details will impress your guests.
Pro Tips
- Use Fresh Cranberries: Fresh cranberries provide a more vibrant color and tartness compared to frozen. If using frozen, ensure they are fully thawed and drained before cooking.
- Customize Sweetness: Adjust the sugar in the cranberry mixture based on your preference for sweetness. If you enjoy a more tart flavor, reduce the sugar slightly.
- Check Doneness Early: Ovens can vary in temperature. Start checking the bars at the 25-minute mark to prevent over-baking.
- Storage Tips: Store the bliss bars in an airtight container at room temperature for up to 3 days, or refrigerate for longer freshness.
Variations
Different Crust Options
You can mix up the crust for your Cranberry Christmas Bars. Instead of the basic butter and flour base, try using graham cracker crumbs. This adds a nice crunch and a hint of sweetness. You can also swap in almond flour for a gluten-free option. Just remember to adjust the butter and sugar as needed. These changes keep the bars fresh and exciting.
Topping Alternatives
For toppings, think beyond powdered sugar. You might like to sprinkle some oats on top for texture. A drizzle of chocolate can add a rich flavor, too. For a fruity twist, use orange zest or a few slivers of lemon. These options can give your bars a unique flair that impresses everyone.
Seasonal Flavor Additions
Incorporate seasonal spices to elevate your bars. Adding nutmeg or allspice can bring warmth. You could also mix in some fresh orange juice or zest. This will brighten the flavors and tie them to the holiday spirit. If you want a fun twist, try adding a splash of peppermint extract. It gives a festive touch that everyone will love.
Storage Information
Best Storage Practices
To keep your Cranberry Christmas Bars fresh, store them in an airtight container. Place parchment paper between layers to avoid sticking. You can keep them at room temperature for up to three days. For longer freshness, store them in the fridge for up to a week. If you want to maintain their taste and texture, avoid leaving them out in the open.
How to Freeze Bars
Freezing is a great option if you want to save some bars for later. First, let the bars cool completely. Then, cut them into squares or rectangles. Wrap each piece in plastic wrap. Place the wrapped bars in a freezer-safe container or bag. This method helps keep them fresh for about three months. When you’re ready to enjoy, just thaw them in the fridge overnight.
Reheating Instructions
If you want to warm up your bars, it’s simple. Preheat your oven to 350°F (175°C). Place the bars on a baking sheet and cover them with foil. Heat for about 10-15 minutes. This warms them without making them dry. You can also use the microwave. Heat each bar for about 15-20 seconds. Enjoy them warm for a cozy treat!
FAQs
How to make Cranberry Christmas Bars from scratch?
To make these bars from scratch, start with fresh or frozen cranberries. Cook them with sugar until they burst. This makes a sweet filling. Next, beat butter and sugar until fluffy. Add eggs and vanilla, mixing well. In another bowl, mix flour, baking powder, salt, and cinnamon. Combine the wet and dry mixes. Fold in nuts if you like. Layer half the batter in a greased pan, add the cranberry filling, and top with the rest of the batter. Bake until golden. Cool and cut into bars.
Can I use dried cranberries instead?
Yes, you can use dried cranberries. However, they are sweeter and less tart. So, cut back on sugar. Soak them in warm water for about 20 minutes. This helps them soften. After soaking, drain and add them where you would use fresh cranberries. The bars will taste different but still delicious.
What can I substitute for walnuts or pecans?
If you cannot use walnuts or pecans, try other nuts. Almonds or hazelnuts work well. You can also use seeds like sunflower or pumpkin seeds. If you prefer no nuts, leave them out. The bars will still taste great without the crunch.
How long do cranberry bars last?
These cranberry bars last about 5 days at room temperature. Store them in an airtight container to keep them fresh. You can also refrigerate them for up to a week. If you want to keep them longer, consider freezing them.
Can I make these bars ahead of time?
Yes, making these bars ahead of time is a great idea. You can bake them a day or two before your event. Just store them in an airtight container. If you freeze them, wrap them well. Thaw them in the fridge before serving, and dust with powdered sugar for a festive touch.
Cranberry bars blend sweet and tart flavors, making them a festive treat. We covered ingredients like fresh cranberries, sweeteners, and baking essentials. Then, we went through each step—from preparing your pan to mixing and baking. I shared tips for perfect texture, flavor boosts, and great presentations.
Try variations with different crusts or toppings to personalize your bars. For best storage, keep them in a cool place or freeze them. Making these bars can be simple and fun. Enjoy your delicious creation

Cranberry Christmas Bliss Bars
Ingredients
- 2 cups fresh or frozen cranberries
- 1 cup granulated sugar (plus additional for serving, if desired)
- 1 cup unsalted butter, softened to room temperature
- 2 cups all-purpose flour
- 0.5 teaspoon baking powder
- 0.25 teaspoon salt
- 2 large eggs
- 1 teaspoon pure vanilla extract
- 1 cup chopped walnuts or pecans (optional for added crunch)
- 0.5 teaspoon ground cinnamon
- for dusting powdered sugar
Instructions
- Preheat your oven to 350°F (175°C) and prepare a 9x13-inch baking pan by greasing it with butter or non-stick spray.
- In a medium saucepan over medium heat, combine the cranberries and granulated sugar. Stir occasionally and cook until the cranberries start to burst and the mixture thickens to a jam-like consistency, about 5-8 minutes. Once done, remove from heat and allow it to cool slightly.
- In a large mixing bowl, beat the softened butter and an additional 1 cup of granulated sugar together with an electric mixer until the mixture is light and fluffy, approximately 2-3 minutes.
- Add the eggs to the bowl, one at a time, mixing well after each addition. Stir in the vanilla extract until fully incorporated.
- In a separate bowl, whisk together the all-purpose flour, baking powder, salt, and ground cinnamon to evenly distribute the dry ingredients. Gradually pour the dry mixture into the wet mixture, blending gently until just combined. Take care not to overmix.
- If desired, carefully fold in the chopped walnuts or pecans for a delightful crunch.
- Spread half of the prepared batter into the bottom of the greased baking pan, smoothing it evenly to create a base layer. Next, pour the cooled cranberry mixture over this layer, spreading it out gently to ensure even coverage. Finally, using a spoon, dollop the remaining batter on top of the cranberries—the goal is to leave some cranberries visible for a beautiful presentation.
- Place the baking pan in the preheated oven and bake for approximately 30-35 minutes. The bars should become golden brown, and a toothpick inserted into the center should come out clean when they are done.
- Once baked, remove the bars from the oven and allow them to cool completely in the pan on a wire rack. After cooling, cut the bars into squares or rectangles, and dust with powdered sugar before serving for a festive touch.
![For a great crispy tofu panini, you need: - 1 block firm tofu, well-pressed and sliced into 1/2 inch slabs - 1 tablespoon soy sauce - 1 tablespoon sesame oil - 1 tablespoon cornstarch - 1 large round ciabatta or focaccia bread, sliced in half horizontally - 1/2 cup fresh spinach leaves, washed and dried - 1/2 red bell pepper, roasted, peeled, and sliced thin - 1 small ripe avocado, sliced - 2 tablespoons hummus or vegan mayonnaise - Salt and freshly ground black pepper to taste - Olive oil, for grilling These ingredients work together to create a crispy, tasty panini that is both filling and healthy. You can add some extra flavor with these ingredients: - Sliced tomatoes for freshness - Red onion for a bit of bite - Fresh herbs like basil or cilantro - A dash of hot sauce for heat If you want to mix things up, these optional ingredients can make your panini even better. To make your meal complete, consider these sides: - A light salad with lemon vinaigrette - Sweet potato fries for crunch - A bowl of soup, like tomato or lentil These sides balance the flavors and add variety to your meal. Plus, they are easy to prepare! For the full recipe, check out the detailed steps to bring your crispy tofu panini to life. To start, we need to prepare the tofu. First, press the block of firm tofu. Use a clean kitchen towel or tofu press. This step removes excess moisture. Removing moisture is key for achieving crispiness later. Once pressed, slice the tofu into even slabs, each about 1/2 inch thick. This ensures even cooking and crispiness. Next, we will marinate the tofu. In a mixing bowl, whisk together soy sauce, sesame oil, and a pinch of salt and pepper. Then, add your tofu slices to this mixture. Make sure each piece gets coated well. Let the tofu soak in the marinade for about 15 minutes. This allows the tofu to absorb all those tasty flavors. Now, it’s time to cook the tofu. After marinating, take the slices out and sprinkle cornstarch on both sides. This coating is crucial for that nice, crispy texture. Heat a non-stick skillet over medium heat. Add a drizzle of olive oil to the pan. When the oil shimmers, carefully lay the coated tofu slices in the skillet. Cook each slice for about 4-5 minutes on each side. Look for a golden brown color and a crispy texture. Once done, transfer the tofu to a plate and set it aside. Let’s move on to assembling the panini. Take your ciabatta or focaccia bread and cut it in half horizontally. Spread hummus or vegan mayo on the inside of both halves. This adds moisture and flavor to the sandwich. On the bottom half, layer fresh spinach leaves first. Then add the crispy tofu slices, followed by roasted red bell pepper slices. Finally, place avocado slices on top. Now, close the sandwich with the top half of the bread. Press it down gently to hold everything in place. Next, we grill the panini. Preheat your panini press or another skillet over medium heat. Brush the outside of the sandwich with olive oil. This helps to create a crunchy crust while grilling. If using a skillet, place a heavy pan on top of the sandwich. This presses it down as it cooks. Grill for about 3-4 minutes on each side. Look for a beautiful golden brown color and a crispy texture. Once grilled to perfection, remove the panini from the heat. Slice it in half with a sharp knife and serve warm for the best taste. Enjoy your crispy tofu panini, a flavorful and satisfying delight! For the full recipe, check out the earlier sections. To make your tofu crispy, follow these tips: - Press the tofu well: Remove as much water as possible. This helps the tofu absorb flavors better. - Use cornstarch: Coat both sides of the tofu slices with cornstarch. This creates a crunchy crust. - Heat your skillet properly: Use medium heat and wait for the oil to shimmer before adding the tofu. - Do not overcrowd the pan: Cook in batches if needed. This allows each piece to get crisp. Here are some mistakes to watch out for: - Skipping the marination: Marinating adds flavor. Don’t rush this step. - Using too little oil: A light drizzle helps achieve that golden color and crisp texture. - Not slicing evenly: Make sure your tofu slabs are even. This ensures consistent cooking. - Opening the panini too soon: Let it grill fully to get the best texture. Having the right tools makes a big difference. Here are my top picks: - Panini press: This tool cooks evenly and gives perfect grill marks. - Non-stick skillet: If you don’t have a press, a good skillet works too. - Heavy pan: Use it to press down the sandwich while it cooks in a skillet. - Sharp knife: A sharp knife helps slice your panini without squishing it. Using these tips and tools, you can create a delicious crispy tofu panini. For the full recipe, check out the earlier sections. {{image_4}} When making a crispy tofu panini, you can switch up the ingredients to match your taste. This adds fun and keeps things interesting. You can use different sauces or spreads. Try using pesto or spicy mustard instead of hummus. Swap spinach for kale or arugula for a bolder flavor. For added crunch, add sliced cucumbers or pickles. You can also replace the red bell pepper with grilled zucchini or eggplant. Each swap brings a new twist to your panini. To keep this dish vegan, stick with plant-based ingredients. Use gluten-free bread to make it gluten-free. Many brands offer delicious options that taste great. Check labels to ensure they have no animal products. This allows everyone to enjoy the crispy tofu panini without worry. Fresh produce can change with the seasons. In spring, try adding fresh asparagus or sprouts. In summer, include ripe tomatoes or zucchini. In fall, swap in roasted butternut squash for a sweet flavor. Winter might call for roasted root vegetables like carrots or sweet potatoes. These seasonal swaps help you enjoy fresh tastes all year long. This recipe offers endless possibilities for creativity. Use the [Full Recipe] as your base, and let your imagination run wild with variations! To keep your crispy tofu panini fresh, wrap it tightly. Use plastic wrap or foil for best results. Store it in the fridge for up to three days. Avoid leaving it out at room temperature. This helps prevent sogginess and keeps the flavors intact. To reheat, use a skillet over medium heat. Place the panini in the skillet and cover it. Heat for about 4-5 minutes on each side. This method helps restore the crispiness. You can also use a toaster oven for a similar effect. Avoid the microwave, as it can make the bread soft. If you want to freeze your panini, wrap it well in plastic wrap and foil. It can last for up to a month in the freezer. When you’re ready to eat, thaw it in the fridge overnight. Reheat it in a skillet for the best texture. This way, you can enjoy a quick meal without losing flavor. To make tofu extra crispy, start with firm tofu. Press it well to remove water. Slice it into even slabs. Marinate the slices in soy sauce and sesame oil. Let them soak for at least 15 minutes. After marinating, coat each slice with cornstarch. This coating helps create that crunchy texture you want. Cook the tofu in a hot skillet with olive oil. Flip it until golden brown on both sides. Yes, you can use many types of bread. Ciabatta and focaccia work great, but others can too. Try sourdough or whole grain for a different taste. Each bread type adds its own flavor and texture. Choose one that you love, and enjoy your panini in a new way. Dipping sauces can enhance your panini experience. Hummus is a classic choice. It adds creaminess and flavor. Vegan mayo also works well for a smooth dip. You can try spicy salsa for a kick. Another option is a tangy vinaigrette. Each sauce complements the crispy tofu and adds fun flavors. For more ideas, check out the Full Recipe for inspiration. In summary, we explored how to make a crispy tofu panini. We covered the main and optional ingredients, step-by-step cooking tips, and even some fun variations. Remember to store leftovers well and reheat them correctly for the best taste. Experiment with flavors and enjoy this dish as part of your meals. With a few simple steps, you can have a delicious, crispy tofu panini that satisfies your cravings. Enjoy your cooking journey!](https://fastmealmate.com/wp-content/uploads/2025/06/c0074219-6fc3-4ba3-a1d2-dcd469194d4e-768x768.webp)