Vanilla French Beignets Irresistible Sweet Treat


If you’ve ever craved a warm, fluffy treat that melts in your mouth, your search ends here! Today, I’m diving into the delightful world of Vanilla French Beignets. These sweet, airy bites are perfect for any occasion, whether it’s breakfast or dessert. With simple ingredients and easy steps, you’ll be creating these irresistible treats in no time. Ready to impress your friends and family? Let’s get started!
Why I Love This Recipe
- Fluffy Texture: These beignets are incredibly light and airy, making each bite a delightful experience.
- Easy to Make: This recipe features straightforward steps, making it perfect for both beginner and experienced bakers.
- Versatile Treat: Enjoy them dusted with powdered sugar or pair with your favorite dipping sauce for a fun twist.
- Irresistible Aroma: The combination of vanilla and nutmeg fills your kitchen with an inviting scent that’s hard to resist.
Ingredients
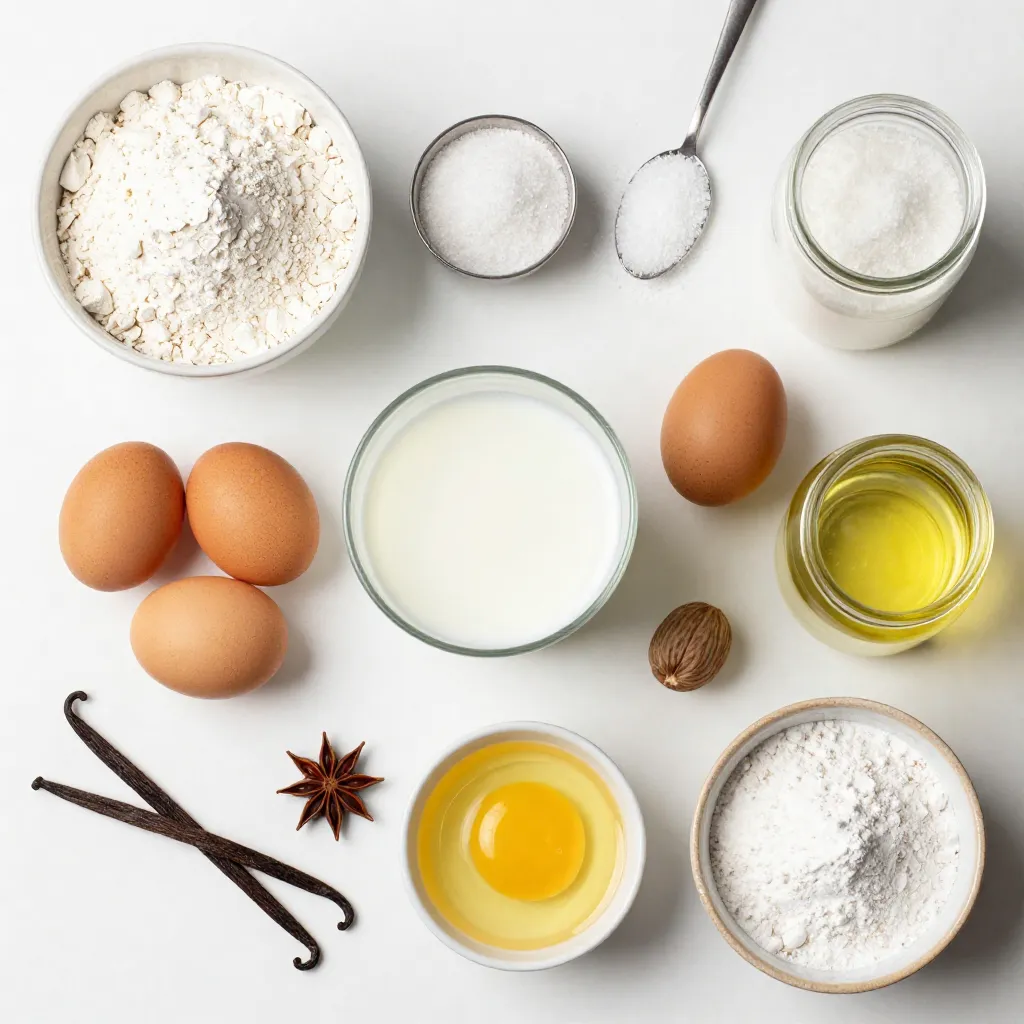
List of Required Ingredients
– 2 cups all-purpose flour
– 1/4 cup granulated sugar
– 2 teaspoons baking powder
– 1/2 teaspoon salt
– 1/4 teaspoon ground nutmeg
– 1 large egg
– 1/2 cup whole milk
– 1 tablespoon vanilla extract
– 1/4 cup unsalted butter, melted
– Vegetable oil for frying
– Powdered sugar for dusting
To make these beignets, you will need basic pantry items. Most of the ingredients are easy to find. This simple list helps you gather everything quickly.
Ingredient Substitutions
– You can use alternative flours like whole wheat or almond flour.
– For dairy-free options, try almond milk or oat milk.
– If you want less sugar, use honey or maple syrup instead.
These substitutions let you customize your beignets. You can make them fit your diet or taste better. Remember, each change can change the final taste and texture!
Step-by-Step Instructions
Preparation of Dry Ingredients
In a large bowl, mix the dry ingredients.
Add 2 cups of all-purpose flour.
Then, add 1/4 cup of granulated sugar.
Next, mix in 2 teaspoons of baking powder.
Add 1/2 teaspoon of salt and 1/4 teaspoon of ground nutmeg.
Whisk it all together until no lumps remain.
Preparation of Wet Ingredients
In a separate bowl, crack 1 large egg.
Beat the egg lightly with a fork.
Add 1/2 cup of whole milk and 1 tablespoon of vanilla extract.
Pour in 1/4 cup of melted unsalted butter.
Whisk until the mixture is smooth and blended well.
Making the Dough
Gradually pour the wet mixture into the dry bowl.
Mix gently until just combined.
It’s okay if the batter is a bit lumpy.
Cover the bowl with a clean towel.
Let the dough rest for about 30 minutes.
Frying the Beignets
In a deep fryer or pot, heat 2 inches of vegetable oil.
Aim for a temperature of 350°F (175°C).
While the oil heats, dust a clean work surface with flour.
Roll the rested dough to about 1/2 inch thick.
Cut the dough into 2-inch squares using a sharp knife.
Carefully drop a few squares into the hot oil.
Fry for 2-3 minutes on each side until golden brown.
Finishing Touches
Use a slotted spoon to remove the beignets from the oil.
Place them on a plate lined with paper towels.
While warm, dust them generously with powdered sugar.
Serve in a charming basket with parchment paper.
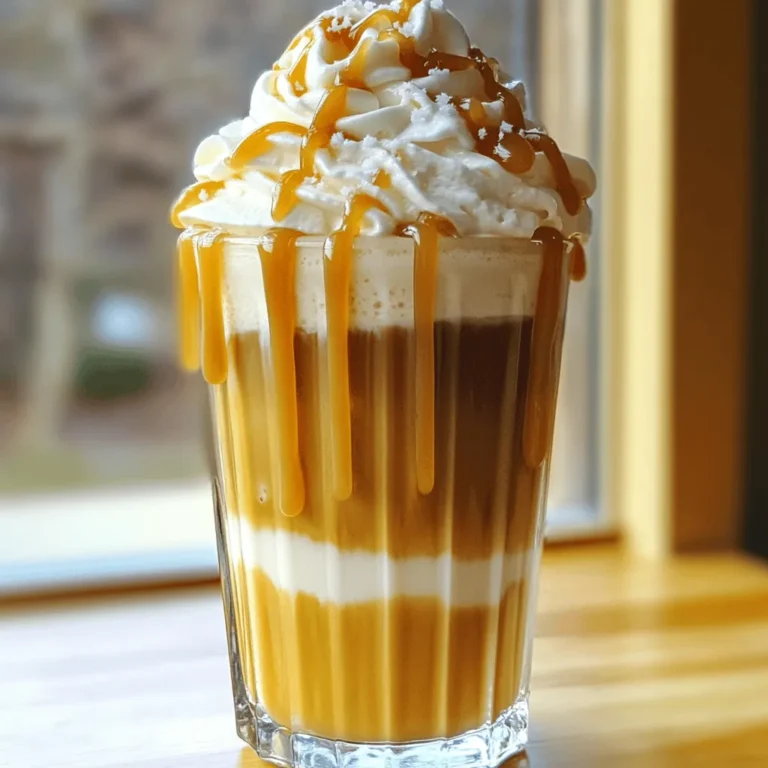
For fun, pair with whipped cream or chocolate sauce.
Tips & Tricks
Perfecting the Texture
To make fluffy beignets, avoid overmixing the dough. Mix just until the wet and dry ingredients combine. It’s okay if the batter is a bit lumpy. Overmixing makes the beignets tough. Next, let the dough rest for about 30 minutes. This helps the dough rise a bit and improves the texture. A good rest makes your beignets light and airy.
Ensuring Proper Frying
Oil temperature is key for frying beignets. Heat the oil to 350°F (175°C). Use a candy thermometer to check the heat. If the oil is too hot, the outside cooks too fast, leaving the inside raw. If it’s too cool, the beignets absorb too much oil. Fry only a few at a time to ensure even cooking. This way, they won’t stick together and cook evenly.
Presentation Tips
Serve your beignets in a nice basket lined with parchment paper. A light dusting of powdered sugar adds a sweet touch. For extra fun, offer dips like whipped cream or rich chocolate sauce. This makes your beignets even more inviting and tasty. You can also try serving them with fresh fruit or berries for a pop of color.
Pro Tips
- Use Fresh Ingredients: Ensure your baking powder is fresh for the best rise and fluffiness in your beignets.
- Monitor Oil Temperature: Use a thermometer to keep the oil at a consistent 350°F (175°C) for perfectly cooked beignets.
- Resting the Dough: Allowing the dough to rest is crucial as it helps improve the texture and flavor of the beignets.
- Dust with Powdered Sugar: Dust the beignets with powdered sugar while they’re still warm for better adherence and a sweeter finish.
Variations
Flavor Variations
You can play with flavors in many ways. Add chocolate chips to the dough for a sweet twist. Or, try mixing in fruit purees like raspberry or strawberry for a fruity touch. You can also change the spices. Use cinnamon or cardamom to give your beignets a warm kick. These small changes can make your beignets unique!
Dietary Variations
If you need gluten-free beignets, switch to a gluten-free flour blend. This will keep the texture light and fluffy. For vegan options, replace the egg with flaxseed meal mixed with water. Use almond milk instead of whole milk. You can also use coconut oil instead of butter. These swaps keep the beignets delicious for everyone.
Stuffed Beignets
Stuffed beignets can be a fun surprise! You can fill them with cream cheese, jam, or even Nutella. To properly stuff the dough, make a small ball and flatten it. Place a spoonful of filling in the center. Pinch the edges closed. Fry them as usual, and enjoy the burst of flavor inside.
Storage Info
Storing Leftover Beignets
To keep your beignets fresh, you should cover them well. Use plastic wrap or an airtight container. Place them in the fridge if you plan to eat them later. They will stay good for about two days. Storing them this way helps keep their soft texture.
Reheating Tips
When it’s time to enjoy your beignets again, reheating is key. You can use an oven or a toaster oven for the best results. Heat them at 350°F (175°C) for about 5-7 minutes. This will make them warm and crispy again.
If you want to freeze your beignets, do this right after they cool. Place them in a single layer on a baking sheet and freeze for about an hour. Once frozen, transfer them to a freezer bag. They can last up to a month in the freezer.
To defrost, take them out and let them sit at room temperature for about 30 minutes before reheating. This way, you get to enjoy that fresh taste again!
FAQs
What are beignets?
Beignets are sweet, fluffy pastries. They are deep-fried and often dusted with powdered sugar. Originating from France, they hold a special place in New Orleans culture. At breakfast or dessert, these treats bring joy to many.
Can I make the dough ahead of time?
Yes, you can make the dough ahead of time. Prepare the dough and cover it well. Store it in the fridge for up to 24 hours. This allows the flavors to deepen. Just remember to let it rest at room temperature for 30 minutes before frying.
How do I know when the oil is ready for frying?
The oil is ready when it reaches 350°F (175°C). You can use a candy thermometer for accuracy. Another trick is to drop a small piece of dough into the oil. If it sizzles and rises, the oil is hot enough.
What can I serve with vanilla French beignets?
Beignets pair well with many dips and drinks. Here are some ideas:
– Whipped cream for a light touch
– Rich chocolate sauce for a sweet treat
– Fresh fruit preserves for a fruity twist
– Coffee or hot chocolate to warm up your morning
This blog post covered everything you need to know about making beignets. We explored the essential ingredients and offered tasty substitutions. You learned step-by-step how to prepare and fry your dough. We also shared tips to help you perfect your beignets.
In the end, with the right techniques and a bit of creativity, you can make these treats your own. Enjoy your cooking adventures and impress your friends and family with delicious, homemade beignet

Fluffy Vanilla French Beignets
Ingredients
- 2 cups all-purpose flour
- 1 quarter cup granulated sugar
- 2 teaspoons baking powder
- 1 half teaspoon salt
- 1 quarter teaspoon ground nutmeg
- 1 large egg
- 1 half cup whole milk
- 1 tablespoon vanilla extract
- 1 quarter cup unsalted butter, melted
- as needed cup vegetable oil for frying
- as needed cup powdered sugar for dusting
Instructions
- In a large mixing bowl, combine the all-purpose flour, granulated sugar, baking powder, salt, and ground nutmeg. Whisk together until the mixture is well mixed and there are no lumps.
- In another bowl, crack the egg and beat it lightly. Add the whole milk, vanilla extract, and melted butter to the egg, whisking until the mixture is smooth and thoroughly combined.
- Gradually incorporate the wet mixture into the dry ingredients. Mix gently until the two are just combined; it’s okay if the batter remains slightly lumpy, as overmixing can make the beignets tough.
- Cover the bowl with a clean kitchen towel and let the dough rest at room temperature for approximately 30 minutes. This helps the dough to rise slightly and improves the texture.
- In a deep fryer or heavy-bottomed pot, heat about 2 inches of vegetable oil to 350°F (175°C). A candy thermometer can help you maintain the perfect temperature.
- While the oil is heating, lightly dust a clean work surface with flour. Turn the rested dough onto the floured surface and gently roll it out to about 1/2 inch thickness.
- Use a sharp knife or pizza cutter to cut the rolled dough into 2-inch squares, making sure to create even pieces for uniform cooking.
- Carefully drop the squares of dough into the hot oil, frying only a few at a time to prevent overcrowding. Fry for about 2-3 minutes on each side, or until they achieve a beautiful golden brown color.
- Once golden, use a slotted spoon to remove the beignets from the hot oil and place them on a plate lined with paper towels to absorb excess oil.
- While the beignets are still warm, dust them generously with powdered sugar for a sweet finish before serving.
![- Cooked chicken breast - Greek yogurt - Dijon mustard - Garlic powder - Smoked paprika - Black pepper - Mixed greens - Cherry tomatoes - Cucumber - Whole wheat tortillas - Garnishing options The key to tasty Mini Chicken Wraps lies in the right ingredients. First, use cooked chicken breast. It is tender and full of protein. I recommend shredding the chicken for easy mixing. Next, Greek yogurt adds creaminess. It also gives a nice tang. Adding Dijon mustard brings a zesty kick to the wraps. Now, let's add some flavor! Garlic powder enhances the taste. Smoked paprika gives a subtle smokiness. Finally, a dash of black pepper adds warmth without being too spicy. For fresh fillings, I like to use mixed greens. They add color and crunch. Cherry tomatoes bring sweetness, and cucumber offers a refreshing bite. These fresh ingredients balance the rich flavors of the chicken mixture. Don’t forget the wraps! Whole wheat tortillas work best. They are healthy and keep everything together. You can also garnish your wraps with fresh herbs like cilantro. This adds a pop of color and flavor. For the full recipe, check out the [Full Recipe]. You will love how easy it is to make these delicious snacks! To start, gather your ingredients. In a large bowl, mix the chicken and other items. Combine 2 cups of shredded chicken, 1/2 cup of creamy Greek yogurt, and 1 tablespoon of Dijon mustard. Add 1 teaspoon of garlic powder, 1 teaspoon of smoked paprika, and 1/4 teaspoon of black pepper. Stir well until every piece is coated. You want a thick, creamy mix that sticks to the chicken. Next, lay out your whole wheat tortillas on a clean surface. Each tortilla should be flat and ready for filling. Scoop about 1/4 cup of the chicken mixture into the center of each tortilla. Spread it evenly, leaving a little space at the edges. Then, add a handful of mixed greens, halved cherry tomatoes, and thin cucumber slices. This creates a bright and tasty filling. Now it’s time to roll your wraps. First, fold the sides of the tortilla in. Then, roll it tightly from the bottom up. This secures all the yummy fillings inside. Once rolled, take a sharp knife and slice each wrap in half diagonally. This makes it easy to serve and looks great on a plate. For a fresh touch, sprinkle cilantro on top before serving. For the full recipe, refer to the earlier section. Enjoy making these tasty mini chicken wraps! Marinating chicken boosts its flavor. A simple marinade can include Greek yogurt, Dijon mustard, and spices. Let the chicken sit for at least 30 minutes. This adds depth and taste. You can also try adding fresh herbs like cilantro or basil. These herbs bring a burst of freshness to the wraps. You can prepare the wraps ahead of time. Simply make the chicken mixture and store it in the fridge. You can assemble the wraps just before serving. For a fun twist, serve with dips like hummus or salsa. These dips add more flavor and excitement to your meal. Pair with crunchy veggies like carrot sticks or bell peppers for a complete snack. Always ensure your chicken is fully cooked. It should reach an internal temperature of 165°F. Use a meat thermometer for accuracy. When handling raw chicken, wash your hands and surfaces. This keeps food safe from bacteria. Store leftovers in an airtight container in the fridge. Enjoy your mini chicken wraps fresh or as a quick snack later! For the full recipe, check out the section above. {{image_4}} You can switch things up by using beef or shrimp instead of chicken. Beef adds a rich flavor, while shrimp brings a nice bite. For a vegetarian option, try beans and cheeses. Black beans or chickpeas work great. They add protein and keep the wraps filling. The sauce you choose can change everything. For creamy options, you can use ranch or tzatziki. Both add a cool touch to your wraps. If you want heat, go for spicy sauces like sriracha or a tangy hot sauce. These add a kick that makes each bite exciting. Using lettuce leaves instead of tortillas gives a fresh twist. Lettuce wraps are crunchy and light. They are perfect for a low-carb meal. If you need gluten-free options, look for rice paper or corn tortillas. These wraps still hold all the tasty fillings while being friendly to different diets. For the full recipe, check out Savory Mini Chicken Wraps . You can store mini chicken wraps in the fridge for up to three days. This time frame helps keep them fresh and safe to eat. Use airtight containers to keep the wraps moist and tasty. Glass or plastic containers work well. Avoid using containers that allow air inside, as this can make the wraps dry. To freeze mini chicken wraps, wrap each one tightly in plastic wrap or foil. This step helps keep them from getting freezer burn. Place the wrapped wraps in a freezer-safe bag or container. Label the bag with the date so you know when you made them. You can freeze them for up to three months. To reheat frozen wraps, take them out and let them thaw in the fridge overnight. If you want a quicker option, you can microwave them for about one to two minutes. Make sure to check that they are hot all the way through before eating. Enjoy these tasty wraps any time, even after freezing! For the full recipe, check out the previous sections. To make Mini Chicken Wraps healthier, swap some ingredients. Here are a few low-calorie options: - Use low-fat Greek yogurt instead of regular. - Replace whole wheat tortillas with lettuce wraps. - Add more fresh veggies, like bell peppers or carrots. - Use less mustard or choose a lighter dressing. These swaps keep the flavor while cutting calories. Yes, using leftover chicken is a great idea! Here are best practices: - Ensure the chicken is fully cooked before using it. - Shred or chop the leftover chicken for easy mixing. - Store leftover chicken in the fridge no longer than 3-4 days. Using leftovers saves time and reduces waste, making your wraps quick and tasty. Mini Chicken Wraps go well with various dips. Here are some tasty suggestions: - Hummus adds a creamy and flavorful touch. - Salsa gives a fresh and zesty kick. - Ranch dressing adds a classic flavor. - Tzatziki sauce brings a cool, tangy element. Experiment with these dips to find your perfect match! Mini chicken wraps are tasty, easy to make, and full of flavor. We discussed key ingredients, like chicken, Greek yogurt, and fresh veggies. You learned how to prepare and assemble these wraps while keeping safety in mind. You also have tips for flavor enhancement and storage. Remember, you can customize these wraps in many ways. Think about using different proteins or sauces to suit your taste. Enjoy your cooking and create delicious meals that everyone will love!](https://fastmealmate.com/wp-content/uploads/2025/06/124e56a0-f478-4b5e-be65-4c059dfc39c0-768x768.webp)
![To make a hearty Instant Pot beef stew, you need fresh and tasty ingredients. Here’s what you will need: - 2 pounds beef chuck, cut into 1-inch cubes - 1 tablespoon olive oil - 1 large onion, finely chopped - 2 cloves garlic, minced - 4 medium carrots, sliced into rounds - 3 medium potatoes, peeled and diced into 1-inch cubes - 2 cups beef broth - 1 tablespoon tomato paste - 1 teaspoon dried thyme - 1 teaspoon dried rosemary - 1 bay leaf - Salt and freshly ground black pepper to taste - 2 tablespoons cornstarch (optional, for thickening) - Fresh parsley, chopped (for garnish) These ingredients bring great flavor and comfort to your dish. Each one plays a key role. For example, beef chuck gives the stew a rich taste. Onions and garlic add depth. Carrots and potatoes give it heartiness. Don’t skip the herbs; they add wonderful notes to every bite. You will find that using quality ingredients makes a big difference. Fresh veggies and good beef will elevate your stew. Remember, you can always adjust the seasonings to fit your taste. If you want to explore more, check out the Full Recipe for step-by-step instructions. - Prep time: 15 minutes - Cook time: 35 minutes - Total time: 1 hour - Servings: 6 With just an hour, you can create a warm and filling meal for your family or friends. Enjoy the process! Set your Instant Pot to “Sauté” and pour in the olive oil. Let it heat until it shimmers. Add the beef cubes in a single layer. Sear them until browned, about 5-7 minutes. This step seals in flavor. Once browned, remove the beef and set it aside on a plate. In the same pot, add the finely chopped onion and minced garlic. Cook them for 2-3 minutes until the onion is soft. You will smell a rich aroma that adds depth to your stew. Pour a splash of beef broth into the pot. Use a wooden spoon to scrape up the browned bits stuck to the bottom. This step is key for enhancing the stew’s flavor. Now, return the seared beef to the pot. Add the sliced carrots, diced potatoes, the remaining beef broth, tomato paste, dried thyme, dried rosemary, and the bay leaf. Don’t forget to add a pinch of salt and pepper. Stir everything until well mixed. Close the lid tightly on the Instant Pot. Make sure the steam release valve is set to “Sealing.” Select the “Manual” function. Adjust the cooking time to 35 minutes at high pressure. When the cooking time is up, let the Instant Pot naturally release pressure for 10 minutes. This helps make the beef tender. After that, carefully quick-release any remaining pressure by turning the valve to “Venting.” If you want a thicker stew, mix 2 tablespoons of cornstarch with cold water to make a slurry. Stir this into the warm stew. Set the Instant Pot back to “Sauté” for 5 minutes. Stir often until the stew thickens to your liking. Before serving, remember to remove the bay leaf. Garnish the stew with freshly chopped parsley for color. Ladle it into bowls while hot. Enjoy this hearty meal! Check the [Full Recipe] for more details. Browning meat is key. It builds flavor and color. When you sear beef, you create a nice crust. This adds a rich taste to your stew. Make sure to do this step well. For seasoning, use salt and pepper early. This helps to boost the flavor. Add herbs like thyme and rosemary for aroma. If you love a kick, throw in some paprika. Pair your beef stew with sides that shine. Mashed potatoes work great. They soak up all the stew's goodness. You can also serve it with green beans or a fresh salad. Bread is a must! Choose crusty bread for dipping. Sourdough or baguette are fantastic options. They bring texture and enhance the meal. Want to deepen the taste? Try adding red wine. A splash of wine gives a rich layer to your stew. If you prefer, soy sauce works too. It adds umami that makes flavors pop. Don’t forget about extra veggies! Mushrooms, peas, or bell peppers can brighten your stew. They add nutrition and color. Chop them up and toss them in before cooking. For the full recipe, check out the details above. Happy cooking! {{image_4}} You can use chicken or pork in your stew. For chicken, use boneless thighs or breasts. Cut them into bite-sized pieces. Sear them just like you do with beef. Chicken cooks faster, so reduce the cooking time to 25 minutes. For pork, use shoulder or loin. Cut into 1-inch cubes and follow the same steps as beef. Both meats will soak up the rich flavors of your stew. To make a vegetarian stew, skip the meat entirely. Use hearty vegetables like mushrooms, butternut squash, or lentils. Replace beef broth with vegetable broth for a lighter taste. You can add beans for protein and texture. Cook it just like the beef stew. This version is still rich and filling, perfect for anyone. You can change the taste by using different herbs and spices. Instead of thyme and rosemary, try basil and oregano for an Italian twist. Or, add cumin and coriander for a warm, earthy flavor. For a touch of heat, add red pepper flakes or a splash of hot sauce. Each change gives you a new dish to enjoy. To refrigerate beef stew, let it cool first. Pour the stew into a container. Seal it tightly with a lid. Store it in the fridge for up to three days. If you want to enjoy it later, use the freezer. To freeze beef stew, follow these steps. Cool the stew completely first. Then, transfer it to freezer-safe bags or containers. Remove as much air as possible to avoid freezer burn. Label the bags with the date. You can freeze it for up to three months. To reheat, let it thaw in the fridge overnight. Heat it in the microwave or on the stove until hot. In the fridge, beef stew lasts about three days. If you freeze it, it can last for three months. After that, the quality may decline. Be sure to check for any off smells or changes in texture before eating. When stored correctly, the stew stays flavorful and comforting. Yes, you can skip browning the meat. However, your stew may lack flavor. Browning adds depth and richness. It creates a lovely crust and enhances the dish. If you skip this step, consider adding more spices. If your stew is too thick, add more beef broth. Start with half a cup and stir well. You can also use water if needed. Another option is to add more veggies. They will release moisture as they cook. You can use frozen beef, but adjust the cooking time. Increase the time to 45 minutes for frozen chunks. This allows the meat to cook through properly. Make sure to add a few extra minutes if pieces are large. The beef is tender when it falls apart easily. You can check by using a fork. If it shreds easily, it's done. Aim for a melt-in-your-mouth texture for the best stew. Yes, this recipe is great for meal prep. You can make it ahead and store leftovers. It keeps well in the fridge for about three days. You can also freeze it for up to three months. Just reheat before serving. Check out the Full Recipe for more details. This blog post covered delicious Instant Pot beef stew. You learned the key ingredients, simple steps, and expert tips. I emphasized the importance of browning the beef for flavor. You can customize the recipe with different proteins or vegetables too. Stored correctly, it lasts well and is perfect for meals later. Enjoying this hearty dish brings warmth and satisfaction. I hope you try this recipe and share it with friends. Your kitchen adventures await!](https://fastmealmate.com/wp-content/uploads/2025/07/4eb70415-c4b6-43db-bf2d-31d3ec08fe2e-768x768.webp)

![- 16 oz firm tofu, pressed and cubed - 1 cup plant-based milk (almond or soy) - 1 tablespoon apple cider vinegar - 1 cup all-purpose flour - 1 cup cornmeal - 2 teaspoons garlic powder - 2 teaspoons onion powder - 1 teaspoon smoked paprika - 1 teaspoon cayenne pepper (adjust to your spice preference) - 1 teaspoon salt - 1 teaspoon black pepper - 1 tablespoon maple syrup - ¼ cup hot chili oil - Fresh pickles and sliced bread for serving I love using firm tofu for this recipe. It holds its shape and gives a nice bite. Pressing the tofu is key. It removes excess water and helps the nuggets get crispy. The buttermilk mixture is easy to make. Just mix plant-based milk with apple cider vinegar. Let it sit for five minutes. It thickens and works well for coating. For the dry ingredients, I use all-purpose flour and cornmeal. The cornmeal adds a crunchy texture. The spices pack on the flavor. Garlic powder and onion powder make the nuggets taste savory. Smoked paprika adds a lovely depth. Cayenne pepper is what brings the heat. Adjust it to make it milder or spicier based on your taste. Maple syrup in the hot oil glaze gives a sweet touch. It balances the spice perfectly. Don't forget the fresh pickles! They add a refreshing crunch when served with the nuggets. Sliced bread is optional but makes a great sandwich. Enjoy your Vegan Nashville Hot Tofu Nuggets! For the complete step-by-step guide, check out the Full Recipe. - Preheat the oven to 400°F (200°C). - Press the tofu to remove water, then cut it into nugget-sized pieces. - In a bowl, combine 1 cup of plant-based milk with 1 tablespoon of apple cider vinegar. - Let it sit for 5 minutes. This thickens and curdles the milk. - In one dish, mix 1 cup of flour with garlic powder, onion powder, smoked paprika, salt, and black pepper. - In another dish, pour in 1 cup of cornmeal and mix in cayenne pepper. - Dip each nugget in the flour mix, coating it well. - Next, dip it in the buttermilk, letting excess drip off. - Finally, roll it in the cornmeal mix, pressing gently for a thick coating. - Arrange the coated nuggets on a baking sheet lined with parchment paper. - Lightly oil the nuggets to help them crisp up. - Bake for 25-30 minutes, flipping them halfway for even browning. - In a small bowl, mix hot chili oil with 1 tablespoon of maple syrup for the glaze. - Toss the baked nuggets in the glaze to coat them evenly. Enjoy these spicy treats with fresh pickles for extra flavor! To get the best texture with tofu, pressing is key. Start by using a tofu press or a simple method. Wrap your tofu in a clean towel and place a heavy object on top. Let it press for at least 30 minutes. This step gets rid of extra moisture. It helps your nuggets become crispy. For that perfect crisp, ensure a solid coating. After you coat each nugget in the flour mix, dip it in the buttermilk mixture. Then, roll it in the cornmeal mix. The cornmeal gives a crunchy bite. Lightly spray the nuggets with oil before baking. This adds to their crispiness. Adjusting spice levels is easy. If you want more heat, add more cayenne pepper. Just remember, start small. You can always add more later. For milder nuggets, reduce the cayenne to suit your taste. You can also mix in other spices. Try smoked paprika for a deep flavor. Add some cumin for a warm touch. Garlic powder and onion powder boost the taste without extra heat. Experiment to find your perfect blend. Presentation matters! Arrange your nuggets on a large, colorful platter. Add fresh pickles on top for a pop of color. A sprig of parsley also brightens the dish. You can serve with a side of dipping sauce for added flavor. Consider using sliced bread or buns for a sandwich. It makes for a fun meal. This way, your Vegan Nashville Hot Tofu Nuggets look as good as they taste. {{image_4}} You can change the flavor of your Vegan Nashville Hot Tofu Nuggets by using different spices. Try adding cumin for a warm taste or chili powder for a kick. You can also mix in herbs like thyme or oregano. Fresh herbs add brightness and depth to each bite. These nuggets pair well with many sides. Serve them with crispy fries or a fresh salad. You can also create a delicious sandwich. Place the tofu nuggets in a bun and add your favorite toppings. Think lettuce, tomatoes, and a drizzle of vegan mayo for extra flavor. If you need a gluten-free version, swap out the all-purpose flour and cornmeal. Use almond flour instead of regular flour for the breading. For cornmeal, try using gluten-free breadcrumbs. These changes keep the nuggets tasty and the texture just right. To keep your Vegan Nashville Hot Tofu Nuggets fresh, cool them first. Let them sit at room temperature for about 30 minutes. This helps avoid steam buildup, which makes them soggy. Once cooled, pack them in airtight containers. Glass or BPA-free plastic works best. Make sure to store them in the fridge. They stay good for up to four days. To reheat your tofu nuggets, the oven is best. Preheat it to 375°F (190°C). Place the nuggets on a baking sheet. Bake them for about 10-15 minutes. This method keeps them crispy. You can also use an air fryer. Set it at 350°F (175°C) and cook for about 5-8 minutes. Avoid microwaving as it makes them soft and chewy. You can freeze these nuggets, both baked and unbaked. For unbaked nuggets, arrange them on a baking sheet. Freeze until solid, then transfer to a freezer bag. This saves space. For baked nuggets, let them cool first. Then, place them in a freezer-safe container. They last up to three months. When ready to eat, thaw overnight in the fridge. Bake or air fry them again for best results. You should use firm or extra-firm tofu. Silken tofu is too soft for nuggets. Firm tofu holds its shape well. Extra-firm tofu gives a nice texture. Press it to remove moisture for the best results. This step helps the nuggets get crispy. Yes, this recipe is nut-free. The main ingredients do not include nuts. If you want to add a creamy dip, use tahini or sunflower seed butter. Both options are safe and tasty. Always check labels to ensure all ingredients are nut-free. To kick up the heat, add more cayenne pepper. You can also mix in hot sauce for extra spice. Try using a spicy chili oil instead of regular oil. Red pepper flakes are another good option. Adjust the heat to fit your taste. Yes, you can fry the nuggets! Heat oil in a deep pan for frying. Coat the tofu nuggets well for a crispy crust. Fry in batches to keep the oil hot. This method gives a crunchy texture and rich flavor. Just be careful with hot oil. These nuggets pair well with fresh pickles and sliced bread. You can also serve them with coleslaw for a cool crunch. Dipping sauces like ranch or hot sauce add more flavor. Sweet potato fries make a great side, too! You can find the [Full Recipe] for Vegan Nashville Hot Tofu Nuggets online. In this blog post, we explored how to make Vegan Nashville Hot Tofu Nuggets. We covered key ingredients, like firm tofu and spices, and detailed how to prepare, bread, and bake them to get that perfect crunch. I shared tips for adjusting spice levels and achieving great texture. You now have ideas for serving and storing leftovers too. Enjoy creating this tasty dish, and don’t be afraid to experiment with new flavors! Dive in and make these nuggets your own.](https://fastmealmate.com/wp-content/uploads/2025/06/1c2352f9-cf3e-44e9-8ce8-a5cbad64ddd1-768x768.webp)