Crockpot Bourbon Chicken Flavorful and Simple Recipe
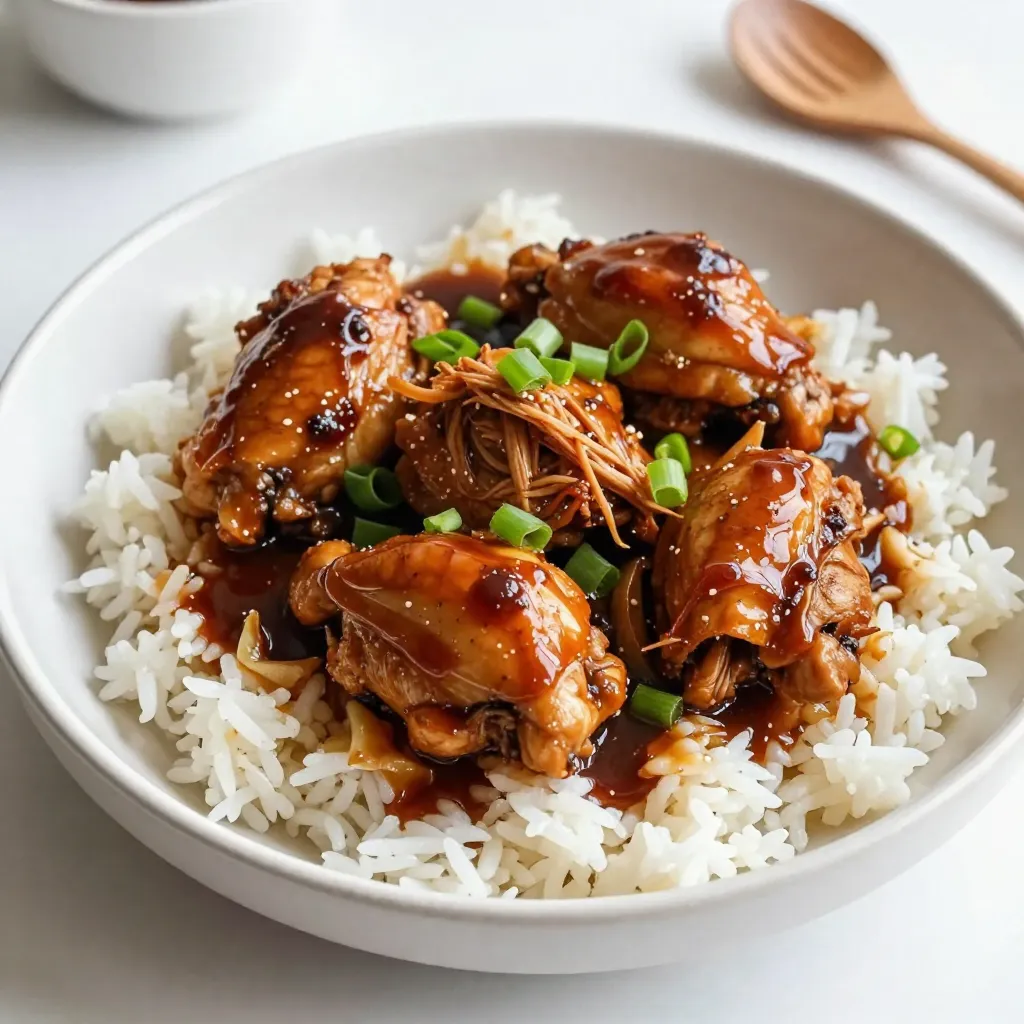

Are you ready to dive into a simple and flavorful dish? Crockpot Bourbon Chicken is an easy recipe that will impress your friends and family. With just a handful of ingredients, you can create a tender and tasty meal that cooks itself. In this article, I’ll walk you through making this delicious dish step by step, complete with tips and variations. Let’s get your Crockpot ready for some mouthwatering magic!
Why I Love This Recipe
- Easy Preparation: This recipe requires minimal effort, making it perfect for busy weekdays or meal prep.
- Flavorful Combination: The mix of sweet maple syrup and savory soy sauce creates a deliciously unique flavor profile.
- Versatile Serving Options: Serve with rice, noodles, or even in wraps for a variety of meal options.
- Family-Friendly: This dish is a hit with both kids and adults, ensuring everyone at the table enjoys the meal.
Ingredients
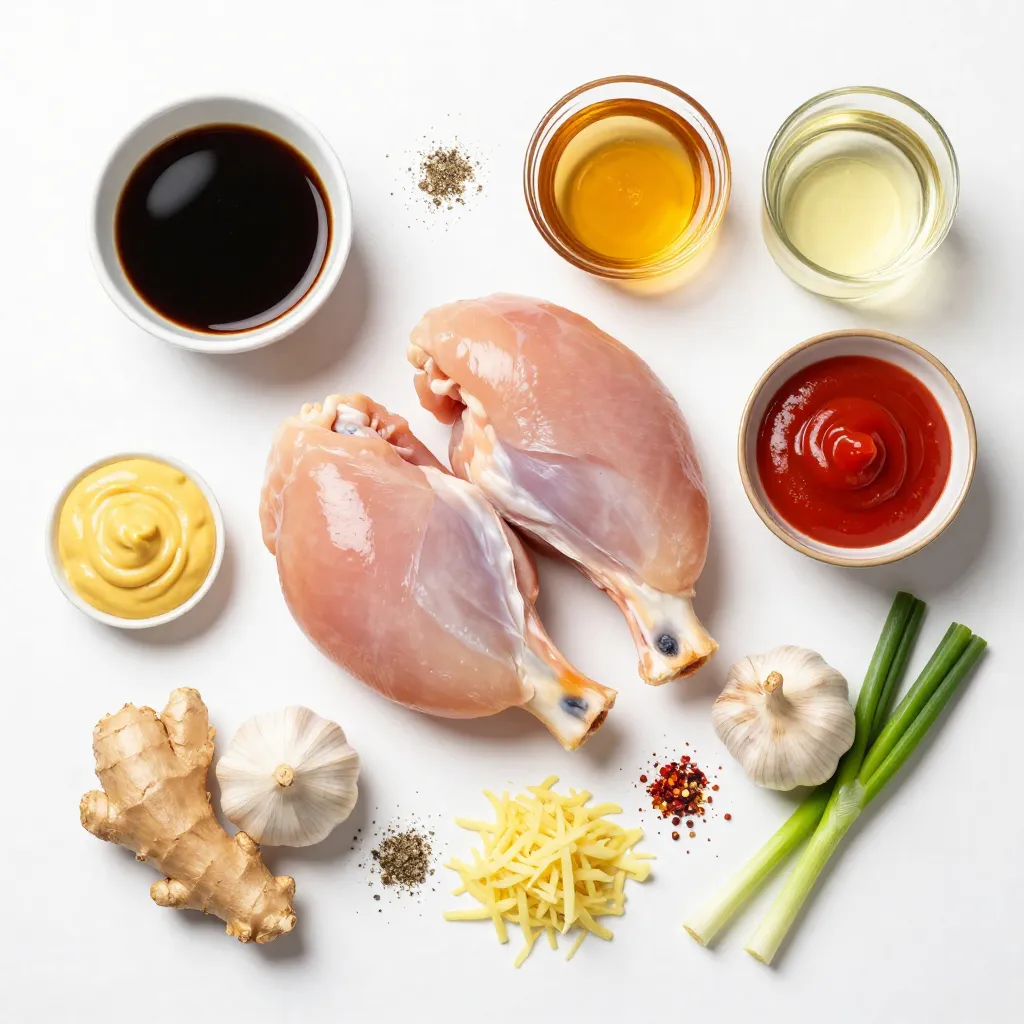
Main Ingredients for Crockpot Bourbon Chicken
– 2 lbs boneless, skinless chicken thighs
– 1/2 cup soy sauce
– 1/2 cup pure maple syrup
– 1/4 cup apple cider vinegar
Additional Flavor Enhancers
– 2 tablespoons ketchup
– 1 tablespoon Dijon mustard
– 1 tablespoon minced garlic
– 1 tablespoon fresh ginger
Seasoning and Garnish Suggestions
– 1/4 teaspoon freshly ground black pepper
– 1/4 teaspoon red pepper flakes (optional)
– 2 green onions for garnish
– Cooked rice (for serving)
The main ingredients create a great base. Chicken thighs add juiciness and flavor. The soy sauce brings saltiness and depth. Maple syrup adds sweetness that balances the dish. Apple cider vinegar gives a tangy note, making it bright.
The additional flavor enhancers boost the taste. Ketchup adds a hint of sweetness. Dijon mustard gives a nice kick. Garlic and ginger provide warmth and spice. Together, these ingredients make a rich sauce that coats the chicken.
Seasoning is key for flavor. Black pepper adds warmth, while red pepper flakes can spice things up. Garnishing with green onions adds a fresh crunch. Serve this dish over cooked rice for a filling meal.
This recipe is simple yet packed with flavor. Each ingredient plays its part in making your Crockpot Bourbon Chicken a hit. Trust me, once you try it, you’ll want to make it again and again!
Step-by-Step Instructions
Preparing the Sauce
Start by whisking together these ingredients in a mixing bowl:
– 1/2 cup soy sauce
– 1/2 cup pure maple syrup
– 1/4 cup apple cider vinegar
– 2 tablespoons ketchup
– 1 tablespoon Dijon mustard
– 1 tablespoon minced garlic
– 1 tablespoon fresh ginger, grated
– 1/4 teaspoon black pepper
– 1/4 teaspoon red pepper flakes (if you want some heat)
Whisk until smooth. Make sure everything blends well. This sauce is the key to great flavor.
Adding Chicken to the Crockpot
Next, take 2 pounds of boneless, skinless chicken thighs. Place them directly in the Crockpot. Pour your sauce mixture over the chicken. Make sure every piece is well coated. This will help the chicken soak up all the yummy flavors.
Cooking the Chicken
Now, secure the lid on the Crockpot. Set it to low for 6 to 7 hours. If you are in a hurry, set it to high for 3 to 4 hours. When the time is up, carefully take out the chicken. Use two forks to shred it into bite-sized pieces. Mix the shredded chicken with the remaining sauce in the Crockpot. If you want a thicker sauce, you can simmer it in a saucepan until it reduces to your liking.
Tips & Tricks
Perfecting the Sauce Consistency
To make the sauce thicker, transfer it to a saucepan. Heat it over medium heat. Let it simmer until it reduces. This will give your sauce a nice, rich texture.
Garnishing for Presentation
Garnishing adds flair to your dish. Top your bourbon chicken with sesame seeds. Fresh cilantro also brings a vibrant touch. These simple additions make your meal look stunning.
Making it Spicy
Do you like heat? Adjust the red pepper flakes to your taste. Add more for a kick or less for a milder dish. This way, you can customize the spice level just how you like it.
Pro Tips
- Marinate for More Flavor: For an even deeper flavor, marinate the chicken in the sauce for a few hours or overnight in the refrigerator before cooking.
- Use Bone-In Chicken: If you prefer, you can use bone-in chicken thighs for extra flavor. Just be sure to adjust the cooking time accordingly.
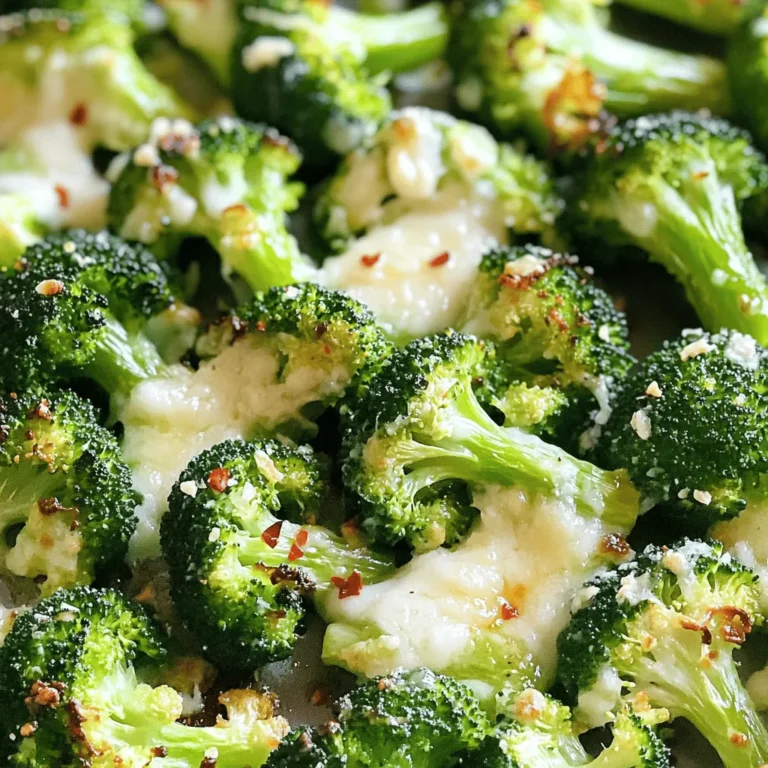
- Add Vegetables: Incorporate vegetables like bell peppers, carrots, or broccoli into the Crockpot for a complete one-pot meal.
- Leftover Storage: Store any leftovers in an airtight container in the fridge for up to 4 days, or freeze for up to 3 months for quick future meals.
Variations
Alternate Protein Options
You can switch up the protein in this dish. Instead of chicken thighs, try chicken breasts. They will cook well and still taste great. If you want a plant-based option, use tofu. Tofu soaks up flavors nicely. Cut it into cubes and add it to the sauce. Cook it the same way as chicken for a delightful meal.
Flavor Variations
This recipe is flexible when it comes to flavor. You can use different sauces to mix things up. Try teriyaki sauce for a sweet twist. Hawaiian barbecue sauce adds a fruity vibe. Both options work well with the other ingredients. Feel free to explore and find your favorite flavor combo.
Add Vegetables
Adding vegetables gives your meal extra nutrition. You can use bell peppers, snap peas, or carrots. Chop them into bite-sized pieces to help them cook evenly. Add them to the Crockpot at the same time as the chicken. They will absorb the sauce and add color to your dish.
Storage Info
Refrigeration Guidelines
Store leftovers in an airtight container for up to 3-4 days. This keeps the chicken fresh. Make sure to let it cool before sealing. It’s best to eat it within this time for great taste.
Freezing Recommendations
You can freeze shredded bourbon chicken for up to 3 months. This is perfect for meal prep. Just make sure to let it cool before packing. When you want to eat it, thaw it in the fridge overnight.
Reheating Tips
To reheat, use a microwave or stove. Add a splash of water to keep it moist. If using the stove, heat it over low. Stir it often to heat evenly. Enjoy the amazing flavors just like when it was fresh!
FAQs
Can I use frozen chicken in the Crockpot?
Yes, you can use frozen chicken. Just remember to increase the cooking time. Make sure the chicken reaches a safe internal temperature of 165°F to ensure it’s cooked well.
What sides go well with Crockpot Bourbon Chicken?
You can serve this chicken with rice. Steamed vegetables also pair nicely. A fresh salad adds a crisp touch. These sides balance the sweet and savory flavors of the dish.
Can I make this dish ahead of time?
Absolutely! You can prepare the chicken and sauce the night before. Just refrigerate everything until you’re ready to cook. This makes meal prep easy and helps the flavors meld together.
Crockpot Bourbon Chicken is easy to make and packed with flavor. We covered the key ingredients, step-by-step cooking instructions, and some handy tips. You can customize it with different proteins or vegetables to suit your taste. This dish works well for meal prep and tastes great reheated. Enjoy this delicious meal and impress your family with your cooking skill

Sweet and Savory Crockpot Chicken
Ingredients
- 2 lbs boneless, skinless chicken thighs
- 0.5 cup soy sauce
- 0.5 cup pure maple syrup
- 0.25 cup apple cider vinegar
- 2 tablespoons ketchup
- 1 tablespoon Dijon mustard
- 1 tablespoon minced garlic
- 1 tablespoon fresh ginger, finely grated
- 0.25 teaspoon freshly ground black pepper
- 0.25 teaspoon red pepper flakes
- 2 units green onions, thinly sliced
- 1 serving cooked rice
Instructions
- In a mixing bowl, start by whisking together the soy sauce, maple syrup, apple cider vinegar, ketchup, Dijon mustard, minced garlic, grated ginger, black pepper, and red pepper flakes until you have a smooth and well-combined sauce.
- Take the chicken thighs and place them directly into the Crockpot. Pour the prepared sauce mixture over the chicken, ensuring every piece is thoroughly coated.
- Secure the lid on the Crockpot and select your cooking mode: set it to low for 6-7 hours for juicy, tender chicken, or on high for 3-4 hours if you're short on time.
- Once the cooking time is up, carefully remove the chicken thighs. Using two forks, shred the chicken into bite-sized pieces and mix it well with the remaining sauce in the Crockpot. If you prefer a thicker sauce, transfer it to a saucepan and bring to a gentle simmer over medium heat, letting it reduce to your desired consistency.
- Serve the flavorful shredded chicken over a bed of your choice of cooked rice and finish by garnishing with the sliced green onions for a fresh touch. Enjoy the delightful blend of sweet and savory flavors in this comforting dish!

![To make these tasty strawberry cream cheese rolls, gather these simple ingredients: - 1 cup fresh strawberries, diced - 1 tablespoon granulated sugar (optional; for sweetness) - 8 oz cream cheese, softened to room temperature - 1/4 cup powdered sugar - 1 teaspoon pure vanilla extract - 1 package (about 8 oz) crescent roll dough - 1 egg, beaten (for egg wash) - 1 tablespoon sesame seeds (for topping, optional) You can change some ingredients if needed. Here are some easy swaps: - Strawberries: Use any berry like blueberries or raspberries. - Cream Cheese: Neufchâtel cheese is a great lower-fat choice. - Sugar: Try honey or maple syrup for a natural sweetener. - Crescent Roll Dough: Use puff pastry if you want a flakier roll. - Egg Wash: Brush with milk or a non-dairy milk for a vegan option. Having the right tools makes the process easier. Here’s what you need: - Baking sheet - Parchment paper - Mixing bowls - Electric mixer or whisk - Rolling pin (optional) - Knife for cutting strawberries - Measuring cups and spoons Gathering these items will help you whip up these rolls with ease. Enjoy the process! First, we need to get the oven ready. Set your oven to 375°F (190°C). This step is key. Preheating helps the rolls bake evenly. While the oven heats, you can prep the other ingredients. Next, let’s work on the strawberries. Dice 1 cup of fresh strawberries. Place them in a bowl. If you want extra sweetness, add 1 tablespoon of granulated sugar. Gently stir them together. Let the strawberries sit for about 10 minutes. This process, called macerating, helps them soften and release their juices. Now, it’s time to make the filling. In a separate bowl, take 8 oz of softened cream cheese. Add 1/4 cup of powdered sugar and 1 teaspoon of pure vanilla extract. Beat these together until the mixture is smooth and creamy. Make sure there are no lumps. This filling is rich and tasty, perfect for our rolls. Let’s assemble our rolls. Unroll 1 package of crescent roll dough on a clean surface. Separate the dough into individual triangles. For each triangle, spread a generous spoonful of the cream cheese mixture on the wide end. Add a few pieces of the macerated strawberries on top. Roll the dough from the wider side to the tip, tucking in the filling as you go. Press the tip down gently to seal the roll. Now, we prepare for baking. Place the rolls on a parchment-lined baking sheet. To make them shiny and golden, brush the tops with a beaten egg. If you like, sprinkle sesame seeds on top for extra crunch. Now, put the baking sheet in your preheated oven. Bake the rolls for about 12-15 minutes. Look for a golden brown color. Once baked, take the rolls out of the oven. Let them cool for a few minutes on the baking sheet. The filling will be hot, so be careful! For a lovely presentation, serve the rolls on a nice platter. You can dust them with powdered sugar and add whole strawberries on the side for a fresh touch. Enjoy your sweet treat! For the full recipe, check out the details above. To make the best strawberry cream cheese rolls, focus on the texture. Always use softened cream cheese. This helps it blend well with the sugar and vanilla. If your cream cheese is too cold, it will be lumpy. For the strawberries, let them sit with sugar for about 10 minutes. This softens them and brings out their natural juice. When rolling the dough, avoid over-stretching. This keeps the rolls fluffy and light. Watch out for a few common mistakes. First, don’t skip the egg wash. This gives the rolls a lovely golden color. Second, be careful not to overfill. Too much filling can cause the rolls to burst open while baking. Lastly, always preheat your oven. This step is crucial for even baking. If you skip it, the rolls may not rise properly. Presentation matters, especially with these rolls. Serve them on a nice platter, dusted with powdered sugar. This makes them look extra special. You can also add whole strawberries around the rolls. This adds color and freshness to your dish. For a finishing touch, consider drizzling a little melted chocolate on top. These simple steps make your rolls shine on any table. For the complete recipe, check the Full Recipe section. Enjoy making your own delicious strawberry cream cheese rolls! {{image_4}} You can switch up the fruit in these rolls. Instead of strawberries, use raspberries, blueberries, or peaches. Each fruit brings a unique taste. Raspberries add a tart flavor, while blueberries offer a sweet touch. To use other fruits, chop them into small pieces. Mix them with sugar, just like you did with the strawberries. Let them sit to release their juices. This step helps enhance the flavor. If you're gluten-free, don't worry! You can still enjoy these rolls. Look for gluten-free crescent roll dough in stores. Many brands make tasty options. Just follow the same steps as the regular recipe. The end result will still be fluffy and delicious. Always check the ingredients to ensure they meet your needs. Feel free to add more flavors to the cream cheese filling. You can mix in lemon zest for a fresh twist. Alternatively, consider adding a dash of cinnamon for warmth. For a chocolatey treat, fold in some mini chocolate chips. These add-ins will create a fun twist on the classic rolls. You can also use flavored cream cheese, like strawberry or vanilla. This can save time while adding even more flavor. Check out the Full Recipe for these ideas and details! Store leftover strawberry cream cheese rolls in an airtight container. Keep them in the fridge for up to three days. If you want to keep them fresh for longer, consider wrapping each roll in plastic wrap before placing them in the container. This helps maintain their moisture and flavor. To reheat the rolls, preheat your oven to 350°F (175°C). Place the rolls on a baking sheet and cover them with foil. Heat for about 10-15 minutes, or until warm throughout. You can also use a microwave. Heat each roll for 15-20 seconds until warm. Just be careful not to overheat them, as this can make them tough. You can freeze these rolls for later enjoyment. Allow them to cool completely after baking. Then, wrap each roll tightly in plastic wrap, followed by aluminum foil. This helps prevent freezer burn. Store them in the freezer for up to two months. When you are ready to enjoy them, thaw them in the fridge overnight and reheat as described above. For the full recipe, check out the complete instructions above! You can prepare the rolls a day before. Follow the steps until the baking part. Once you assemble them, cover the rolls tightly with plastic wrap. Store them in the fridge overnight. When you're ready to bake, take them out and let them sit for about 20 minutes. Then, brush with egg wash and bake as usual. Yes, you can use frozen strawberries. Thaw them first and drain any excess juice. Dicing them will help them mix well with the cream cheese. The taste will still be great, but fresh strawberries do add a nice touch. These rolls pair well with a few items. Consider serving them with whipped cream or a scoop of vanilla ice cream. A light drizzle of chocolate sauce can elevate the flavor. Fresh mint leaves also add a nice touch and color. Check the color and texture of the rolls. They should be golden brown and puffed up. You can gently tap the top; it should sound hollow. If you're unsure, an instant-read thermometer can help. The internal temperature should reach 190°F (88°C) for a perfect bake. For the full recipe, refer to the [Full Recipe]. This blog post covered everything you need to make Strawberry Cream Cheese Rolls. We explored the ingredients, gave useful substitutions, and listed the best tools. Then, I provided simple steps for prepping, baking, and serving. I shared tips for great texture and ways to avoid common mistakes. In conclusion, enjoy these tasty rolls with your favorite flavors. They are fun to make and eat! Keep experimenting with variations and storage tips to make the most of your delicious treats. Happy baking!](https://fastmealmate.com/wp-content/uploads/2025/06/0240e1a4-5971-472f-af7e-a45e0386d654-768x768.webp)