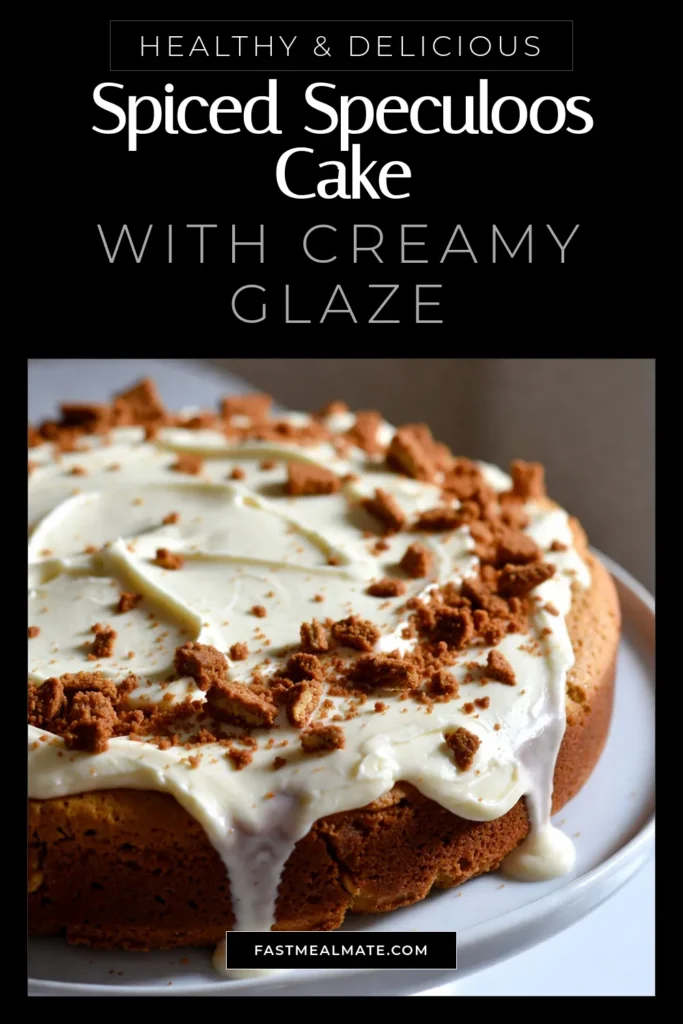
Speculoos Cake with Mascarpone Glaze Delight
Get ready to indulge in a treat you won’t forget! This Speculoos Cake with Mascarpone Glaze is pure bliss for your taste buds. With hints of warm spices and a creamy, vibrant frosting, every slice whispers comfort. I’ll guide you step by step, ensuring you create a stunning cake that impresses everyone. Are you ready to bake and savor this delightful dessert? Let’s dive in!
Why I Love This Recipe
- Unique Flavor Profile: This Speculoos cake combines warm spices and a creamy mascarpone glaze, creating a delightful flavor experience that’s perfect for any occasion.
- Easy to Make: The simple instructions and readily available ingredients make this cake an accessible treat for bakers of all skill levels.
- Perfect for Any Occasion: Whether it’s a cozy family gathering or a festive celebration, this cake is sure to impress guests and loved ones alike.
- Delightfully Textured: The crunch of crushed speculoos cookies paired with the smooth mascarpone glaze adds a wonderful contrast in texture with every bite.
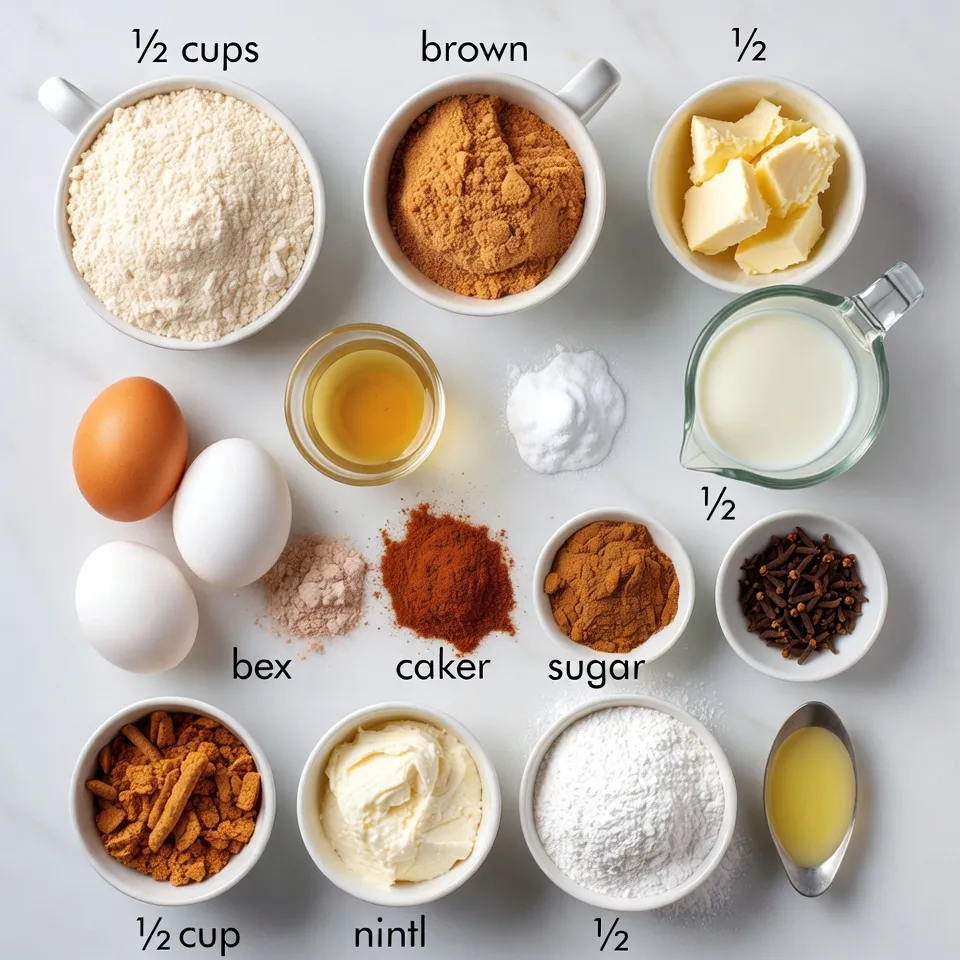
Ingredients
Dry Ingredients
– 1 ½ cups all-purpose flour
– 1 tsp baking powder
– 1 tsp baking soda
– 2 tsp ground cinnamon
– 1 tsp ground ginger
– ½ tsp ground nutmeg
– ½ tsp ground cloves
– ½ cup crushed speculoos cookies
Wet Ingredients
– 1 cup brown sugar
– ½ cup unsalted butter, softened
– 2 large eggs, at room temperature
– 1 tsp pure vanilla extract
– ½ cup whole milk
– 1 cup mascarpone cheese
– ½ cup powdered sugar, sifted
– 1 tsp fresh lemon juice
Additional Garnish
– Extra crushed speculoos cookies
Gathering the right ingredients is key to a great Speculoos Cake with Mascarpone Glaze. Start with dry ingredients like flour, baking powder, baking soda, and warm spices. The spices bring warmth and sweetness, making the cake special. You’ll want to include crushed speculoos cookies to add flavor and texture.
Next, move to the wet ingredients. Use brown sugar for a rich, caramel taste. Softened unsalted butter will help create a fluffy cake. The eggs add richness, while vanilla extract enhances the flavor. Whole milk keeps the cake moist. Mascarpone cheese is the star of the glaze. The powdered sugar gives sweetness, and fresh lemon juice adds a nice tang.
Finally, don’t forget the extra crushed speculoos cookies for garnish. They add a crunchy finish that looks beautiful on the cake.
Step-by-Step Instructions
Prepping the Oven and Cake Pan
– Preheat your oven to 350°F (175°C).
– Grease and flour an 8-inch round cake pan. This prevents sticking and helps the cake slide out easily.
Mixing Wet Ingredients
– In a large bowl, cream together the softened butter and brown sugar. Mix until fluffy.
– Add the two eggs. Mix in the eggs one by one. Stir well after each one.
– Next, add the vanilla extract and whole milk. Stir until the mixture is smooth.
Combining Dry Ingredients
– In another bowl, whisk the dry ingredients. This includes the flour, baking powder, baking soda, and ground spices.
– Make sure no lumps remain. This step is key for a light cake.
Merging Mixtures
– Gradually add the dry mix to the wet mix. Use a spatula to fold them together.
– Be careful not to overmix. Overmixing can make the cake dense and tough.
Baking Process
– Pour the batter into the prepared cake pan. Smooth the top with a spatula.
– Bake for 25-30 minutes. Check with a toothpick to see if it comes out clean.
– Let the cake cool in the pan for about 10 minutes. Then transfer it to a wire rack to cool completely.
Making the Mascarpone Glaze
– In a medium bowl, combine mascarpone cheese, sifted powdered sugar, and fresh lemon juice.
– Use a whisk or electric mixer to mix until the glaze is smooth and creamy. No lumps should remain.
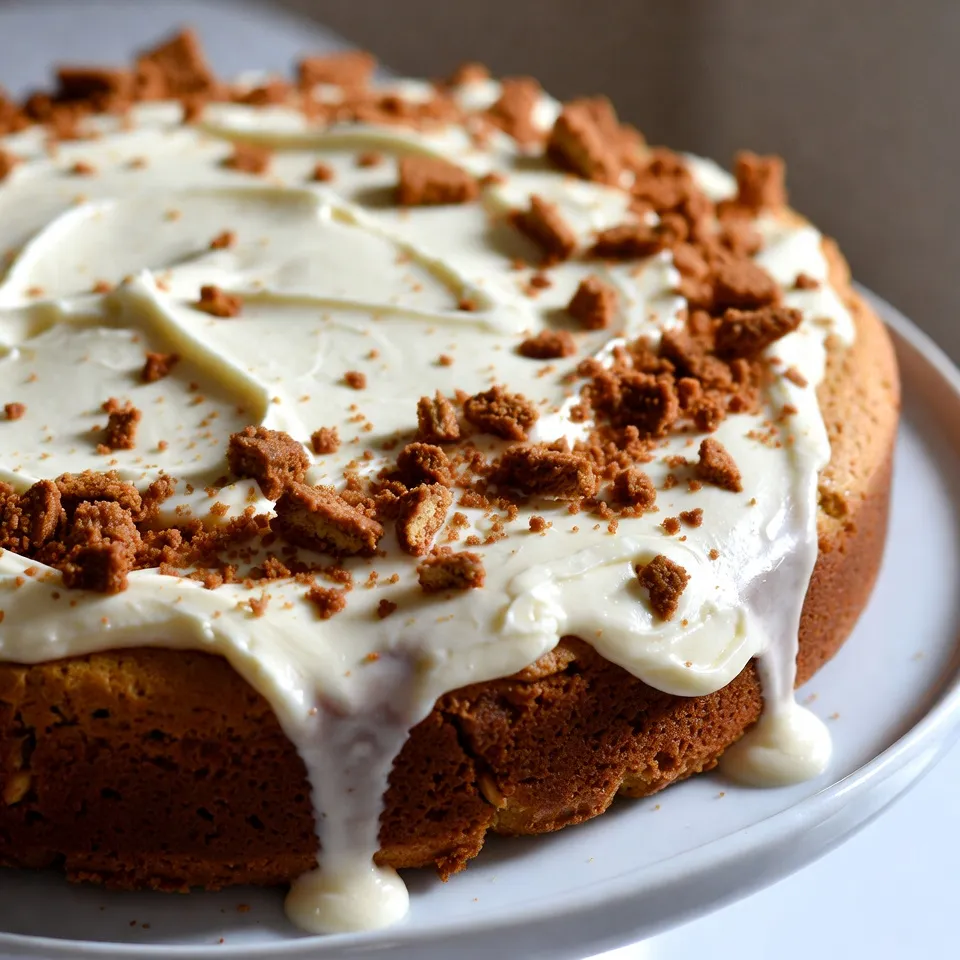
Final Assembly
– Once the cake is cool, spread the mascarpone glaze evenly on top.
– Let it drip down the sides for a lovely look.
– For extra crunch, sprinkle crushed speculoos cookies on top of the glaze. This adds flavor and texture.
Tips & Tricks
Ensuring a Fluffy Cake
To make your cake fluffy, avoid overmixing the batter. Mix just until combined. Overmixing makes the cake dense. Use room temperature ingredients, too. This helps your batter blend smoothly. Cold eggs or butter can lead to a lumpy mix.
Perfecting the Glaze
For the mascarpone glaze, aim for a lump-free texture. Start by whisking the mascarpone cheese well. Blend in the powdered sugar and lemon juice until smooth. If your glaze is too thick, add a splash of milk to thin it. If too runny, add more powdered sugar to thicken.
Presentation Advice
For elegant serving, place each slice on a nice plate. A sprig of mint or a light dusting of powdered sugar adds charm. You can also serve with a scoop of vanilla ice cream. This enhances the flavors and makes each bite special. Consider garnishing with extra crushed speculoos cookies for texture.
Pro Tips
- Use Room Temperature Ingredients: Ensure that your eggs and butter are at room temperature to create a smoother batter and help the cake rise properly.
- Don’t Overmix the Batter: When combining the wet and dry ingredients, mix just until combined to avoid a dense cake texture.
- Check for Doneness: Use a toothpick or cake tester inserted into the center of the cake; it should come out clean or with a few moist crumbs.
- Chill the Glaze: For a firmer mascarpone glaze, refrigerate it for about 15 minutes before spreading it on the cooled cake.

Variations
Flavor Adjustments
You can easily change the flavor of your speculoos cake.
– Spices: Try adding nutmeg or cardamom for a twist.
– Chocolate: Mix in chocolate chips for a sweet surprise.
– Fruit: Add diced apples or pears for a fruity touch.
Each adjustment gives the cake a new character. You can make it your own.
Gluten-Free Option
If you need a gluten-free cake, it’s simple!
– Just swap all-purpose flour for gluten-free flour.
– Look for a blend that works for cakes.
This change keeps the texture light and fluffy. Your friends won’t even notice it’s gluten-free!
Vegan Adaptation
Want a vegan version? You can do that too!
– Use plant-based butter instead of regular butter.
– Replace eggs with flaxseed meal mixed with water.
– Substitute whole milk with almond or oat milk.
– For mascarpone, try a vegan cream cheese.
These swaps let everyone enjoy this delightful cake! You can serve it at gatherings without worry.
Storage Info
Best Storage Practices
To keep your Speculoos Cake fresh, refrigerate any leftovers. Wrap the cake in plastic wrap or place it in an airtight container. This helps prevent the cake from drying out. If you want to keep it for a longer time, you can freeze it.
Freezing the Cake
If you freeze the cake, do it before adding the glaze. Wrap the unglazed cake tightly in plastic wrap. Then, place it in a freezer bag. This helps to keep the cake moist. If you want to freeze the glazed cake, let it cool completely. Cover it well to protect the glaze.
To thaw the cake, move it from the freezer to the fridge for several hours. You can also let it sit at room temperature for about an hour. When ready to serve, slice and enjoy!
FAQs
How do I know when the cake is done?
To check if the cake is done, use a toothpick. Insert it into the center of the cake. If it comes out clean, your cake is ready. If there is batter on the toothpick, bake it a few more minutes. Keep an eye on the time, but the toothpick is the best test.
Can I make this cake in advance?
Yes, you can make this cake in advance. Bake the cake and let it cool completely. Wrap it well in plastic wrap. Store it at room temperature for up to two days. You can also freeze the cake for up to three months. Just thaw it in the fridge overnight before serving.
What can I substitute for mascarpone?
If you can’t find mascarpone, there are good substitutes. Cream cheese works well in a pinch. Mix it with a bit of heavy cream to mimic the texture. Ricotta cheese can also be used, but blend it smooth first. These options will still give you a creamy glaze.
How long will the cake last?
The cake will last about two days at room temperature when glazed. If you store it in the fridge, it can last up to a week. Without the glaze, it can last longer. Just keep it in an airtight container to keep it fresh. Always check for any signs of spoilage before enjoying your cake.
In this post, I covered all the ingredients and steps to make a delicious cake. You learned about dry and wet ingredients, plus how to add a tasty mascarpone glaze. The tips help ensure a fluffy cake, while variations let you get creative. Finally, I shared storage tips for your cake’s freshness. Enjoy making this cake your own, and have fun experimenting with flavors. Your kitchen is the perfect place for baking memories. Happy bakin

Speculoos Cake with Mascarpone Glaze
Ingredients
- 1.5 cups all-purpose flour
- 1 cup brown sugar
- 0.5 cup unsalted butter, softened to room temperature
- 2 large eggs, at room temperature
- 1 tsp pure vanilla extract
- 0.5 cup whole milk
- 1 tsp baking powder
- 1 tsp baking soda
- 2 tsp ground cinnamon
- 1 tsp ground ginger
- 0.5 tsp ground nutmeg
- 0.5 tsp ground cloves
- 0.5 cup speculoos cookies, crushed (plus extra for garnish)
- 1 cup mascarpone cheese
- 0.5 cup powdered sugar, sifted
- 1 tsp fresh lemon juice
Instructions
- Preheat the oven to 350°F (175°C). Prepare an 8-inch round cake pan by greasing it with butter and lightly dusting it with flour.
- In a large mixing bowl, cream together the softened butter and brown sugar on medium speed until light and fluffy, about 3-4 minutes. Add the eggs one at a time, mixing well after each addition. Stir in the vanilla extract and whole milk until smooth.
- In a separate bowl, whisk together the all-purpose flour, baking powder, baking soda, ground spices, and crushed speculoos cookies.
- Gradually add the dry mixture to the wet mixture, folding gently until just combined.
- Pour the batter into the prepared cake pan and smooth the top. Bake for 25-30 minutes, or until a toothpick inserted in the center comes out clean. Allow to cool in the pan for 10 minutes before transferring to a wire rack.
- In a medium bowl, combine the mascarpone cheese, sifted powdered sugar, and fresh lemon juice. Mix until smooth and creamy.
- Once the cake has cooled completely, spread the mascarpone glaze evenly over the top, allowing it to drip down the sides.
- Sprinkle additional crushed speculoos cookies over the glaze for garnish.
- Cut the cake into slices and serve immediately, or refrigerate for up to two days.
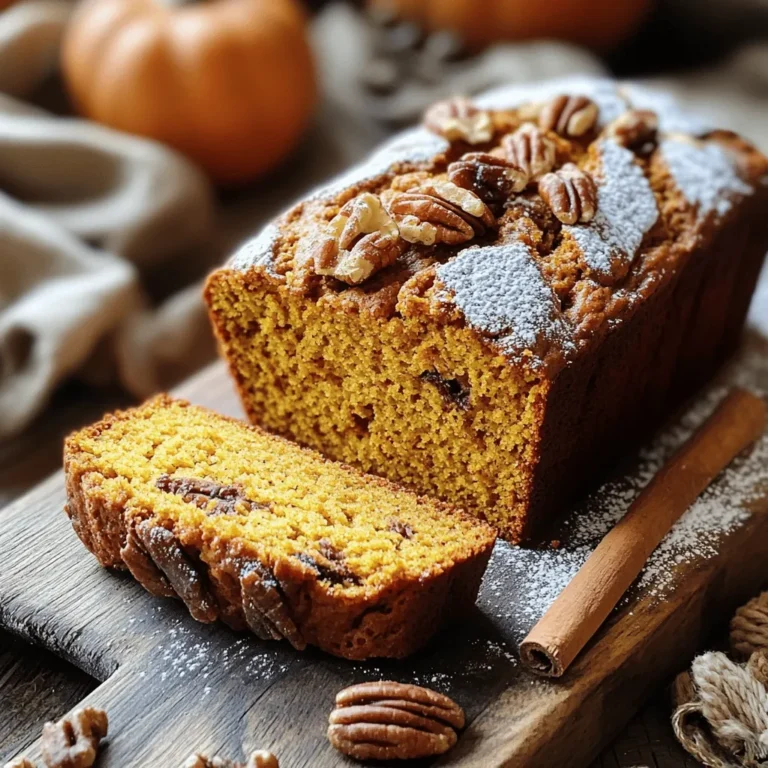
![To make these tasty bars, you need a few simple ingredients: - 1 cup creamy peanut butter - 1/2 cup honey or maple syrup - 1 1/2 cups rolled oats - 1/2 cup almond flour - 1/4 cup unsweetened cocoa powder - 1/2 teaspoon vanilla extract - A pinch of salt - 1/3 cup dark chocolate chips (optional) These ingredients blend well together. The peanut butter gives a rich flavor. Honey or maple syrup adds sweetness. Oats provide a hearty base, making them filling. You may want to add some extra touches for more flavor: - A sprinkle of cinnamon for warmth - Chopped nuts for crunch - Dried fruits for sweetness These options can change the taste and texture. Feel free to mix and match based on your preferences. If you have allergies, here are some easy swaps: - Use sunflower seed butter instead of peanut butter - Substitute maple syrup for honey if needed - Replace almond flour with oat flour or coconut flour These substitutions keep the recipe safe and delicious. You can still enjoy the bars while avoiding allergens. Just remember to follow the same steps, and you’ll be good to go! Start by gathering your ingredients. Place the creamy peanut butter and honey in a large bowl. Use a spatula or wooden spoon to mix them. Stir until the mix is smooth and creamy. This step is key to a tasty bar. Next, add the rolled oats, almond flour, cocoa powder, vanilla, and salt. Mix everything together well. You want to see no dry spots. This creates a thick and sticky dough that holds together nicely. Now, take an 8x8 inch baking dish and line it with parchment paper. Leave some paper hanging over the edges. This makes it easy to lift out the bars later. Transfer your peanut butter mixture into the dish. Use your hands or a spatula to press it down. Make sure it’s even and firm across the bottom. If you want to add a chocolate drizzle, melt the dark chocolate chips next. Place them in a microwave-safe bowl. Heat in 15-second bursts, stirring each time. Once melted, drizzle the chocolate over the pressed mixture. Use a spoon or piping bag for a nice look. Finally, place your baking dish in the fridge. Chill for at least 1-2 hours. This helps the bars set firmly. Once ready, lift them out by the parchment paper. Cut into squares or bars as you like. You can find the full recipe [Full Recipe]. To get the best texture, mix the peanut butter and honey well. You want it smooth and creamy. If your mixture seems too dry, add a bit more honey or a splash of water. This helps bind everything together. The rolled oats should be well coated to hold the bars nicely. When you press the mixture into the dish, use damp hands. This prevents sticking. Start at the center and push outward. Press firmly and evenly to avoid air pockets. A flat spatula can help smooth the top. Make sure the layer is compact and even for better bars. For a great look, cut the bars into squares or rectangles. Place them on a colorful plate. You can add fresh fruit like berries or banana slices on the side. For a fun touch, sprinkle some extra cocoa powder or crushed nuts on top. This makes your treat look even more inviting. {{image_4}} You can make these bars even better with fun mix-ins. Chopped nuts add crunch. Walnuts or almonds work great. Dried fruits like cranberries or raisins give a sweet touch. Mix in about 1/2 cup of these before you press the mixture into the dish. This way, each bite has a surprise! Want to change the flavor? Use coconut or almond extract! Just add a teaspoon to the mix. Coconut gives a tropical twist. Almond makes it rich and nutty. You can also add shredded coconut for extra texture. It’s easy to make each batch unique! You can swap honey for maple syrup if you want. Both sweeteners work well, but they taste different. Maple syrup has a deep flavor. Honey is sweeter and lighter. You can also use agave nectar if you prefer. Just remember, the texture may change slightly with each choice. Use the one that you love best for your no-bake peanut butter bars. For the full recipe, check the details above! To keep your no-bake peanut butter bars fresh, use an airtight container. This helps lock in moisture. Place a piece of parchment paper between layers if you stack them. This prevents sticking and makes them easy to grab. Store them in the refrigerator for the best taste and texture. You can freeze these bars for later. Cut them into squares first and wrap each one in plastic wrap. Then, place them in a freezer-safe bag. Squeeze out as much air as you can before sealing. They will last up to three months in the freezer. When you're ready to enjoy, thaw them in the fridge overnight. These bars can last up to one week in the fridge. Keep them cool and away from heat. Check for any changes in smell or texture before eating. If you notice anything off, it's best to toss them. Following these tips ensures you always have a tasty treat on hand. If you want the full recipe, you can check it out for more details! Yes, you can use crunchy peanut butter. It will add some nice texture to the bars. The flavor will be the same, but the crunch gives a fun bite. If you like a little crunch, go for it! The bars need to chill for at least 1-2 hours. This time helps them set well. If you can wait longer, they will be even firmer and easier to cut. Just make sure they are cold before slicing. They can be vegan if you use maple syrup instead of honey. Just check your peanut butter, too, to ensure it doesn’t have added ingredients. With the right swaps, you can enjoy this treat without any animal products! You can use any nut flour, like hazelnut or cashew flour. If you need a nut-free option, try oat flour or even whole wheat flour. Just remember that different flours may change the texture a bit. The bars are set when they are firm to the touch. They should hold their shape when you lift them out of the pan. If they feel soft, give them more time in the fridge. Once set, they are ready to cut into pieces. These no-bake peanut butter bars are simple and tasty. We covered ingredients, steps, and great tips. You can customize them with different flavors and mix-ins. Remember to store them well for freshness. Feel free to experiment with substitutes and variations. Enjoy making these treats for yourself or to share. They are quick to whip up, perfect for any snack. Now, it’s your turn to enjoy this easy, delicious recipe!](https://fastmealmate.com/wp-content/uploads/2025/07/4c36effc-71ba-4d9d-bf30-f4c7732f2b92-768x768.webp)