
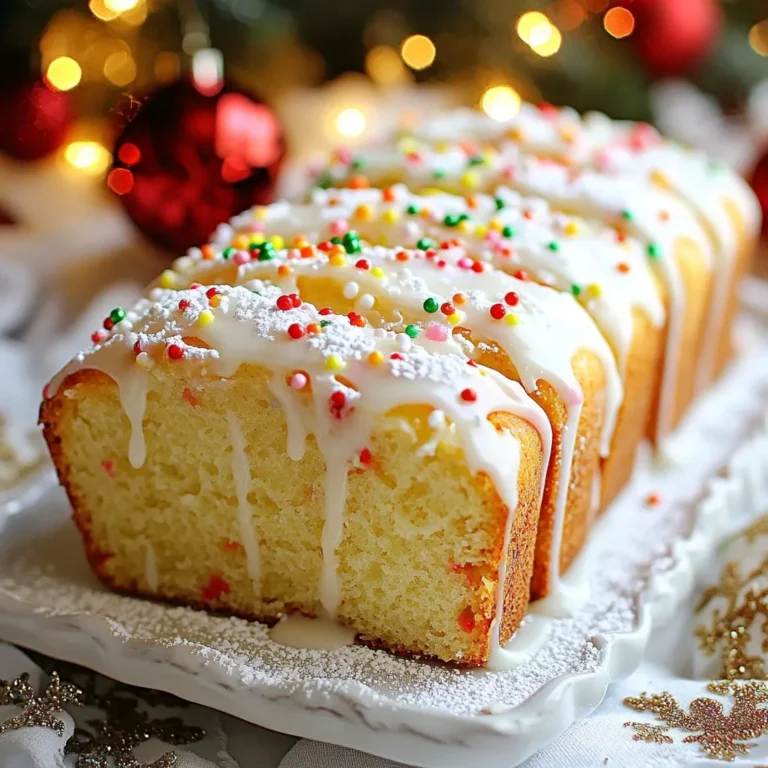
Sugar Cookie Christmas Fudge Festive and Delicious Treat
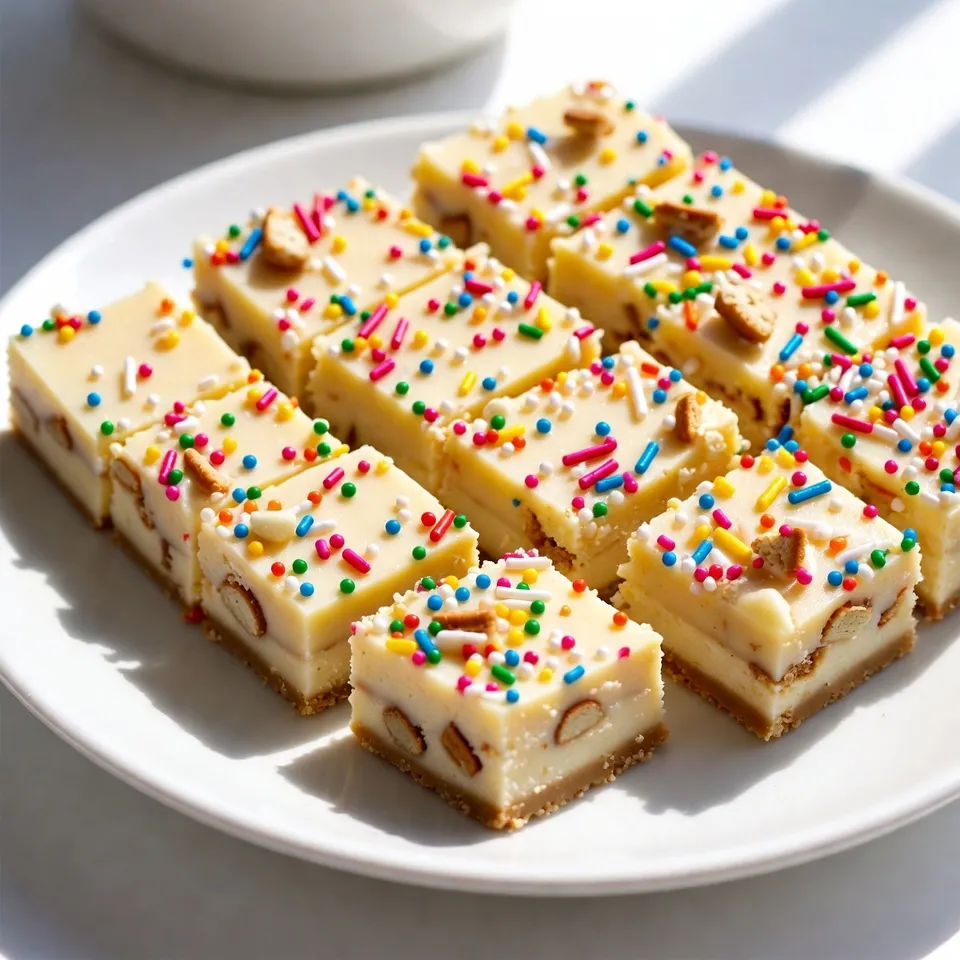

Get ready to delight your taste buds with my Sugar Cookie Christmas Fudge! This sweet treat combines the classic flavor of sugar cookies with creamy fudge. Perfect for holiday gatherings, it’s easy to make and fun to share. I’ll walk you through the simple ingredients and steps needed to create this festive delicacy. Let’s dive in and make something delicious that everyone will love!
Why I Love This Recipe
- Festive Flavor: This fudge combines the sweetness of sugar cookies with the rich creaminess of white chocolate, creating a delightful holiday treat.
- Easy to Make: With just a few simple ingredients and steps, this recipe is perfect for both novice and experienced bakers looking to whip up a festive dessert.
- Perfect for Gifting: These fudge squares make a charming gift for friends and family during the holiday season, beautifully packaged or presented on a platter.
- Customizable Toppings: Feel free to mix in your favorite festive sprinkles or toppings, allowing for personalization and creativity with each batch.
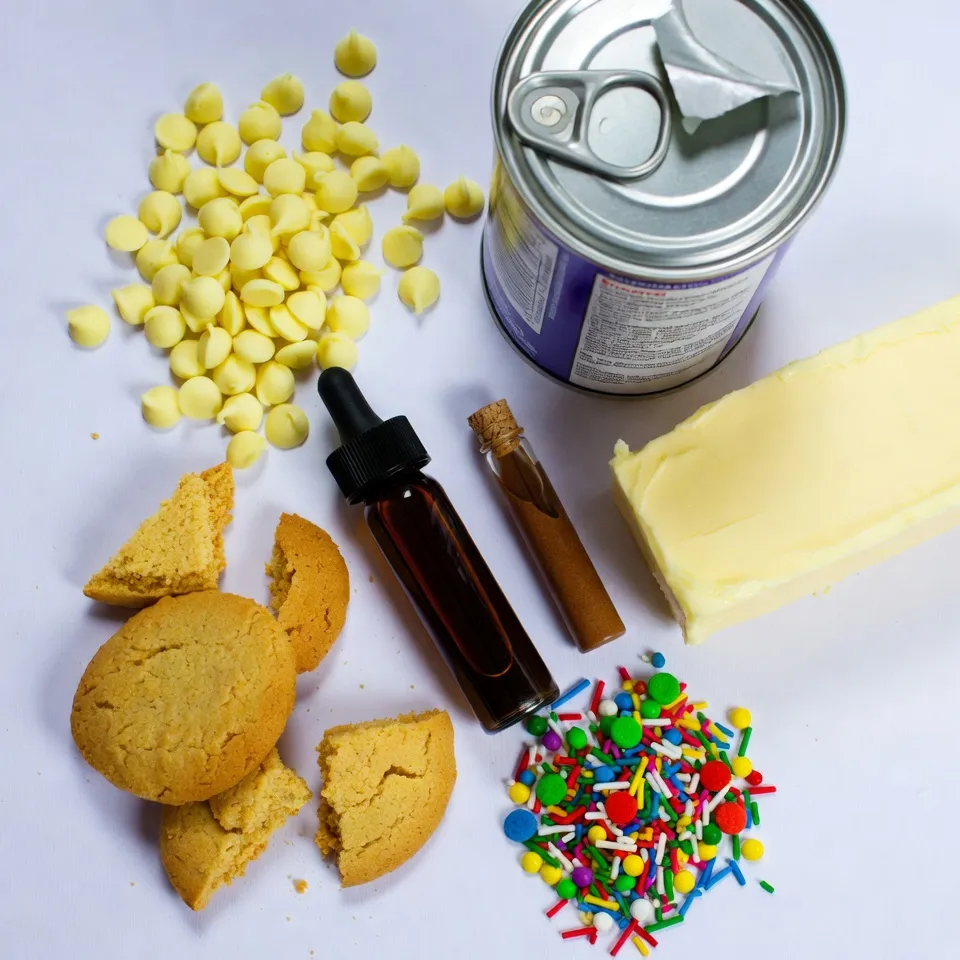
Ingredients
List of Ingredients
– 2 cups white chocolate chips
– 1 can (14 oz) sweetened condensed milk
– 1/4 cup unsalted butter
– 1 cup crushed sugar cookies
– 1/2 teaspoon vanilla extract
– 1/4 teaspoon almond extract
– 1/2 cup festive sprinkles
Ingredient Substitutions
You can swap white chocolate chips for milk or dark chocolate chips. If you want a non-dairy option, use coconut milk or almond milk in the fudge. For sprinkles, try using chocolate chips, nuts, or dried fruit. This will add a fun twist to your fudge.
Step-by-Step Instructions
Preparing the Baking Pan
Start by lining a 9×9-inch baking pan with parchment paper. Make sure some paper hangs over the edges. This overhang helps when you lift the fudge out after it sets. It saves you from messy breaks.
Melting the Ingredients
In a medium saucepan, combine 2 cups of white chocolate chips, 1 can of sweetened condensed milk, and 1/4 cup of unsalted butter. Set the pan over low heat. Stir constantly with a silicone spatula. This keeps the chocolate from burning. You want the mixture to be smooth and creamy.
Flavor Development
Once the mixture is smooth, remove the pan from the heat. Stir in 1/2 teaspoon of vanilla extract and 1/4 teaspoon of almond extract. This adds a lovely aroma. Next, gently fold in 1 cup of crushed sugar cookies. Make sure the cookies are evenly mixed in for consistent flavor.
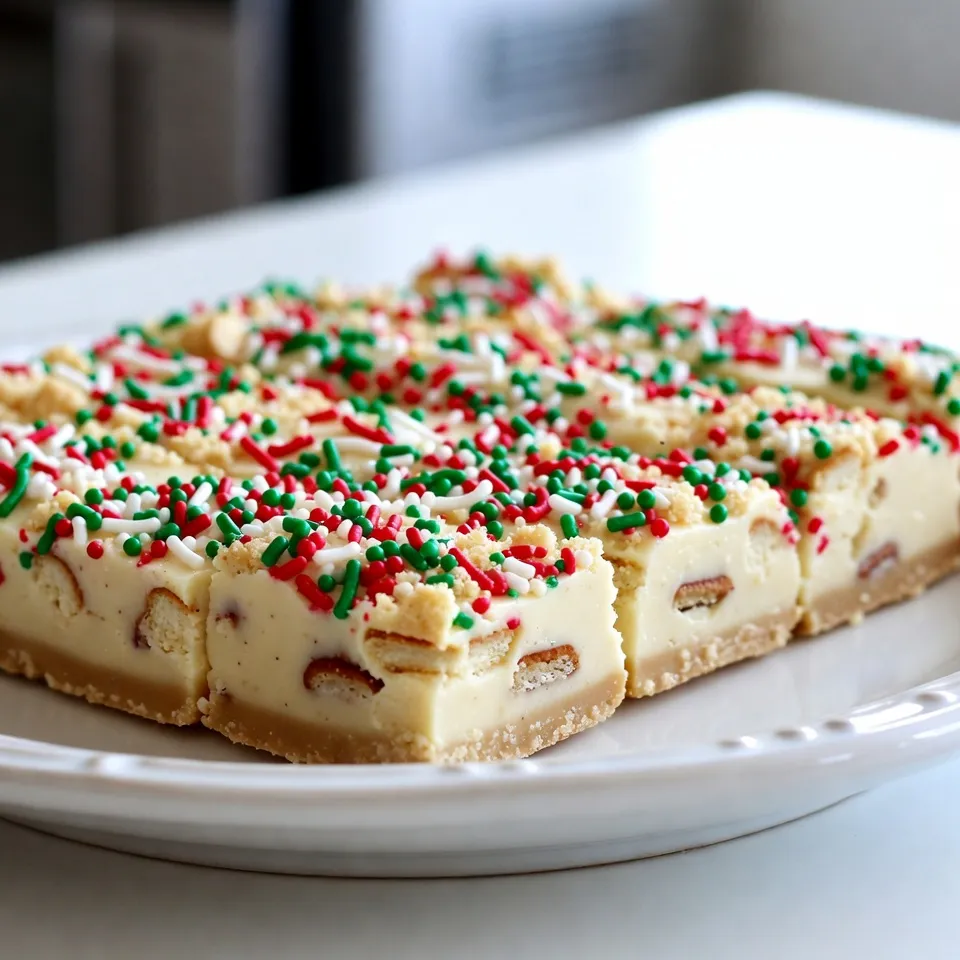
Pouring and Setting
Carefully pour the fudge mixture into the prepared pan. Use your spatula to spread it evenly. Smooth the top for a nice finish. Now, sprinkle 1/2 cup of festive sprinkles on top. Press them down slightly so they stick. This festive touch makes the fudge extra special!
Cooling Process
Let the fudge cool at room temperature for about 1 hour. Then, transfer it to the fridge. Chill for at least 2 hours or until it feels firm. You can tell it’s ready when it holds its shape well.
Tips & Tricks
Perfecting Your Fudge
To make great fudge, you want even mixing. When you fold in the crushed sugar cookies, make sure they spread out well. This way, each bite tastes the same. You also need to avoid burning the chocolate. Keep the heat low and stir often. If you see any signs of burning, take it off the heat right away.
Presentation Ideas
For serving, think about how to make it pretty. Place the fudge squares on a nice platter. You can add little sugar cookies or festive decorations around the fudge. This gives it a cheerful look. Holiday-themed garnishes like mini ornaments or themed picks also work well.
Common Mistakes to Avoid
One big mistake is overheating the ingredients. If you let the chocolate get too hot, it can burn. Always use low heat and stir. Another mistake is not letting the fudge cool long enough. After mixing, it should sit at room temperature for one hour. Then, chill it in the fridge for at least two hours. This ensures it firms up nicely.
Pro Tips
- Use High-Quality Chocolate: Opt for premium white chocolate chips for a creamier and richer fudge texture.
- Let It Cool Completely: Ensure the fudge cools at room temperature before refrigerating to prevent condensation, which can make it sticky.
- Experiment with Flavors: Feel free to add a pinch of cinnamon or nutmeg for a warm holiday spice twist to your fudge.
- Storage Tips: Keep the fudge in an airtight container in the fridge for up to two weeks to maintain freshness.
Variations
Flavor Variations
You can easily switch up the flavor of your sugar cookie Christmas fudge. Try adding different extracts. For a minty twist, peppermint extract works great. Just swap it in for the almond extract. This gives your fudge a refreshing taste. You can also mix in nuts, like walnuts or pecans, for added crunch. If you want something more chocolatey, add cocoa powder. This makes the fudge richer and deeper in flavor. All of these options let you create a fudge that suits your taste buds.
Dietary Modifications
If you need gluten-free options, use gluten-free cookies. Just crush them the same way as regular sugar cookies. This keeps the taste and texture you love. For vegan-friendly substitutions, use dairy-free chocolate chips. You can replace sweetened condensed milk with a coconut milk version. These changes keep your fudge tasty while meeting dietary needs.
Holiday Themes
Your fudge can fit any holiday theme. For Valentine’s Day, use red and pink sprinkles. It adds a sweet touch to your treats. For Easter, you can swap in pastel colors for the sprinkles. This makes your fudge look fun and festive. You can also create color-themed fudge for parties. Match the colors to your event for a special touch. Your fudge will stand out and bring joy to any celebration.
Storage Info
Best Practices for Storage
Store your fudge in proper airtight containers. This keeps it fresh longer. Choose containers that fit snugly, keeping air out. Avoid letting your fudge sit in warm or humid places. Heat and moisture can ruin its texture and taste.
Shelf Life
At room temperature, the fudge lasts about one week. If you store it in the fridge, it can last up to two weeks. You can also freeze the fudge for up to three months. Just wrap it tightly in plastic wrap and place it in a freezer-safe container.
Reheating Guidelines
If your fudge becomes too hard, soften it by letting it sit at room temperature. You can also microwave it briefly. If you freeze your fudge, let it cool for a bit before serving. This helps improve the texture and flavor before you enjoy it.
FAQs
What is sugar cookie fudge?
Sugar cookie fudge is a sweet treat that blends fudge and sugar cookies. It has a creamy texture and a rich flavor. The main ingredients are white chocolate, sweetened condensed milk, and crushed sugar cookies. This fudge captures all the joy of sugar cookies in a bite-sized square.
Can I make sugar cookie Christmas fudge ahead of time?
Yes, you can make this fudge ahead of time. It keeps well in the fridge for up to two weeks. Prepare it a few days before your holiday event. This way, you save time and enjoy stress-free baking.
How do I know when the fudge is ready to cut?
The fudge is ready to cut after it chills in the fridge for at least two hours. You should see it looks firm and set. When you press lightly, it should hold its shape.
Is this recipe suitable for gifting?
Absolutely! Sugar cookie fudge makes a great gift. Package it in a festive box or tin. Add a ribbon for a lovely touch. Friends and family will appreciate this homemade treat.
Can I use milk chocolate instead of white chocolate?
You can use milk chocolate, but it will change the flavor. The fudge will taste sweeter and less creamy than with white chocolate. If you love milk chocolate, go for it! Just keep an eye on melting it to avoid burning.
You now have all the steps to make delicious sugar cookie fudge. We covered the key ingredients and substitutions, followed by clear instructions for each stage of the process. I shared tips to perfect your fudge and ideas for fun variations. Keep your fudge fresh with the right storage methods.
Enjoy crafting this sweet treat for yourself or as a gift. Remember, the joy is in sharing! Happy bakin

Sugar Cookie Christmas Fudge
Ingredients
- 2 cups white chocolate chips
- 1 can (14 oz) sweetened condensed milk
- 1 4 cup unsalted butter
- 1 cup crushed sugar cookies
- 1 2 teaspoon vanilla extract
- 1 4 teaspoon almond extract
- 1 2 cup festive sprinkles
Instructions
- Begin by lining a 9x9-inch baking pan with parchment paper, allowing some paper to hang over the edges. This overhang will aid in lifting the fudge out after it sets.
- In a medium saucepan, set over low heat, combine the white chocolate chips, sweetened condensed milk, and unsalted butter. Stir constantly with a silicone spatula until the mixture is completely melted and smooth, ensuring that the chocolate does not burn.
- Once the mixture is smooth, remove the saucepan from the heat. Immediately stir in the vanilla and almond extracts until fully incorporated, releasing their wonderful aromas.
- Next, gently fold in the crushed sugar cookies into the melted mixture. Make sure the crushed cookies are evenly distributed throughout for consistent flavor in every bite.
- Carefully pour the fudge mixture into the prepared baking pan. Use the spatula to spread it evenly into the corners, smoothing the top for a polished look.
- Generously sprinkle the festive sprinkles across the top of the fudge, pressing them down slightly so they adhere to the surface. This adds a delightful holiday touch!
- Allow the fudge to cool at room temperature for approximately 1 hour. After that, transfer it to the refrigerator to chill for at least 2 hours, or until completely firm.
- Once the fudge is solidified, use the parchment paper overhang to lift it out of the pan. Place it on a cutting board and slice it into small squares for serving.
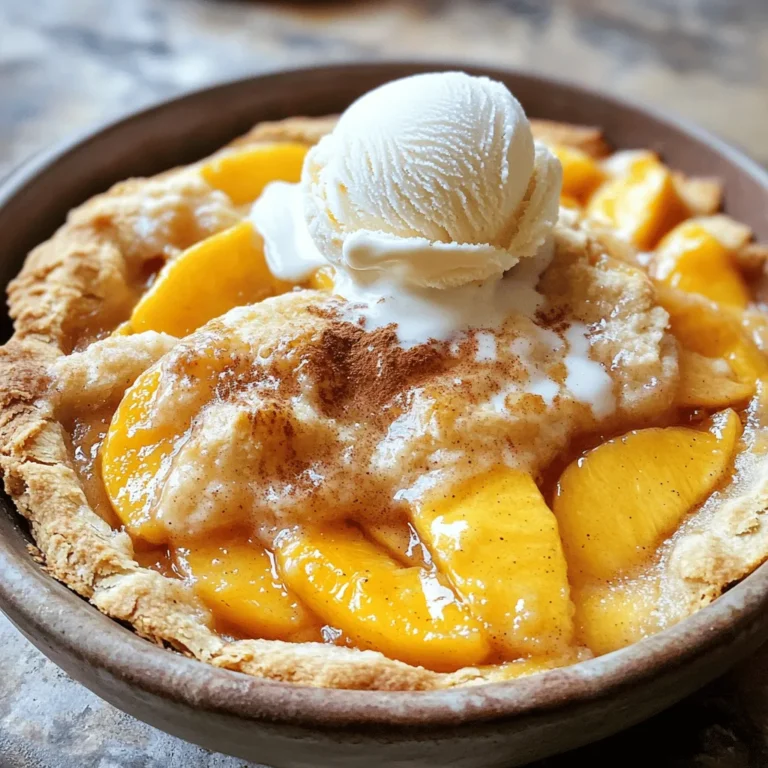
![To make a delightful Raspberry Lemon Loaf, you will need the following ingredients: - 1 ½ cups all-purpose flour - 1 teaspoon baking powder - ½ teaspoon baking soda - ¼ teaspoon salt - ½ cup unsalted butter, softened to room temperature - 1 cup granulated sugar - 2 large eggs, at room temperature - 1 teaspoon pure vanilla extract - Zest of 1 lemon - ½ cup buttermilk, at room temperature - 1 cup fresh raspberries (or frozen, thawed and drained) - 1 tablespoon fresh lemon juice Using quality ingredients makes a big difference. The all-purpose flour gives the loaf a soft texture. Baking powder and baking soda help it rise well, creating a light loaf. The butter and sugar add richness and sweetness. Eggs provide structure and moisture. The vanilla extract enhances the flavor, while lemon zest adds a fresh, bright note. Buttermilk helps keep the loaf moist and tender. Fresh raspberries bring a burst of flavor and color. You can find the full recipe linked above, which includes details on preparation and baking. Each ingredient plays a role in making this loaf a tasty treat. Enjoy the process of gathering and mixing these lovely items! 1. Preheat your oven to 350°F (175°C). This step is key for even baking. 2. Grab a 9x5-inch loaf pan. Grease the sides and line the bottom with parchment paper. This makes removing the loaf easy later. 3. In a medium bowl, whisk together 1 ½ cups of all-purpose flour, 1 teaspoon baking powder, ½ teaspoon baking soda, and ¼ teaspoon salt. Mix well and set aside. 4. In a large bowl, cream ½ cup of softened unsalted butter with 1 cup of granulated sugar. Whip until light and fluffy, which takes about 3-4 minutes. 1. Add 2 large eggs, one at a time. Mix well after each addition. This helps the batter blend smoothly. 2. Stir in 1 teaspoon of pure vanilla extract and the zest of 1 lemon. These flavors are what make this loaf special. 3. Now, pour in half of the dry mixture from earlier. Gently fold it into the butter mix. 4. Add ½ cup of buttermilk and mix until just combined. Avoid over-mixing, as it can make the loaf tough. 5. Gradually fold in the rest of the dry ingredients until no flour streaks are left. 6. Carefully fold in 1 cup of fresh raspberries. Be gentle to keep them whole. 1. Transfer the batter into your prepared loaf pan. Smooth the top with a spatula. 2. Drizzle 1 tablespoon of fresh lemon juice over the batter. This boosts lemon flavor. 3. Bake for 55-60 minutes. Check for doneness by inserting a toothpick into the center. It should come out clean. 4. Once baked, let the loaf cool in the pan for about 10 minutes. After that, move it to a wire rack to cool completely. Enjoy making your Raspberry Lemon Loaf! For detailed measurements, check the Full Recipe. To start, use room temperature ingredients. This helps the batter mix well. Cold butter or eggs can lead to a dense loaf. When mixing, be gentle. Over-mixing can make the loaf tough. Mix just until you see no dry flour. To boost raspberry flavor, try adding a bit of lemon zest. This will brighten the taste. You can also use a splash of raspberry juice if you want more flavor. For slicing, use a sharp knife. This will give you clean cuts. Place the slices on a beautiful platter for a nice look. Garnish with fresh raspberries and a dusting of powdered sugar. This adds color and makes your loaf look appealing. Serve each slice with whipped cream or vanilla ice cream. This makes it feel special and adds a creamy touch. Enjoy every bite! For the full recipe, check the [Full Recipe]. {{image_4}} You can change up the recipe with fun ingredient swaps. - Using different types of berries: Raspberries are great, but try blueberries or strawberries. Each berry adds its own taste and color. - Alternative flours for gluten-free options: If you need a gluten-free loaf, use almond flour or a gluten-free blend. This keeps the loaf soft and tasty. - Variations with citrus zest: Want to switch it up? Use lime or orange zest instead of lemon. This brightens the flavor and gives a twist to the loaf. You can also add extra flavors to make your loaf unique. - Adding spices like cinnamon or nutmeg: A pinch of cinnamon gives warmth. Nutmeg adds a hint of spice. Just a little can change the whole taste. - Incorporating chocolate or nuts: Mix in chocolate chips for a sweet touch. Chopped nuts, like walnuts or pecans, add crunch and richness. - Options for a lemon glaze or icing: Drizzle a lemon glaze on top for added sweetness. Mix powdered sugar with lemon juice to create a simple icing. This makes the loaf even more special. For the complete recipe, check the [Full Recipe]. To keep your raspberry lemon loaf fresh, store it at room temperature. Place it in an airtight container. This helps lock in moisture and flavor. If you have leftovers, the loaf can last about three days on the counter. For longer freshness, you can refrigerate the loaf. Wrap it tightly in plastic wrap or foil. This adds a little chill and keeps it soft. In the fridge, it can last up to a week. If you want to save it for later, freezing is a great option. Slice the loaf first for easy serving. Wrap each slice in plastic wrap and then in foil. This keeps the flavor and texture intact. You can freeze it for up to three months. On the counter, your loaf will stay fresh for about three days. After that, it may start to dry out or lose taste. Look for signs of spoilage, like a change in smell or mold. If the loaf feels hard or dry, it's best to toss it. For thawing frozen slices, take them out of the freezer. Let them sit at room temperature for about 30 minutes. You can also warm them up in a toaster. This brings back that soft texture. For the full recipe, check the link provided. Enjoy your baking! Can I use frozen raspberries? Yes, you can use frozen raspberries. Just thaw and drain them first. This helps keep the batter from getting too wet. How do I know when the loaf is done baking? To check if the loaf is done, insert a toothpick in the center. If it comes out clean, your loaf is ready! What can I serve with Raspberry Lemon Loaf? You can serve it with whipped cream or a scoop of vanilla ice cream. Fresh raspberries on the side add a nice touch too. Why does my loaf sink in the middle? A loaf may sink if you overmix the batter or if the oven is too cool. Ensure to mix just until blended. How to fix dry loaf or dense texture? If your loaf is dry, it may have too much flour. Measure flour carefully and add a bit more buttermilk next time. Adjusting for high-altitude baking differences At high altitudes, reduce sugar and increase liquid. Bake the loaf a bit longer to ensure it cooks through. This raspberry lemon loaf combines bright flavors with simple steps. We discussed the ingredients, from flour to fresh raspberries. Following easy instructions, you can create a delightful loaf. I shared tips to perfect your bake and enhance presentation. You even learned about ingredient swaps and storage methods to keep it fresh. With these insights, you can bake with confidence. Enjoy your delicious raspberry lemon loaf!](https://fastmealmate.com/wp-content/uploads/2025/07/33c21139-c12e-4c78-b65a-e6904fdb8542-768x768.webp)
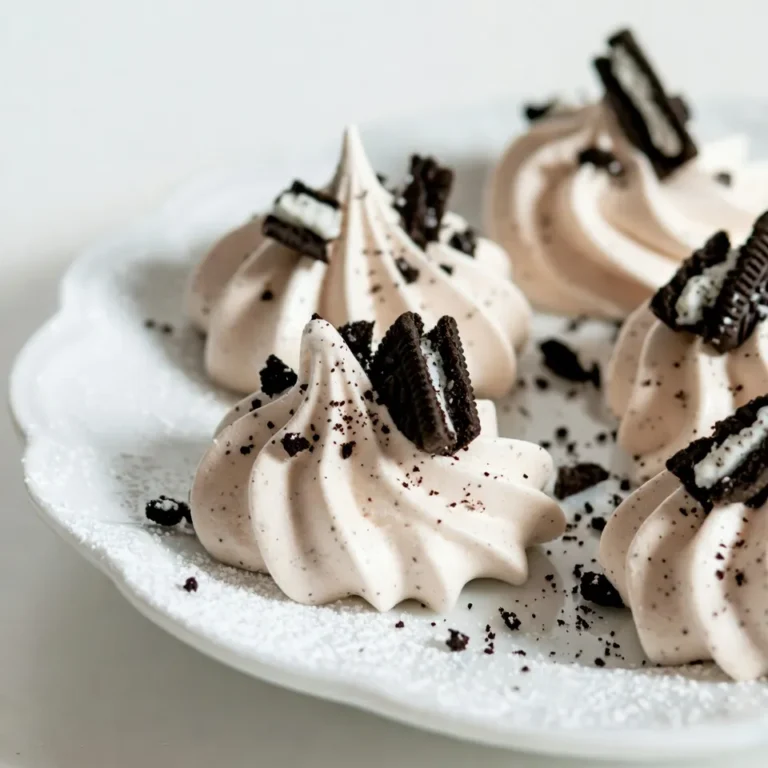
![- 1 cup unsalted butter, softened to room temperature - 1/2 cup powdered sugar, plus additional for dusting - 1 teaspoon pure vanilla extract - 1/2 teaspoon almond extract - 2 cups all-purpose flour - 1/2 cup finely chopped almonds - 1/4 teaspoon salt - 1/2 cup raspberry preserves When making Raspberry Almond Snowball Cookies, each ingredient plays a key role. The butter makes the cookies rich and tender. Powdered sugar adds a sweet touch and helps with that snowy look. Vanilla and almond extracts give the cookies a warm, nutty flavor. The flour gives structure to the cookies. Chopped almonds add a nice crunch. Salt balances the sweetness. Finally, raspberry preserves are the surprise inside. They burst with flavor when you take a bite. - For a different sweet taste, try using honey or maple syrup instead of powdered sugar. - If you want a dairy-free option, use vegan butter. It works well in this recipe. - For a gluten-free treat, swap all-purpose flour with almond flour or a gluten-free mix. These substitutions can change the flavor and texture, but they keep the spirit of the cookies alive. Experimenting with these ingredients can lead to fun and tasty variations! For the full recipe, check out the detailed steps to create this delightful treat. First, preheat your oven to 350°F (175°C). This step helps your cookies bake evenly. While the oven heats, line a baking sheet with parchment paper. This keeps the cookies from sticking, making cleanup easy. Next, in a large bowl, mix 1 cup of softened butter with 1/2 cup of powdered sugar. Then, add 1 teaspoon of pure vanilla extract and 1/2 teaspoon of almond extract. Beat this mixture with an electric mixer until light and fluffy. This takes about 2-3 minutes. Now, gradually add 2 cups of all-purpose flour and 1/4 teaspoon of salt to the butter mixture. Mix on low speed until just combined. Be careful not to overmix; we want a nice texture. Gently fold in 1/2 cup of finely chopped almonds. For the fun part, scoop about 1 tablespoon of dough. Flatten it slightly in your hand. Add 1/2 teaspoon of raspberry preserves in the center. Carefully fold the dough edges around the preserves, sealing it tightly into a ball. Place the cookie balls on your prepared baking sheet. Make sure they are about 2 inches apart. This spacing allows them to spread while baking. Bake the cookies for 12-15 minutes. Keep an eye on them; you want the bottoms to turn lightly golden. After baking, let the cookies cool on the baking sheet for about 5 minutes. This helps them firm up a bit. Then, gently transfer them to a wire rack to cool completely. Once cool, take some extra powdered sugar and dust it generously over the cookies. This adds a lovely snowy look. Enjoy these delightful treats with your friends or family! For the full recipe, check out the details provided. To make the best cookies, start with room temperature butter. Soft butter mixes well, creating a light and fluffy dough. Cold butter makes it hard to blend. Another tip is to prevent cookies from spreading too much. Chill your cookie dough for at least 30 minutes before baking. This helps them keep their shape while baking. When you arrange your cookies, think about a nice display. Use a decorative plate to showcase them beautifully. You can also garnish with fresh raspberries or a sprinkle of almond slices. This adds color and makes them look even more inviting. A light-colored dish contrasts nicely with the snowy dusting of sugar. Want to boost the flavor? Try adding a pinch of cinnamon or a dash of lemon zest. This can give your cookies a unique twist. You can also adjust the sweetness by using different types of raspberry preserves. For a tart flavor, opt for low-sugar preserves. For a sweeter taste, choose regular preserves. You can find the full recipe [here]. {{image_4}} You can play with flavors in your Raspberry Almond Snowball Cookies. Try different fruit preserves like strawberry or apricot. Each fruit adds a unique twist. You might also add chocolate chips or cocoa powder. This makes the cookies richer and more indulgent. Mixing in these flavors can make each batch fun and exciting. For those with dietary needs, there are great options. You can make gluten-free cookies by using almond flour or a gluten-free flour blend. These swaps keep the cookies light and tasty. If you want a vegan version, substitute the butter with coconut oil or vegan butter. Use a plant-based milk in place of any dairy. These changes keep the spirit of the cookies while catering to different diets. You can make themed cookies for special occasions. For holidays, add colorful sprinkles or food coloring to the dough. This gives the cookies a festive touch. For parties, consider making mini cookie versions. Smaller cookies are great for sharing and look lovely on a platter. Each theme allows you to share the joy of baking with your loved ones. If you want the full recipe, check out the details above! To keep your Raspberry Almond Snowball Cookies fresh, store them in an airtight container. This helps to lock in moisture and flavor. You can use glass jars or plastic containers with tight lids. Place parchment paper between layers of cookies to prevent sticking. Keep the cookies at room temperature for up to a week. If you want to keep them longer, then freezing is a great option. You can freeze both unbaked and baked cookies. For unbaked cookies, scoop them onto a baking sheet lined with parchment paper. Freeze until solid, then transfer them to a freezer bag. This way, you can bake fresh cookies anytime. For baked cookies, let them cool completely first. Place them in a freezer-safe container or bag, separating layers with parchment paper. When you are ready to enjoy them, thaw baked cookies at room temperature. If you want a warm treat, pop them in the oven at 350°F for a few minutes. Reheating brings back their delightful texture. For unbaked cookies, just bake them straight from the freezer. Add a couple of extra minutes to the bake time to ensure they cook through. How long do Raspberry Almond Snowball Cookies last? These cookies stay fresh for about one week. Store them in an airtight container. If you want them to last longer, you can freeze them. Can I make the dough ahead of time? Yes, you can make the dough and chill it in the fridge. Wrap it tightly in plastic. This way, you can bake them later. What can I do if my cookies turn out too crumbly? If your cookies are too crumbly, you might need more butter. Add a little melted butter to the dough. Mix gently until it holds together. Can I substitute almond extract with something else? Yes, you can use vanilla extract or even a bit of coconut extract. Each will give a different flavor but will still taste great. What is the best way to measure flour for this recipe? Use the spoon and level method. Scoop flour into a measuring cup, then level it off with a knife. Don’t pack it down for the best results. What to serve with these cookies? These cookies pair well with fresh fruit, like raspberries or strawberries. You can also serve them with vanilla ice cream for a tasty treat. Ideal beverages to pair with Raspberry Almond Snowball Cookies Enjoy these cookies with a warm cup of tea or coffee. A glass of milk also complements their sweet and nutty flavor nicely. In this blog post, I covered how to make Raspberry Almond Snowball Cookies. We explored the key ingredients and tips for perfecting texture and flavor. You can use alternatives like vegan butter and gluten-free flour too. I shared storage methods for keeping cookies fresh and ways to freeze them. Try different fruit preserves or chocolate chips for fun variations. Remember, cookies taste best when shared and enjoyed fresh. Give this recipe a try, and I bet you will love it!](https://fastmealmate.com/wp-content/uploads/2025/07/7fd5f108-97a5-4fb0-86b3-b9219b799aa8-768x768.webp)