
Christmas Red Velvet Cake Roll Delightful Holiday Dessert
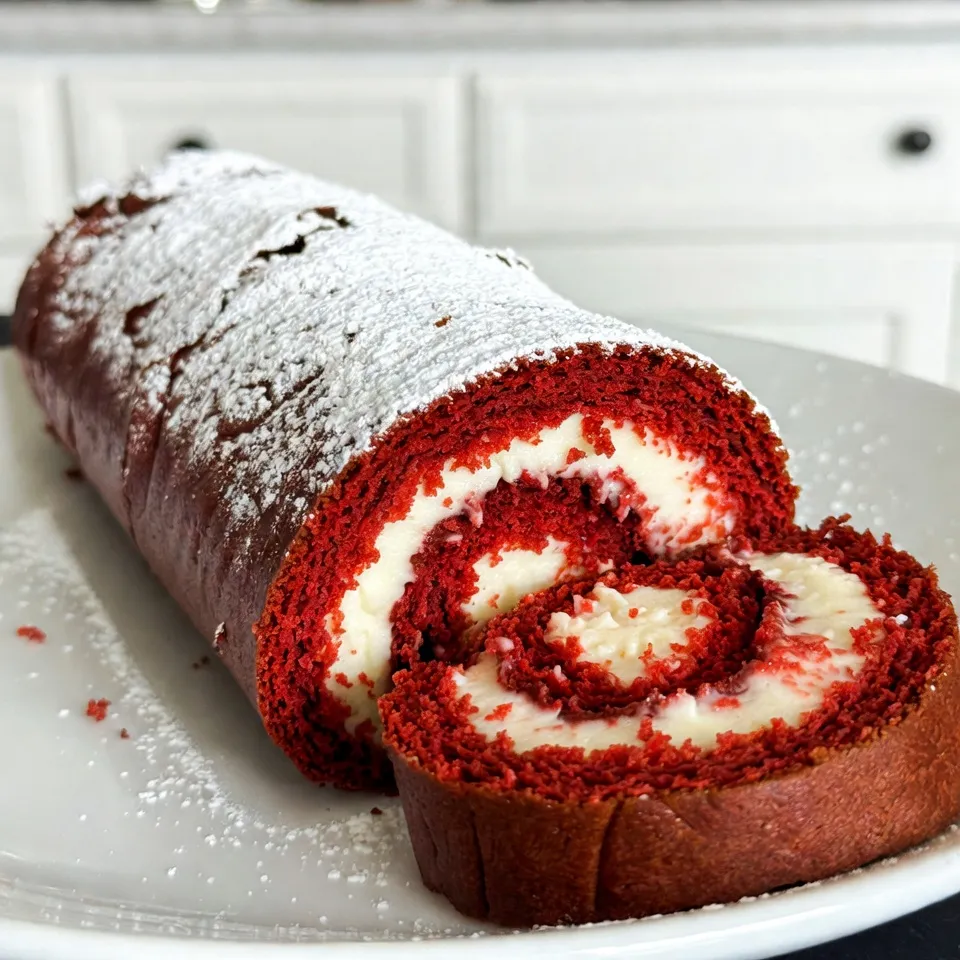
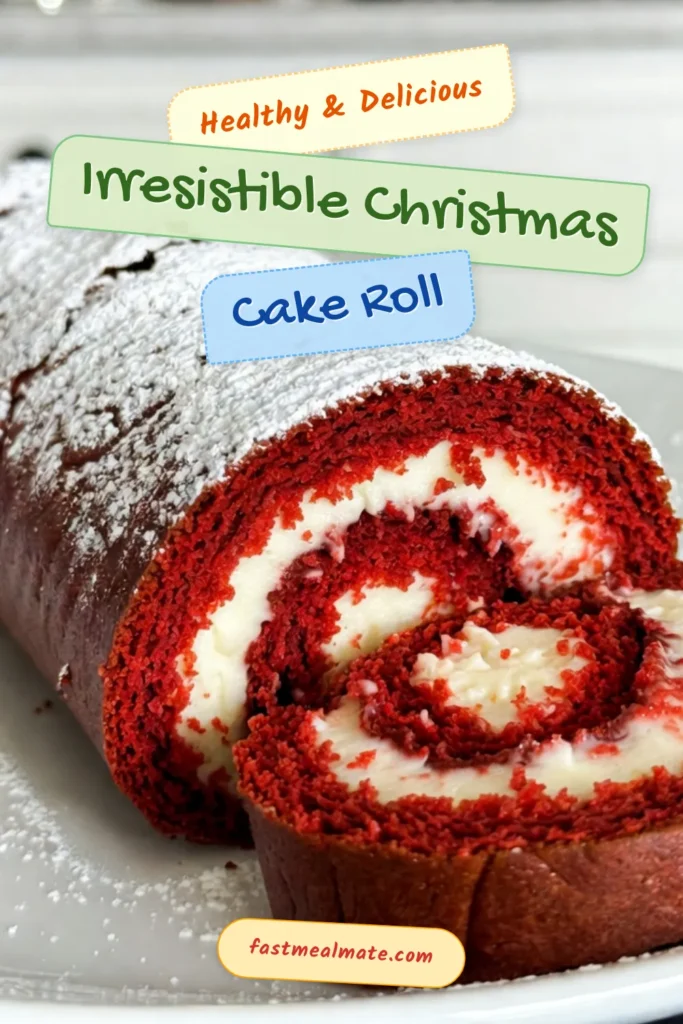
Are you ready to impress your guests this holiday season? The Christmas Red Velvet Cake Roll is the perfect festive dessert that’s as delightful to look at as it is to eat. With its rich flavors and vibrant red color, this treat will steal the show at any gathering. Join me as we dive into the simple steps to create this holiday favorite, complete with tips, variations, and storage advice for the best results!
Why I Love This Recipe
- Festive Appearance: This cake roll showcases a stunning red color that embodies the spirit of Christmas, making it a perfect centerpiece for holiday gatherings.
- Delicious Flavor: The rich and moist red velvet cake combined with the creamy filling creates a delightful flavor experience that is simply irresistible.
- Easy to Make: Despite its impressive look, this recipe is straightforward and manageable, making it perfect for bakers of all skill levels.
- Great for Sharing: This cake roll serves 10-12 slices, making it an ideal treat to share with family and friends during the festive season.
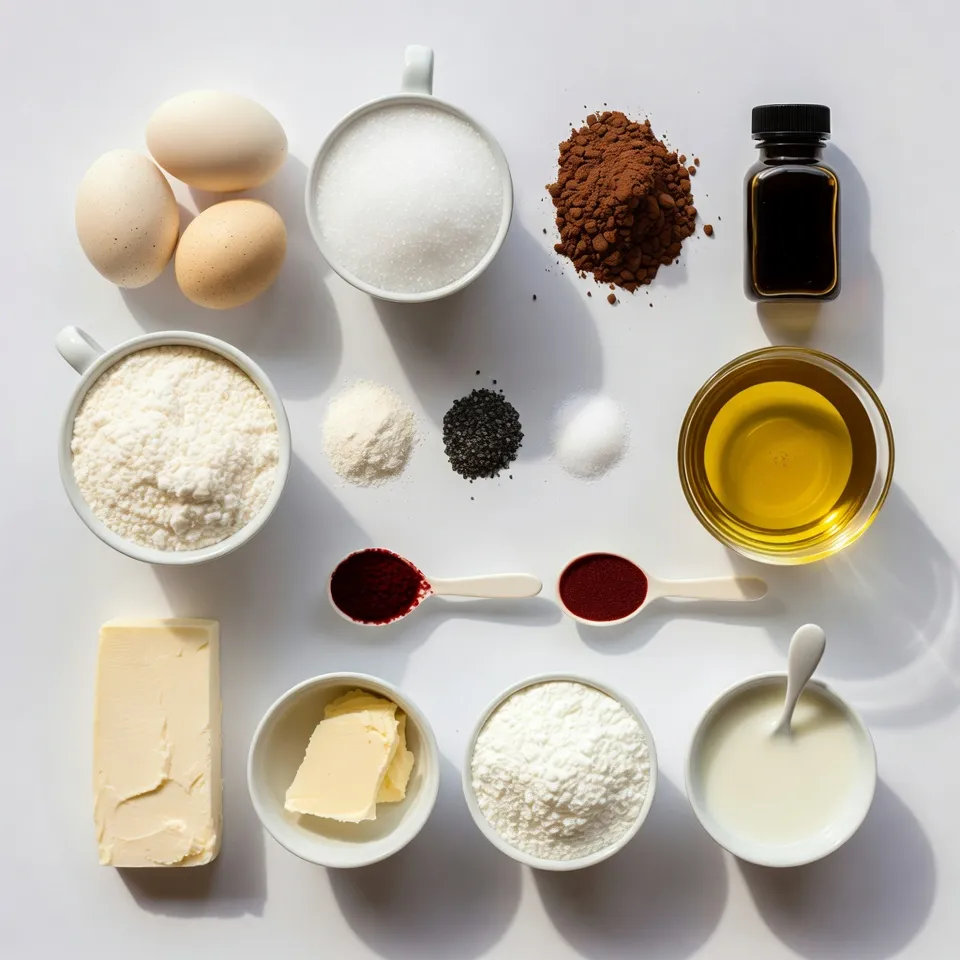
Ingredients
List of Ingredients for Cake
– 3 large eggs
– 1 cup granulated sugar
– 1 tablespoon unsweetened cocoa powder
– 1 teaspoon vanilla extract
– 1 cup all-purpose flour
– 1 teaspoon baking powder
– ½ teaspoon salt
– ½ teaspoon baking soda
– 1 cup vegetable oil
– 2 tablespoons red food coloring
– Powdered sugar for dusting
List of Ingredients for Cream Cheese Filling
– 8 oz cream cheese, softened to room temperature
– ½ cup unsalted butter, softened to room temperature
– 2 cups powdered sugar
– 1 teaspoon vanilla extract
– 1 tablespoon heavy cream (or milk)
The ingredients for this Christmas Red Velvet Cake Roll are simple yet delightful. You start with three large eggs, which provide the base. They add fluffiness and richness. Next, you mix in granulated sugar to sweeten it up. The cocoa powder adds a hint of chocolate flavor, while vanilla extract gives it a warm aroma.
For the dry ingredients, you need flour, baking powder, salt, and baking soda. These help your cake rise and create a soft texture. The vegetable oil keeps the cake moist, and the red food coloring gives it that festive look. Finally, a dusting of powdered sugar adds a lovely finish.
Moving on to the cream cheese filling, you will need softened cream cheese and butter. They create a rich, creamy texture. The powdered sugar sweetens the filling, while vanilla extract adds depth. A splash of heavy cream (or milk) helps make it smooth and spreadable.
These ingredients come together to create a stunning dessert, perfect for any holiday table.
Step-by-Step Instructions
Prepping the Oven and Pan
– Preheat the oven to 350°F (175°C).
– Prepare a 15×10 inch jelly roll pan by lining it with parchment paper.
Mixing the Batter
– In a large bowl, beat 3 large eggs and 1 cup of granulated sugar until fluffy.
– Add 1 tablespoon of unsweetened cocoa powder and 1 teaspoon of vanilla extract.
– In another bowl, whisk 1 cup of all-purpose flour with 1 teaspoon of baking powder, ½ teaspoon of salt, and ½ teaspoon of baking soda.
– Slowly mix the dry ingredients into the egg mixture. Add 1 cup of vegetable oil and 2 tablespoons of red food coloring. Mix until smooth.
Baking and Rolling the Cake
– Pour the vibrant batter into the prepared pan. Spread it evenly.
– Bake for 12-15 minutes. Check with a toothpick; it should come out clean.
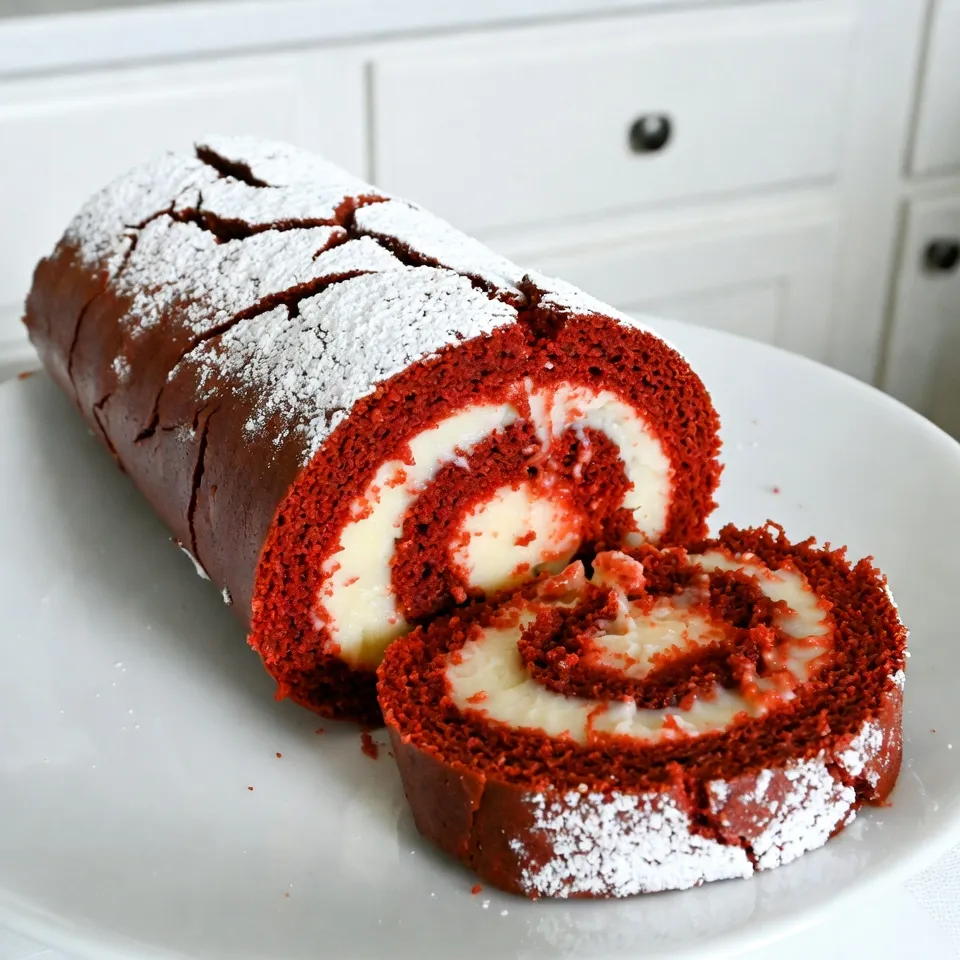
– Dust the top with powdered sugar. Cover the cake with a clean kitchen towel. Flip the pan onto the towel and peel off the parchment paper. Roll the cake tightly using the towel. Let it cool completely.
Making the Cream Cheese Filling
– In a bowl, beat 8 oz of softened cream cheese, ½ cup of unsalted butter, and 2 cups of powdered sugar until smooth.
– Add 1 teaspoon of vanilla extract and 1 tablespoon of heavy cream. Mix until fluffy.
Final Assembly
– Once the cake is cool, unroll it gently. Spread the cream cheese filling evenly over the cake.
– Roll the cake back up without the towel. Wrap it in plastic wrap and chill it in the fridge for at least 1 hour.
– After chilling, slice the cake roll into rounds and serve. Enjoy this festive treat!
Tips & Tricks
Successful Cake Rolling Techniques
Rolling your cake while it’s warm is key. If you wait too long, it may crack. The warmth helps the cake stay flexible. Use a clean kitchen towel to help with the rolling process. A light dusting of powdered sugar on the cake’s surface prevents sticking. This simple step makes a big difference.
Cream Cheese Filling Variations
You can add fun flavors to your cream cheese filling. Try lemon for a zesty touch or almond for a nutty twist. If you want a healthier option, swap out some sugar for honey or agave. This keeps the filling tasty and lowers the sweetness. Experimenting with flavors can make the cake even more special.
Presentation Tips
Arranging your cake slices on a beautiful platter is important. This makes the dessert look more inviting. You can garnish with fresh berries or mint leaves for color. A sprinkle of powdered sugar on top gives a lovely finishing touch. These small details make your dessert shine at the holiday table.
Pro Tips
- Fresh Ingredients: Always use fresh eggs and cream cheese for the best flavor and texture in your cake roll.
- Food Coloring: For a more vibrant red, consider using gel food coloring instead of liquid. It provides a richer hue without adding extra moisture.
- Cooling Technique: When rolling the cake, ensure it cools completely in the towel to maintain its shape and prevent cracking.
- Chill Before Serving: Let the filled cake roll chill for at least an hour; this helps the flavors meld and makes slicing easier.
Variations
Different Flavor Options
You can switch up the red velvet flavor for fun! Try making a chocolate red velvet cake roll. Just add more cocoa powder to the batter. This gives a deep, rich chocolate taste that pairs well with cream cheese.
Another option is a carrot cake roll. For this, mix in grated carrots and warm spices like cinnamon and nutmeg. It adds a nice twist and brings in some holiday spice.
Alternative Filling Ideas
If you want to change the filling, consider using fruit preserves or curds. Strawberry or raspberry preserves add a fruity kick. They bring brightness and a fresh taste to the cake.
Whipped cream is another great choice. You can fold in some vanilla or lemon zest to make it flavorful. This adds a light and airy feel to the dessert.
Seasonal Decorations
Decorating your cake roll can be fun! Use holiday-themed toppings like crushed peppermint or chocolate shavings. They create a festive look and enhance the taste.
You can also add edible decorations like sprinkles or berries. These little touches make your cake roll stand out during Christmas festivities. Enjoy getting creative with your festive dessert!
Storage Info
Short-term Storage
To keep your Christmas Red Velvet Cake Roll fresh, wrap it well in plastic wrap. Make sure it’s airtight. You can also place it in a sealed container. This method helps keep the cake moist. Refrigerate it for up to three days. For the best taste, chill the cake for at least one hour before serving. This resting time allows the flavors to blend perfectly.
Long-term Storage
For long-term storage, freezing is a great option. Slice the cake roll into pieces before freezing. Wrap each slice in plastic wrap, then place them in a freezer bag. This helps prevent freezer burn. You can freeze the cake for up to three months. When ready to enjoy, remove a slice and thaw it in the fridge overnight. This method keeps the cake tasty and fresh.
FAQs
Can I make the cake roll in advance?
Yes, you can make the cake roll a day or two ahead. Just prepare the cake and fill it. Then, wrap the roll in plastic wrap and store it in the fridge. This way, the flavors blend well. Plus, it saves time on the big day.
What can I substitute for red food coloring?
You can use beet juice or pomegranate juice as natural options. They give a nice red hue, but the color may not be as bright. You could also try using cranberry juice. Keep in mind that the flavor might change slightly, adding a fruity note.
How do I prevent the cake from cracking when rolling?
To avoid cracks, roll the cake while it is warm. Use a clean kitchen towel dusted with powdered sugar. This helps the cake keep its shape. If it cracks a little, don’t worry! You can cover it with frosting later.
Can I use a different type of frosting?
Absolutely! Cream cheese frosting is my favorite, but you can try whipped cream or chocolate ganache. Each option brings a different taste to your cake. Just ensure the frosting is thick enough to hold the roll together.
This post detailed how to make a delicious cake roll. You learned the key ingredients, from eggs to food coloring, and how to mix them properly. I shared tips for rolling your cake and ideas for cream cheese filling variations. Remember, practice makes perfect, especially when cooling or storing your cake. Enjoy experimenting with flavors and decorations to make this treat your own. Baking is fun, and this recipe is sure to impress your friends and family. Happy bakin

Christmas Red Velvet Cake Roll 🎄❤️
Ingredients
- 3 large eggs
- 1 cup granulated sugar
- 1 tablespoon unsweetened cocoa powder
- 1 teaspoon vanilla extract
- 1 cup all-purpose flour
- 1 teaspoon baking powder
- 0.5 teaspoon salt
- 0.5 teaspoon baking soda
- 1 cup vegetable oil
- 2 tablespoons red food coloring
- to taste powdered sugar for dusting
- 8 oz cream cheese, softened to room temperature
- 0.5 cup unsalted butter, softened to room temperature
- 2 cups powdered sugar
- 1 teaspoon vanilla extract
- 1 tablespoon heavy cream (or milk)
Instructions
- Preheat the Oven: Begin by preheating your oven to 350°F (175°C). Prepare a 15x10 inch jelly roll pan by lining it with parchment paper, ensuring some overhang for easy removal later.
- Mix Egg and Sugar: In a large mixing bowl, use an electric mixer to beat the eggs and granulated sugar together on high speed. Continue mixing until the mixture is light and fluffy, approximately 2-3 minutes.
- Add Cocoa and Vanilla: Gently mix in the cocoa powder and vanilla extract until thoroughly combined and the color is even.
- Combine Dry Ingredients: In a separate medium bowl, whisk together the all-purpose flour, baking powder, salt, and baking soda until evenly mixed.
- Incorporate the Wet Ingredients: Gradually add the dry ingredient mixture to the egg mixture, alternating with the vegetable oil and red food coloring. Mix until just combined and smooth, but be careful not to overmix.
- Spread in Pan: Pour the vibrant batter into the prepared jelly roll pan. Use a spatula to spread the batter evenly to all corners of the pan.
- Bake the Cake: Place the pan in the preheated oven and bake for 12-15 minutes. Check for doneness by inserting a toothpick into the center; it should come out clean. Remove the pan from the oven.
- Roll the Cake: Lightly dust the top of the cake with powdered sugar. Cover the cake with a clean kitchen towel, then carefully flip the pan onto the towel. Gently peel away the parchment paper. Starting from the short side, roll the cake up with the towel, creating a tight roll. Allow it to cool completely in this shape.
- Prepare Cream Cheese Filling: In a medium bowl, use an electric mixer to beat together the softened cream cheese, unsalted butter, powdered sugar, vanilla extract, and heavy cream until the mixture is smooth and fluffy, about 2-3 minutes.
- Fill the Cake Roll: Once the cake has completely cooled, carefully unroll it. Evenly spread the prepared cream cheese filling over the entire surface of the cake, then gently roll it back up without the towel.
- Chill and Slice: Wrap the completed cake roll in plastic wrap and refrigerate for at least 1 hour to let the flavors meld and the cake set.
- Serve: After chilling, slice the roll into rounds and serve this festive delight to your guests. Enjoy the rich flavors of the red velvet with a luscious cream cheese filling!

![- 1 cup pumpkin puree - 1/2 cup unsalted butter, softened - 1 cup brown sugar and 1/2 cup granulated sugar These ingredients form the base of your chewy pumpkin spice cookies. Pumpkin puree provides moisture and flavor. Softened butter helps create that melt-in-your-mouth texture. Mixing brown and granulated sugar gives sweetness and a lovely depth. - 1/2 cup chocolate chips - 1/2 cup chopped pecans or walnuts If you want to elevate your cookies, consider adding chocolate chips. They bring a rich sweetness that pairs well with pumpkin spice. Chopped pecans or walnuts add a nice crunch and nutty flavor. Feel free to mix and match based on your taste. - 2 cups all-purpose flour - 1 teaspoon baking soda, baking powder, pumpkin spice, and sea salt All-purpose flour is your main structure builder. Baking soda and baking powder help the cookies rise and stay soft. Pumpkin spice adds warmth and that classic fall flavor. Sea salt enhances the sweetness and balances the spices. For the full recipe, check out the details above. Each ingredient plays a key role in creating these irresistibly soft treats! - Preheat your oven to 350°F (175°C). This step ensures even baking. - Line a baking sheet with parchment paper. This helps the cookies not stick. - In a large bowl, cream together softened butter and both sugars. - Use an electric mixer for the best results. Mix until light and fluffy. - Next, add the pumpkin puree, egg, and vanilla extract. - Beat well until everything is smooth and combined. - In a separate bowl, whisk together the flour, baking soda, baking powder, pumpkin spice, and salt. - Gradually add this dry mix to the wet ingredients. Stir gently and avoid overmixing. - Use a tablespoon or cookie scoop to portion the dough onto the lined baking sheet. - Leave enough space between each cookie to allow for spreading. - Bake in the preheated oven for 10-12 minutes. The edges should be golden brown. - The centers might look a bit soft but will set as they cool. For the full recipe, refer to the earlier sections. Enjoy the process! To make your cookies chewy, do not overmix the dough. Mix just until the flour disappears. Overmixing makes cookies tough. The right baking time and temperature are key. Bake at 350°F (175°C) for 10-12 minutes. Watch for golden edges and soft centers. They will harden as they cool. You can use homemade pumpkin puree or canned. Homemade puree adds a fresh taste. Canned options are quick and easy. Also, try different spices. While pumpkin spice is great, adding a pinch of cardamom or allspice can elevate the flavor. Experiment until you find your favorite blend. For a stunning display, stack your cookies on a rustic platter. This adds charm to your table. To make them look even nicer, dust with powdered sugar. Add some cinnamon sticks beside the cookies for a cozy touch. These small details impress guests and enhance enjoyment. For the full recipe, check the complete instructions above. {{image_4}} You can make fun swaps for your chewy pumpkin spice cookies. One easy change is to use coconut oil instead of butter. This makes the cookies dairy-free and adds a light coconut flavor. If you want a vegan option, replace the egg with flax eggs. To make a flax egg, mix one tablespoon of ground flaxseed with three tablespoons of water. Let it sit for five minutes to thicken. This keeps your cookies soft and chewy, just like the original recipe. Want to add more flavor? Try adding dried fruits like cranberries or raisins. They bring a sweet chewiness that pairs well with pumpkin spice. For a fresh twist, you can also add a hint of citrus zest. A little orange or lemon zest brightens the cookies and gives them a fun taste. These small changes can make your cookies stand out during the fall season. Frosting can take your cookies to another level. Cream cheese frosting pairs perfectly with the warm spices in these cookies. To make it, mix cream cheese with powdered sugar and a splash of vanilla. If you want something lighter, consider a simple glaze. Just mix powdered sugar with a bit of milk until smooth. Drizzle it over the cookies for added sweetness. These frosting options make each bite even more delightful. To keep your chewy pumpkin spice cookies fresh, use an airtight container. This helps lock in moisture. Store them at room temperature, away from sunlight. A cool, dry place works best. To maintain their soft and chewy texture, place a slice of bread in the container. The cookies absorb moisture from the bread, keeping them soft. You can also wrap each cookie in plastic wrap for extra protection. Freezing cookies is easy and a great way to save them for later. First, let the cookies cool completely. Then, arrange them in a single layer on a baking sheet. Freeze them for about one hour. This step prevents them from sticking together. After freezing, transfer the cookies to a freezer-safe bag. Remove as much air as possible before sealing. They can last for up to three months in the freezer. When you're ready to eat them, thaw cookies at room temperature. For a warm treat, pop them in the microwave for about 10-15 seconds. Chewy pumpkin spice cookies last about a week at room temperature. Store them in an airtight container to keep them fresh. Look out for signs of spoilage. If they become hard or dry, they may be past their prime. Also, check for any off smells or mold. If you see or smell anything unusual, it’s best to throw them away. These tips will help you enjoy your chewy pumpkin spice cookies even longer! For the full recipe, check out the [Full Recipe]. You can use pumpkin pie filling, but it is not the same. Pumpkin puree is pure pumpkin with no added sugar or spices. Pumpkin pie filling has sugar and spices mixed in. If you use it, cut back on the sugar in your recipe. It may make your cookies sweeter than you want. To reduce sweetness, cut down on the sugar. You can use 3/4 cup of brown sugar instead of 1 cup. You can also skip the granulated sugar. Another option is to add more pumpkin puree. This can balance the sweetness while keeping the texture. To reheat your cookies, use the oven for the best results. Preheat your oven to 350°F (175°C). Place the cookies on a baking sheet. Heat them for about 5 minutes. This keeps them soft and chewy. You can also use the microwave. Heat them for 10-15 seconds. This works, but they may not be as chewy. Enjoy your chewy pumpkin spice cookies warm! These chewy pumpkin spice cookies are simple to make with the right ingredients. Start with pumpkin puree, butter, and sugars for the best taste. Follow the steps to create a delightful treat and use my tips for the perfect chewy texture. Experiment with flavors to make your cookies unique. Store them well to keep that freshness. Enjoy sharing these cookies, as they are sure to impress!](https://fastmealmate.com/wp-content/uploads/2025/07/8de16806-55b5-45ec-964c-13b68a3ec1a0-768x768.webp)
