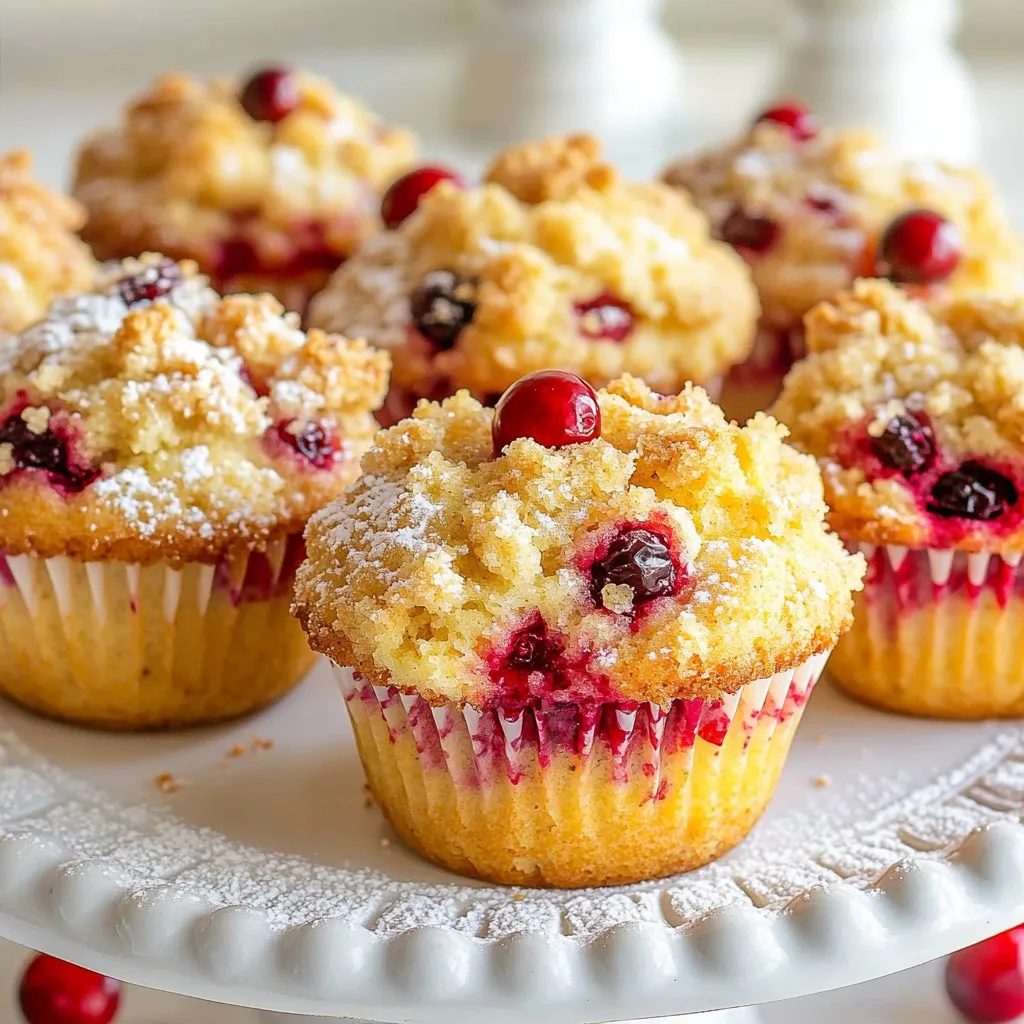
Cranberry Orange Crumb Muffins Perfect for Breakfast
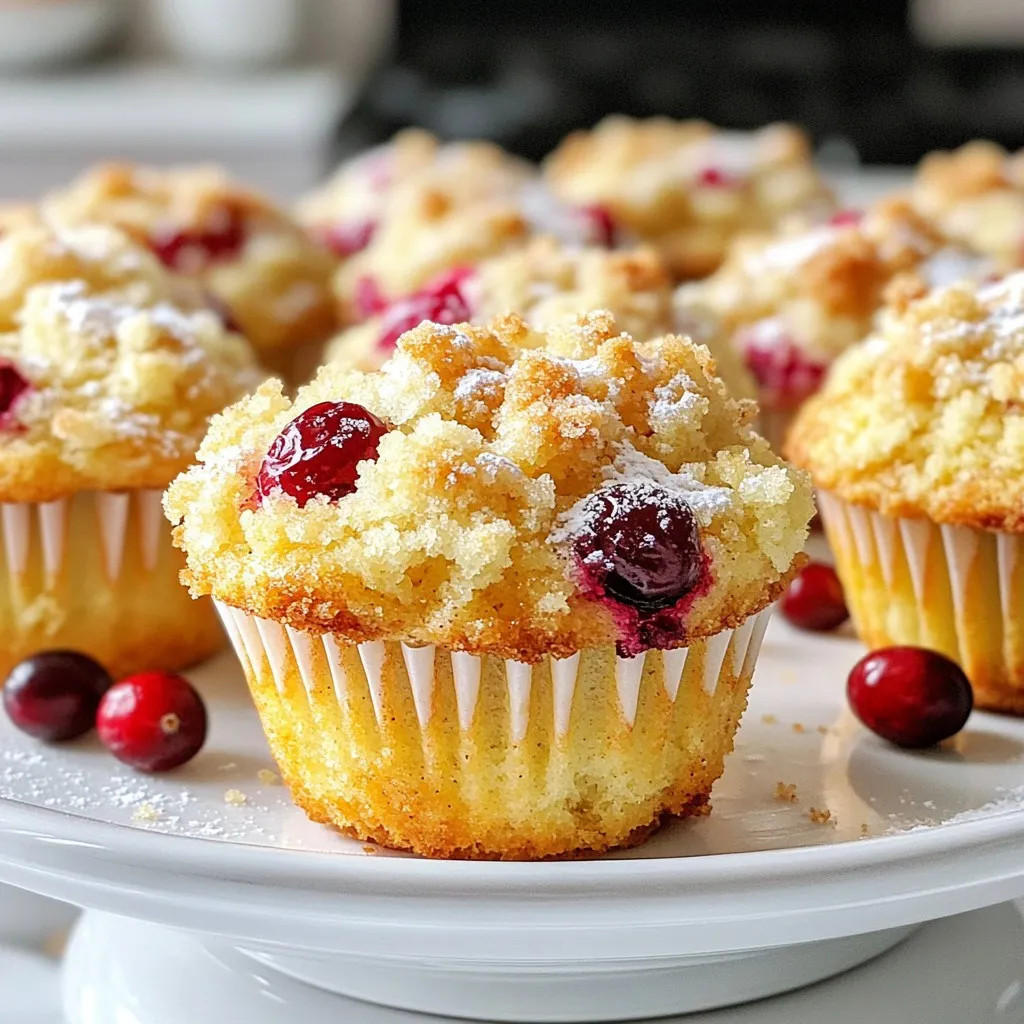
Are you ready to take your breakfast game to the next level? My Cranberry Orange Crumb Muffins are the perfect mix of sweet and tart, ideal for a cozy morning. These muffins are fluffy, flavorful, and topped with a delicious crumb. Whether you enjoy them with coffee or as a quick snack, this recipe is sure to please. Let’s dive into the simple steps to create these tasty treats!
Why I Love This Recipe
- Bright Flavors: The combination of tart cranberries and zesty orange creates a refreshing and vibrant flavor profile that’s perfect for any occasion.
- Crispy Crumb Topping: The crumb topping adds a delightful crunch that contrasts beautifully with the soft and moist muffin texture.
- Simple to Make: This recipe comes together quickly, making it an ideal choice for busy mornings or last-minute brunch gatherings.
- Customizable: Feel free to swap in different nuts or add more spices to make these muffins your own!
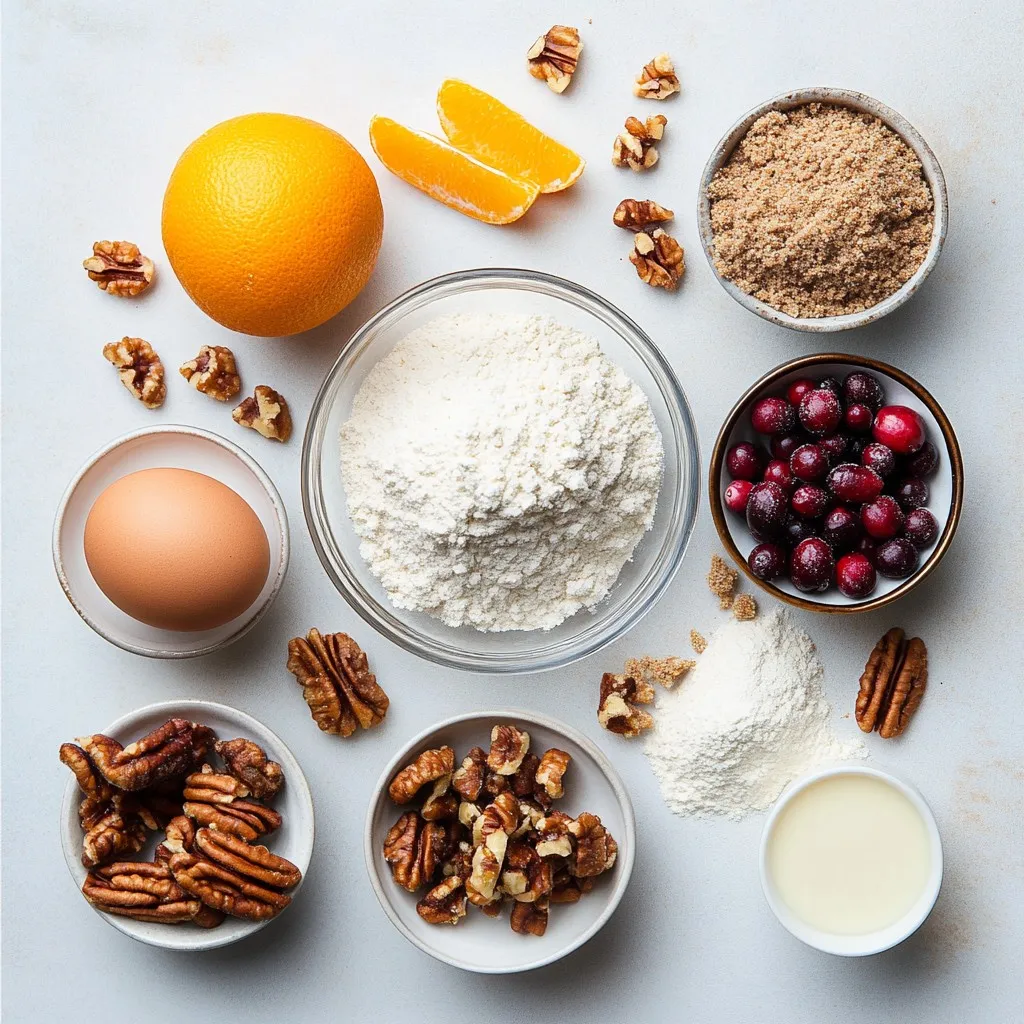
Ingredients
Dry Ingredients
– 1 ½ cups all-purpose flour
– ½ cup granulated sugar
– ½ cup brown sugar, packed
– 2 teaspoons baking powder
– 1 teaspoon baking soda
– ½ teaspoon salt
– ½ teaspoon ground cinnamon
Wet Ingredients
– 1 large egg
– ¾ cup buttermilk
– ⅓ cup vegetable oil
– Zest of 1 large orange
Add-ins and Toppings
– 1 cup fresh cranberries, roughly chopped
– ¼ cup walnuts or pecans, finely chopped (optional)
– Crumb topping ingredients:
– ½ cup all-purpose flour
– ¼ cup brown sugar, packed
– ⅓ cup unsalted butter, softened
– ½ teaspoon ground cinnamon
These ingredients create a mix of sweet and tart flavors. The fresh cranberries add a pop of color and a burst of tang. The orange zest brightens the muffins, making them taste fresh. The crumb topping adds that crunchy texture you crave. It’s a simple yet delicious way to start your day.
Step-by-Step Instructions
Prepping the Oven and Muffin Tin
Start by preheating your oven to 350°F (175°C). This step is key for even cooking. Next, prepare your muffin tin. Line it with paper liners or grease it lightly with non-stick spray. This helps the muffins release easily after baking.
Mixing Dry Ingredients
In a large mixing bowl, combine the following dry ingredients:
– 1 ½ cups all-purpose flour
– ½ cup granulated sugar
– ½ cup brown sugar, packed
– 2 teaspoons baking powder
– 1 teaspoon baking soda
– ½ teaspoon salt
– ½ teaspoon ground cinnamon
Whisk these dry items together until no lumps remain. This ensures a uniform batter.
Mixing Wet Ingredients
In another bowl, crack one large egg and beat it gently. Add ¾ cup buttermilk, ⅓ cup vegetable oil, and the zest of one large orange. Whisk these wet ingredients until they blend smoothly. This mix adds moisture and flavor to the muffins.
Combining Wet and Dry Mixtures
Pour the wet mixture into the dry ingredients. Stir gently with a spatula or wooden spoon. Mix just until combined. It’s fine to have small lumps in the batter. Overmixing can lead to tough muffins.
Adding Add-ins
Carefully fold in 1 cup of roughly chopped fresh cranberries and ¼ cup of chopped walnuts or pecans, if you like. This adds flavor and texture. Ensure they are evenly distributed throughout the batter.
Making the Crumb Topping
In a small bowl, mix together:
– ½ cup all-purpose flour
– ¼ cup brown sugar, packed
– ⅓ cup unsalted butter, softened
– ½ teaspoon ground cinnamon
Use your fingers or a fork to blend these until you get coarse crumbs. This topping will give your muffins a lovely crunch.
Filling Muffin Cups and Baking
Divide the batter evenly among the muffin cups, filling each about three-quarters full. Then, sprinkle the crumb topping generously over each muffin. This creates a crispy layer on top. Bake the muffins in your preheated oven for 18-20 minutes. They are done when a toothpick comes out clean or with a few moist crumbs. After baking, let them cool in the pan for about 5 minutes before transferring to a wire rack. Enjoy the delightful aroma!
Tips & Tricks
How to Achieve Perfect Muffin Texture
Mixing technique plays a big role in muffin texture. When you mix, be gentle. Overmixing makes muffins tough. Stir until just combined. A few lumps are okay. This keeps the muffins light and fluffy.
Customizing Flavor
You can add more flavor to your muffins. Try different mix-ins like chocolate chips or raisins. Spices can also enhance taste. A pinch of nutmeg or ginger adds warmth. Experiment with your favorite flavors to make them unique.
Servings Suggestions
These muffins are great for breakfast or snacks. Serve them warm with butter. They also pair well with coffee or tea. For a fun twist, add a light drizzle of honey. This makes your morning brighter and tastier.
Pro Tips
- Fresh Ingredients: Always use fresh cranberries for the best flavor. Frozen cranberries can be used, but they may result in a slightly mushy texture.
- Perfect Muffin Texture: Avoid overmixing the batter. Mixing just until combined ensures a light and fluffy muffin.
- Customize Your Nuts: Feel free to substitute walnuts with pecans or omit nuts altogether for a nut-free version of this recipe.
- Storage Tips: Store leftover muffins in an airtight container at room temperature for up to 3 days, or freeze them for longer storage.
Variations
Alternate Fruit Options
If you want to mix things up, consider using other fruits. Blueberries are a great choice. They bring a sweet and tart flavor that pairs well with orange. You can also try diced apples for a crunchy texture. Chopped strawberries offer a fresh taste, too. If you want a unique twist, use chopped peaches or nectarines. Each fruit adds its special flavor while keeping the muffin moist and delicious.
Vegan Substitution
To make these muffins vegan, swap the egg for a flax egg. Mix one tablespoon of ground flaxseed with two and a half tablespoons of water. Let it sit for a few minutes to thicken. Instead of buttermilk, use almond milk with a splash of vinegar to mimic the tangy taste. For the vegetable oil, you can use melted coconut oil or any other light oil. These changes keep the muffins tasty and fluffy.
Gluten-Free Variation
For a gluten-free version, use a gluten-free flour blend. Look for a blend that includes xanthan gum, which helps with the texture. You can also use almond flour or coconut flour, but you may need to adjust the liquid in the recipe. Start with a bit less liquid and add more as needed. This helps keep the muffins light and fluffy without gluten.
Storage Info
Best Ways to Store Muffins
To keep your cranberry orange crumb muffins fresh, store them properly. For room temperature, place them in an airtight container. This keeps moisture in and prevents them from drying out. If your kitchen is warm, the fridge is a good option. Just remember, the cold can make them a bit dry. You can wrap them in plastic wrap or use a container to prevent them from getting stale.
Freezing Muffins
Freezing your muffins is a great way to save them for later. First, let them cool completely. This avoids extra moisture in the bag. Then, wrap each muffin tightly in plastic wrap or foil. Place the wrapped muffins in a freezer-safe bag or container. When you want to eat one, take it out and let it thaw at room temperature. You can also warm it in the microwave for about 15-20 seconds.
Shelf Life
These muffins stay fresh for about 3 days at room temperature. In the fridge, they last for about a week. If you freeze them, expect them to taste good for up to 3 months. After that time, they might lose some flavor and texture. For the best taste, enjoy them sooner rather than later!
FAQs
Can I use frozen cranberries?
Yes, you can use frozen cranberries. They work well in muffins. Just toss them in flour before adding to your batter. This helps keep them from sinking. Also, do not thaw them. Use them straight from the freezer. This keeps your muffins nice and fresh. You get all the tart flavor without any extra water.
How do I prevent my muffins from sticking?
To prevent sticking, use muffin liners. They make cleanup easy, too. If you don’t have liners, grease the muffin tin well. Use non-stick cooking spray or butter. Make sure to cover the sides and bottom of each cup. This way, your muffins will pop right out. Let them cool for a few minutes before removing for best results.
Can I make mini muffins with this recipe?
Yes, you can make mini muffins! Just fill each mini cup halfway. Bake them for about 10 to 12 minutes. Check for doneness with a toothpick. If it comes out clean, they are ready. Mini muffins are perfect for snacks or parties. Enjoy the same great taste in a smaller bite!
In this blog post, we explored how to make delicious cranberry muffins from scratch. We covered key ingredients, step-by-step instructions, and useful tips for perfect texture. I shared ideas for variations and how to store these treats to keep them fresh. Baking is simple when you follow these steps. Remember, you can easily customize flavors and try different fruits. Enjoy your baking journey and make these muffins your ow
Cranberry Orange Crumb Muffins
Ingredients
- 1.5 cups all-purpose flour
- 0.5 cups granulated sugar
- 0.5 cups brown sugar, packed
- 2 teaspoons baking powder
- 1 teaspoon baking soda
- 0.5 teaspoon salt
- 0.5 teaspoon ground cinnamon
- 1 large egg
- 0.75 cups buttermilk
- 0.33 cups vegetable oil
- 1 large orange zest
- 1 cups fresh cranberries, roughly chopped
- 0.25 cups walnuts or pecans, finely chopped (optional)
- 0.5 cups all-purpose flour (for crumb topping)
- 0.25 cups brown sugar, packed (for crumb topping)
- 0.33 cups unsalted butter, softened (for crumb topping)
- 0.5 teaspoon ground cinnamon (for crumb topping)
Instructions
- Preheat your oven to 350°F (175°C). Prepare a muffin tin by lining it with paper liners or lightly greasing it with non-stick cooking spray.
- In a large mixing bowl, combine the all-purpose flour, granulated sugar, packed brown sugar, baking powder, baking soda, salt, and ground cinnamon. Whisk these dry ingredients together until thoroughly mixed.
- In a separate bowl, crack the large egg and beat it gently. Add the buttermilk, vegetable oil, and orange zest, whisking until well integrated.
- Pour the wet mixture into the bowl of dry ingredients. Stir gently until just mixed, leaving a few small lumps.
- Carefully fold in the chopped fresh cranberries and chopped walnuts or pecans (if using).
- For the crumb topping, combine the flour, packed brown sugar, softened butter, and ground cinnamon in a small bowl. Mix until it resembles coarse crumbs.
- Divide the muffin batter evenly among the prepared muffin cups, filling each about three-quarters full. Sprinkle the crumb topping over each muffin.
- Bake the muffins for 18-20 minutes until a toothpick inserted comes out clean or with a few moist crumbs.
- Allow the muffins to cool in the pan for about 5 minutes before transferring them to a wire rack to cool completely.
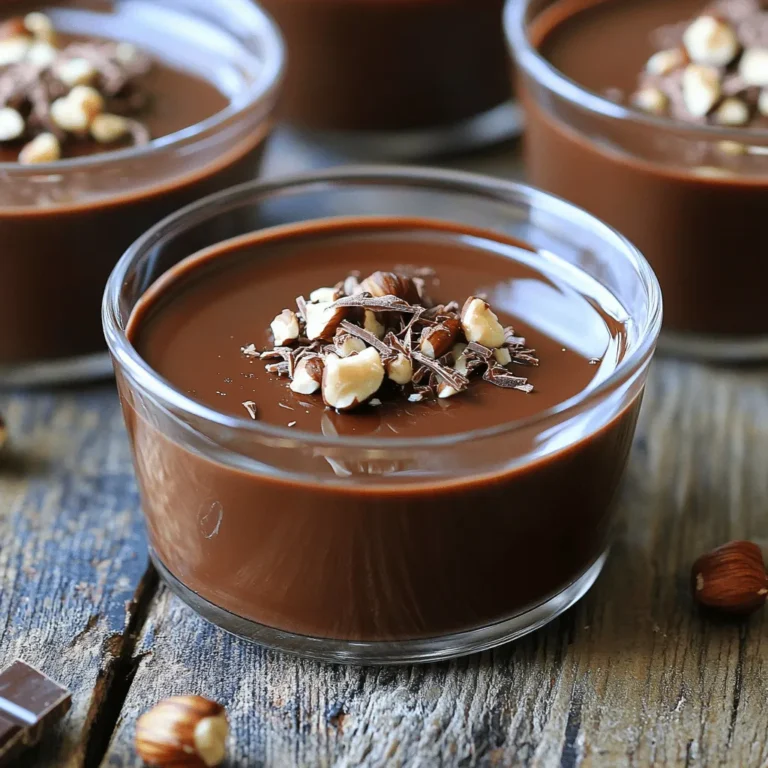
![This Chocolate Tres Leches Cake uses simple ingredients. Each one works together to create a rich flavor. - 1 cup all-purpose flour - 1/2 cup unsweetened cocoa powder - 1 1/2 teaspoons baking powder - 1/2 teaspoon baking soda - 1/4 teaspoon salt - 1/2 cup unsalted butter, softened - 1 cup granulated sugar - 3 large eggs, at room temperature - 1 teaspoon vanilla extract - 1/2 cup buttermilk, at room temperature - 1 cup sweetened condensed milk - 1 cup evaporated milk - 1 cup whole milk - 1 cup heavy cream, chilled - 2 tablespoons powdered sugar (for whipped cream) - Chocolate shavings or cocoa powder for garnish (optional) These ingredients create a soft cake soaked in a sweet milk mixture. The heavy cream topping adds a light and airy touch. Using room temperature ingredients helps everything mix well. I recommend using fresh milk for the best taste. For a unique twist, sprinkle chocolate shavings on top before serving. Enjoy making this delicious treat! For the complete recipe, check the [Full Recipe]. Start by preheating your oven to 350°F (175°C). Grab a 9x13 inch baking pan. Grease it with butter to make sure your cake won’t stick. Dust the pan lightly with flour. This quick step helps the cake come out clean and perfect. In a medium bowl, sift together the all-purpose flour, cocoa powder, baking powder, baking soda, and salt. This helps mix everything well. In a large bowl, use an electric mixer to beat the softened butter and sugar until it is light and fluffy. This takes about 3-5 minutes. Then, add the eggs one at a time. Mix well after each egg. Finally, stir in the vanilla extract. Slowly fold the dry ingredients into the wet mixture. Alternate with the buttermilk. Start and finish with the dry mix. Be gentle; mix until you see no flour streaks. Pour the batter into your prepared pan. Smooth the top with a spatula. Bake for 30-35 minutes. Check if it’s done by inserting a toothpick into the center; it should come out clean. Let it cool for 10 minutes, then turn it out onto a wire rack. In a separate bowl, mix the sweetened condensed milk, evaporated milk, and whole milk. Whisk this mixture until blended. This will soak into your cake, making it rich and moist. Once the cake is cool, poke holes in the top with a fork. Pour the tres leches mixture evenly over the cake. This helps the cake absorb the milk. Cover it with plastic wrap and let it soak for at least one hour. This step is key for flavor. In a large bowl, beat the chilled heavy cream with powdered sugar until stiff peaks form. Spread this whipped cream over the soaked cake. For a nice touch, sprinkle chocolate shavings or cocoa powder on top. Refrigerate the cake for at least 2 hours before serving. This waiting time mixes the flavors and makes each bite delicious. For the full recipe, check the details in the earlier sections. To get a moist cake, follow a few simple steps. Start by using room temperature ingredients. This helps the batter mix well. Next, do not overmix the batter. Mix until just combined. Overmixing adds air, which can dry the cake out. Finally, bake the cake just until a toothpick comes out clean. If you bake too long, the cake will dry out. Soaking the cake properly is key. First, let the cake cool completely before soaking it. This helps the cake absorb the milk mixture better. Use a fork to poke holes all over the top of the cake. This allows the milk to seep in. Then, pour the tres leches mixture evenly over the cake. Let it sit for at least one hour. For best results, cover it with plastic wrap and refrigerate. This ensures the cake soaks up all the flavor. Whipped cream adds a light touch to the cake. Start by chilling your mixing bowl and beaters. This keeps the cream cold and helps it whip better. Beat the heavy cream until it forms stiff peaks. This means it should hold its shape when you lift the whisk. Add the powdered sugar gradually for sweetness. Spread the whipped cream gently over the soaked cake. For a fun twist, add chocolate shavings or a sprinkle of cocoa powder on top. For the complete recipe, check the Full Recipe section. {{image_4}} You can make a gluten-free version of this cake easily. Just swap the all-purpose flour for a gluten-free flour blend. Look for a blend that works well for baking. This change keeps the cake moist and delicious. You may also add a pinch of xanthan gum to help the texture. To create a vegan chocolate tres leches cake, replace the eggs with flax eggs. Mix 1 tablespoon of ground flaxseed with 2.5 tablespoons of water for each egg. For the milk mixture, use coconut milk, almond milk, or any plant-based milk. Use coconut cream instead of heavy cream for topping. This way, you keep the rich flavor while going dairy-free. You can also play with flavors to make this cake unique. For a minty twist, add mint extract to the batter and whipping cream. Just a teaspoon will do. If you love coffee, add espresso powder to the batter for a rich, coffee flavor. You can also fold in chocolate chips for more texture and taste. Each variation brings a new fun experience to this classic dessert. For the full recipe, check the source to get all the details you need. To keep your Chocolate Tres Leches Cake fresh, always store it in the fridge. Use an airtight container to prevent it from drying out. If you have not yet topped it with whipped cream, store the cream separately. This keeps the cake moist and the cream fluffy. When stored properly, the cake lasts about 3 to 5 days in the fridge. The flavors will continue to blend, making each bite even better. Always check for any signs of spoilage, like a strange smell or changes in texture. You can freeze the cake if you want to keep it longer. Wrap it tightly in plastic wrap, then place it in a freezer-safe bag. This way, it can last up to 3 months in the freezer. When you're ready to enjoy it, let it thaw in the fridge overnight. Add the whipped cream topping just before serving for the freshest taste. For the complete recipe, you can refer to the Full Recipe section. Yes, you can! This cake is great for planning ahead. You can bake the cake, soak it, and then chill it in the fridge. It tastes even better after a day. Just cover it well so it stays fresh. Tres leches cake is soaked in three types of milk. Regular cake usually has no soaking. Tres leches is moist and rich. Regular cake is often lighter. The extra milk makes tres leches creamy and sweet. To keep the cake from being too soggy, let it cool completely first. After soaking, cover the cake and chill it. Serve it within a few days. This way, it stays moist without getting overly wet. Yes, you can use cake mix. Just follow the package instructions for baking. Make sure to adjust the milk mixture. This way, you get the rich flavor of tres leches without starting from scratch. You can use sweetened condensed milk, evaporated milk, and whole milk. If you want, you can try alternatives like almond milk or oat milk. Each choice will give a different taste, but they will still work well. For the full recipe, check out the Heavenly Chocolate Tres Leches Cake recipe above! In this post, we covered the essential steps to make a Chocolate Tres Leches Cake. You learned about the key ingredients and how to mix them. We detailed how to bake the cake and prepare the soaking mix. You got tips on keeping your cake moist and explored tasty variations. Finally, we discussed storing leftovers to enjoy later. Baking is fun and rewarding. Try this recipe to impress friends and family. Enjoy every delicious bite!](https://fastmealmate.com/wp-content/uploads/2025/06/83784e58-e7f6-4d4b-aebc-0bf8177d26de-768x768.webp)