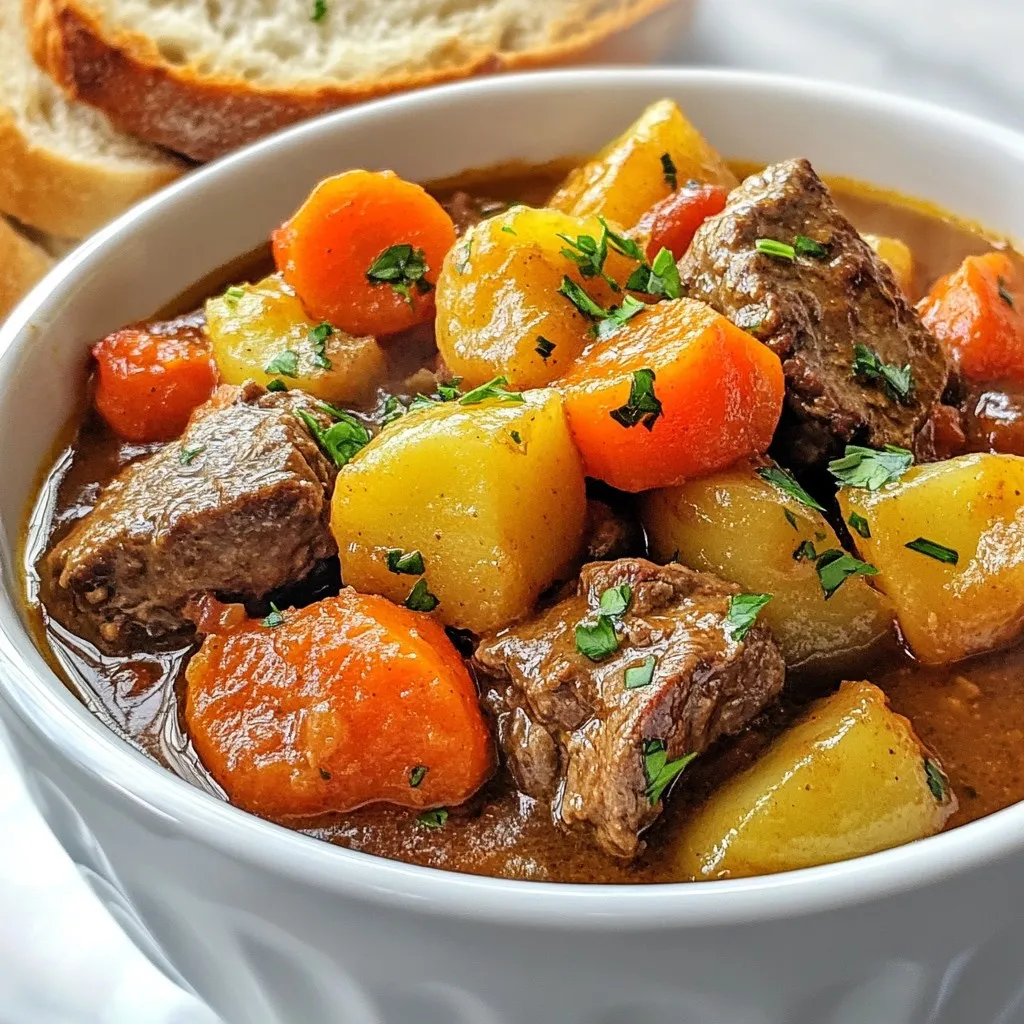
Instant Pot Beef Stew Flavorful and Hearty Meal


Are you ready to create a warm and hearty meal with your Instant Pot? This beef stew recipe will blow you away with rich flavors and tender meat. With simple ingredients and easy steps, you’ll make a delicious dish in no time. Perfect for busy weeknights or cozy weekends, this Instant Pot Beef Stew is a must-try. Let’s dive in and make something amazing together!
Why I Love This Recipe
- Comforting and Hearty: This beef stew is a warm hug in a bowl, perfect for cozy dinners on chilly nights.
- Quick and Easy: With the Instant Pot, you can have a delicious home-cooked meal in just about an hour, making it ideal for busy weeknights.
- Flavorful Ingredients: The combination of beef, vegetables, and spices creates a rich and savory stew that everyone will love.
- Versatile and Customizable: Feel free to swap in your favorite vegetables or adjust the seasoning to suit your taste!
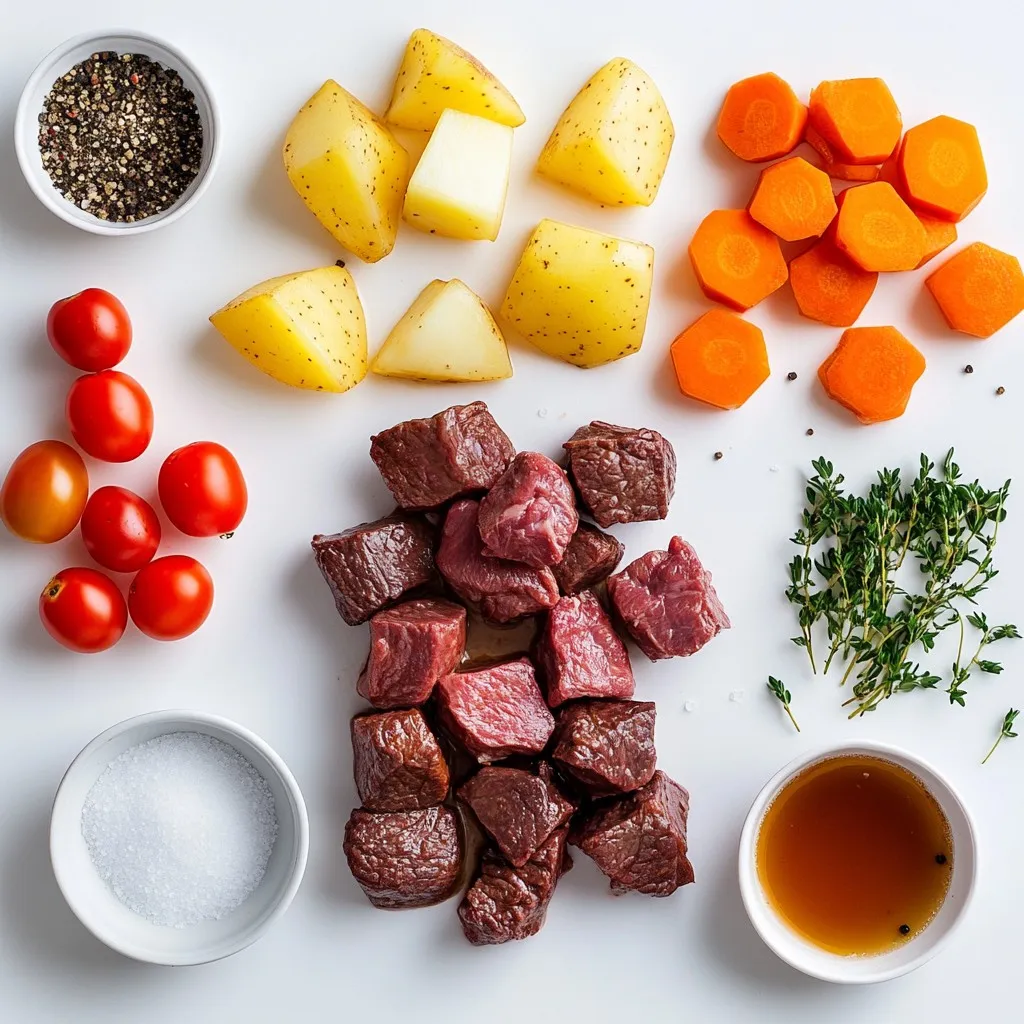
Ingredients
To make a warm and tasty Instant Pot beef stew, gather these key ingredients:
– 2 pounds beef stew meat, cut into 1-inch cubes
– 1 tablespoon olive oil
– 1 medium onion, finely chopped
– 3 cloves garlic, minced
– 4 medium carrots, peeled and sliced into rounds
– 3 medium potatoes, diced into bite-sized pieces
– 2 cups beef broth (low sodium recommended)
– 1 cup cherry tomatoes, halved
– 2 teaspoons dried thyme
– 1 teaspoon smoked paprika
– 1 teaspoon salt
– ½ teaspoon black pepper
– 2 tablespoons Worcestershire sauce (optional for enhanced depth of flavor)
– 2 tablespoons cornstarch (for thickening)
– 2 tablespoons water (for cornstarch slurry)
– Fresh parsley, chopped (for garnish)
Each ingredient brings its own unique flavor. The beef provides a rich base, while the veggies add sweetness and texture. The herbs and spices enhance the overall taste. I love using cherry tomatoes for their burst of freshness. You can adjust the seasonings to your liking. Don’t forget the fresh parsley for that final touch!
Step-by-Step Instructions
Sauté the Aromatics
Set your Instant Pot to Sauté mode. When the pot is hot, add the olive oil. Next, toss in the chopped onion. Cook for about 3 minutes until the onion is soft. Then, add the minced garlic. Stir and cook for another 30 seconds. You want the garlic to smell nice.
Brown the Beef
Now, raise the heat a bit. Add the beef stew meat to the pot. Cook for about 5 to 7 minutes. Stir often so all sides get brown. This step brings out great flavor in your stew.
Combine Remaining Ingredients
Once the beef is brown, add the sliced carrots, diced potatoes, and halved cherry tomatoes. Pour in the beef broth, and add the dried thyme, smoked paprika, salt, and black pepper. If you like, add Worcestershire sauce too. Stir everything well so it mixes nicely.
Cook Under Pressure
Put the lid on the Instant Pot and make sure the sealing valve is set to Sealing. Select the Manual or Pressure Cook option. Set the timer for 35 minutes. This will cook your stew perfectly.
Release Pressure
When the timer goes off, let the pressure release naturally for 10 minutes. After that, carefully turn the valve to Quick Release. This lets out any remaining pressure safely.
Thicken the Stew
In a small bowl, mix the cornstarch and water until smooth. Set the Instant Pot back to Sauté mode. Stir the cornstarch mixture into the stew. Cook for 2 to 3 minutes, stirring often, until the stew thickens up.
Final Touches
Taste your stew and adjust the seasoning if needed. Add more salt or pepper if it needs it. When ready, ladle the stew into bowls. Enjoy your hearty meal!
Tips & Tricks
Best Cuts of Beef for Stew
For beef stew, I recommend using chuck roast or brisket. These cuts are tough but full of flavor. They also become tender when cooked low and slow. Look for meat with good marbling. Marbling means the fat is spread throughout the meat. This fat adds moisture and flavor, making your stew rich and satisfying.
Seasoning Options
You can enhance your stew’s flavor with various spices. Consider adding bay leaves, rosemary, or even cumin. Each spice brings a unique taste. Fresh herbs also work well. Thyme is a classic choice, but parsley and basil can brighten the stew. They add freshness and depth to each bite.
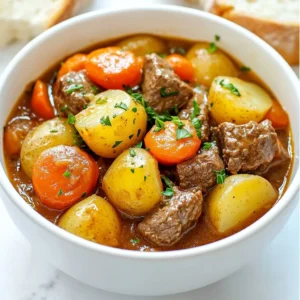
Serving Suggestions
Beef stew pairs well with many sides. Try serving it with crusty bread to soak up the broth. A simple green salad can add a nice crunch. If you want something warm, mashed potatoes or rice are great options. For garnishing, sprinkle fresh parsley on top. It adds color and a fresh taste.
Pro Tips
- Brown the Meat Well: Ensuring that the beef is well-browned before adding other ingredients enhances the stew’s depth of flavor.
- Use High-Quality Broth: Opt for homemade or high-quality beef broth for the best flavor in your stew.
- Let it Rest: Allow the stew to sit for a few minutes after cooking. This resting time helps the flavors meld together beautifully.
- Adjust Seasonings: Always taste your stew before serving. Adjust the seasonings to your preference for the best results.
Variations
Additions to Customize Your Stew
You can easily adjust this stew to your taste. Here are some ideas:
– Vegetables: Add peas, green beans, or bell peppers for color and flavor. You might also try adding turnips or parsnips for a sweet twist.
– Proteins: Swap the beef for chicken or turkey for a lighter option. You could even use lentils for a vegetarian stew.
These changes can make each batch unique. Feel free to experiment!
Alternative Cooking Methods
If you don’t have an Instant Pot, no worries! Here are other ways to cook this stew:
– Slow Cooker: Brown the meat as noted. Then, add all ingredients to the slow cooker. Cook on low for 6-8 hours or high for 3-4 hours.
– Stovetop: After browning the meat, add all ingredients to a large pot. Bring to a boil, then reduce heat. Let it simmer for about 1.5-2 hours until the meat is tender.
Each method brings a different texture and flavor to the stew.
Gluten-Free and Low-Carb Options
Need to adjust for diet? Here’s how:
– Gluten-Free: Use gluten-free Worcestershire sauce and check broth labels. Most options are gluten-free, but some brands add gluten.
– Low-Carb: Replace potatoes with cauliflower or zucchini. These options keep the dish hearty without the extra carbs.
These simple swaps ensure everyone can enjoy this comforting meal.
Storage Info
Refrigeration Guidelines
To store beef stew in the fridge, let it cool first. Then, put it in an airtight container. I like using glass or plastic containers with tight seals. This keeps the stew fresh and tasty. You can store it for up to three days. When you are ready to eat, just take it out and reheat.
Freezing Instructions
If you want to freeze beef stew, use freezer-safe containers. Leave a little space at the top for expansion. It’s best to use it within three months for the best quality. When you want to eat it, thaw it in the fridge overnight. This keeps it safe and helps maintain good flavor.
Reheating Tips
For reheating leftovers, the stovetop is my favorite method. Just pour the stew into a pot and heat over medium heat. Stir often to avoid sticking. You can also use the microwave, but make sure to heat it in short intervals. This helps it heat evenly. Avoid letting it boil, as that can change the texture. Always taste and adjust the seasoning if needed after reheating.
FAQs
How long to cook beef stew in the Instant Pot?
Cook beef stew in the Instant Pot for 35 minutes. This gives the meat time to become tender and soak up the flavors. After cooking, let the pressure release naturally for 10 minutes. Then do a quick release for any remaining pressure.
Can I use frozen beef for this recipe?
Yes, you can use frozen beef. Just add a few extra minutes to the cooking time. Keep in mind that frozen meat may release more liquid. This can make your stew a bit more soupy, so plan accordingly.
What is the best way to thicken beef stew?
To thicken beef stew, mix cornstarch with water to create a slurry. Stir this into the stew while it’s on Sauté mode. Let it cook for a few more minutes until it reaches your desired thickness. You can also use flour or potato starch if you prefer.
Can I skip the browning step?
You can skip browning, but I don’t recommend it. Browning the beef adds great flavor. It creates a rich base that makes your stew taste even better. If you do skip it, you may miss out on that deep flavor.
What can I use instead of beef broth?
If you don’t have beef broth, try using chicken broth or vegetable broth. Water is also an option, but it won’t add much flavor. For a richer taste, you can use red wine or a mix of water and soy sauce.
Beef stew is a comforting dish that’s easy to make. We covered the ingredients needed, from beef stew meat to fresh parsley. I shared step-by-step instructions on cooking, including browning the meat and thickening the stew. Plus, you learned some tips for variations and storage.
Remember, customizing your stew can make it your own. Use fresh herbs or different proteins if you like. Enjoying your homemade stew can be a fulfilling experience, and it’s perfect for sharing with friends and famil
Savory Delight Instant Pot Beef Stew
Ingredients
- 2 pounds beef stew meat, cut into 1-inch cubes
- 1 tablespoon olive oil
- 1 medium onion, finely chopped
- 3 cloves garlic, minced
- 4 medium carrots, peeled and sliced into rounds
- 3 medium potatoes, diced into bite-sized pieces
- 2 cups beef broth (low sodium recommended)
- 1 cup cherry tomatoes, halved
- 2 teaspoons dried thyme
- 1 teaspoon smoked paprika
- 1 teaspoon salt
- 0.5 teaspoon black pepper
- 2 tablespoons Worcestershire sauce (optional for enhanced depth of flavor)
- 2 tablespoons cornstarch (for thickening)
- 2 tablespoons water (for cornstarch slurry)
- 1 tablespoon fresh parsley, chopped (for garnish)
Instructions
- Set your Instant Pot to the Sauté mode. When the pot is hot, pour in the olive oil. Add the chopped onion and sauté for about 3 minutes until the onions become translucent. Stir in the minced garlic and cook for an additional 30 seconds until fragrant.
- Increase the heat slightly and introduce the beef stew meat to the pot. Cook for approximately 5-7 minutes, stirring frequently, until the meat is browned on all sides.
- Add the sliced carrots, diced potatoes, halved cherry tomatoes, beef broth, dried thyme, smoked paprika, salt, and black pepper to the pot. If you're using Worcestershire sauce, pour that in as well. Stir vigorously to ensure all the ingredients are well incorporated.
- Secure the lid on the Instant Pot making sure the sealing valve is set to Sealing. Select the Manual or Pressure Cook option, and set the timer to 35 minutes.
- After the cooking cycle is complete, allow the pressure to release naturally for 10 minutes. Then, carefully turn the valve to Quick Release to release any remaining pressure.
- In a small bowl, whisk together the cornstarch and water to form a smooth slurry. Set the Instant Pot back to Sauté mode and stir in the cornstarch mixture. Continue to cook for an additional 2-3 minutes, stirring regularly, until the stew has thickened to your desired consistency.
- Taste the stew and adjust seasoning as needed before serving to ensure perfect flavor.

![To make Greek chicken bowls, gather these key items: - 2 large chicken breasts - 2 tablespoons extra virgin olive oil - 1 teaspoon dried oregano - 1 teaspoon garlic powder - 1 teaspoon smoked paprika - Salt and freshly ground black pepper to taste - 1 cup quinoa, rinsed under cold water - 2 cups vegetable broth (or water) - 1 cup cherry tomatoes, halved - 1 cucumber, diced into bite-sized pieces - ½ red onion, thinly sliced - 1 cup kalamata olives, pitted and halved - ½ cup crumbled feta cheese - ½ cup tzatziki sauce - Fresh parsley, finely chopped for garnish Feel free to add more flavor and texture with these extras: - Avocado slices - Roasted red peppers - Spinach or mixed greens - Artichoke hearts For the best results, consider these brands: - Olive Oil: Colavita or Pompeian - Quinoa: TruRoots or Ancient Harvest - Feta Cheese: Athenos or Dodoni - Tzatziki Sauce: Oikos or Fage These ingredients come together to create a healthy, delicious meal. You can find the full recipe for a complete guide on how to prepare these tasty bowls. First, let's marinate the chicken. In a medium bowl, mix together the olive oil, oregano, garlic powder, smoked paprika, salt, and black pepper. Use a whisk to blend them well. Add the chicken breasts and coat them completely with this marinade. Cover the bowl and place it in the fridge. Let the chicken sit for at least 30 minutes or up to 2 hours. This step adds great flavor. While the chicken marinates, it's time to cook the quinoa. In a medium saucepan, combine the rinsed quinoa and vegetable broth. Bring the mixture to a rolling boil. Then, reduce the heat to low and cover the pot. Let it simmer for about 15 minutes. The quinoa should absorb all the liquid and become fluffy. Once done, remove it from heat and let it sit for 5 more minutes while covered. Now, we grill the chicken. Preheat your grill or skillet over medium-high heat. Place the marinated chicken on the grill or skillet. Cook each side for about 6-7 minutes. You want the chicken to reach an internal temperature of 165°F (75°C). Once it’s done, move the chicken to a cutting board. Let it rest for a few minutes before slicing it thin. While the chicken cooks, prepare the veggies. Start by halving the cherry tomatoes. Next, dice the cucumber into bite-sized pieces. Then, thinly slice the red onion. Once done, set the veggies aside. This step adds freshness and crunch to your bowls. Grab four serving bowls to assemble your meal. Begin by spooning a generous scoop of fluffy quinoa into each bowl. Next, layer on the sliced chicken. Follow this with the halved cherry tomatoes, diced cucumber, red onion, and halved kalamata olives. Finally, sprinkle crumbled feta cheese on top for a creamy touch. To finish your bowls, drizzle a good amount of tzatziki sauce over each one. This sauce adds a cool and refreshing flavor. For the final touch, sprinkle finely chopped parsley on top. This adds color and freshness. Now you have a delightful Greek chicken bowl! For the full recipe, check [Full Recipe]. To make Greek chicken bowls shine, focus on marinating the chicken well. A good marinade adds flavor, so let it sit for at least 30 minutes. You can use a grill or skillet for cooking. Both methods yield juicy chicken. For grilling, preheat the grill to medium-high heat. Cook the chicken for about 6-7 minutes on each side. If using a skillet, add a splash of olive oil to keep the chicken moist. You can enhance flavors easily. Try adding lemon zest to the marinade for a fresh twist. Fresh herbs like dill or mint can boost your vegetables. For a spicy kick, sprinkle some red pepper flakes on the chicken. If you love garlic, use fresh minced garlic instead of powder. This small change adds depth to the dish. Presentation matters! Use colorful bowls to make your meal pop. Layer the ingredients nicely. Start with a base of fluffy quinoa. Arrange the sliced chicken and veggies in a circular pattern on top. Add crumbled feta and a drizzle of tzatziki sauce for a beautiful finish. Don’t forget to add a lemon wedge on the side. It makes the dish look fresh and inviting. For more detail, check the Full Recipe. {{image_4}} You can easily swap chicken for other proteins. Try grilled shrimp for a seafood twist. It cooks quickly and adds a nice flavor. Lamb is another great choice for those who want something richer. If you enjoy beef, use thinly sliced steak. Each protein brings its unique taste and texture. If you prefer a plant-based meal, consider chickpeas or lentils. Both are high in protein and very filling. You can roast chickpeas with spices for extra crunch. Another option is marinated tofu. It soaks up flavors well and works perfectly in bowls. While tzatziki is classic, you can mix things up with other sauces. A tahini dressing adds a nutty flavor that complements the veggies. Or, try a lemon herb vinaigrette for bright freshness. You could even drizzle some spicy harissa for a kick. Each option changes the flavor profile and keeps your meals exciting. For a complete recipe, check out the Full Recipe for Mediterranean Bliss Greek Chicken Bowls. To store leftovers, place your Greek chicken bowls in airtight containers. Make sure to separate the chicken, quinoa, and veggies if you can. This keeps everything fresh and tasty. You can store them in the fridge for up to three days. When you’re ready to eat, reheat your bowl in the microwave. Just cover the bowl with a microwave-safe lid or wrap. Heat it in short bursts, about one minute at a time. Stir in between to ensure even warming. You can also reheat everything in a skillet over low heat. If you want to freeze your Greek chicken bowls, do so before adding tzatziki or feta cheese. Freeze the chicken, quinoa, and veggies in airtight bags. They can last for up to three months in the freezer. When ready to eat, thaw overnight in the fridge. Then, reheat and add fresh toppings. This way, you keep the flavors bright! To make Greek chicken bowls, start by marinating the chicken. Mix olive oil, oregano, garlic powder, smoked paprika, salt, and pepper. Coat the chicken breasts and let them sit for at least 30 minutes. Next, cook the quinoa in vegetable broth until fluffy. While it cooks, grill or pan-cook the chicken until it reaches 165°F. Prepare your veggies by chopping cherry tomatoes, cucumber, and red onion. Assemble the bowls with quinoa, chicken, veggies, olives, feta cheese, and tzatziki sauce. For the full recipe, check out the detailed steps above. Yes, using store-bought tzatziki sauce is a great time saver. It can add a nice flavor without extra work. Just make sure to choose a brand you like. Look for fresh options in the refrigerated section for the best taste. If you want to change it up, try brown rice or farro as substitutes for quinoa. Both have great textures and flavors. You can also use couscous or bulgur wheat for a different twist. Just adjust the cooking times based on what you choose. Greek chicken bowls will stay fresh in the fridge for up to four days. Store them in airtight containers to keep them tasty. Always check for any signs of spoilage before eating leftovers. Absolutely! You can marinate the chicken and cook the quinoa a day ahead. Chop your veggies in advance and store them in the fridge. This way, you can assemble and enjoy bowls quickly when you're ready to eat. Greek chicken bowls are simple to make and tasty. We covered ingredients, cooking steps, and clever tips. You can try different proteins or sauces to mix things up. Keep leftovers fresh and reheat them easily. In closing, making these bowls is fun and healthy. You can enjoy cooking while creating delicious meals. Follow these steps, and you’ll impress anyone who eats your food!](https://fastmealmate.com/wp-content/uploads/2025/06/353123fa-fb97-4087-931a-2db7911ed322-768x768.webp)