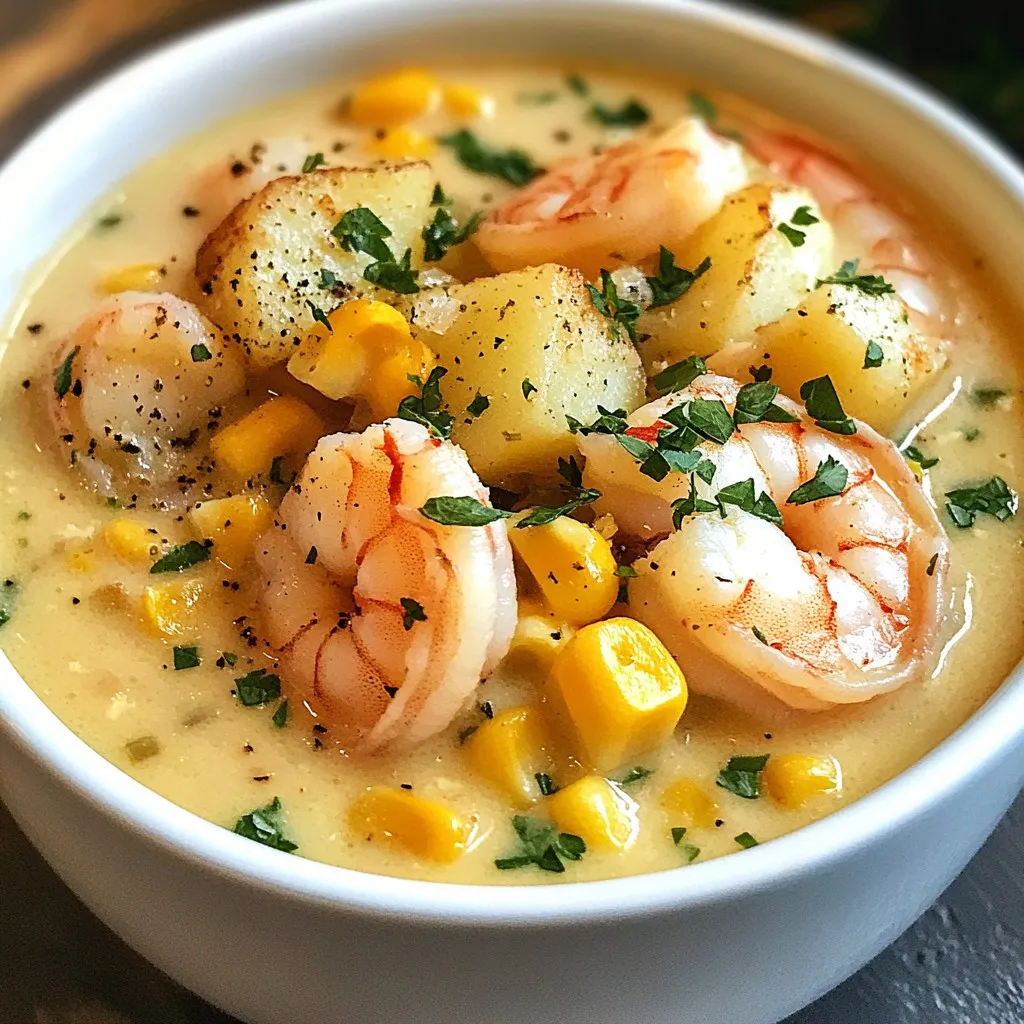
Creamy Shrimp and Corn Chowder Delightful Comfort Soup

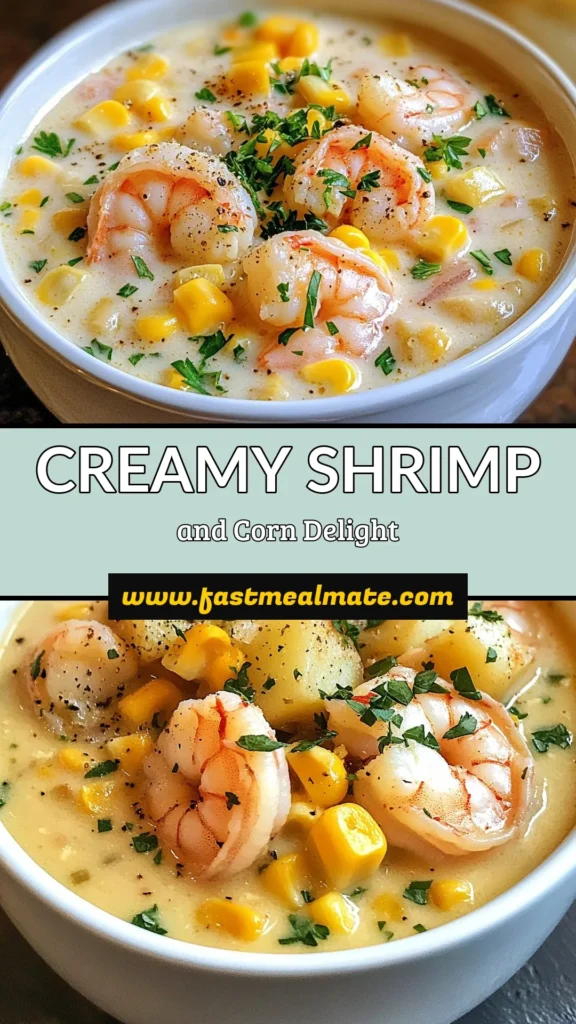
Cozy up with a bowl of my Creamy Shrimp and Corn Chowder—your new favorite comfort food! This rich, creamy soup combines tender shrimp and sweet corn for a delightful blend of flavors. Each bite warms the soul and fills the belly. Let me show you how to whip up this easy, satisfying chowder, packed with fresh ingredients and tips to make it just right. Get ready to savor every spoonful!
Why I Love This Recipe
- Delicious Flavor Combination: The blend of shrimp and sweet corn creates a delightful taste that is both comforting and satisfying.
- Easy to Make: This chowder comes together quickly, making it perfect for weeknight dinners or cozy weekends.
- Versatile Ingredients: You can easily swap out ingredients based on what you have on hand, making this recipe adaptable to your pantry.
- Hearty and Filling: This chowder is not only creamy and rich but also packed with nutrients, ensuring a wholesome meal.
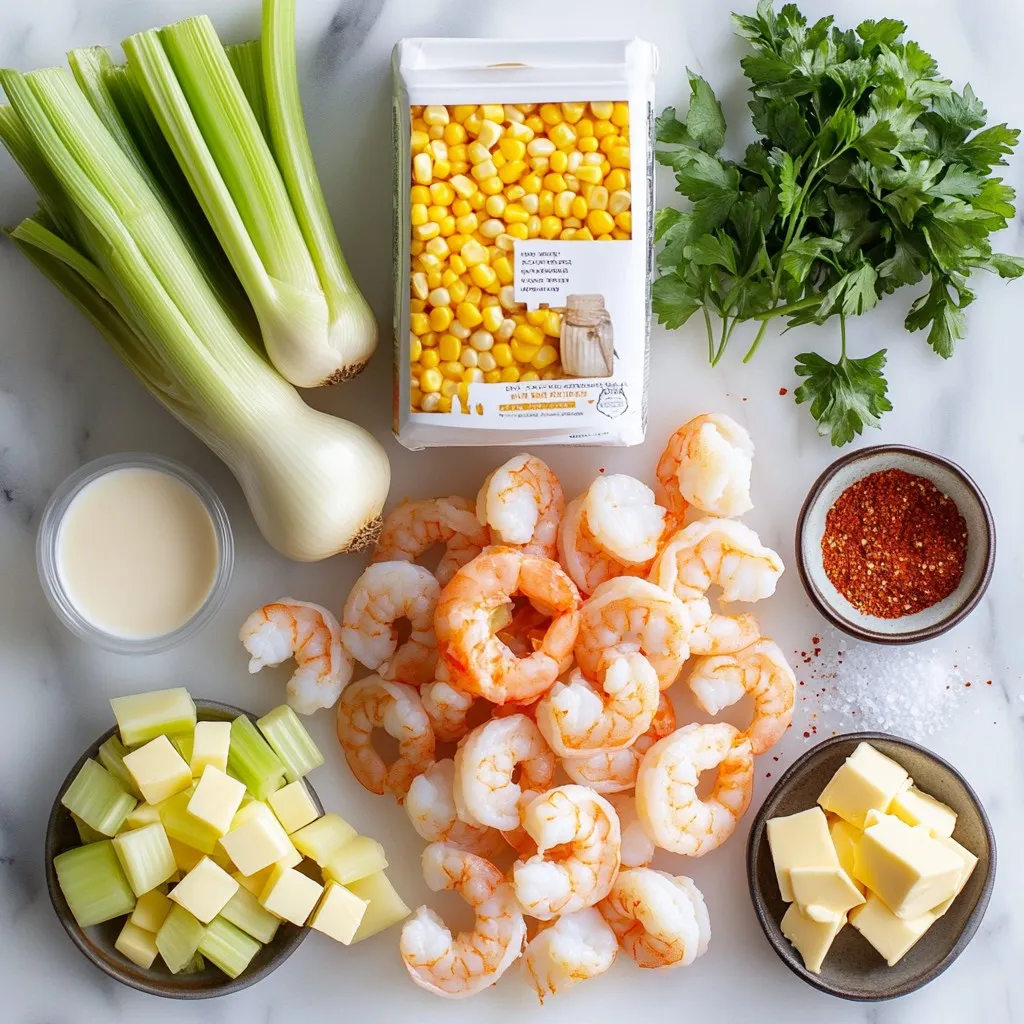
Ingredients
List of Ingredients
– Large shrimp, peeled and deveined
– Fresh or frozen corn kernels
– Onion, garlic, potatoes, celery
– Vegetable broth and heavy cream
– Seasonings: smoked paprika, cayenne pepper, salt, and pepper
– Butter and fresh parsley for garnish
To make this chowder, you need key ingredients. Start with large shrimp. Make sure they are peeled and deveined for the best texture. Next, grab fresh or frozen corn kernels. Both options work well.
You will also need some veggies. Use one medium onion, two cloves of garlic, two medium potatoes, and one cup of diced celery. These add great flavor and texture.
For the base of the chowder, you will need four cups of vegetable broth. This keeps it light yet tasty. Then, add one cup of heavy cream. This makes the chowder rich and creamy.
Now, let’s spice things up! You need one teaspoon of smoked paprika. If you like heat, add half a teaspoon of cayenne pepper. Don’t forget salt and pepper to taste.
Finally, use two tablespoons of butter. This will help sauté the veggies. Top it off with fresh parsley for a bright finish.
With these ingredients, you create a bowl of joy and comfort.
Step-by-Step Instructions
Sautéing the Base
Start by placing a large pot over medium heat. Add 2 tablespoons of butter and let it melt. Once melted, add 1 finely chopped onion and 1 cup of diced celery. Cook these together for about 5 minutes. You want the onion to become soft and clear. This step builds a rich base for your soup.
Next, add 2 minced garlic cloves to the pot. Cook it for about 1 minute. The garlic should smell nice and fragrant, adding depth to your chowder.
Building the Chowder
Now it’s time to make the chowder hearty. Add 2 diced potatoes, 4 cups of vegetable broth, and 2 cups of corn kernels to the pot. Sprinkle in 1 teaspoon of smoked paprika and 1/2 teaspoon of cayenne pepper if you like some heat. Season with salt and pepper to taste.
Bring this mixture to a boil. After boiling, reduce the heat. Let it simmer for 15 to 20 minutes. You want the potatoes to be soft when you poke them with a fork.
Finishing Touches
When your potatoes are tender, it’s time to add the stars of the dish. Toss in 1 pound of peeled and deveined shrimp. Cook for 5 to 7 minutes, stirring gently. You’ll know it’s done when the shrimp turns pink and opaque.
Now, lower the heat again and pour in 1 cup of heavy cream. Stir it well and let it warm for another 3 to 4 minutes. Avoid boiling to keep the cream smooth. Taste your chowder and adjust the seasoning with more salt and pepper if needed.
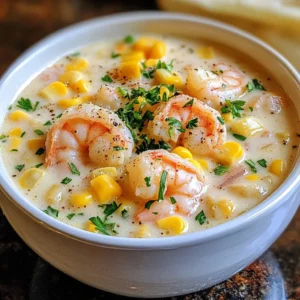
Let the chowder sit for a couple of minutes. This will help it thicken slightly. Serve your chowder hot, with fresh parsley on top for color and flavor. Enjoy the delightful comfort of your homemade shrimp and corn chowder!
Tips & Tricks
Ensuring Creaminess
To keep your chowder creamy, avoid boiling after adding the cream. Boiling can cause the cream to curdle. Instead, gently heat it until warm. This keeps the texture smooth and rich.
Adjusting heat levels is key. After adding the cream, lower the heat to medium-low. This prevents any sudden changes that could affect the cream’s texture.
Flavor Enhancements
You can elevate the flavor of your chowder with extra seasonings. Try adding thyme or dill for a fresh taste. A squeeze of lemon juice can also brighten the dish.
To gain depth of flavor, caramelize some corn. Heat a small pan over medium heat, add a bit of butter, and cook the corn until golden. Sprinkle this over the chowder just before serving. It adds a nice crunch and a sweet touch.
Pro Tips
- Fresh Corn is Best: If possible, use fresh corn on the cob for the sweetest flavor. Simply shave off the kernels and add them to the chowder for a burst of freshness.
- Perfectly Cooked Shrimp: To keep shrimp tender, avoid overcooking them. They should only take 5-7 minutes to turn pink and opaque; any longer and they may become tough.
- Season Gradually: It’s best to season your chowder gradually. Start with a little salt and pepper, then taste and adjust as needed to enhance the flavors without overpowering them.
- Thickening Tips: If you prefer a thicker chowder, consider mashing a few of the cooked potatoes in the pot or adding a cornstarch slurry to achieve your desired consistency.
Variations
Ingredient Swaps
You can easily change some ingredients in this chowder. If you want to swap the shrimp, try using crab or scallops. Both options add a different taste while still being delicious.
If you prefer a veggie chowder, replace the shrimp with mushrooms or tofu. You can keep the corn for sweetness and texture.
For those who want a dairy-free option, use cashew cream or coconut milk instead of heavy cream. These alternatives will give you a creamy texture without the dairy.
Spice Level Modifications
Adjusting the spice level is simple. If you want more heat, add more cayenne pepper. Start with a pinch and taste as you go.
You can also try different spices. For a smoky flavor, add chipotle powder. For a fresh kick, consider using fresh jalapeños.
These changes can make your chowder unique. Experimenting with spices keeps the dish exciting and fresh.
Storage Info
Best Practices for Storing Chowder
To store your chowder, let it cool down first. This step helps keep it fresh. Once it cools, transfer it to airtight containers. Be sure to seal them tightly. You can keep chowder in the fridge for up to three days. For longer storage, freeze it. In the freezer, it lasts about three months. Just remember to label your containers with the date.
Reheating Instructions
When reheating chowder, do it slowly. You can use a pot on the stove or a microwave. If you use the stove, heat on low. Stir often to avoid burning. If you microwave, do it in short bursts. Stop to stir in between. This keeps the texture smooth and creamy. If it seems too thick, add a splash of broth or cream. This will help bring it back to life.
FAQs
Can I make this chowder ahead of time?
Yes, you can make this chowder ahead of time. To store it, let it cool completely. Then, transfer it to an airtight container. You can keep it in the fridge for up to three days. When you’re ready to eat, reheat the chowder on the stove over low heat. Stir often to keep it from sticking. If it seems too thick, add a splash of broth or water.
What can I use instead of heavy cream?
If you want a lighter option, try using half-and-half. It gives a creamy texture but has less fat. You can also use coconut milk for a non-dairy choice. It adds a nice flavor, too. Another option is to use a mixture of milk and flour. Combine one cup of milk with two tablespoons of flour to thicken your chowder without heavy cream.
Can I freeze creamy chowder?
You can freeze creamy chowder, but be careful. Dairy can change texture when frozen. To freeze, let the chowder cool down. Then, pour it into freezer-safe containers. Leave some space at the top for expansion. When you want to eat it, thaw it in the fridge overnight. Reheat on the stove, adding a little broth or milk to bring back the creaminess.
This blog post covered how to make a delicious shrimp chowder. I shared the key ingredients, like shrimp, potatoes, and seasonings. You learned step-by-step instructions for cooking the chowder and tips for perfect creaminess. I also discussed variations to suit your taste and best practices for storage.
In conclusion, this chowder is not only tasty but also flexible. You can make it your own by swapping ingredients or adjusting flavors. Enjoy creating a bowl of comfor
Creamy Shrimp and Corn Chowder
Ingredients
- 1 pound large shrimp, peeled and deveined
- 2 cups fresh corn kernels (or frozen)
- 1 medium onion, finely chopped
- 2 cloves garlic, minced
- 2 medium potatoes, diced
- 1 cup celery, diced
- 4 cups vegetable broth
- 1 cup heavy cream
- 2 tablespoons butter
- 1 teaspoon smoked paprika
- 1/2 teaspoon cayenne pepper (optional for heat)
- to taste salt and pepper
- for garnish fresh parsley, chopped
Instructions
- Start by placing a large pot over medium heat and adding the butter. Once melted, toss in the finely chopped onion and diced celery. Sauté them together for about 5 minutes, or until the onion is soft and translucent.
- Next, incorporate the minced garlic into the mixture, cooking for an additional minute until it becomes fragrant.
- Now, add the diced potatoes, vegetable broth, and corn kernels to the pot. Sprinkle in the smoked paprika, cayenne pepper (if you'd like some spice), along with salt and pepper to taste. Bring this hearty mixture to a boil, then reduce the heat to let it simmer for 15-20 minutes, or until the potatoes are tender when pierced with a fork.
- When the potatoes are tender, introduce the shrimp into the pot. Cook for an additional 5-7 minutes, stirring gently, until the shrimp have turned pink and opaque.
- Lower the heat once again and pour in the heavy cream. Stir well and allow the chowder to warm through for another 3-4 minutes, avoiding a boil to keep the cream from curdling.
- Taste the chowder and adjust the seasoning with additional salt and pepper if needed. Remove from heat and let it sit for a couple of minutes; this will help it thicken slightly.
- Serve the chowder piping hot, garnished with a sprinkle of freshly chopped parsley on top for a touch of color and freshness.

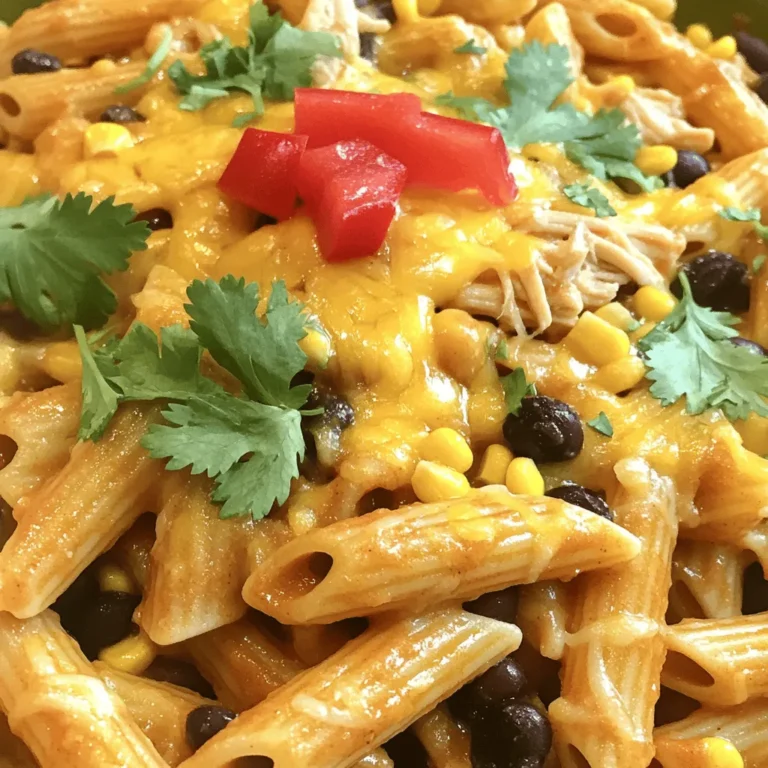
![To make this tasty Parmesan Spinach Couscous, you need a few simple items. - 1 cup couscous - 2 cups vegetable broth - 2 cups fresh spinach, finely chopped - 1 cup cherry tomatoes, halved - 1/2 cup freshly grated Parmesan cheese - 2 tablespoons extra virgin olive oil - 1 tablespoon freshly squeezed lemon juice - 1 garlic clove, minced - Salt and freshly ground black pepper to taste - Fresh parsley, finely chopped, for garnish (optional) Each ingredient adds a layer of flavor. Couscous is light and fluffy. Spinach brings a fresh taste. Cherry tomatoes add sweetness and color. Parmesan cheese gives a rich, creamy finish. Olive oil smooths everything out. Lemon juice adds a bright zing. Garlic gives it a warm aroma. Salt and pepper enhance all the flavors. This recipe is easy to follow. You can find the Full Recipe above to make it at home. Enjoy cooking! - Start by boiling 2 cups of vegetable broth in a medium saucepan. - Once it boils, add 1 cup of couscous. Stir it well. - Cover the saucepan and take it off the heat. - Let it rest for 5 minutes, so the couscous soaks up the broth. - In a large skillet, heat 2 tablespoons of extra virgin olive oil over medium heat. - Add 1 minced garlic clove and sauté for about 1 minute. - Toss in 2 cups of finely chopped spinach and 1 cup of halved cherry tomatoes. - Cook for 3-4 minutes, stirring until the spinach wilts and tomatoes soften. - After the couscous rests, fluff it with a fork. - Gently mix the fluffy couscous with the sautéed vegetables. - Sprinkle in 1/2 cup of freshly grated Parmesan cheese. - Drizzle 1 tablespoon of freshly squeezed lemon juice over the mix. - Stir until the cheese melts and coats everything. - Season with salt and black pepper to your taste. - Serve warm, and if you like, garnish with fresh parsley. For the complete recipe, check out the [Full Recipe]. To avoid mushy couscous, use the right liquid-to-couscous ratio. Stick to 2 cups of broth for every 1 cup of couscous. This keeps it fluffy. When cooking, bring your broth to a boil first. Then add the couscous quickly. Cover it and let it rest for five minutes. This lets the couscous absorb the flavors without overcooking. Spices can take your dish to the next level. I like adding a pinch of red pepper flakes for heat. Fresh herbs like basil or thyme also add a nice touch. If you want to mix it up, try using feta cheese instead of Parmesan. Feta gives a tangy twist. You can also explore vegan cheese options for a dairy-free dish. Parmesan spinach couscous pairs well with grilled chicken or fish. You can also serve it alongside a fresh salad. The dish tastes best warm. Serve it right after cooking for the best flavor and texture. If you let it sit, the couscous may clump together. For the full recipe, check the earlier section. {{image_4}} You can add protein to make your Parmesan spinach couscous heartier. Grilled chicken works well. Simply slice it and mix it in just before serving. It adds a nice flavor and texture. If you want a vegetarian option, try incorporating chickpeas or beans. They boost the protein and add fiber. Just rinse and drain them, then fold them into the couscous. Feel free to swap spinach for kale. Kale adds a different bite and is very nutritious. You can also use seasonal vegetables. Try bell peppers in summer or butternut squash in fall. Each option gives a new taste to the dish and keeps it fresh. You can experiment with different cheeses too. Feta or goat cheese can be great choices. They add a tangy twist. For those who prefer vegan options, look for vegan cheese. There are many great brands that melt well and taste delicious. Each cheese brings its own flavor, making the dish unique each time. To store leftovers, let the couscous cool first. Place it in an airtight container. This keeps it fresh for later use. I recommend glass or BPA-free plastic containers. These options help keep food safe and tasty. You can freeze Parmesan Spinach Couscous if you have extra. Scoop the cooled dish into freezer-safe bags. Press out as much air as you can before sealing. This helps prevent freezer burn. When you're ready to eat, thaw it overnight in the fridge. Reheat in a skillet over low heat. Add a splash of broth to help it warm up nicely. In the fridge, the couscous lasts about 3 to 5 days. Check for any off smells or mold, which are signs of spoilage. If it looks dry or hard, it's best to toss it out. Always trust your senses when it comes to food safety. You can easily make Parmesan Spinach Couscous gluten-free. Just swap regular couscous for gluten-free couscous. Brands like Bob's Red Mill or Trader Joe's offer great options. Make sure to check the label for any hidden gluten. The cooking method stays the same, and you will still enjoy all the flavors! Yes, you can prep this dish ahead of time. Make the couscous and sauté the veggies earlier in the day. Store them separately in the fridge. When you’re ready to eat, just combine them with the cheese and heat everything gently. This keeps the dish fresh and tasty! Parmesan Spinach Couscous pairs well with many dishes. Here are some great options: - Grilled chicken for protein - Roasted vegetables like zucchini or bell peppers - A fresh garden salad with a light vinaigrette - Sautéed shrimp for a seafood twist Feel free to mix and match based on your taste! For the full recipe, check out the section above. This recipe for Parmesan Spinach Couscous is both simple and tasty. You learned the ingredient list, step-by-step cooking methods, and tips for a great dish. Plus, we explored fun variations and storage ideas. With these insights, you can make a meal that pleases everyone. Experiment with different flavors and ingredients to match your taste. Enjoy every bite and feel good about your cooking!](https://fastmealmate.com/wp-content/uploads/2025/05/f4ccb392-4fc5-4f37-838a-261a9f2c6c95-768x768.webp)