Roasted Beet & Carrot Burrata Salad Vibrant and Fresh

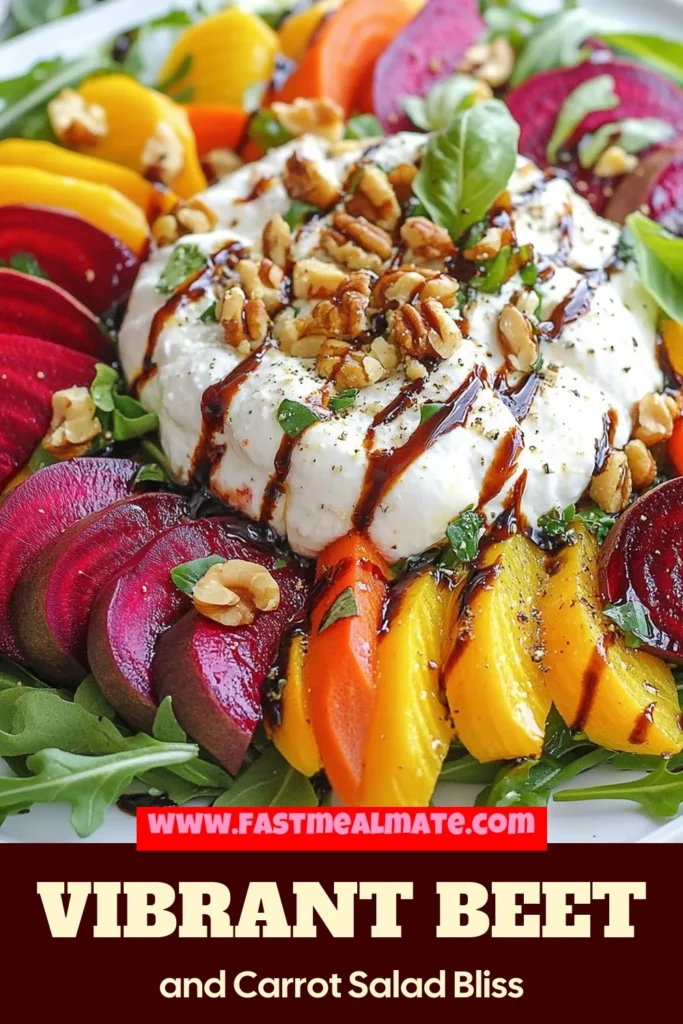
Looking for a fresh and vibrant dish to brighten your table? This Roasted Beet & Carrot Burrata Salad is just the recipe you need! With earthy beets, crunchy carrots, and creamy burrata, it’s a delightful mix of flavors and textures. You’ll love how easy it is to prepare and how beautiful it looks. Dive into the full recipe to impress your guests and nourish your palate!
Why I Love This Recipe
- Vibrant Colors: The combination of roasted beets and carrots creates a stunning visual appeal, making this salad a feast for the eyes.
- Flavorful Contrast: The warm roasted vegetables paired with creamy burrata offer a delightful contrast in both temperature and texture.
- Healthy Ingredients: This salad is packed with wholesome ingredients, including fresh greens and antioxidant-rich beets, making it a nutritious option.
- Easy to Prepare: With simple steps and minimal prep time, this dish is perfect for both casual meals and special occasions.
Ingredients
– 2 medium-sized beets, peeled and cut into wedges
– 2 large carrots, peeled and sliced into thin ribbons
– 2 tablespoons extra virgin olive oil
– Salt and freshly ground black pepper to taste
– 1 cup fresh arugula or baby spinach
– 8 oz creamy burrata cheese
– 1 tablespoon balsamic glaze for drizzling
– 1 tablespoon chopped fresh basil leaves
– Optional: 1 tablespoon chopped walnuts for added crunch
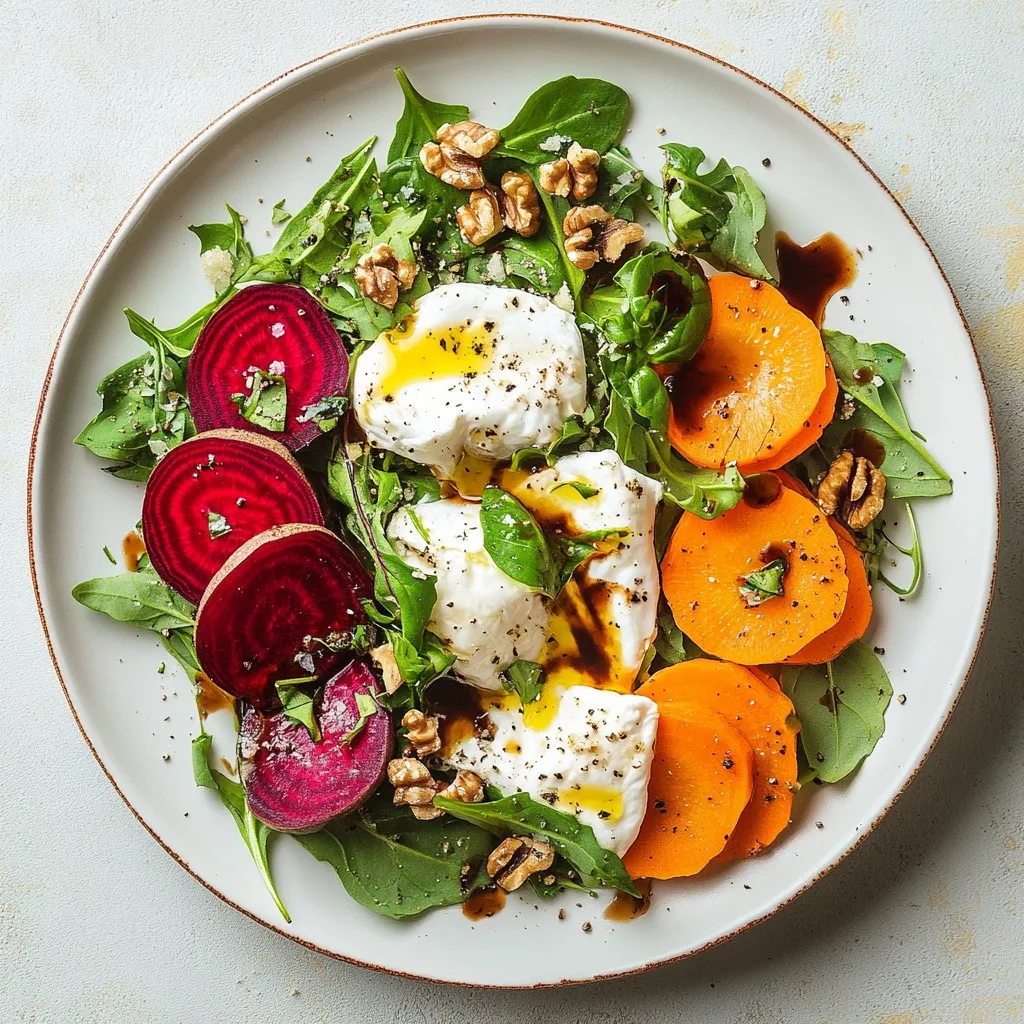
This salad bursts with color and flavor. The beets add earthiness, while the carrots bring sweetness. The creamy burrata ties it all together. Using fresh ingredients makes a big difference. Choose bright, vivid beets for the best taste.
You can use organic vegetables for extra quality. Fresh basil adds a fragrant touch. The walnuts give a nice crunch, but they are optional. This dish is fun to make and looks stunning on a plate. I love how it’s not just good for your taste buds but also for your eyes!
Step-by-Step Instructions
Preparation of Vegetables
First, preheat your oven to 400°F (200°C). This step is key for roasting. While the oven heats, peel the beets and cut them into wedges. Do the same for the carrots, but slice them into thin ribbons. Combine the beet wedges and carrot ribbons in a bowl. Drizzle with olive oil and sprinkle salt and pepper on top. Toss everything well to coat the veggies evenly.
Roasting Process
Next, line a baking sheet with parchment paper for easy cleanup. Spread the seasoned beets and carrots in a single layer on the sheet. This helps them roast evenly. Place the baking sheet in the oven. Roast for about 25-30 minutes. The beets should become tender and caramelized. Remember to turn them halfway through cooking for even browning.
Assembling the Salad
After roasting, take the baking sheet from the oven and let the veggies cool for a few minutes. Now, it’s time to assemble the salad. Start by creating a base with fresh arugula or baby spinach on a large serving platter. Then, arrange the warm roasted beets and carrot ribbons over the greens. Next, tear the burrata cheese into pieces and place them on top. Drizzle balsamic glaze over the salad for a sweet touch. Finally, sprinkle with fresh basil and walnuts for added flavor and crunch. Enjoy your vibrant and fresh salad!
Tips & Tricks
Perfect Roasting Technique
To get the best flavor, roast your beets and carrots evenly. Start by preheating your oven to 400°F (200°C). Cut the beets into wedges and the carrots into thin ribbons. Toss them in olive oil, salt, and pepper. Spread them on a baking sheet in a single layer. This helps them cook well. Roast for 25-30 minutes, turning them halfway. This step ensures they caramelize nicely and have a rich taste. After roasting, let them cool for a few minutes. This cooling time allows the flavors to blend.
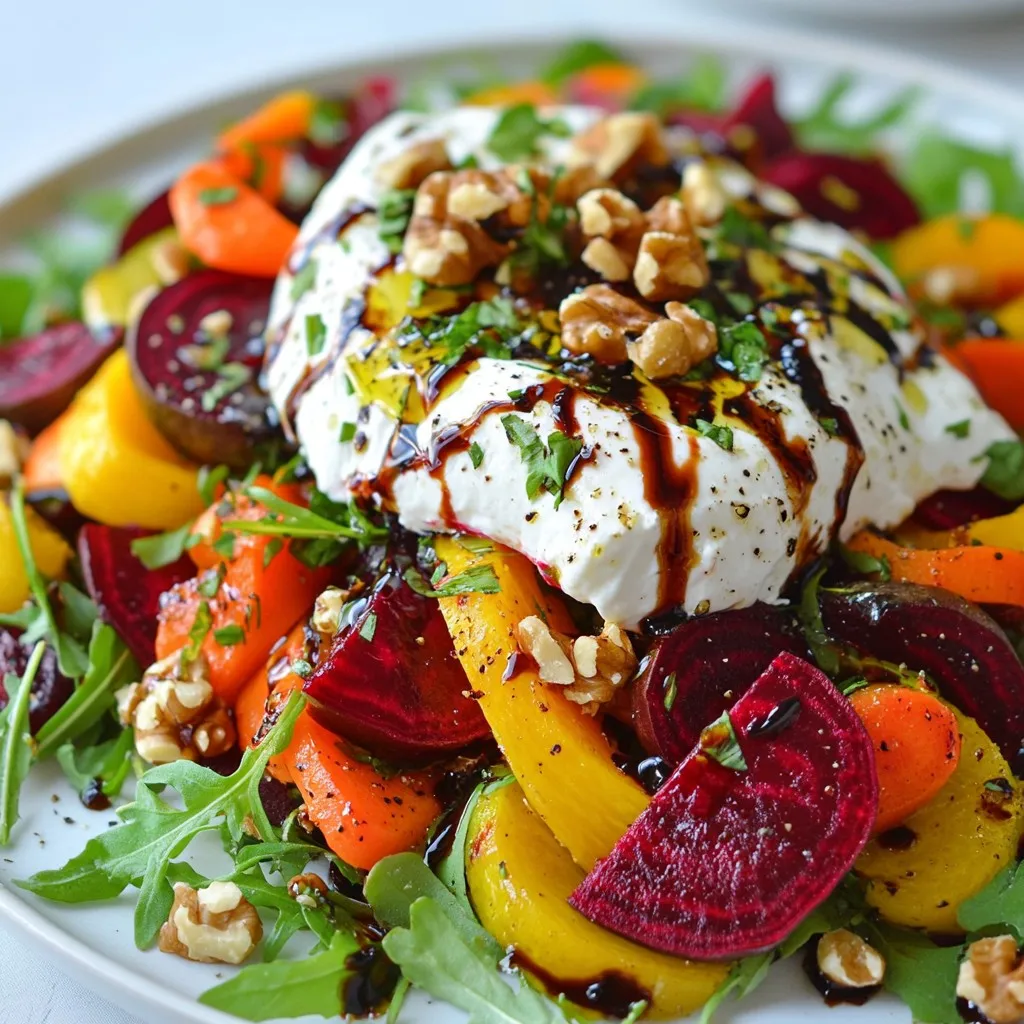
Presentation Tips
Serving your salad well makes it more appealing. Use a large white plate to show off the bright colors of the beets and carrots. Start with a bed of arugula or spinach. Layer the roasted veggies on top, making sure their colors pop. Tear the burrata cheese into pieces and scatter them over the salad. Drizzle balsamic glaze for a finishing touch. For added flair, garnish with fresh basil leaves and chopped walnuts. This adds texture and makes your dish look professional.
Flavor Enhancements
To elevate the taste, think about pairing your salad with other flavors. A light citrus dressing can brighten it up. You could also add sliced avocado for creaminess. Mixing in nuts or seeds adds a nice crunch, too. Balancing textures is key. The creamy burrata, crunchy veggies, and peppery greens make every bite exciting. This variety keeps your taste buds happy and satisfied.
Pro Tips
- Choose Fresh Produce: Opt for firm, vibrant beets and carrots to ensure maximum flavor and texture in your salad.
- Variations on Greens: Experiment with different greens like kale or mixed baby greens for added flavor and nutrition variations.
- Perfect Roasting: Keep an eye on your vegetables while roasting; they should be tender and slightly caramelized, but not burnt.
- Serve at Room Temperature: Allow the salad to sit for a few minutes before serving to let the flavors meld beautifully.
Variations
Ingredient Substitutions
You can switch out beets and carrots for other seasonal veggies. Try sweet potatoes or squash for a tasty twist. If you want a dairy-free option, swap burrata for vegan cheese made from cashews or tofu. This keeps the creaminess without the dairy.
Add-ins for Extra Crunch
For extra crunch, consider adding different nuts like pecans or almonds. Seeds like pumpkin or sunflower also work well. If you want more protein, toss in some chickpeas or black beans. They add texture and make the salad heartier.
Dressing Alternatives
While balsamic glaze is delicious, other dressings can add new flavors. Try a honey mustard or tahini dressing for something different. You can also explore citrus-based dressings, like lemon vinaigrette, to brighten the salad. These options keep things fresh and exciting.
Storage Info
Short-term Storage
To store leftovers, place the salad in an airtight container. Keep it in the refrigerator. It stays fresh for up to three days. To maintain freshness, separate the burrata from the salad. This prevents sogginess. Store the burrata in its own container with some olive oil to keep it moist.
Long-term Storage
I do not recommend freezing this salad. Roasted vegetables can lose their texture when thawed. If you want to freeze roasted beets or carrots, do so in a single layer on a baking sheet first. Once frozen, store them in a freezer-safe bag for up to three months. To reheat, place them in a 350°F oven until warm. This helps keep some of the texture.
Serving Recommendations
After storage, serve the salad chilled or at room temperature. If the salad seems dry, drizzle a bit more balsamic glaze. For meal prep, pack individual servings in containers. This makes for quick lunches. You can also add protein, like grilled chicken or chickpeas, to make it a full meal.
FAQs
How can I make this salad vegan?
To make this salad vegan, swap burrata with a plant-based cheese. Use cashew cheese or tofu as good options. You can also skip the cheese and add more nuts or seeds for texture. The other ingredients, like beets and carrots, are vegan-friendly.
Can I prepare this salad in advance?
Yes, you can prep parts of this salad ahead. Roast the beets and carrots a day prior. Store them in the fridge. Keep the greens and cheese separate until serving. This keeps everything fresh and crunchy. Drizzle the balsamic glaze just before serving for the best taste.
What other vegetables can I use in this salad?
Feel free to add or replace veggies! Try sweet potatoes or butternut squash for sweetness. Radishes add a nice crunch and bite. Seasonal vegetables like zucchini or asparagus work well too. Use whatever you love or have on hand!
How to choose good quality burrata cheese?
Look for burrata with a plump shape and smooth texture. Fresh burrata should feel soft and creamy. Check the sell-by date to ensure it’s fresh. A good burrata will have a mild flavor, not too salty. Always buy from a trusted source for the best quality.
You learned how to create a colorful, tasty salad with beets, carrots, and creamy burrata. Follow the steps for roasting and assembling your dish for the best flavors. Use my tips for perfect roasting and presentation. Don’t forget the options for variations to suit your taste, and the storage info ensures your leftovers stay fresh. Try these ideas, and enjoy your delicious sala
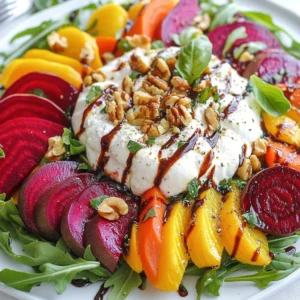
Roasted Beet & Carrot Burrata Salad
Ingredients
- 2 medium beets, peeled and cut into wedges
- 2 large carrots, peeled and sliced into thin ribbons
- 2 tablespoons extra virgin olive oil
- to taste Salt and freshly ground black pepper
- 1 cup fresh arugula or baby spinach
- 8 oz creamy burrata cheese
- 1 tablespoon balsamic glaze for drizzling
- 1 tablespoon chopped fresh basil leaves
- 1 tablespoon chopped walnuts (optional for added crunch)
Instructions
- Begin by preheating your oven to 400°F (200°C) to prepare for roasting.
- In a mixing bowl, combine the beet wedges and carrot ribbons. Drizzle with olive oil, then season generously with salt and freshly ground black pepper. Toss well until all the vegetables are evenly coated.
- Line a baking sheet with parchment paper for easy cleanup, and spread the seasoned beets and carrots out in a single layer to ensure even roasting.
- Place the baking sheet in the preheated oven and roast for approximately 25-30 minutes. The vegetables are done when the beets are tender and exhibit a slight caramelization; be sure to turn them halfway through the cooking time for even roasting.
- Once roasted, carefully remove the baking sheet from the oven and let the vegetables cool for a few minutes.
- On a large, decorative serving platter, create a lush bed with the fresh arugula or baby spinach, arranging it evenly to serve as the salad's base.
- Artistically place the warm roasted beets and carrot ribbons over the greens, allowing their vibrant colors to shine.
- Tear the burrata cheese into generous pieces and nestle them atop the salad, ensuring that they remain luscious and creamy.
- Finish the dish by drizzling balsamic glaze over the entire salad, then sprinkle with fresh chopped basil and walnuts if desired, adding both flavor and texture.
- Serve immediately to enjoy the delightful contrast of warm and creamy ingredients, or allow the salad to chill for a few minutes so the flavors can meld beautifully.

![- 1 lb ground beef - 1 cup shredded cheddar cheese - 1 cup shredded mozzarella cheese - 1/2 cup grated Parmesan cheese - 1 tablespoon minced garlic - 1 teaspoon onion powder - 1 teaspoon garlic powder - 1/2 teaspoon salt - 1/2 teaspoon black pepper - 1 package (16 oz) refrigerated pizza dough - 1/2 cup unsalted butter, melted - 2 tablespoons fresh parsley, chopped (for garnish) I recommend using fresh ground beef for the best flavor and texture. Look for good-quality cheeses. A mix of sharp cheddar and creamy mozzarella works wonders. For the Parmesan, choose a block and grate it yourself. Fresh garlic adds a punch that garlic powder cannot match. Always opt for unsalted butter to control the saltiness in your dish. Each serving contains approximately: - Calories: 250 - Protein: 15g - Carbohydrates: 20g - Fat: 14g - Fiber: 1g - Sugar: 1g This dish packs flavor and comfort in each bomb. Enjoy the satisfaction of creating these tasty bites. For the full recipe, check the section above. First, preheat your oven to 375°F (190°C). This ensures the bombs bake evenly. While the oven warms up, grab a large mixing bowl. In this bowl, mix together the ground beef, shredded cheddar, mozzarella, and grated Parmesan cheese. Add minced garlic, onion powder, garlic powder, salt, and black pepper. Stir until all the ingredients blend well. This mixture is the heart of your cheeseburger bombs. Next, you need to handle the pizza dough. Lightly flour a clean surface to prevent sticking. Roll out the pizza dough into a large rectangle. Use a pizza cutter or knife to slice the dough into 12 equal squares. Each square should measure about 3 inches by 3 inches. For each square, place a generous spoonful of the cheeseburger filling right in the center. Now, fold the corners of each dough square over the filling. Pinch them tightly to create a seal. Place the sealed bombs seam-side down on your prepared baking sheet. Now it’s time to bake. Brush the tops of each bomb with melted butter. This gives them a nice, golden finish. Bake these tasty treats in the preheated oven for 18-20 minutes. They should puff up and turn a beautiful golden brown. After baking, let them cool for a few minutes on the baking sheet. This step helps enhance the flavors. For a fresh touch, sprinkle chopped parsley on top just before serving. For the full recipe, check the earlier section. Enjoy your Garlic Parmesan Cheeseburger Bombs! To make your Garlic Parmesan Cheeseburger Bombs pop with flavor, use quality spices. Fresh garlic adds a strong taste. Minced garlic blends well with the beef. Garlic powder boosts the garlic flavor. Onion powder adds depth and sweetness. The mix of cheddar, mozzarella, and Parmesan gives a rich, creamy texture. Try using sharp cheddar for a bolder taste. Always taste the mixture before sealing the bombs. Adjust the salt and pepper to your liking. A perfect golden crust makes your bombs look and taste great. Start by brushing the tops with melted butter. This adds flavor and helps with browning. Bake at 375°F for 18-20 minutes. Keep an eye on them as they bake. If they are not golden yet, let them bake a few more minutes. The crust should be puffed and golden brown. For a stunning display, use a large platter. Place the bombs in a circle, and sprinkle fresh parsley on top. This adds a nice pop of color. Serve with dipping sauces like ketchup or ranch for extra fun. You can also add a side of pickles or a fresh salad. This makes a great snack or meal for any gathering. Enjoy each tasty bite from your Garlic Parmesan Cheeseburger Bombs! For the complete recipe, click [Full Recipe]. {{image_4}} You can change the filling for your Garlic Parmesan Cheeseburger Bombs. For a vegetarian option, swap ground beef for cooked lentils or black beans. Add some diced bell peppers and chopped onions for flavor. If you want a spicy kick, mix in jalapeños or hot sauce. You can even use spicy sausage for a meaty twist. This way, everyone can enjoy these tasty bombs. If you need a gluten-free option, use gluten-free pizza dough. Many stores sell this now. If you feel adventurous, you can make homemade dough. Combine almond flour, coconut flour, and eggs for a gluten-free base. This change keeps the bombs delicious and safe for those with gluten issues. Experiment with different types of dough to find your favorite. Toppings can take your bombs to a new level. After baking, try adding melted cheese on top. You can also sprinkle some crispy bacon bits for extra flavor. Fresh herbs like chives or cilantro can add a burst of color and taste. Consider serving with a side of garlic butter for dipping. These creative touches make your Garlic Parmesan Cheeseburger Bombs truly special. For detailed steps, check the Full Recipe. After you enjoy your Garlic Parmesan Cheeseburger Bombs, store any leftovers right away. Let them cool to room temperature first. Then, place them in an airtight container. This keeps them fresh and tasty. You can also wrap them tightly in plastic wrap. Store them in the fridge for up to three days. If you want to keep them longer, freezing is a great option. When it’s time to eat those leftover bombs, reheating them properly is key. Preheat your oven to 350°F (175°C). Place the bombs on a baking sheet. Heat for about 10-15 minutes. This helps them regain their crispiness. You can also use a microwave. Heat them for about 30-45 seconds. However, the oven method is best for keeping that nice texture. If you want to freeze your Garlic Parmesan Cheeseburger Bombs, do it before baking. After shaping the bombs, place them on a baking sheet. Freeze them for about an hour until solid. Then, transfer them to a freezer-safe bag. They can last up to three months in the freezer. When you’re ready to bake, just add a few extra minutes to the cooking time. Enjoy the fresh taste anytime with this simple method! You can still enjoy these bombs without specific cheese. Use any cheese you like. Try gouda, pepper jack, or even cream cheese. Just make sure the cheese melts well. This keeps the bombs gooey and tasty. Yes, you can prepare these bombs ahead of time. Make the filling and fill the dough squares. Place them on a baking sheet. Cover and store them in the fridge. Bake them fresh when you are ready to eat. This saves time for your busy days. Dipping sauces make these bombs even better. Ketchup is a classic choice. Ranch dressing or garlic aioli adds a nice touch. You can also try spicy mustard or BBQ sauce. Each sauce brings a new flavor and fun to your meal. This blog post covered all you need for Garlic Parmesan Cheeseburger Bombs. I shared the key ingredients, step-by-step instructions, and handy tips to enhance flavor. You also learned about great variations to try and how to store your tasty treats. In my final thoughts, remember to have fun while cooking. Experiment with flavors and enjoy every bite of your creations. Happy cooking!](https://fastmealmate.com/wp-content/uploads/2025/06/70ca770e-dfd2-457a-a57a-f773e5b0e22d-768x768.webp)
![To make a Zesty Italian Pasta Salad, you need fresh and colorful ingredients. Here’s the complete list of ingredients you will need: - 2 cups rotini pasta - 1 cup cherry tomatoes, halved - 1 cup cucumber, diced - 1/2 cup black olives, sliced - 1/2 cup red bell pepper, chopped - 1/4 cup red onion, finely chopped - 1/2 cup mozzarella balls, halved - 1/3 cup Italian dressing - 1 tablespoon fresh basil, chopped - 1 teaspoon dried oregano - Salt and pepper to taste Each ingredient brings its own flavor and texture. The rotini pasta is fun and holds dressings well. Cherry tomatoes add sweetness, while cucumbers give a nice crunch. Black olives bring a salty bite, and bell peppers add color and freshness. Red onions add a bit of sharpness, while mozzarella balls provide creaminess. For the dressing, you can use store-bought or make your own. I love using fresh basil and oregano for a burst of flavor. Finally, season with salt and pepper to balance everything. You can find the full recipe [here]. Enjoy your cooking adventure! - Bring salted water to a boil. - Cook rotini pasta until al dente. - Drain and cool under cold water. Cooking the pasta is the first step. Use a large pot and fill it with water. Add a good amount of salt to the water. This step adds flavor to the pasta. Once the water boils, add the rotini pasta. Follow the package directions for cooking time until it is al dente. This means the pasta should be firm but cooked. After cooking, drain the pasta and rinse it under cold water. This stops the cooking process and cools the pasta quickly. - Combine cherry tomatoes, cucumber, olives, bell pepper, and onion. - Stir gently to mix. While the pasta cools, you can prepare the vegetables. Take a large bowl and add the halved cherry tomatoes, diced cucumber, sliced black olives, chopped red bell pepper, and finely chopped red onion. Each vegetable brings its own flavor and texture to the salad. Stir gently to mix them without squishing the tomatoes. This colorful mix will make your salad bright and fun! - Add cooled pasta to the vegetable mix. - Incorporate mozzarella balls. - Drizzle with dressing and seasonings. Once the pasta is cool, add it to the bowl with the mixed vegetables. Next, add halved mozzarella balls. These little cheese bites add creaminess. Now, drizzle the Italian dressing over the pasta and vegetables. Don't forget to sprinkle the fresh basil, dried oregano, salt, and pepper. These seasonings will enhance the flavors. - Toss ingredients to combine. - Refrigerate for at least 30 minutes. Now, it is time to mix everything. Toss all the ingredients together carefully. You want every part to be coated with dressing. Cover the bowl with a lid or plastic wrap. Place it in the fridge for at least 30 minutes. Chilling the salad helps the flavors blend well. Trust me, the wait is worth it! To get the best taste from your Zesty Italian Pasta Salad, choose a good Italian dressing. Brands like Annie's or Ken's work well. Don't use too much dressing at first; you can always add more later. Always taste as you go. A little salt and pepper can boost the flavor. Remember, it's easy to add, but hard to take away. Serving your pasta salad is just as fun as making it! You can use a large bowl for a family-style meal. This makes it easy for everyone to help themselves. For a more stylish look, you can serve it in small bowls. This way, each guest gets their own. A sprinkle of fresh basil on top adds a nice touch. It makes the dish look bright and tasty! One common mistake is overcooking the pasta. Make sure to cook it just until it's al dente. This keeps your pasta from getting mushy. Another mistake is not chilling the salad. Chilling helps the flavors blend well. If you skip this step, your salad may not taste as good. Aim to chill it for at least 30 minutes before serving. For the full recipe, check out the Zesty Italian Pasta Salad section. {{image_4}} You can easily adapt this salad to fit different diets. For a gluten-free option, use gluten-free rotini pasta. It cooks just like regular pasta. Many brands make great options now. For a vegan twist, swap the mozzarella cheese with vegan cheese or even avocado. Both add creaminess and flavor to your dish. Want to make this salad more filling? Add some protein! Grilled chicken works great. Just chop it into bite-sized pieces. Shrimp is another tasty choice. Cook it until pink and toss it in. For a plant-based option, chickpeas are perfect. They add a nice texture. When you add protein, taste your salad again. You may need to adjust the seasoning. Just add a pinch of salt or a dash of dressing. Using seasonal veggies can elevate your pasta salad. In summer, add fresh zucchini or bell peppers. They bring a nice crunch and color. In fall, roasted butternut squash can add sweet notes. You can also switch up the dressing. Try a balsamic vinaigrette for a tangy twist. This keeps your salad exciting and fresh year-round. To store your zesty Italian pasta salad, use airtight containers. Glass or plastic containers work well. Make sure the lid seals tightly to keep air out. This helps maintain freshness. For best results, store the salad in the fridge within two hours of serving. You can freeze pasta salad, but it might change texture. To freeze, place it in a freezer-safe container. Label the container with the date. When ready to eat, thaw it in the fridge overnight. Reheat gently on the stove or in the microwave. Be careful not to overcook it again. In the fridge, your pasta salad lasts about three to five days. Keep an eye out for signs of spoilage. If it has an off smell, or if the vegetables look mushy, it’s best to toss it. Trust your senses; they guide you well in the kitchen. You can make Zesty Italian Pasta Salad a day before serving. Cook the pasta, mix it with the veggies, and add the dressing. Store it in the fridge. Chilling helps the flavors blend well. Just give it a good toss before serving. This makes it a great option for parties. Yes, you can customize the ingredients to fit your taste. Try adding different vegetables like bell peppers or zucchini. You can also swap out mozzarella for feta or add beans for protein. Get creative! Make it your own. Italian Pasta Salad pairs well with grilled meats, like chicken or steak. It also goes nicely with crusty bread or a fresh green salad. For a fun twist, serve it with garlic bread for a complete meal. No, it's not safe to leave pasta salad out for long. The safe time is about two hours. After that, bacteria can grow, making it unsafe to eat. Keep it chilled if you are not serving it right away. Absolutely! Homemade Italian dressing adds a personal touch. You can control the flavors and ingredients. Mix olive oil, vinegar, herbs, and spices to create your blend. This makes the salad even more special. For the full recipe, check out the section above! This Zesty Italian Pasta Salad is a bright and tasty dish. It combines fresh veggies, pasta, and cheese. Each bite is full of flavor. Here’s a quick look at what you need and how to make it. - 2 cups rotini pasta - 1 cup cherry tomatoes, halved - 1 cup cucumber, diced - 1/2 cup black olives, sliced - 1/2 cup red bell pepper, chopped - 1/4 cup red onion, finely chopped - 1/2 cup mozzarella balls, halved - 1/3 cup Italian dressing (store-bought or homemade) - 1 tablespoon fresh basil, chopped - 1 teaspoon dried oregano - Salt and pepper to taste First, cook the rotini pasta in salted boiling water. Follow the package instructions for best results. Drain and cool the pasta under cold water. This stops the cooking and keeps it firm. While the pasta cools, chop the veggies. Use a large bowl for the cherry tomatoes, cucumber, black olives, red bell pepper, and red onion. Stir them gently to mix. Next, add the cooled pasta to the veggies. Toss in the mozzarella balls, making sure they spread evenly. Now, drizzle the Italian dressing over the mix. Add the chopped basil, dried oregano, and a sprinkle of salt and pepper. Toss everything together until well coated. Finally, cover the bowl and chill in the fridge for at least 30 minutes. This step helps all the flavors blend nicely. Serve the pasta salad in a large bowl. You can also use individual bowls for a fun touch. Garnish with extra basil leaves for color. Enjoy this tasty dish at picnics or family meals! This blog post detailed how to make a zesty Italian pasta salad. We reviewed all the ingredients, cooking steps, and tips for the best flavor. You learned how to store leftovers and variations to suit your diet. Remember to chill the salad and avoid overcooking the pasta. With these tips, you can impress friends and family with this easy dish. Enjoy creating your own version of this refreshing salad!](https://fastmealmate.com/wp-content/uploads/2025/06/c8b502a6-31c8-41d1-a3bc-a403a8dd39f3-768x768.webp)