
Anti-Inflammatory Turmeric Chicken Soup Recipe Delight
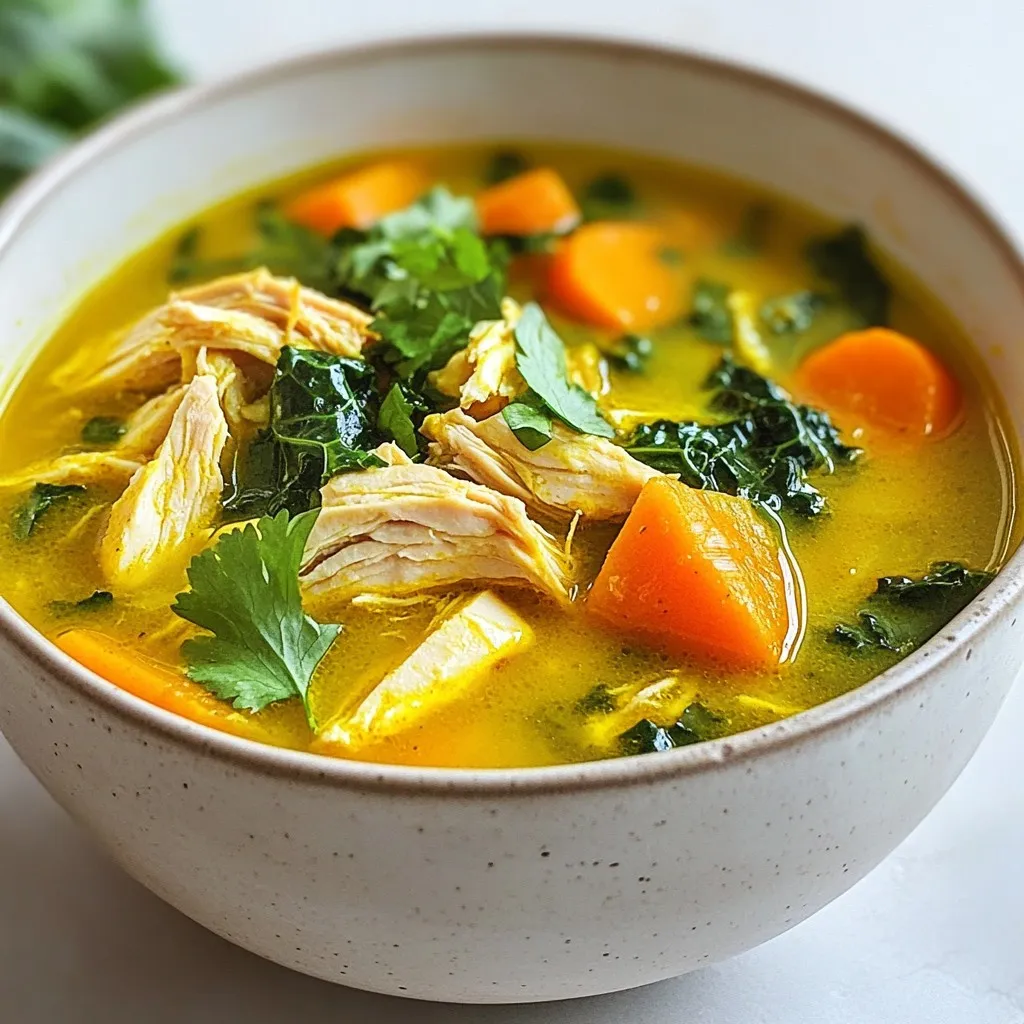
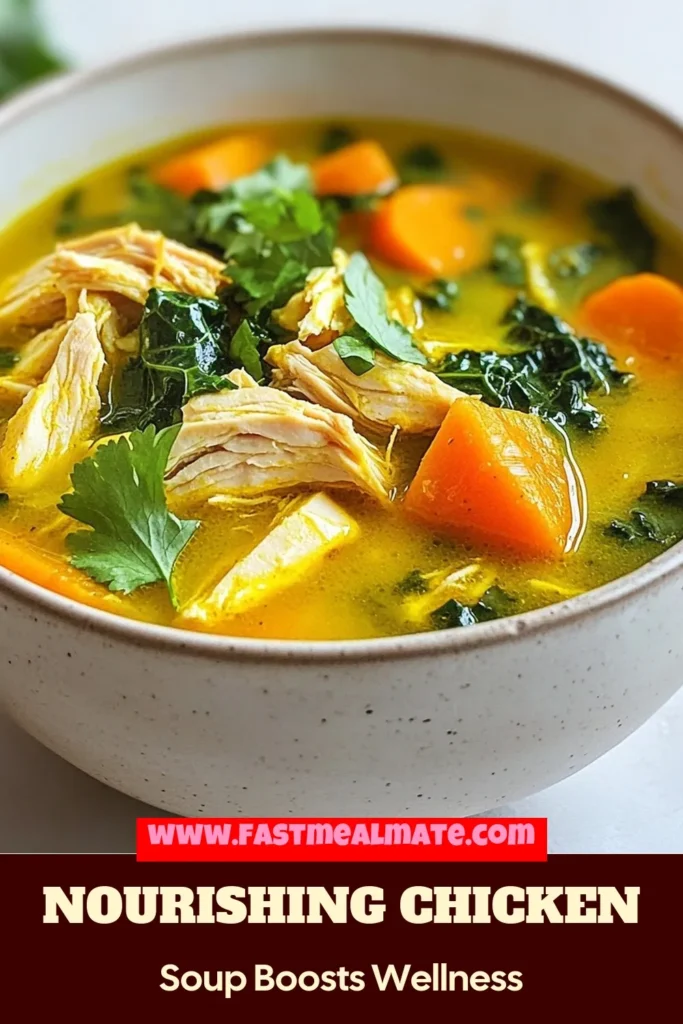
Welcome to your new go-to comfort food: Anti-Inflammatory Turmeric Chicken Soup! This warm, hearty soup is packed with flavors and healing ingredients. Each bite not only warms you up but also boosts your health. Turmeric, chicken, and fresh vegetables combine to fight inflammation and support immune health. Ready to discover how to make this delightful recipe? Let’s dive into the flavorful details!
Why I Love This Recipe
- Health Benefits: This soup is packed with anti-inflammatory ingredients like turmeric and ginger, making it perfect for boosting immunity and overall wellness.
- Comforting Flavor: The combination of spices and fresh vegetables creates a warm, hearty flavor that is both comforting and satisfying, ideal for chilly days.
- Easy Preparation: With simple steps and minimal prep time, this recipe is perfect for busy weeknights when you want a nutritious meal without the hassle.
- Customizable: Feel free to adapt the recipe by adding your favorite vegetables or adjusting the spices to suit your personal taste.
Ingredients
List of ingredients
– 2 boneless, skinless chicken breasts
– 1 tablespoon olive oil
– 1 medium onion, finely chopped
– 3 cloves of garlic, minced
– 1 tablespoon fresh ginger, grated
– 1 teaspoon ground turmeric
– 1 teaspoon ground cumin
– 1/2 teaspoon freshly ground black pepper
– 4 cups low-sodium chicken broth
– 2 cups fresh kale or spinach, chopped
– 2 medium carrots, diced
– 1 cup sweet potatoes, peeled and diced
– 1 tablespoon freshly squeezed lemon juice
– Salt, to taste
– Fresh cilantro leaves, for garnish
Health benefits of each ingredient
Every ingredient in this soup brings something special. Chicken is a great source of protein. It helps build strong muscles. Olive oil has healthy fats that support heart health. Onions contain antioxidants that may lower blood pressure. Garlic boosts the immune system and adds flavor.
Ginger helps reduce nausea and may ease inflammation. Turmeric is known for its anti-inflammatory properties. Cumin aids digestion and adds warmth. Black pepper helps your body absorb turmeric better. Chicken broth is hydrating and comforting.
Kale and spinach are packed with vitamins. They support strong bones and healthy skin. Carrots are high in beta carotene, good for your eyes. Sweet potatoes provide fiber and help regulate blood sugar. Lemon juice adds brightness and vitamin C. Cilantro brings fresh flavor and may aid digestion.
Importance of fresh vs. dried spices
Using fresh spices makes a big difference in taste. Fresh ginger and garlic give a vibrant flavor. Ground spices, like turmeric and cumin, are convenient but lose some aroma over time. Always check the dates on your dried spices. If they are old, they may lack flavor. When you can, choose fresh ingredients to enhance your dish.

Step-by-Step Instructions
Preparation of base ingredients
Start by gathering all your ingredients. You will need:
– 2 boneless, skinless chicken breasts
– 1 tablespoon olive oil
– 1 medium onion, finely chopped
– 3 cloves of garlic, minced
– 1 tablespoon fresh ginger, grated
– 1 teaspoon ground turmeric
– 1 teaspoon ground cumin
– 1/2 teaspoon freshly ground black pepper
– 4 cups low-sodium chicken broth
– 2 cups fresh kale or spinach, chopped
– 2 medium carrots, diced
– 1 cup sweet potatoes, peeled and diced
– 1 tablespoon freshly squeezed lemon juice
– Salt, to taste
– Fresh cilantro leaves, for garnish
Heat olive oil in a large pot over medium heat. When the oil shimmers, add the chopped onion. Sauté the onion for 3-4 minutes until it turns translucent. Then, add minced garlic and grated ginger. Cook for about 1 minute until the aroma fills your kitchen.
Cooking process overview
Now, stir in the ground turmeric, ground cumin, and black pepper. Cook for another 1-2 minutes. This step brings out the rich flavors of the spices. Next, add the chicken breasts into the pot. Pour in the low-sodium chicken broth and increase the heat. Bring the mixture to a gentle simmer.
Once it simmers, toss in the diced carrots and sweet potatoes. Cover the pot and cook for 15-20 minutes. This allows the chicken to cook fully and the veggies to soften. When done, remove the chicken from the pot.
Shredding chicken and final touches
Use two forks to shred the chicken into bite-sized pieces. Return the shredded chicken back into the pot and stir. Now, add the chopped kale or spinach and drizzle in the lemon juice. Cook for an additional 5 minutes. This will let the greens wilt nicely.
Finally, taste your soup and add salt as needed. If you want more flavor, adjust the spices. Serve your soup hot, garnished with fresh cilantro leaves. This adds a nice pop of color and taste to your dish. Enjoy!
Tips & Tricks
How to enhance flavor
To boost the flavor of your turmeric chicken soup, try these tips:
– Use fresh turmeric root instead of ground turmeric. It adds a bright taste.
– Sauté your garlic and ginger longer. This brings out their sweet and rich flavors.
– Add a splash of coconut milk for creaminess. It pairs well with the spices.
– Experiment with herbs like thyme or rosemary. They add a fresh note.
Common mistakes to avoid
Here are some common missteps to watch out for:
– Skipping the spice toasting: Always toast your spices before adding liquid. This step releases their oils and deepens the flavor.
– Overcooking the chicken: Remove the chicken as soon as it’s cooked. Overcooked chicken becomes dry and tough.
– Not seasoning enough: Taste your soup at the end. Adjust the salt and spices for the best taste.
– Using low-quality broth: A good broth forms the soup’s base. Choose low-sodium for better control over saltiness.
Recommended kitchen tools for efficient preparation
These tools can help make your cooking easier:
– A sharp chef’s knife for chopping vegetables. It saves time and effort.
– A cutting board for safe and easy prep. Look for one that’s easy to clean.
– A large pot with a lid for simmering the soup. A heavy bottom helps prevent burning.
– A set of measuring spoons and cups to get accurate amounts. This ensures your flavors balance well.
– Two forks for shredding chicken. They make the process quick and simple.
Pro Tips
- Choosing the Right Chicken: Opt for organic, free-range chicken for better flavor and texture in your soup.
- Enhancing Flavor: Add a pinch of cayenne pepper for a spicy kick that complements the turmeric and ginger.
- Vegetable Variations: Feel free to substitute or add other vegetables like zucchini or bell peppers for more variety and nutrients.
- Storage Tips: Store leftover soup in an airtight container in the fridge for up to 3 days, or freeze for up to 2 months.

Variations
Vegetarian option
You can easily make this soup vegetarian. Simply replace the chicken with chickpeas or tofu. Use vegetable broth instead of chicken broth. The spices, like turmeric and cumin, will still bring great flavor. Add extra vegetables like bell peppers or zucchini for more texture.
Spicy version with extra ingredients
If you crave heat, add chopped jalapeños or crushed red pepper flakes. You can also stir in a tablespoon of sriracha for a spicy kick. A dash of hot sauce at the end can also spice things up. These ingredients will give your soup a nice zing while keeping it healthy.
Alternate cooking methods (slow cooker, Instant Pot)
You can use a slow cooker for this recipe. Just add all ingredients, except for greens and lemon juice. Cook on low for 6-8 hours. If you use an Instant Pot, set it to high pressure for about 12 minutes. Both methods make the chicken tender and flavorful. For either method, add the greens and lemon juice in the last few minutes of cooking.
Storage Info
Best practices for storing leftovers
To keep your soup fresh and tasty, store it in an airtight container. Avoid letting it sit out for too long. Let the soup cool to room temperature before sealing it. This helps prevent condensation. Store it in the fridge for up to three days. If you want to keep it longer, freezing is the way to go.
Freezing instructions
To freeze your soup, first let it cool completely. Pour the cooled soup into freezer-safe bags or containers. Leave some space at the top for expansion. Seal tightly and label with the date. You can freeze it for up to three months. When ready to eat, just take it out and thaw it in the fridge overnight.
Reheating tips for best flavor retention
When reheating, use a pot on the stove for the best taste. Add a splash of water or broth to keep it moist. Heat over medium-low heat until warm, stirring often. You can also use a microwave, but check every 30 seconds to avoid overcooking. Taste and adjust the seasoning if needed. Enjoy your soup just like it was freshly made!
FAQs
What are the health benefits of turmeric?
Turmeric has many health benefits. It is known to help reduce inflammation in the body. This spice contains curcumin, a powerful compound that fights inflammation and boosts your immune system. Turmeric may also improve brain function and lower the risk of heart disease. Plus, it can help with digestion and may even help ease arthritis pain. Adding turmeric to your diet is a tasty way to support your health.
Can I make this soup in advance?
Yes, you can make this soup in advance! This soup tastes even better the next day. After you cook it, let it cool down. Then, store it in an airtight container in the fridge. It will stay fresh for about three to four days. You can also freeze it for up to three months. Just reheat it on the stove or in the microwave when you want to enjoy it again.
How do I know when the chicken is fully cooked?
To check if the chicken is fully cooked, use a meat thermometer. The chicken should reach an internal temperature of 165°F (75°C). If you don’t have a thermometer, cut into the thickest part of the chicken. The meat should be white and no longer pink. The juices should run clear. This way, you can ensure that the chicken is safe to eat.
This article explored how to make a delicious, healthy soup. We discussed key ingredients and their health benefits. Fresh spices win over dried ones for taste. The step-by-step guide helped you prep and cook like a pro, including shredding chicken. We’ve shared useful tips to boost flavor and avoid common mistakes. You can also customize with fun variations. Lastly, we covered best practices for storing and reheating leftovers. With this knowledge, you can create a tasty soup that nourishes and delights. Happy cookin

Healing Turmeric Chicken Soup
Ingredients
- 2 pieces boneless, skinless chicken breasts
- 1 tablespoon olive oil
- 1 medium onion, finely chopped
- 3 cloves garlic, minced
- 1 tablespoon fresh ginger, grated
- 1 teaspoon ground turmeric
- 1 teaspoon ground cumin
- 0.5 teaspoon freshly ground black pepper
- 4 cups low-sodium chicken broth
- 2 cups fresh kale or spinach, chopped
- 2 medium carrots, diced
- 1 cup sweet potatoes, peeled and diced
- 1 tablespoon freshly squeezed lemon juice
- to taste salt
- for garnish fresh cilantro leaves
Instructions
- In a large pot, warm the olive oil over medium heat until shimmering.
- Add the chopped onion to the pot and sauté for approximately 3-4 minutes, stirring occasionally, until the onion becomes translucent and fragrant.
- Incorporate the minced garlic and grated ginger into the pot; continue cooking for about 1 minute, until the mixture is aromatic.
- Stir in the ground turmeric, ground cumin, and black pepper, mixing thoroughly to toast the spices for 1-2 minutes, enhancing their flavors.
- Carefully place the chicken breasts into the pot, then pour in the low-sodium chicken broth. Increase the heat slightly to bring the mixture to a gentle simmer.
- Once simmering, add the diced carrots and sweet potatoes. Cover the pot and let it cook for about 15-20 minutes, or until the chicken is fully cooked and the vegetables are tender when pierced with a fork.
- Remove the chicken breasts from the pot and use two forks to shred the meat into bite-sized pieces. Return the shredded chicken back into the pot, mixing it with the broth and vegetables.
- Next, add the chopped kale or spinach and drizzle in the lemon juice. Cook for an additional 5 minutes, allowing the greens to wilt and blend with the soup.
- Taste the soup and season with salt as desired. Adjust any spices if needed for extra flavor.
- Serve the soup hot, garnished with fresh cilantro leaves for a burst of color and freshness on top.


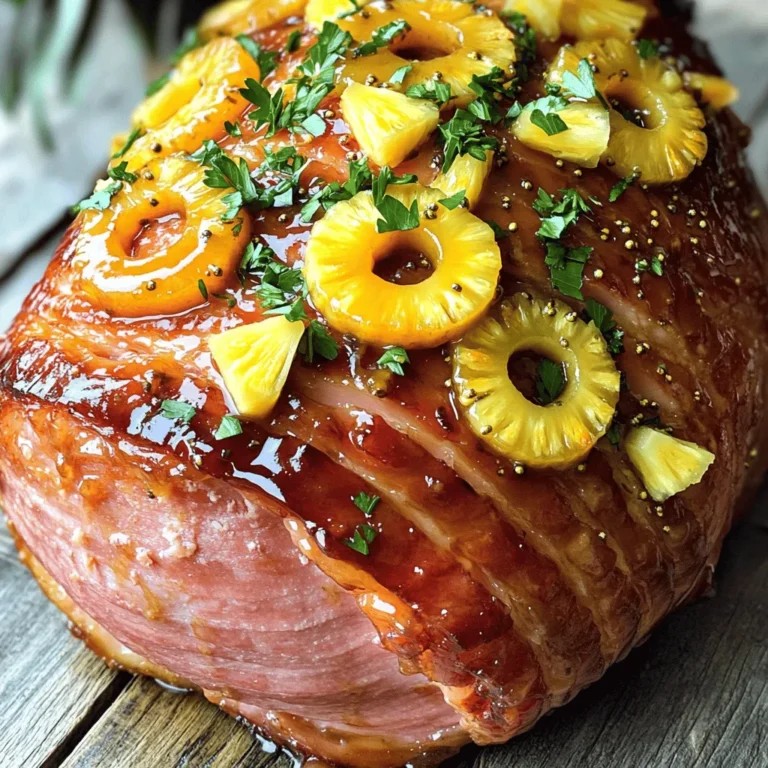
![To make a classic Italian zucchini pasta casserole, you will need the following ingredients: - 3 medium zucchinis, sliced into thin, even rounds - 2 cups cooked pasta (choose your favorite like penne or fusilli) - 1 cup marinara sauce (preferably homemade or high-quality store-bought) - 1 cup creamy ricotta cheese - 1 cup shredded mozzarella cheese, plus extra for topping - 1/2 cup grated Parmesan cheese - 1 large egg, lightly beaten - 2 cloves garlic, minced - 1 teaspoon dried oregano - 1 teaspoon dried basil - Sea salt and freshly cracked black pepper, to taste - Olive oil, for drizzling and greasing - Fresh basil leaves, for garnish Each ingredient plays a key role in building flavor and texture. The zucchini adds a fresh crunch, while the pasta provides a hearty base. The cheeses bring creaminess and richness. Marinara sauce ties everything together with its robust flavor. When I make this dish, I focus on using fresh ingredients. It makes a big difference. Quality marinara or homemade sauce enhances the taste. I also love to mix different cheeses for added depth. You can switch up the cheeses based on your preference. Using good olive oil is essential for greasing the dish and drizzling on top. It adds a lovely finish. As for herbs, oregano and basil deliver classic Italian flavor. Feel free to personalize this recipe. Adjust the seasonings to suit your taste. This dish is forgiving, making it easy to put your spin on it. For the full recipe, check out the complete instructions. 1. Preheating the Oven and Sautéing Zucchini - First, set your oven to 375°F (190°C). This temperature works well for baking. - Next, grab a skillet and drizzle some olive oil into it. Heat it over medium heat. - Add the sliced zucchinis and minced garlic to the skillet. Sauté them for about 5-7 minutes. - Keep stirring until the zucchinis become soft and slightly golden. - Season with sea salt, black pepper, oregano, and basil. This adds a punch of flavor. - Once done, remove the skillet from the heat and let it cool for a few moments. 2. Mixing Ingredients for the Casserole - While the zucchini cools, take a large mixing bowl and combine the cooked pasta, marinara sauce, ricotta cheese, and the lightly beaten egg. - Add half of the mozzarella and half of the Parmesan cheese to the bowl. - Stir everything together until well mixed. This will create a creamy base. - Now, gently fold the sautéed zucchini into the pasta mixture. Make sure it blends without mashing the veggies. 1. Assembling the Casserole - Grease a 9x13 inch baking dish with olive oil. This keeps the casserole from sticking. - Pour the pasta and zucchini mixture into the greased dish. Spread it out evenly with a spatula. - To finish, sprinkle the remaining mozzarella and Parmesan on top. This creates a cheesy crust. 2. Baking and Best Practices - Cover the dish tightly with aluminum foil and place it in the preheated oven. - Bake for 20 minutes. This helps all the flavors mix well. - After 20 minutes, carefully take off the foil. Bake for another 10-15 minutes. Watch for the cheese to melt and turn golden brown. - Once it’s done, remove the casserole from the oven. Let it cool for a few minutes before serving. - For a lovely touch, garnish with fresh basil leaves. This adds color and flavor to your dish. For the complete recipe, refer to [Full Recipe]. - Seasoning Suggestions: I love using fresh herbs. Basil and oregano add a lovely taste. Don’t forget to season with sea salt and black pepper. These simple touches make a big difference. Consider adding a pinch of red pepper flakes for a bit of heat. - Achieving the Perfect Cheese Crust: To get that golden crust, use a mix of mozzarella and Parmesan on top. When you bake the casserole, keep it covered for the first part of cooking. This helps the cheese melt nicely. Uncover it towards the end to allow browning. - Sautéing Tips: When sautéing zucchini, cut it into thin, even rounds. This ensures even cooking. Don’t overcrowd the pan; this can lead to steaming instead of browning. Give them enough space to caramelize. - Alternative Pasta Cooking Methods: You can use different pasta shapes, like penne or fusilli. You don’t need to cook it all the way. Make it al dente, as it will cook more in the oven. This keeps the pasta from getting mushy in the casserole. Make sure to check out the Full Recipe for all the steps and details! {{image_4}} Different Cheese Options Cheese makes this dish rich and creamy. You can swap ricotta for cottage cheese if you like. For a sharper taste, use aged provolone or gouda. If you want a bit of tang, try feta cheese. Each cheese brings its unique flavor to the casserole. Meat Additions and Alternatives For meat lovers, ground beef or turkey can add protein. Cook the meat first and mix it with the pasta. If you prefer a lighter option, add cooked chicken or sausage. You can also use plant-based meats for a tasty, hearty dish. Gluten-Free Options To make this casserole gluten-free, choose gluten-free pasta. Many brands offer great options that hold up well in baking. Just check the package for cooking times to ensure perfect texture. Vegan Adaptations For a vegan version, swap all cheeses for cashew cream or tofu ricotta. You can also use a flax egg instead of the beaten egg for binding. Use your favorite marinara sauce that is dairy-free, and you’ll have a delicious vegan casserole. Experimenting with these swaps and modifications can make the Classic Italian Zucchini Pasta Casserole fit any diet or taste. For the full recipe, check out the details above. After enjoying your Classic Italian Zucchini Pasta Casserole, let’s talk storage. First, cool the casserole completely. This helps prevent condensation, which can make it soggy. Once cool, place leftovers in an airtight container. Store them in the fridge for up to three days. If you want to save it for longer, freezing works too. Cut the casserole into portions. Wrap each slice tightly in plastic wrap, then place them in a freezer-safe bag. This way, you can enjoy it for up to three months. When ready to enjoy your casserole again, reheating is key. The best method is using an oven. Preheat it to 350°F (175°C). Place the casserole in a baking dish and cover it with foil. Heat for 20-25 minutes. This helps keep the texture nice and creamy. If you’re in a hurry, a microwave works too. Use a microwave-safe plate and cover it with a damp paper towel. Heat in short bursts, stirring in between, until hot. This method may not keep the texture as good as the oven. For the best flavor and texture, always let it cool slightly before serving. Enjoy! Can I use other vegetables? Yes, you can use other veggies. Try bell peppers, spinach, or mushrooms. Just chop them small so they cook well. Mixing different vegetables adds flavor and color to your dish. How to make it ahead of time? You can make this casserole a day ahead. Just prepare it like normal, but do not bake it. Cover it and store it in the fridge. When ready, bake it as instructed, adding a few extra minutes if needed. What types of pasta work best? I love using penne or fusilli for this dish. Both types hold sauce well and stay firm while baking. You can also use gluten-free pasta if you prefer. How long can it be stored in the fridge? You can keep leftovers in the fridge for about three days. Make sure to cover it well. To reheat, just warm it in the oven or microwave until hot. Recommended Side Dishes Serve this casserole with a fresh salad or garlic bread. A simple mixed greens salad adds a crisp touch. Garlic bread brings a nice crunch and flavor. Pairing Wine with Casserole A light red wine like Chianti pairs well with this dish. It balances the flavors of the zucchini and cheese. If you prefer white, try a crisp Pinot Grigio. How to Garnish and Serve Garnish with fresh basil leaves for a pop of color. You can also sprinkle extra Parmesan on top before serving. This adds flavor and looks great on the table. For the full recipe, check the details above. Enjoy your cooking! In this blog post, we explored a delicious zucchini pasta casserole. We covered ingredients like zucchini, pasta, marinara, and various cheeses. You learned step-by-step instructions for preparation and baking. We included helpful tips for flavor and texture enhancement. You also discovered variations to suit different diets and preferences. In closing, this casserole is versatile and easy to make. Enjoy the cooking process and share it with loved ones.](https://fastmealmate.com/wp-content/uploads/2025/07/1e9eddde-dee0-4a9c-92bd-9b0350c13af8-768x768.webp)
