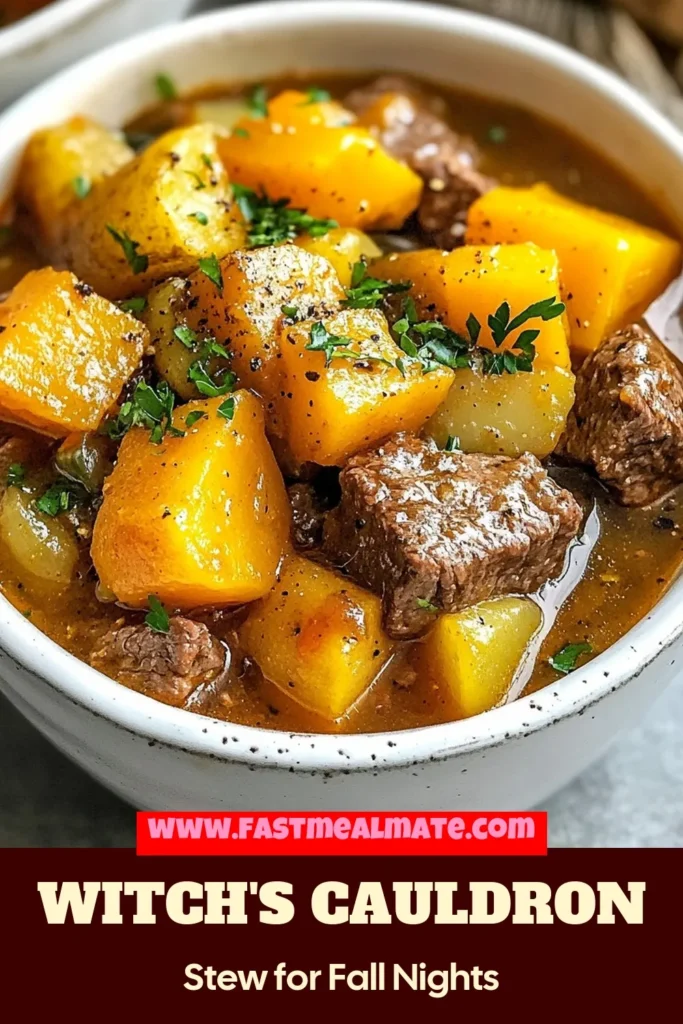
Witch’s Cauldron Beef Stew Hearty and Flavorful Meal
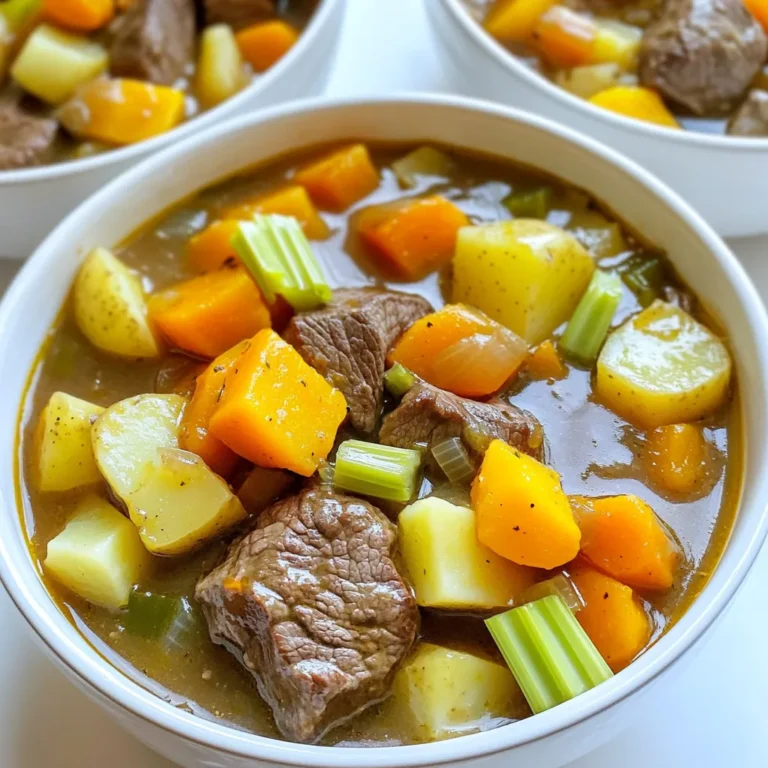
Welcome to my kitchen, where magic meets flavor! Today, we’ll conjure up a hearty Witch’s Cauldron Beef Stew that warms the soul. This easy-to-follow recipe combines tender beef, fresh veggies, and rich seasonings. Whether you’re cooking for a cozy night or hosting a spooky gathering, this dish will delight your taste buds. Let’s dive into the cauldron and discover the ingredients and steps to create this delicious meal!
Why I Love This Recipe
- Hearty and Filling: This beef stew is the epitome of comfort food, perfect for chilly evenings when you crave something warm and satisfying.
- Flavorful Ingredients: The combination of beef, root vegetables, and herbs creates a rich and savory flavor profile that is deeply satisfying.
- Slow-Cooked Goodness: Slow simmering allows the flavors to meld beautifully, resulting in tender beef and perfectly cooked vegetables.
- Customizable: This recipe is versatile; you can easily swap in your favorite vegetables or adjust the seasonings to suit your taste.
Ingredients
Witch’s Cauldron Beef Stew needs fresh, hearty ingredients. Let’s break them down.
List of Ingredients
– Beef and Vegetables
– 2 lbs beef chuck, cut into 1-inch cubes
– 1 large onion, diced
– 3 cloves garlic, minced
– 2 medium carrots, sliced
– 2 medium potatoes, diced
– 1 cup butternut squash, diced
– 1 cup frozen peas
– Seasoning and Broth
– 3 tablespoons olive oil
– 4 cups beef broth
– 1 tablespoon Worcestershire sauce
– 1 teaspoon dried thyme
– 1 teaspoon dried rosemary
– 1 bay leaf
– Salt and pepper to taste
– Optional Garnish
– Fresh parsley, chopped
These ingredients create a rich and filling stew. They work together to build deep flavor. The beef chuck gives a nice texture. The vegetables add sweetness and color. The herbs enhance the taste and aroma. Using fresh ingredients makes all the difference. Enjoy the magic of cooking with these simple yet powerful components!

Step-by-Step Instructions
Preparing the Beef
Searing the Beef
Start by heating three tablespoons of olive oil in a large pot over medium-high heat. The oil should shimmer, which tells you it’s ready. Season two pounds of beef chuck with salt and pepper. Add the beef cubes in batches. Sear them for about five to seven minutes. Make sure they get brown on all sides. This adds flavor. Once browned, remove the beef and set it aside on a plate.
Setting aside seared beef
Keep the beef on the plate while you cook the vegetables. It is important to keep the beef warm. This ensures it stays juicy when you mix it back in later.
Cooking the Vegetables
Sautéing the Onion and Garlic
Lower the heat slightly. In the same pot, add one large diced onion. Sauté it for about three to four minutes until soft. Next, add three minced garlic cloves. Cook for one more minute. The garlic should smell great but watch it carefully so it doesn’t burn.
Adding Remaining Vegetables
Now, add two sliced carrots, two diced potatoes, and one cup of diced butternut squash. Stir everything together. Cook for about three to five minutes. You want the vegetables to start softening and getting some nice color.
Combining Ingredients and Simmering
Mixing in Broth and Seasonings
Return the seared beef to the pot. Stir it in with the veggies. Pour in four cups of beef broth. Add one tablespoon of Worcestershire sauce, one teaspoon of dried thyme, one teaspoon of dried rosemary, and one bay leaf. Give everything a good stir to mix the flavors.
Simmering the Stew
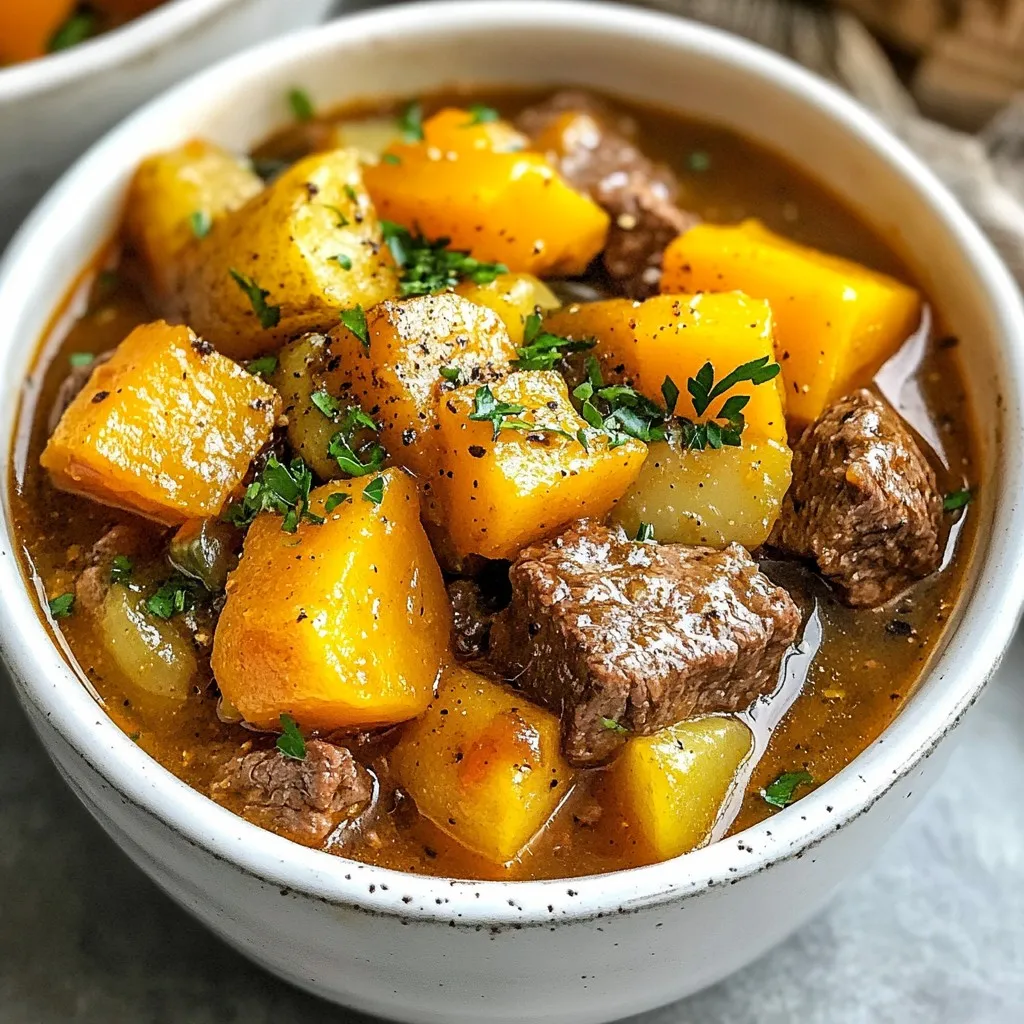
Bring the stew to a gentle simmer. Reduce the heat to low and cover the pot. Let it simmer for about one and a half to two hours. This slow cooking will make the beef very tender and blend the flavors nicely. In the last ten minutes, add one cup of frozen peas. Stir them in gently to warm them through. Before serving, taste the stew and adjust the seasoning with more salt and pepper if needed. Remember to take out the bay leaf for a clean look!
Tips & Tricks
Perfecting Your Beef Stew
Searing Techniques for Flavor
To start, searing the beef is key. This step adds great flavor. Heat olive oil in a pot until it shimmers. Then, season the beef with salt and pepper. Add the beef in batches. Don’t crowd the pot; this helps with browning. Aim for a golden crust on all sides. This takes about 5-7 minutes per batch. Once browned, set the beef aside. The juices left in the pot will add more taste.
Adjusting Seasoning to Taste
Once the stew is done, taste it. Adjust the seasoning as needed. Add more salt or pepper if it needs it. This final touch makes a big difference. Remember, flavors deepen as the stew sits. So, taste it just before serving. This way, you can ensure it’s perfect.
Enhancing the Cauldron Theme
Creative Serving Suggestions
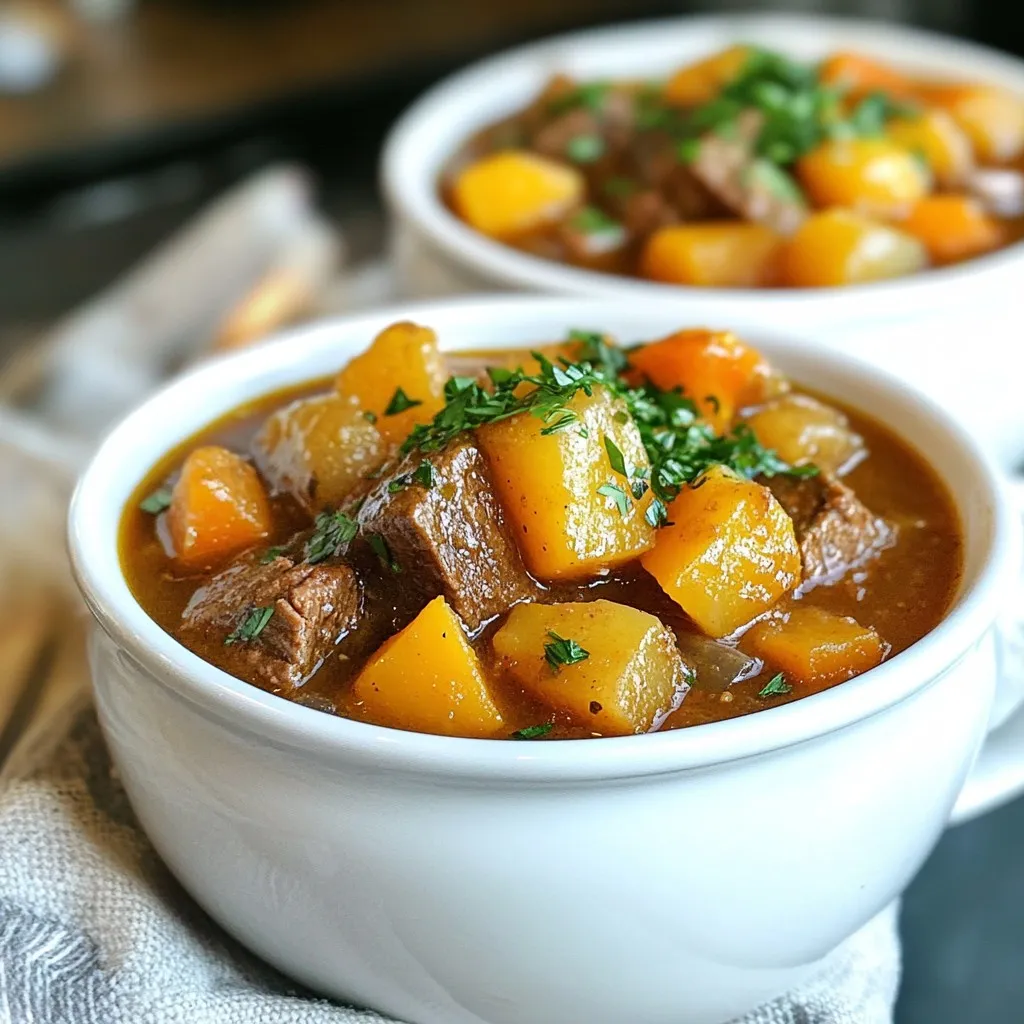
For a fun serving style, use rustic bowls. Ladle the stew into each bowl. This gives a warm, inviting feel. You can garnish with fresh parsley for color. Pair it with crusty bread for dipping. This adds a nice touch, making meals more enjoyable.
Thematic Presentation Ideas
To embrace the cauldron theme, consider using dark, earthy colors. A black or deep green tablecloth works well. You might also use little cauldrons for serving. This adds a whimsical feel to your meal. Use themed napkins and candles for extra charm. These small details make the dish feel special and festive.
Pro Tips
- Sear the Beef Properly: Make sure the beef cubes are patted dry before seasoning and searing. This helps achieve a rich, golden crust that adds depth to the stew’s flavor.
- Use Homemade Beef Broth: If possible, use homemade beef broth for a more robust flavor. Store-bought broth can work, but it may lack the richness of homemade.
- Let It Rest: After cooking, let the stew sit for about 15 minutes before serving. This resting period allows the flavors to meld even further.
- Experiment with Vegetables: Feel free to add or substitute other vegetables like parsnips or turnips for a unique twist and added nutrition.
Variations
Ingredient Swaps
Different Types of Meat
You can swap beef chuck for other meats. Try using lamb for a gamey taste. Pork also works well, giving a sweeter flavor. Chicken is a lighter option. Adjust cooking times for tender results with different meats.
Alternative Vegetables
Feel free to mix up the veggies. Sweet potatoes add a nice twist. You can also use parsnips for a hint of sweetness. Mushrooms give an earthy taste. Green beans or bell peppers can bring a colorful crunch.
Dietary Adjustments
Gluten-Free Options
To keep the stew gluten-free, check the Worcestershire sauce. Some brands contain gluten. You can find gluten-free versions easily. Use cornstarch or arrowroot for thickening instead of flour.
Vegetarian Adaptations
For a vegetarian version, skip the beef. Use hearty mushrooms or lentils as protein. Replace beef broth with vegetable broth for flavor. Add more root vegetables for extra texture and taste.
Storage Info
Storing Leftovers
To keep your Witch’s Cauldron Beef Stew fresh, follow these tips. First, let the stew cool down before storing. This helps prevent moisture build-up in the container. Use airtight containers and divide the stew into smaller portions. This way, you can easily reheat just what you need.
Best Practices for Refrigeration
– Place the stew in the fridge within two hours of cooking.
– Keep it in the fridge for up to three days.
– Make sure the container is tightly sealed.
Freezing the Beef Stew
– You can freeze the beef stew for up to three months.
– Use freezer-safe containers or bags.
– Leave some space at the top of the container for expansion.
Reheating Tips
Reheating your stew is simple. You want to warm it up without losing its rich flavor. Here are some easy methods.
How to Reheat Without Losing Flavor
– Always reheat gently over low heat.
– Stir often to help heat evenly.
– Add a splash of beef broth or water if it seems too thick.
Microwave vs. Stovetop
– For the microwave, heat in short bursts. Stir in between to avoid hot spots.
– The stovetop is great for larger portions. Just keep the heat low and stir well.
These tips will help you enjoy your hearty stew even after the first serving!
FAQs
How can I thicken my beef stew?
You can thicken your beef stew in a few simple ways. First, you can make a slurry by mixing equal parts cornstarch and cold water. Stir it into the stew about 10 minutes before it finishes cooking. Another method is to mash some of the potatoes or butternut squash in the stew. This adds body and thickens the sauce naturally. Lastly, simmer the stew uncovered for a longer time. This helps some liquid evaporate, making the stew thicker.
Can I make this stew in a slow cooker?
Yes, you can make Witch’s Cauldron Beef Stew in a slow cooker. First, follow the instructions for browning the beef and cooking the onions and garlic. Then, transfer everything to your slow cooker. Add the remaining ingredients, including broth and seasonings. Set the slow cooker on low for 6-8 hours or on high for 3-4 hours. This method allows flavors to meld nicely while you go about your day.
What can I serve with Witch’s Cauldron Beef Stew?
– Pairing Suggestions
This stew pairs well with crusty bread. Slices of fresh baguette or a hearty sourdough are perfect for dipping. You can also serve it with a green salad for a refreshing contrast.
– Side Dish Ideas
Consider roasted vegetables or steamed green beans as side dishes. A simple coleslaw can add a nice crunch. For something cozy, try serving it with mashed potatoes. They soak up the flavorful broth wonderfully!
This blog post covered how to make a hearty beef stew. We explored the key ingredients, from beef and veggies to seasonings and broth. I guided you through easy steps for preparing and cooking. Additionally, I shared tips for enhancing flavors, serving, and creative variations.
In your kitchen, you can now create this delicious stew. Enjoy the process and adapt it to your tastes. Your beef stew will warm hearts and bellies alike. Happy cookin

Witch’s Cauldron Beef Stew
Ingredients
- 2 lbs beef chuck, cut into 1-inch cubes
- 3 tablespoons olive oil
- 1 large onion, diced
- 3 cloves garlic, minced
- 2 medium carrots, sliced
- 2 medium potatoes, diced
- 1 cup butternut squash, diced
- 4 cups beef broth
- 1 tablespoon Worcestershire sauce
- 1 teaspoon dried thyme
- 1 teaspoon dried rosemary
- 1 leaf bay leaf
- to taste salt and pepper
- 1 cup frozen peas
- for garnish fresh parsley, chopped
Instructions
- Begin by heating the olive oil in a large heavy-bottomed pot or Dutch oven over medium-high heat until shimmering.
- Season the cubes of beef generously with salt and pepper. In batches, carefully add the beef to the hot oil, making sure not to overcrowd the pot. Sear the beef on all sides until a golden crust forms, approximately 5-7 minutes per batch. Once browned, remove the beef and set it aside on a plate.
- Reduce the heat slightly if necessary, and in the same pot, add the diced onion. Sauté the onion for about 3-4 minutes, stirring occasionally, until it softens and becomes translucent. Follow by adding the minced garlic and cook for an additional minute until fragrant, stirring constantly to prevent burning.
- Next, add the sliced carrots, diced potatoes, and butternut squash to the pot. Stir the mixture and cook for an additional 3-5 minutes, allowing the vegetables to begin to brown slightly and soften.
- Return the seared beef to the pot, mixing it with the vegetables. Pour in the beef broth, followed by the Worcestershire sauce, dried thyme, dried rosemary, and bay leaf. Stir well to combine all flavors and bring the mixture to a gentle simmer.
- Once simmering, reduce the heat to low, cover the pot with a lid, and allow the stew to simmer slowly for about 1.5 to 2 hours. This slow cooking time will ensure the beef becomes tender and the flavors meld together beautifully.
- In the last 10 minutes of cooking, add the frozen peas to the stew, stirring them in gently to allow them to warm through.
- After the cooking time has completed, taste the stew and make any necessary adjustments to seasoning with additional salt and pepper.
- Just before serving, be sure to remove the bay leaf from the stew for a clean presentation.


![- 1 lb lobster tails, halved lengthwise - 1 lb fresh sea scallops - 4 tablespoons unsalted butter, divided - 4 cloves garlic, finely minced - 1 lemon, juiced (about 2 tablespoons) - 2 tablespoons fresh parsley, finely chopped - Salt and freshly ground black pepper, to taste - Lemon wedges, for serving When I prepare Easy Garlic Butter Lobster Scallops, I love how fresh ingredients shine. The lobster tails and scallops are the stars of this dish. Using fresh seafood makes all the difference. Each bite bursts with flavor. Butter brings richness to the dish. I use unsalted butter to control the saltiness. Garlic adds a lovely aroma and taste. It’s important to finely mince the garlic. This helps to spread its flavor evenly. I always squeeze fresh lemon juice for brightness. The juice balances the rich butter. Chopped parsley adds a nice touch. It gives the dish a pop of color and freshness. Don’t forget about seasoning! Salt and black pepper enhance the seafood’s natural flavor. I like to season both the lobster and scallops well before cooking. Lastly, lemon wedges are a must. They add a fresh hit of citrus when served. I find that a squeeze of lemon elevates the whole meal. For the full recipe, check out the details above. Enjoy creating this flavorful delight! First, take the lobster tails and scallops out of the package. Gently pat them dry with a paper towel. This step is key for a nice sear later. Next, season them with salt and black pepper. Make sure to cover all sides for even flavor. Now, let’s get cooking! In a large skillet, melt 2 tablespoons of unsalted butter over medium heat. Once the butter is melted and bubbly, add the minced garlic. Sauté the garlic for about one minute until it is fragrant. Be careful not to let it burn. Next, add the lobster tails to the skillet. Place them cut-side down first. Sear the tails for about 3-4 minutes until they turn golden brown. Then, carefully flip them over and cook for another 2-3 minutes. They should look opaque and fully cooked. Remove them and set aside. Now, it’s time for the scallops. Add them to the same skillet, making sure not to overcrowd them. Sear each side for about 2-3 minutes until they get a beautiful golden crust. Once done, remove the scallops and place them with the lobster. Return the cooked lobster to the skillet. Squeeze in the fresh lemon juice and sprinkle the chopped parsley over everything. Gently toss the lobster and scallops in the garlic butter sauce. This will help all the flavors blend nicely. Finally, serve the lobster and scallops on a large platter. Drizzle any remaining garlic butter sauce over the seafood. Garnish with more parsley and add lemon wedges on the side. For the full recipe, check the detailed instructions above. Enjoy your tasty dish! To make your lobster and scallops shine, start with good searing. Searing gives seafood a nice crust. Heat your skillet until it's hot. Add butter and let it melt before placing the seafood in. This helps lock in flavors and moisture. Drying your seafood before cooking is very important. Use paper towels to pat the lobster tails and scallops dry. Removing excess moisture helps achieve that perfect golden sear. Wet seafood will steam instead of sear. Adding herbs and spices can elevate your dish. Fresh thyme or basil can add great flavor. A pinch of red pepper flakes can give it a nice kick. Don't be afraid to experiment with flavors you love. For sauces, consider making a light citrus sauce. A mix of lemon juice and olive oil works well. You can also add a splash of white wine for depth. These additions can enhance the overall taste of your seafood. Presentation matters when serving seafood. Arrange the lobster tails and scallops on a large platter. Place them in a way that looks inviting. You can stack the scallops for a layered look. Garnishing makes your dish pop. Use chopped parsley for a fresh touch. Lemon wedges add color and a burst of flavor. A well-presented dish makes a great impression, so take your time with this step. Want to try this delicious dish? Check out the [Full Recipe]. {{image_4}} If you cannot find lobster or scallops, you have options. You can use shrimp instead of lobster. Shrimp cooks fast and adds great flavor. For scallops, try using firm fish like cod or halibut. Both will work well in this dish. For dairy-free butter, consider using olive oil or coconut oil. Both options will give a nice taste. You can also find plant-based butter in stores. Just make sure it melts well for your sauce. You can cook your seafood in different ways. Grilling is a fun option. It gives a smoky flavor that pairs well with garlic. Just brush the lobster and scallops with butter before grilling. Sautéing is great for a quick meal. It lets the garlic and butter shine through. Broiling is another method to try. It cooks the seafood from above. This method creates a crispy top while keeping the inside juicy. You will get a different flavor profile that is equally delicious. For side dishes, consider a fresh salad or garlic bread. A light pasta with lemon pairs well, too. These sides will balance the rich flavors of the seafood. As for drinks, a crisp white wine like Sauvignon Blanc is perfect. It cuts through the richness of the butter. If you prefer non-alcoholic drinks, try sparkling water with lemon. It refreshes the palate nicely. For the full recipe, check the Easy Garlic Butter Lobster Scallops 🦞🧄 section. To keep your Easy Garlic Butter Lobster Scallops fresh, place them in an airtight container. This helps avoid any unwanted smells in your fridge. Make sure to refrigerate them within two hours of cooking. They can last up to three days in the fridge. If you notice any off smell or discoloration, it's best to toss them out. When you want to enjoy your leftovers, the best way to reheat is on the stove. Use low heat to warm them gently. This keeps the seafood tender. You can also use the microwave, but do it in short bursts to avoid overcooking. Cover the dish with a damp paper towel to keep moisture in. Remember, seafood can dry out quickly. Yes, you can freeze lobster scallops! However, freezing may change their texture. To freeze, place them in a freezer-safe bag or container. Remove as much air as possible before sealing. They can stay frozen for up to three months. When you're ready to use them, thaw in the fridge overnight. Avoid thawing at room temperature to keep them safe. If you're looking for the full recipe, check out the Easy Garlic Butter Lobster Scallops recipe above! You can tell when scallops are done by their color and texture. They should be opaque and firm. A golden crust on the outside shows they are well-seared. Avoid cooking them too long. Overcooked scallops become rubbery and tough. Common mistakes include overcrowding the pan and not drying them well. Always dry scallops with paper towels. This helps them sear nicely and not steam. Yes, you can use frozen lobster tails and scallops. Just make sure to choose high-quality seafood. Look for ones that are flash-frozen for best taste. To thaw, place them in the fridge overnight. If you're in a hurry, seal them in a bag and submerge in cold water for about 30 minutes. Cook them right after thawing for the best flavor. Pair your dish with light sides. A fresh salad with lemon vinaigrette works well. Roasted asparagus or green beans add great color and flavor. For a complete meal, serve with garlic bread and a glass of white wine. This combination enhances the rich flavors of the lobster and scallops. You can find the full recipe for Easy Garlic Butter Lobster Scallops and create a delightful feast! This blog post highlighted key ingredients for an easy garlic butter lobster and scallops dish. I walked you through preparation, cooking, tips for perfect seafood, and variations to keep meals exciting. You now have practical storage info and answers to common questions. No matter how you serve this dish, it promises flavor. Enjoy crafting a meal that impresses everyone at your table. Happy cooking!](https://fastmealmate.com/wp-content/uploads/2025/06/dfec37c8-f7d2-4a99-9114-2c33cea5f0b3-768x768.webp)