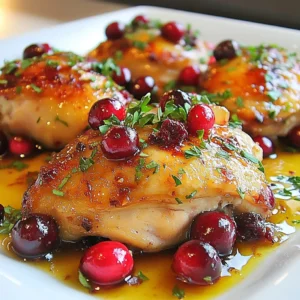
Roasted Cranberry Chicken Savory and Simple Dinner

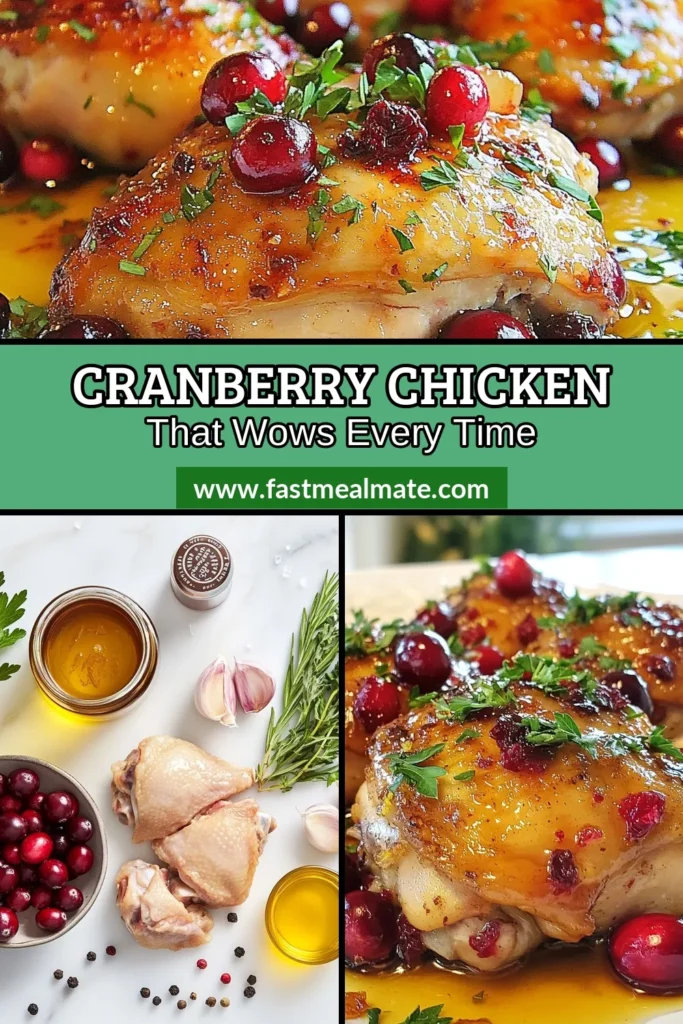
Looking for a simple yet delicious dinner? Try Roasted Cranberry Chicken! This dish bursts with flavor from fresh cranberries, garlic, and rosemary. With easy steps for seasoning and roasting, you can create a golden, savory meal that impresses friends and family. Plus, it’s perfect for any occasion. Don’t miss out on making this delightful dish—it’s easier than you think! Let’s dive into the recipe.
Why I Love This Recipe
- Flavorful Combination: The sweet and tart notes of cranberries combined with savory chicken create a delightful balance that is hard to resist.
- Easy Preparation: With simple ingredients and straightforward steps, this recipe is perfect for both novice and experienced cooks.
- Beautiful Presentation: The vibrant colors of the dish make it an eye-catching centerpiece for any dinner table.
- Seasonal Delight: This recipe beautifully captures the essence of fall, making it a perfect dish for holiday gatherings and special occasions.
Ingredients
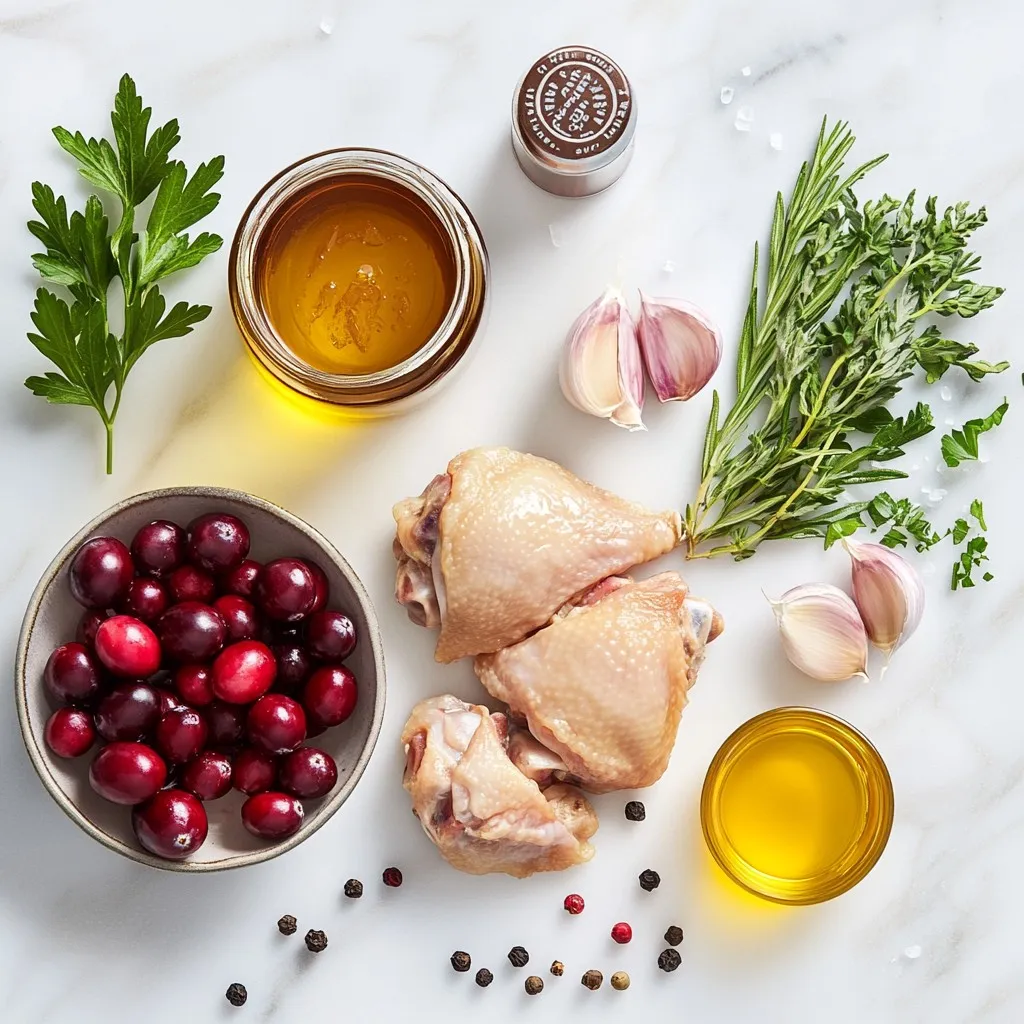
List of Ingredients
– 4 chicken thighs (bone-in, skin-on)
– 1 cup fresh cranberries
– 1/2 cup chicken broth
– 1/4 cup honey
– 2 tablespoons balsamic vinegar
– 3 cloves garlic, minced
– 1 tablespoon fresh rosemary, finely chopped
– 1 tablespoon olive oil
– Salt and black pepper to taste
– Optional: Fresh parsley, finely chopped, for garnish
To make Roasted Cranberry Chicken, you need just a few key ingredients. Start with four chicken thighs. I like bone-in, skin-on for more flavor. Fresh cranberries add a tart taste. Use one cup for the perfect balance. Chicken broth brings moisture. A half cup works well.
Honey adds a nice sweetness. You only need a quarter cup. Balsamic vinegar gives depth to the sauce. Two tablespoons will do. Minced garlic brings aroma and taste. I use three cloves for a rich flavor. Fresh rosemary adds a herbal touch. Just one tablespoon, finely chopped, is enough.
Next, we need olive oil to sear the chicken. One tablespoon will help it crisp up. Don’t forget salt and black pepper. They help to season the chicken well. If you want, add fresh parsley for garnish. It makes the dish look pretty and fresh.
Gather these ingredients before you start cooking. Each one plays a key role in making this dish delicious and satisfying.
Step-by-Step Instructions
Preheat the Oven
Start by preheating your oven to 400°F (200°C). This temperature is ideal for roasting chicken. It helps the skin crisp and the meat cook evenly.
Prepare the Cranberry Mixture
In a large bowl, combine these key ingredients:
– 1 cup fresh cranberries
– 1/2 cup chicken broth
– 1/4 cup honey
– 2 tablespoons balsamic vinegar
– 3 cloves garlic, minced
– 1 tablespoon fresh rosemary, finely chopped
Stir until all the ingredients mix well. The sweet and tangy mix will coat the chicken nicely.
Season the Chicken
Take your chicken thighs and season them well. Use salt and black pepper on both sides. Proper seasoning adds flavor and makes your dish shine.
Sear the Chicken
In a large, oven-safe skillet, heat 1 tablespoon of olive oil over medium-high heat. Once hot, add the chicken skin side down. Sear for about 5-6 minutes. You want a nice golden crust to form.
Roast in the Oven
After searing, flip the chicken over. Pour the cranberry mixture over the chicken. Place the skillet in your preheated oven. Roast for 30-35 minutes. Check that the chicken reaches an internal temperature of 165°F (74°C). The cranberries should burst and create a lovely sauce.
Basting and Resting
Halfway through roasting, baste the chicken with the sauce. This step is key for flavor and juiciness. When done, remove the skillet from the oven. Let the chicken rest for 5 minutes before serving. This keeps the meat moist and tasty.
Tips & Tricks
Enhancing the Flavor
To boost the taste of your Roasted Cranberry Chicken, seasoning is key. I always season the chicken thighs with salt and black pepper. This step is vital for a rich flavor. Consider letting the chicken marinate for about 30 minutes. This allows the seasonings to soak in. You can also add herbs like thyme or sage for extra aroma. For a sweet twist, mix in orange zest with the cranberry sauce. This adds brightness to the dish.
Perfecting the Roast
Cooking temperature matters. I recommend roasting the chicken at 400°F (200°C). This high heat helps crisp the skin while cooking the meat. To check doneness, use a meat thermometer. The chicken should reach an internal temperature of 165°F (74°C). If you don’t have a thermometer, look for clear juices when you cut into the chicken. No pink means it’s done.
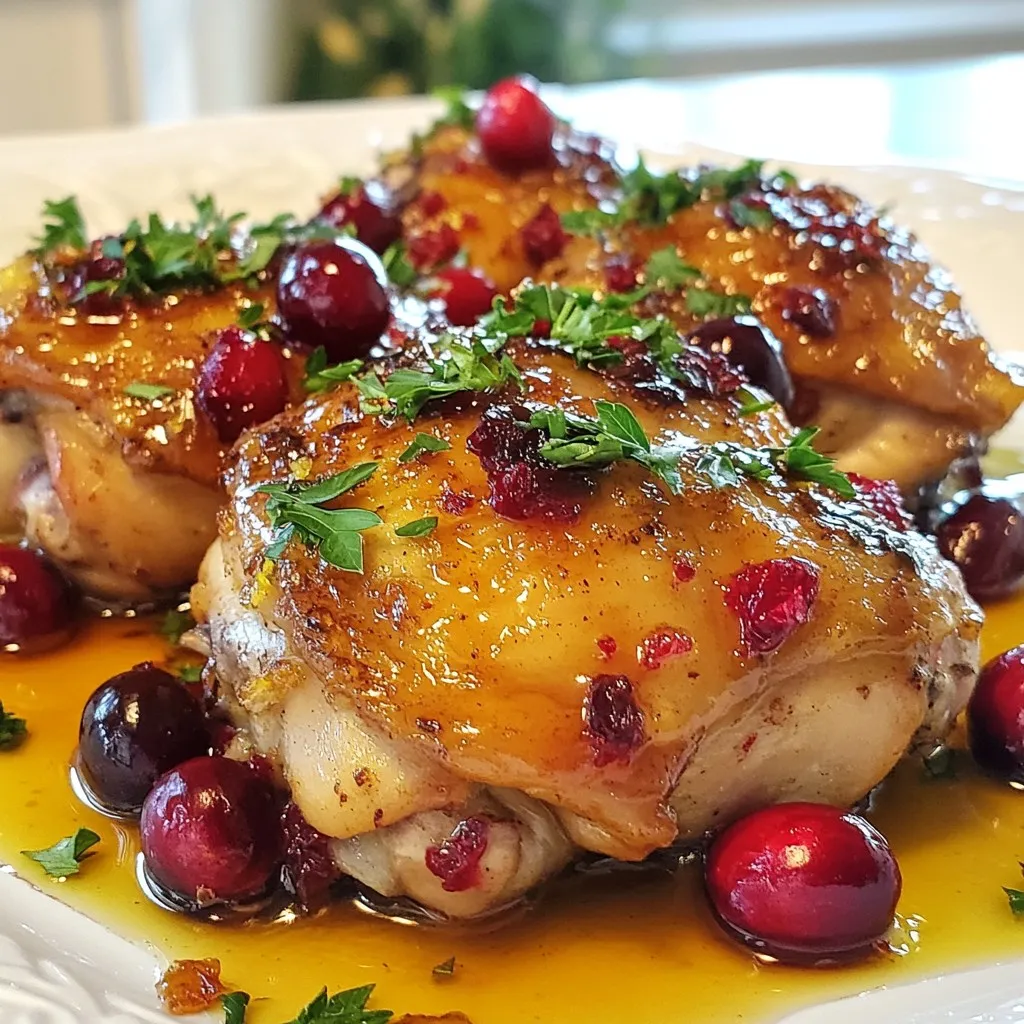
Presentation Suggestions
For a beautiful presentation, arrange the chicken thighs on a large platter. Drizzle with the roasted cranberry sauce. This adds color and makes it appealing. You can sprinkle chopped fresh parsley over the top as a garnish. This not only looks great but adds a fresh taste. Pair your dish with steamed veggies or creamy mashed potatoes for a complete meal.
Pro Tips
- Optimal Searing: Ensure your skillet is hot enough before adding the chicken to achieve a crispy skin. A good sear locks in juices and enhances flavor.
- Cranberry Substitutes: If fresh cranberries are unavailable, consider using frozen cranberries or a high-quality cranberry sauce as an alternative.
- Flavor Boost: For added depth of flavor, incorporate a splash of orange juice or zest into the cranberry mixture for a citrusy twist.
- Resting Time: Allowing the chicken to rest after cooking is crucial for retaining moisture. This step ensures each bite is juicy and flavorful.
Variations
Alternative Proteins
You can switch up the chicken thighs for other cuts. Bone-in chicken breast works well, too. If you prefer red meat, try pork chops or beef. Both will soak up the cranberry flavor nicely. Just adjust the cooking time based on the meat you choose. For instance, pork needs about 25-30 minutes at 400°F.
Ingredient Substitutions
You can make this dish lighter with some easy swaps. Instead of honey, use maple syrup for a new twist. For a low-sodium option, choose low-sodium chicken broth. If you want a little zing, swap balsamic vinegar for apple cider vinegar. These changes keep the dish tasty while adding unique flavors.
Flavor Additions
To deepen the flavor, add spices like thyme or sage. A pinch of red pepper flakes can bring some heat. You might also toss in sliced onions or bell peppers with the cranberries for added texture and taste. Experimenting with these extras can create a dish that feels fresh and exciting every time.
Storage Info
Storing Leftovers
To store leftovers, let the chicken cool first. Place the chicken and sauce in an airtight container. Make sure to cover it well. This keeps the chicken moist and fresh. You can store the leftovers in the fridge for up to three days. Label the container with the date for easy tracking.
Reheating Recommendations
When reheating, I suggest using the oven. Preheat the oven to 350°F (175°C). Place the chicken in a baking dish. Pour a little chicken broth over it to keep it juicy. Cover with foil to trap the steam. Heat for about 20 minutes or until warm. This way, the chicken stays tender, and the sauce remains flavorful.
Freezing Instructions
To freeze the chicken, first, cool it completely. Cut the chicken into pieces if you prefer. Place it in a freezer-safe bag or container. Remove as much air as possible before sealing. Label the bag with the date. You can freeze it for up to three months. When ready to eat, thaw it in the fridge overnight. Then reheat using the oven method for best results.
FAQs
Can I use frozen cranberries?
Yes, you can use frozen cranberries in this recipe. They will change the flavor and texture slightly. Frozen cranberries might be less tart and not as firm. You may need to adjust the cooking time slightly, as they hold water.
What to serve with Roasted Cranberry Chicken?
I love pairing Roasted Cranberry Chicken with side dishes that balance its flavors. Here are some great options:
– Steamed green beans
– Roasted sweet potatoes
– Creamy mashed potatoes
– Rice pilaf
– A fresh green salad
How do I know when the chicken is fully cooked?
Check the chicken’s internal temperature with a meat thermometer. It should reach 165°F (74°C). Look for clear juices when you cut into the chicken. The meat should not be pink.
Can I make this recipe ahead of time?
You can prepare the chicken and cranberry mix up to a day ahead. Store them in the fridge. On the day of cooking, follow the roasting steps. This saves time and keeps flavors fresh.
You learned about making a delicious roasted cranberry chicken. We covered key ingredients, step-by-step cooking methods, and helpful tips. Also, I shared variations and storage info to keep your dish fresh. Remember, seasoning and basting will enhance flavors. You can try different proteins or ingredients for unique twists. Lastly, don’t forget to check for doneness. Enjoy cooking this tasty meal, and impress your friends and famil
Roasted Cranberry Chicken Delight
Ingredients
- 4 pieces chicken thighs (bone-in, skin-on)
- 1 cup fresh cranberries
- 0.5 cup chicken broth
- 0.25 cup honey
- 2 tablespoons balsamic vinegar
- 3 cloves garlic, minced
- 1 tablespoon fresh rosemary, finely chopped
- 1 tablespoon olive oil
- to taste salt
- to taste black pepper
- for garnish fresh parsley, finely chopped (optional)
Instructions
- Begin by preheating your oven to 400°F (200°C) to create the perfect roasting environment.
- In a spacious mixing bowl, combine the fresh cranberries, chicken broth, honey, balsamic vinegar, minced garlic, and finely chopped rosemary. Stir thoroughly until all ingredients are well blended.
- Season the chicken thighs generously with salt and black pepper on both sides, ensuring an even coating for enhanced flavor.
- In a large, oven-safe skillet or baking dish, heat the olive oil over medium-high heat. Once hot, carefully add the chicken thighs skin side down. Sear them until they develop a beautiful golden brown crust, approximately 5-6 minutes.
- Gently flip the chicken thighs over to the other side. Pour the prepared cranberry mixture over the chicken in the skillet, allowing the flavors to meld.
- Transfer the skillet to your preheated oven and roast for 30-35 minutes. Ensure the chicken reaches an internal temperature of 165°F (74°C), and watch for the cranberries to burst and soften, creating a delightful sauce.
- Halfway through the cooking time, don’t forget to baste the chicken with the pan sauce to maximize flavor and juiciness.
- Once cooked, remove the skillet from the oven and let the chicken rest for about 5 minutes to retain its moisture.
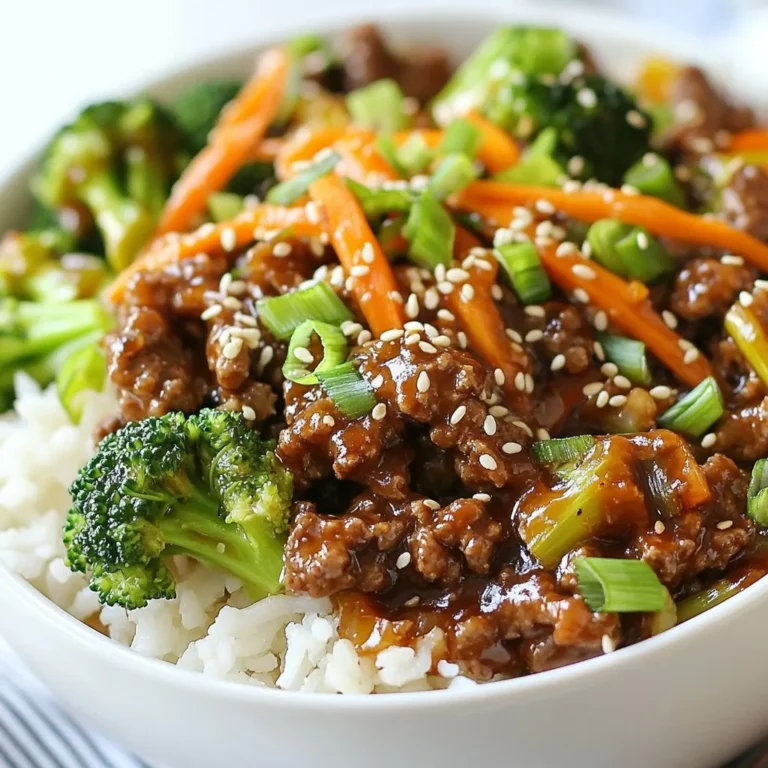
![- 4 boneless, skinless chicken breasts - 1 cup coconut milk (preferably full-fat for creaminess) - 2 tablespoons freshly squeezed lime juice - Zest of 1 lime - 2 tablespoons honey - 2 cloves garlic, minced - 1 teaspoon fresh ginger, grated - 1 teaspoon ground cumin - Salt and pepper to taste - 1 tablespoon olive oil The main ingredients in Coconut Lime Chicken create a perfect balance of flavors. The chicken breasts are the star, providing a solid base. Coconut milk adds creaminess and richness. Lime juice brings bright acidity and zest. Honey balances the tanginess. Garlic and ginger enhance depth, while cumin adds warmth. - Fresh cilantro leaves - Lime wedges for serving Garnishes can elevate your dish. Fresh cilantro adds a pop of color and freshness. Lime wedges provide an extra burst of citrus when served. - Grill or skillet - Resealable plastic bag for marinating A grill or skillet works great for cooking the chicken. The resealable bag is perfect for marinating. It helps the chicken soak up all those delicious flavors. For the Full Recipe, check out the detailed instructions that guide you through the steps to make this delicious Coconut Lime Chicken. To start, gather your ingredients. Combine 1 cup of coconut milk, 2 tablespoons of lime juice, lime zest, 2 tablespoons of honey, 2 minced garlic cloves, 1 teaspoon of grated ginger, and 1 teaspoon of ground cumin in a medium bowl. Add a pinch of salt and pepper to boost the flavor. Whisk these ingredients together until they blend well. This creates a creamy and fragrant marinade. - Tip: Use a sturdy whisk to mix. It helps create a smooth consistency without clumps. Next, it's time to marinate the chicken. Place 4 boneless, skinless chicken breasts into a large resealable plastic bag. Pour the marinade over the chicken. Make sure each piece is coated evenly. Seal the bag tightly and press out any air. For the best flavor, marinate in the fridge for at least 30 minutes. You can marinate for up to 4 hours for a richer taste. - Tip: Flip the bag halfway through marinating. This ensures all sides soak up the flavor. Now, let’s cook the chicken. Preheat your grill or a large skillet over medium-high heat. If using a skillet, drizzle in 1 tablespoon of olive oil. Let it heat until it shimmers but does not smoke. Carefully remove the chicken from the marinade. Allow any excess marinade to drip off. Place the chicken on the grill or in the skillet. Cook each piece for about 6-7 minutes on each side. The chicken is done when it is no longer pink inside and reaches an internal temperature of 165°F. - Tip: If using a skillet, turn the chicken often for even cooking. Once cooked, transfer the chicken to a plate. Let it rest for about 5 minutes. Resting helps the juices stay inside. Finally, slice the chicken and serve it with leftover marinade, fresh cilantro, and lime wedges. For the Full Recipe, check the complete details in the earlier section. Enjoy your Coconut Lime Chicken! Marinating your chicken is key for great taste. I recommend marinating for at least 30 minutes. For deeper flavors, let it sit for up to 4 hours. The coconut milk and lime juice work wonders together. You can also add spices like paprika or herbs like thyme. These will give your dish a unique twist. Resting your chicken after cooking is crucial. Let it sit for 5 minutes before slicing. This helps the juices stay inside. The ideal internal temperature for fully cooked chicken is 165°F (75°C). Use a meat thermometer to check. This step ensures your chicken stays juicy and tender. A great plate makes your meal more inviting. Arrange the sliced chicken on a bright platter. Sprinkle fresh cilantro over the top for color. Serve lime wedges on the side for extra zest. You can also add a side of coconut rice or a fresh salad. These choices elevate your dish, making it visually appealing and delicious. For the full recipe, check out the Coconut Lime Chicken recipe. {{image_4}} You can change the protein in this dish. Try shrimp or tofu for a fun twist. Each option offers a unique taste while soaking up the coconut and lime flavors. If you want to switch up the marinade, use pineapple juice instead of lime juice. This swap adds a sweet touch that works well. You can cook Coconut Lime Chicken in different ways. Oven-baking gives a nice, even cook. Set the oven to 375°F and bake for 25-30 minutes. Slow-cooking is great for busy days. Just put the marinated chicken in a slow cooker for 4-6 hours on low. Grilling adds a smoky flavor that many people love. It gives nice grill marks and a bit of char. Pan-searing is quick and keeps the chicken juicy. Use medium-high heat and watch it closely for great results. Coconut Lime Chicken pairs well with many sides. Coconut rice is a perfect fit. The creaminess of the rice matches the chicken's flavors. A fresh garden salad with lime vinaigrette adds brightness. You can also serve it with roasted vegetables for a colorful plate. For drinks, try a light white wine like Sauvignon Blanc. It complements the lime well. Coconut water is also refreshing and ties in with the meal. If you want a fun twist, mix a tropical cocktail with rum and pineapple juice. For the full recipe, check the earlier section. Enjoy your cooking adventure! To keep your Coconut Lime Chicken fresh, follow these simple steps. First, let the chicken cool completely after cooking. Place any leftover chicken in an airtight container. You can store it in the fridge for up to four days. If you want to keep it longer, freeze the chicken. Wrap it tightly in plastic wrap, then place it in a freezer bag. This helps prevent freezer burn. It can last up to three months in the freezer. When you're ready to eat, remember to label your container with the date. This will help you track how long it's been stored. Reheating your Coconut Lime Chicken is easy, but do it carefully. To keep it moist, I suggest using the oven. Preheat it to 350°F (175°C). Place the chicken in a baking dish, cover it with foil, and heat for about 15 to 20 minutes. Make sure it reaches an internal temperature of 165°F (75°C). You can also reheat in the microwave. Use a microwave-safe dish and cover it with a damp paper towel. Heat for one minute, then check if it's warm. If not, heat in 30-second bursts until hot. Avoid overheating, as this can dry out the chicken. If you want to enjoy your leftovers, consider adding them to salads or wraps for a tasty twist. I recommend marinating the chicken for at least 30 minutes. This time gives the chicken a nice flavor boost. If you have more time, you can marinate it for up to 4 hours. Longer marinating allows the flavors to soak in deeper. Just remember, do not marinate for more than 4 hours. The acid in lime juice can make the chicken tough if left too long. Yes, you can use canned coconut milk for this recipe. I suggest using full-fat coconut milk for the best results. Full-fat coconut milk adds creaminess and richness to the dish. It also helps create a smooth marinade that clings well to the chicken. Low-fat coconut milk can work, but it may not have the same depth of flavor. Coconut Lime Chicken pairs well with many side dishes. Here are some great options: - Coconut rice: It complements the flavor beautifully. - Fresh garden salad: A light salad adds crispness. - Grilled vegetables: They add color and nutrition. - Quinoa: A healthy grain that absorbs flavors well. You can also serve it with lime wedges for an extra citrus kick! For a refreshing drink, consider coconut water or a light mojito. For the full recipe, check out the [Full Recipe]. This blog post covered the key ingredients and steps for making Coconut Lime Chicken. We discussed the main ingredients, marinade tips, and cooking techniques. I shared ways to enhance flavor and ensure juicy chicken, plus creative serving ideas. You can explore variations and proper storage tips for leftovers. Remember, using quality ingredients and following these steps leads to tasty meals. Enjoy experimenting with this recipe to create your perfect dish!](https://fastmealmate.com/wp-content/uploads/2025/06/fb549dd5-9e1c-4fac-867b-0fcc137097f2-768x768.webp)