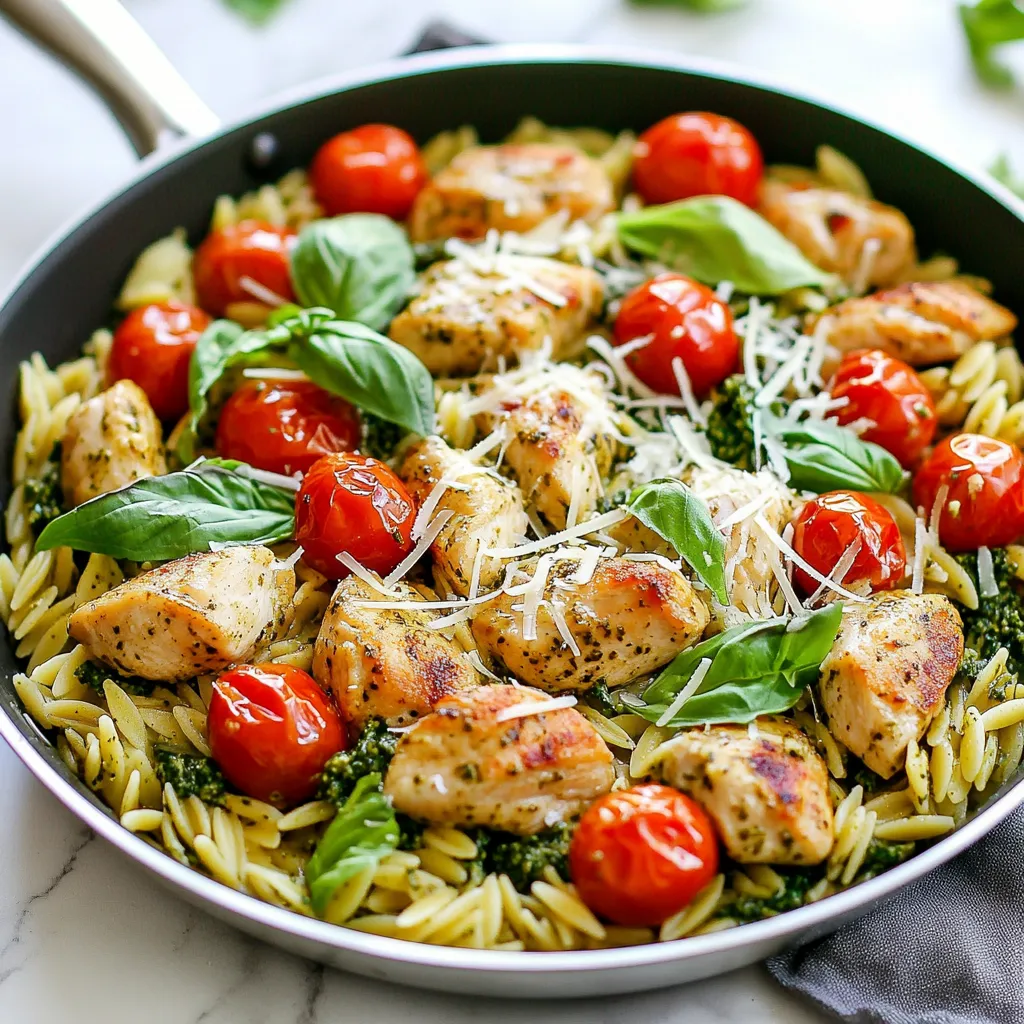
One-Pan Chicken Pesto Orzo Simple and Flavorful Meal


Are you ready to make a quick and tasty meal? One-Pan Chicken Pesto Orzo is the answer! This dish combines chicken, orzo, and vibrant veggies all in one pot. It’s simple, flavorful, and perfect for busy weeknights. You’ll love how easy it is to whip up, while still impressing your family. Let’s dive into this delicious recipe that will make dinnertime a breeze!
Why I Love This Recipe
- Quick and Easy: This recipe can be prepared in just 25 minutes, making it perfect for busy weeknights.
- One-Pan Wonder: No need for multiple pots and pans; everything cooks together, saving you time on cleanup.
- Flavorful Ingredients: The combination of chicken, pesto, and fresh veggies creates a deliciously vibrant dish.
- Customizable: You can easily adapt this recipe by adding your favorite vegetables or proteins for a personal touch.
Ingredients
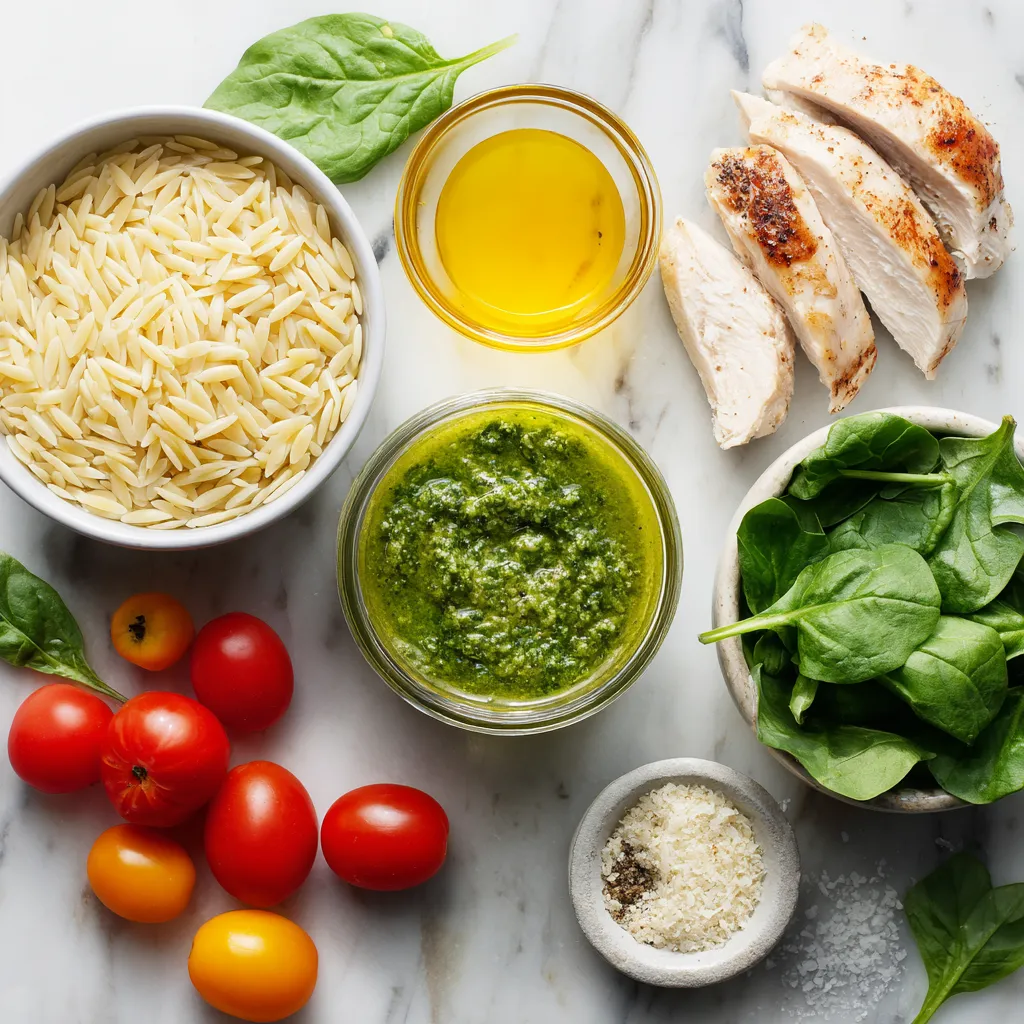
To make One-Pan Chicken Pesto Orzo, gather these simple ingredients:
– Boneless, skinless chicken breasts
– Orzo pasta
– Low-sodium chicken broth
– Cherry tomatoes
– Fresh baby spinach
– Pesto (store-bought or homemade)
– Olive oil
– Garlic powder
– Salt
– Pepper
– Parmesan cheese
– Fresh basil
Each item plays a key role in creating a tasty dish. The chicken provides protein, while orzo gives a hearty base. Cherry tomatoes add sweetness and color. Fresh spinach brings in nutrients and brightness. Pesto ties all the flavors together with its herb-packed punch. Olive oil keeps everything moist, and garlic powder adds depth. Salt and pepper enhance the taste, and Parmesan cheese offers a rich finish. Finally, fresh basil elevates the aroma and presentation.
With these ingredients, you’re set for a delightful cooking experience!
Step-by-Step Instructions
Sautéing the Chicken
Start by heating two tablespoons of olive oil in a large skillet over medium-high heat. Once the oil shimmers, add one pound of bite-sized chicken pieces. Season the chicken with salt, black pepper, and one teaspoon of garlic powder. Cook the chicken for about 5 to 7 minutes. Look for a golden brown color and make sure it is cooked through. Stir occasionally to cook evenly.
Adding Orzo and Broth
After the chicken is done, add one cup of orzo pasta directly to the skillet. Stir it well so the orzo mixes with the chicken and absorbs all the flavors. Then, pour in two cups of low-sodium chicken broth. Increase the heat to bring the mixture to a gentle boil. Once it boils, reduce the heat to low. Cover the skillet and let it simmer for about 10 minutes. The orzo should soak up most of the broth and become tender.
Mixing in Vegetables and Pesto
After simmering, uncover the skillet. Gently stir in one cup of halved cherry tomatoes and one cup of fresh baby spinach. Add half a cup of pesto. Stir everything together. Cook for an additional 2 to 3 minutes. This lets the spinach wilt and all the ingredients heat through.
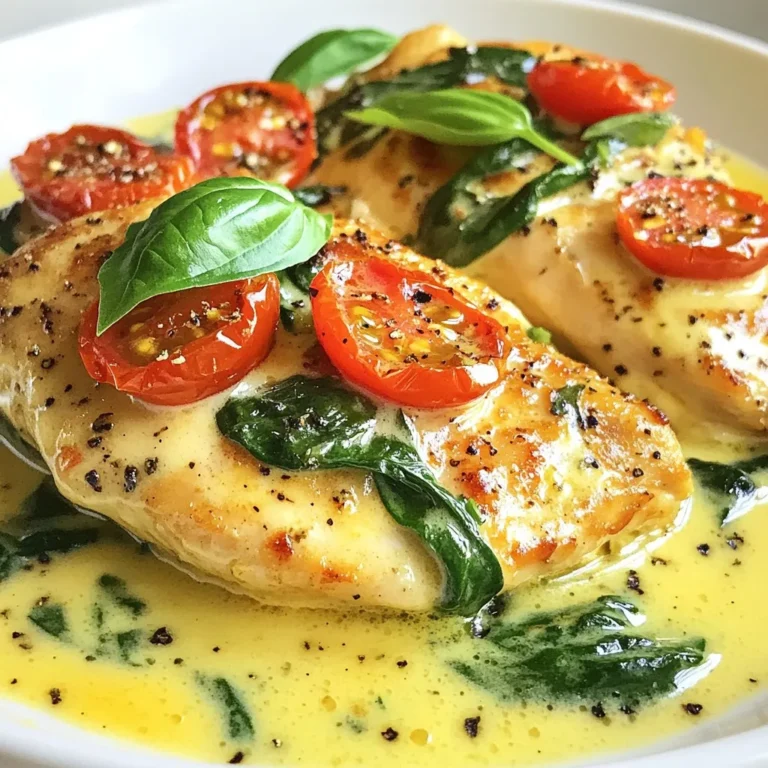
Finishing Touches and Serving
Remove the skillet from heat. If you want, sprinkle a quarter cup of grated Parmesan cheese on top for extra flavor. For a nice finish, garnish with fresh basil leaves. This adds a pop of color and aroma to your dish. Serve it in bowls and enjoy your delicious one-pan chicken pesto orzo!
Tips & Tricks
Enhancing Flavor
To boost flavor, try adding these seasonings:
– Crushed red pepper for heat
– Lemon zest for brightness
– Fresh herbs like parsley or cilantro
You can also explore different types of pesto. Basil pesto is classic, but sun-dried tomato or arugula pesto can add a nice twist. Each type gives a unique taste to your dish.
Cooking Techniques
Cooking orzo perfectly is key. Make sure to stir the orzo often while it cooks. This helps prevent sticking. Always check for doneness a minute or two before the time is up.
To avoid overcooked vegetables, add them at the right time. Cherry tomatoes and spinach need just a few minutes to soften. If you cook them too long, they can lose flavor and texture.
Presentation Ideas
Serving this dish can be fun! I love using bowls for a cozy feel. Add a sprinkle of Parmesan cheese on top for a creamy touch.
For visual appeal, garnish with fresh basil leaves. A little drizzle of olive oil not only adds shine but enhances the taste. Enjoy the vibrant colors and aromas of your meal!
Pro Tips
- Use Fresh Ingredients: Opt for fresh spinach and ripe cherry tomatoes for the best flavor and texture in your dish.
- Customize Your Pesto: Experiment with different types of pesto, such as sun-dried tomato or roasted red pepper, for a unique twist.
- Monitor Orzo Cooking: Keep an eye on the orzo as it cooks; you want it tender but still al dente for the perfect bite.
- Enhance Flavor with Lemon: A squeeze of fresh lemon juice before serving can brighten the dish and enhance all the flavors.
Variations
Ingredient Substitutions
You can switch proteins in this dish. Shrimp works well instead of chicken. For a plant-based option, use tofu. Both options add unique flavors.
Feel free to change up the veggies. Instead of spinach, try kale or zucchini. You can also add bell peppers for a sweet crunch. The goal is to use what you love.
Dietary Modifications
If you need a gluten-free meal, use gluten-free orzo. This keeps the dish tasty while meeting dietary needs. Always check labels to ensure the pasta is certified gluten-free.
For a vegan version, skip the chicken and cheese. Use a vegan pesto made from nuts and herbs. This way, you still enjoy great flavor without animal products.
Flavor Variations
Change the pesto flavor to mix things up. You might try sun-dried tomato pesto for a rich taste. Garlic or spicy pesto can add a kick too.
Incorporating spices can elevate the dish. Try adding red pepper flakes for heat or lemon zest for brightness. Fresh herbs like thyme or oregano can also add depth. These small additions can make a big difference!
Storage Info
How to Store Leftovers
To keep your One-Pan Chicken Pesto Orzo fresh, use airtight containers. Glass or plastic containers work well. Make sure the dish cools before sealing. Refrigerate leftovers within two hours. This helps keep food safe and tasty. The orzo will stay good for about three to four days in the fridge.
Reheating Instructions
When it’s time to enjoy leftovers, you have a few options. You can use a microwave or stovetop. If using the microwave, place the orzo in a bowl. Cover it with a damp paper towel. Heat in short bursts, stirring in between. This keeps the orzo from drying out. On the stovetop, heat gently over low heat. Add a splash of broth or water to keep it moist. Stir often to maintain the texture and flavor.
Freezing Options
You can freeze One-Pan Chicken Pesto Orzo for longer storage. Let it cool completely before freezing. Use a freezer-safe container or bag. Try to remove as much air as possible. This helps prevent freezer burn. The dish can last for up to three months. When you’re ready to eat, thaw it in the fridge overnight. Reheat on the stove with a little broth for best results. This keeps the orzo creamy and delicious.
FAQs
Can I Make This Recipe Ahead of Time?
Yes, you can prepare One-Pan Chicken Pesto Orzo in advance. Here are some meal prep tips:
– Cook and Cool: Make the dish and let it cool completely. This keeps the orzo from becoming mushy.
– Store in Containers: Divide into portions and place in airtight containers. This makes it easy to grab later.
– Refrigerate: You can store it in the fridge for up to three days.
– Reheat: When ready to eat, warm it up in a skillet or microwave. Add a splash of broth to keep it moist.
What Can I Serve with One-Pan Chicken Pesto Orzo?
Pair this dish with some tasty sides. Here are a few ideas:
– Garlic Bread: Crunchy and buttery, it complements the dish well.
– Garden Salad: A fresh salad adds a nice crunch. Use mixed greens, cucumbers, and a light vinaigrette.
– Roasted Vegetables: Carrots, zucchini, or bell peppers work great. They add color and flavor.
– Steamed Broccoli: This adds a healthy touch and pairs well with pesto.
How do I Make Homemade Pesto?
Making pesto at home is easy and fun. Here’s a basic recipe:
– Ingredients Needed:
– 2 cups fresh basil leaves
– 1/2 cup grated Parmesan cheese
– 1/2 cup extra virgin olive oil
– 1/3 cup pine nuts (or walnuts)
– 2 cloves garlic
– Salt to taste
– Instructions:
1. Combine basil, cheese, nuts, and garlic in a food processor.
2. Pulse until chopped.
3. While blending, slowly add olive oil until smooth.
4. Season with salt to taste.
5. Store in a jar with a layer of oil on top to keep it fresh.
This homemade pesto adds fresh flavor to your orzo dish. Enjoy the bright taste!
In this post, we covered an easy recipe for One-Pan Chicken Pesto Orzo. You learned about essential ingredients, step-by-step cooking methods, and tips to enhance flavor. Variations for different diets were shared, plus storage and reheating info.
You now have the tools to make a tasty meal. This recipe is flexible, so feel free to experiment. Enjoy your cooking journey, and delight in your delicious dis
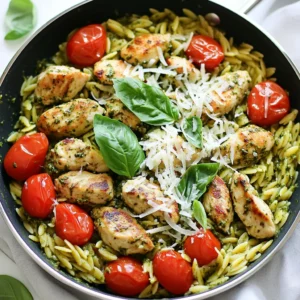
One-Pan Chicken Pesto Orzo
Ingredients
- 1 lb boneless, skinless chicken breasts, cut into bite-sized cubes
- 1 cup orzo pasta
- 2 cups low-sodium chicken broth
- 1 cup cherry tomatoes, halved
- 1 cup fresh baby spinach
- 1/2 cup store-bought or homemade pesto
- 2 tablespoons extra virgin olive oil
- 1 teaspoon garlic powder
- to taste salt and freshly ground black pepper
- 1/4 cup grated Parmesan cheese (optional)
- to garnish fresh basil leaves
Instructions
- In a large, deep skillet, warm the olive oil over medium-high heat. Once hot, add the bite-sized chicken pieces. Season with salt, black pepper, and garlic powder. Cook for approximately 5-7 minutes, or until the chicken is golden brown and cooked through, stirring occasionally for even cooking.
- After the chicken has browned, add the orzo pasta directly to the skillet. Stir well to ensure the orzo is evenly combined with the chicken and coated in the flavors.
- Pour the chicken broth over the mixture in the skillet. Increase the heat to bring everything to a gentle boil. Once boiling, reduce the heat to low, cover the skillet with a lid, and allow it to simmer for about 10 minutes. The orzo should absorb most of the liquid and become tender.
- After 10 minutes, uncover the skillet and gently stir in the halved cherry tomatoes, fresh baby spinach, and prepared pesto. Cook for an additional 2-3 minutes, stirring frequently, until the spinach wilts and everything is heated through.
- Remove the skillet from heat. If you like, sprinkle grated Parmesan cheese over the top for an extra layer of flavor before serving.
- For a fresh finish, garnish with torn basil leaves to enhance the aroma and presentation.
![- 2 large chicken breasts, cut into 1-inch cubes - 1 cup assorted bell peppers (red, yellow, green), chopped into 1-inch pieces - 1 medium red onion, cut into wedges - 1 medium zucchini, sliced into rounds - 1 tablespoon extra-virgin olive oil - 2 tablespoons of your favorite BBQ sauce - 1 tablespoon honey for a touch of sweetness - Sea salt and freshly cracked pepper to taste - 4 cups mixed salad greens (a blend of arugula, spinach, and romaine) - 1/2 cup cherry tomatoes, halved for a pop of color - 1/4 cup crumbled feta cheese, optional for a tangy kick - Fresh parsley, roughly chopped for a vibrant garnish - Cheese and Garnishes - Feta cheese adds a nice salty bite. - Chopped nuts can add a crunch. - Alternative Proteins - You can use shrimp or tofu instead of chicken. - Beef or pork works well too. - Additional Vegetables - Try adding cucumbers for extra freshness. - Avocado can give a creamy texture. Using fresh and colorful ingredients makes this BBQ chicken skewer salad a true feast for the eyes and the taste buds. The combination of marinated chicken and vibrant veggies creates a healthy and satisfying meal. For the full recipe, check out the detailed preparation steps. - Marinating the Chicken Start by cutting the chicken breasts into 1-inch cubes. In a mixing bowl, add the chicken, extra-virgin olive oil, BBQ sauce, honey, sea salt, and cracked pepper. Mix everything well, so each piece gets coated. Cover the bowl with plastic wrap. Place it in the fridge for at least 30 minutes. This time allows the flavors to blend well. - Assembling Skewers After marinating, it’s time to get skewering! Take your marinated chicken and thread it onto skewers. Alternate the chicken cubes with colorful bell peppers, red onion wedges, and zucchini rounds. This not only adds flavor but also makes the skewers look great. - Preheating the Grill While you prepare the skewers, preheat your grill or grill pan to medium-high heat. A hot grill will help achieve nice grill marks and a great char on the chicken. - Cooking the Skewers Place the skewers on the grill. Cook them for about 10-12 minutes. Turn them occasionally to ensure even cooking. The chicken should reach an internal temperature of 165°F. For added flavor, brush some BBQ sauce on the skewers in the last few minutes of cooking. - Combining Salad Ingredients In a large bowl, toss together the mixed salad greens, halved cherry tomatoes, and crumbled feta cheese if you want that tangy kick. The bright colors will make the salad look fresh and inviting. - Plating and Presentation Once the skewers are grilled, let them rest for a minute. Arrange the skewers on top of the salad. Garnish with chopped parsley for a burst of color. If you like, drizzle some extra BBQ sauce over the top for added flavor. This BBQ Chicken Skewer Salad is not just tasty; it looks amazing too! For the complete recipe, check [Full Recipe]. Achieving Perfect Grill Marks To get those perfect grill marks, heat your grill well. Use medium-high heat for the best results. Make sure your grill grates are clean and oiled. Place the skewers at an angle on the grill. After a few minutes, rotate them for those classic crosshatch marks. This not only looks great but adds flavor from the char. Avoiding Dry Chicken To keep your chicken juicy, don’t overcook it. Aim for a cooking time of 10 to 12 minutes. Always check the internal temperature. It should reach 165°F for safety. Marinating the chicken helps lock in moisture. The honey in the marinade adds sweetness and keeps it tender. Pairing with Side Dishes This BBQ chicken skewer salad pairs well with many sides. Try cornbread for a sweet touch or baked beans for heartiness. A light coleslaw adds crunch and balances the meal. You can also serve it with grilled corn on the cob. These sides enhance the flavors of your dish. Creative Ways to Serve For a fun twist, serve the salad in a large bowl. Let guests build their own plates with skewers on top. You could also use small plates for individual servings. Arrange skewers and salad artfully. This makes your meal feel special and inviting. Using Different BBQ Sauces Experiment with various BBQ sauces to find your favorite. A tangy vinegar-based sauce adds zest. A sweet and smoky sauce brings comfort. You can even try spicy sauces for a kick. Each sauce changes the skewer's flavor profile, making it unique. Adding Herbs and Spices Fresh herbs and spices can elevate your salad. Try adding chopped cilantro or basil for brightness. A sprinkle of smoked paprika or cumin gives depth. You can mix in garlic powder or onion powder in the marinade too. This simple addition makes a big difference in taste. For more detailed instructions, check out the Full Recipe. {{image_4}} Gluten-Free Options You can easily make this salad gluten-free. Use gluten-free BBQ sauce to ensure no gluten sneaks in. Check labels on sauces and dressings to be safe. Vegetarian Alternatives For a tasty vegetarian twist, swap chicken for firm tofu or tempeh. Marinate the tofu in the same BBQ sauce for great flavor. Add extra veggies like mushrooms or eggplant for more texture. Spicy BBQ Chicken Skewers Want a kick? Mix in some cayenne pepper or chili powder in your BBQ sauce. You can also serve with a spicy dipping sauce. This will spice up your salad and give it a fun twist. Asian-Inspired Salad Version Try an Asian spin! Replace BBQ sauce with teriyaki sauce for a new flavor. Add sesame oil and some sliced green onions for extra zing. Serve with a sprinkle of sesame seeds on top for crunch. Summer Veggie Additions Summer is perfect for fresh veggies. Add corn, cherry tomatoes, or cucumbers to your salad. These bright flavors make your dish feel light and refreshing. Fall-inspired Ingredients As the weather cools, swap in autumn veggies like roasted butternut squash or Brussels sprouts. Toss in some dried cranberries or walnuts for a seasonal touch. These changes will warm up your meal perfectly. For the full recipe, check out BBQ Chicken Skewer Salad with a Twist. - Best Practices for Refrigeration After making your BBQ chicken skewer salad, let it cool to room temperature. Place any leftovers in an airtight container. Store it in the fridge. This keeps your meal fresh and safe to eat for later. Enjoy your salad within three days for the best taste. - Freezing Chicken Skewers If you have leftover chicken skewers, you can freeze them. Wrap each skewer tightly in plastic wrap. Then, place them in a freezer bag. Be sure to remove as much air as possible before sealing. This helps prevent freezer burn. You can freeze them for up to three months. - Best Methods for Reheating To reheat your chicken skewers, the oven works best. Preheat your oven to 350°F. Place the skewers on a baking sheet and cover them with foil. Heat for about 10-15 minutes. You can also use a microwave. Heat on a microwave-safe plate for 1-2 minutes, checking often. - Tips to Maintain Flavor If you want to keep the flavor strong, brush the skewers with a bit of BBQ sauce before reheating. This adds moisture and taste. Avoid reheating the salad, as fresh greens lose their crunch. - Recommended Storage Timeframes Your BBQ chicken skewer salad lasts about three days in the fridge. Chicken skewers can stay fresh in the freezer for up to three months. Always check for freshness before eating. - Signs of Spoilage Look for changes in color or smell. If the chicken looks dull or has an off odor, discard it. Wilting greens or slimy texture are also signs your salad is no longer good. Always trust your senses when it comes to food safety. - Alternative Proteins: You can use shrimp, beef, or pork. These meats add unique flavors and textures. Cut them into similar-sized pieces to ensure even cooking. - Plant-Based Options: Try tofu or tempeh for a vegan twist. Firm tofu holds up well on skewers. Marinate it just like chicken to soak up all the flavors. - Prepping Ingredients in Advance: Yes! You can chop the veggies and marinate the chicken a day before. Just keep them in the fridge until you’re ready to grill. - Storing Marinated Chicken: Store the marinated chicken in an airtight container. This keeps it fresh and ready for grilling later. - Popular BBQ Sauce Brands: Look for brands like Sweet Baby Ray’s or Stubbs. They offer bold flavors that work well for grilling. - Homemade BBQ Sauce Recommendations: Making your own is easy! Combine ketchup, brown sugar, and vinegar for a tangy taste. Add spices like paprika and garlic for extra flavor. This blog post covered key steps for making delicious chicken skewers and salad. We explored main and optional ingredients, ensuring you have choices for every taste. The grilling process was detailed, alongside tips for perfecting flavors. Variations and storage tips help you adapt and maintain your dish. Cooking can be fun and easy. With practice, you can master this recipe and impress others. Enjoy your tasty creations and share them with friends!](https://fastmealmate.com/wp-content/uploads/2025/06/4abc5258-ee82-48d5-ae8b-570509c2b72d-768x768.webp)