Easy Chicken Taco Soup Flavorful Weeknight Delight

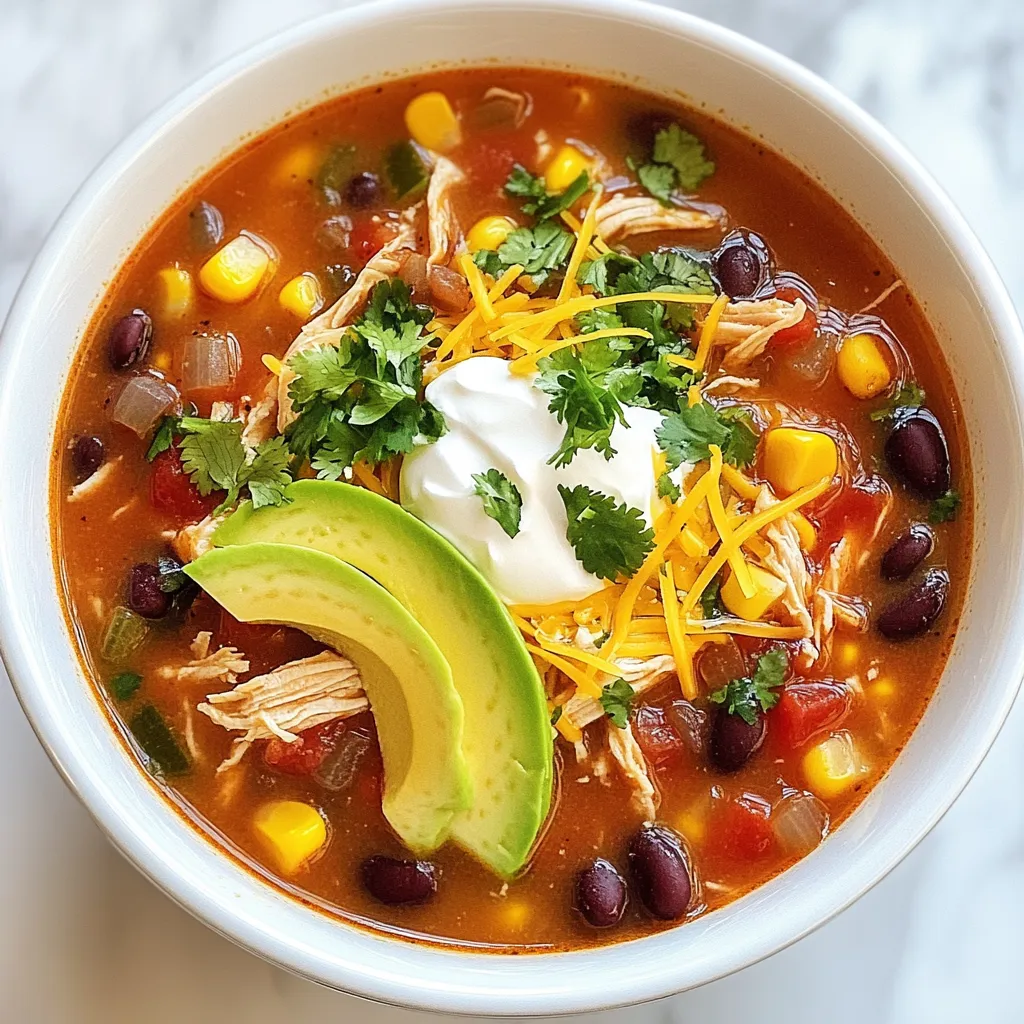
Looking for a quick and tasty meal for busy weeknights? My Easy Chicken Taco Soup is just the answer! This flavorful delight is packed with chicken, beans, and fresh veggies, making it a hearty dish everyone will love. In this guide, I’ll walk you through simple steps, tasty variations, and clever storage tips. Let’s make dinnertime a breeze and fill your kitchen with mouthwatering aromas!
Why I Love This Recipe
- Quick and Easy: This chicken taco soup can be prepared in just 40 minutes, making it a perfect weeknight meal.
- Nutritious Ingredients: Loaded with beans, corn, and chicken, this soup is a hearty, healthy option packed with protein and fiber.
- Customizable Toppings: Everyone can personalize their bowl with toppings like avocado, cheese, and sour cream, making it a fun dining experience.
- Comfort Food: This warm, flavorful soup is perfect for cozy nights, providing both comfort and satisfaction in every bite.
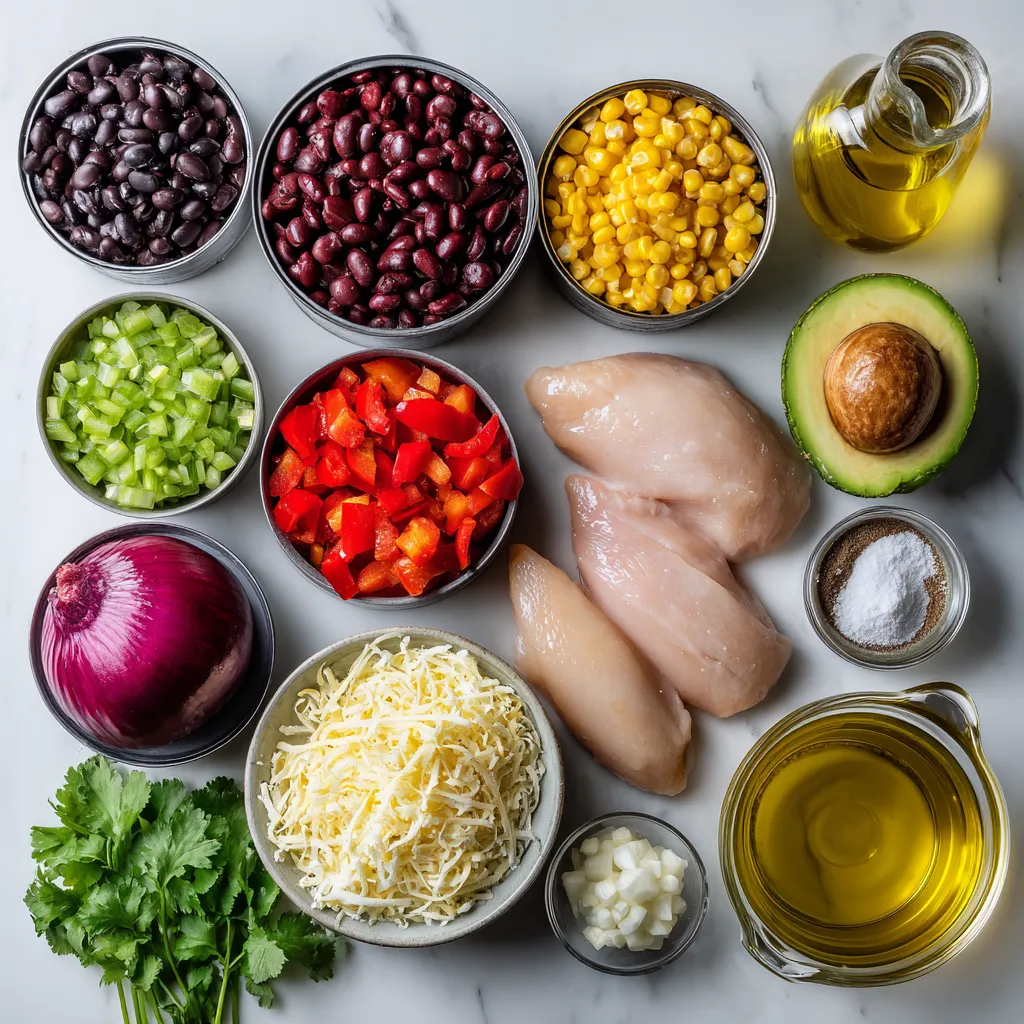
Ingredients
Main Ingredients
– 1 pound boneless, skinless chicken breasts
– 1 can (15 oz) black beans, rinsed and drained
– 1 can (15 oz) kidney beans, rinsed and drained
– 1 can (15 oz) corn, drained
– 1 can (14.5 oz) diced tomatoes with green chilies
You need chicken breasts for a rich base. Beans add protein and fiber. Corn gives a sweet crunch, while tomatoes bring acidity and flavor.
Seasonings and Broth
– 1 packet taco seasoning (about 1 oz)
– 4 cups chicken broth
– 1 small onion, finely diced
– 2 cloves garlic, minced
– 1 red bell pepper, diced
The taco seasoning gives the soup its signature taste. Chicken broth adds depth and warmth. Onions, garlic, and bell peppers add layers of flavor.
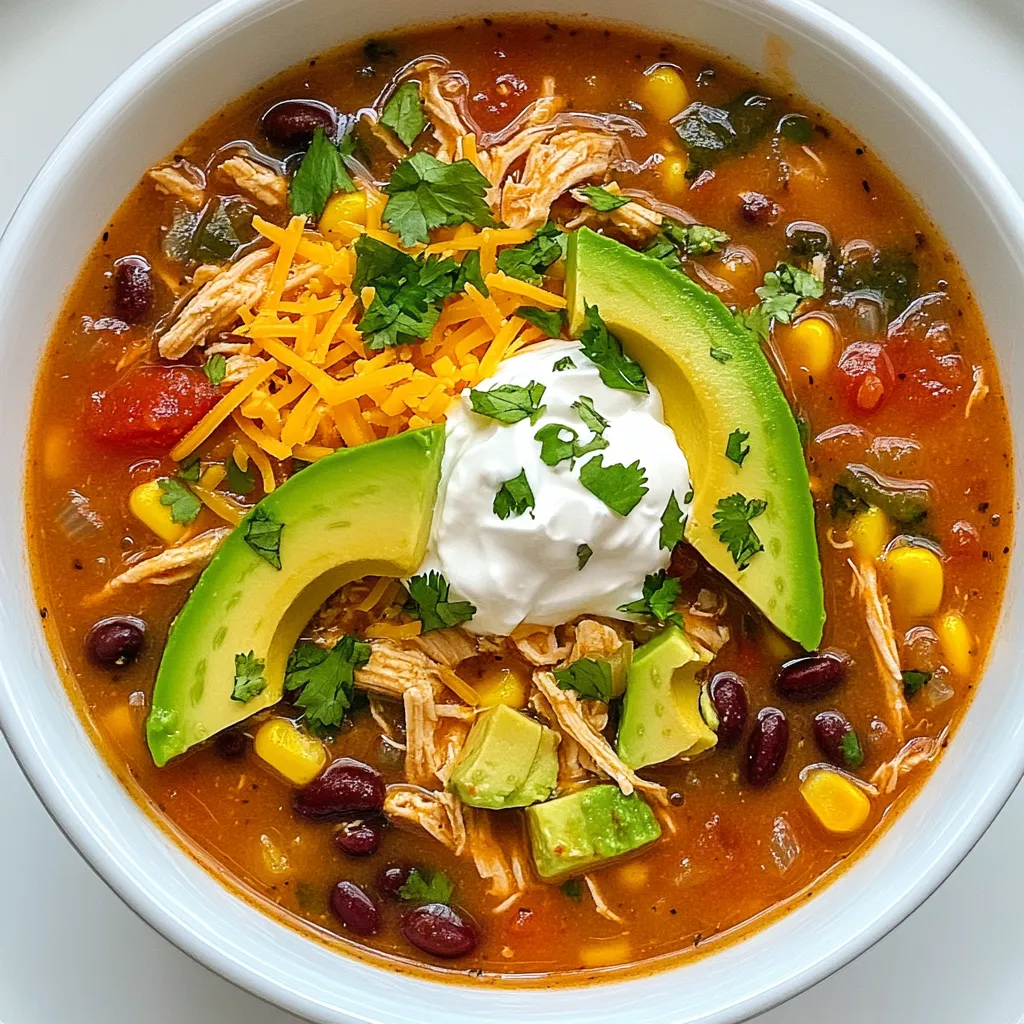
Optional Toppings
– Diced avocado
– Shredded cheese
– Sour cream
– Fresh cilantro
– Tortilla chips
Toppings let you customize each bowl. Avocado adds creaminess, cheese gives richness, and sour cream offers tang. Fresh cilantro brightens the dish, while chips provide crunch.

Step-by-Step Instructions
Preparing the Base
1. Cook the onions and bell pepper: Start with a large pot. Heat one tablespoon of olive oil over medium heat. Add one small, finely diced onion and one diced red bell pepper. Cook for about five minutes. Stir often until the onions turn clear and the peppers soften.
2. Adding garlic for flavor enhancement: Mince two cloves of garlic. Add the garlic to the pot. Sauté for one more minute. You want the garlic to smell good but not burn.
Combining Ingredients
1. Incorporate taco seasoning: Grab one packet of taco seasoning. Sprinkle it over the cooked vegetables. Stir well to coat the veggies. This helps release all those great flavors.
2. Mix in chicken and canned items: Add one pound of boneless, skinless chicken breasts. Then, mix in one can of rinsed black beans, one can of rinsed kidney beans, one can of drained corn, and one can of diced tomatoes with green chilies. Pour in four cups of chicken broth. Stir everything well to blend the flavors.
Cooking Process
1. Simmering the soup to cook chicken: Turn up the heat to bring the soup to a gentle boil. Once it starts bubbling, lower the heat. Cover the pot and let it simmer for 20 to 25 minutes. This cooks the chicken until it’s tender.
2. Shredding chicken and final adjustments: Carefully take the cooked chicken out of the pot. Place it on a cutting board. Use two forks to shred it into small pieces. Return the shredded chicken to the pot and stir well. Taste the soup. Add salt and pepper as needed. If you like it spicy, add more taco seasoning or some crushed red pepper flakes.
Tips & Tricks
Perfecting the Flavor
To make the best chicken taco soup, adjust the seasoning to fit your taste. Start with the recommended taco seasoning, but feel free to add more if you like it spicier. If you want extra heat, add crushed red pepper flakes or fresh jalapeños. These small changes can transform your soup into a dish that excites your palate.
Cooking Methods
You can easily adapt this recipe to a pressure cooker or slow cooker. For a pressure cooker, cook on high for about 10 minutes. If using a slow cooker, let it cook on low for 6-8 hours. Both methods will give you tender chicken and rich flavors. To make this soup in advance, prepare it, then cool it completely. Store it in the fridge for up to three days or freeze it for later.
Serving Suggestions
The right toppings can elevate your chicken taco soup. Diced avocado adds creaminess, while shredded cheese gives a rich flavor. A dollop of sour cream adds a nice tang. Fresh cilantro brightens the taste and looks great on top. Pair the soup with crunchy tortilla chips or a fresh salad for a well-rounded meal. Enjoy customizing each bowl to your liking!
Pro Tips
- Use Bone-In Chicken: For a richer flavor, consider using bone-in chicken thighs instead of breasts. They add depth to the soup and remain tender when cooked.
- Customize Your Spice Level: If you prefer a spicier soup, add diced jalapeños or a few dashes of hot sauce during the cooking process.
- Make It Ahead: This soup tastes even better the next day! Store leftovers in the fridge for easy reheating and enjoy the enhanced flavors.
- Add Fresh Herbs: Enhance the flavor by adding fresh herbs like cilantro or parsley just before serving for a burst of freshness.

Variations
Ingredient Substitutions
You can easily switch up the meat in this soup. Using ground chicken or turkey works well. These options cook faster and add a different texture. If you want a meat-free meal, try plant-based proteins. Options like lentils or chickpeas provide great flavor. They also add protein and fiber.
Flavor Additions
Experiment with different spice blends to enhance the taste. Smoked paprika or cumin can add depth. Feel free to add more vegetables too! Zucchini and corn pair nicely with the existing ingredients. You can also toss in bell peppers of different colors for a vibrant look.
Customizing the Soup
For a creamy texture, add cheese or cream. Cream cheese stirred in at the end gives a rich flavor. You can also make the soup more like chili. Add extra beans and reduce the broth. This change creates a hearty meal perfect for cooler nights.
Storage Info
Refrigeration
Store your chicken taco soup in an airtight container. This keeps it fresh and tasty. Leftovers can last in the fridge for about three to four days. Make sure to cool it down before putting it away.
Freezing
For long-term storage, freezing the soup is a great option. Use freezer-safe bags or containers. Remove as much air as you can to prevent freezer burn. Your soup can last in the freezer for up to three months. When ready to eat, thaw it in the fridge overnight. Reheat it on the stove or microwave until hot. This helps keep the flavor and texture nice.
Meal Prep Suggestions
Batch cooking this soup is smart for busy nights. Make a big pot and save some for later. Portion it into single servings for quick meals. You can easily grab a container from the fridge or freezer. This makes weeknight dinners a breeze and keeps meals fun and varied.
FAQs
How long does chicken taco soup last?
Chicken taco soup lasts about 3 to 4 days in the fridge. Store it in an airtight container. Make sure to cool it down before sealing. If you want it to last longer, freeze it. In the freezer, it can last up to 3 months. Just remember to label the container with the date.
Can I use frozen chicken?
Yes, you can use frozen chicken for this soup. Just add the frozen chicken directly to the pot. Increase the cooking time to ensure it cooks fully. After cooking, shred the chicken just like you would with fresh chicken. This method is great for quick meals.
What can I serve with chicken taco soup?
You can serve chicken taco soup with various sides. Here are some tasty options:
– Tortilla chips for crunch
– A fresh green salad for balance
– Avocado slices for creaminess
– Cornbread for a filling side
– Mexican rice for added flavor
These sides will complement the flavors and make your meal even more enjoyable.
This chicken taco soup is simple and rewarding. You start with key ingredients like chicken, beans, and seasonings. Then, blend them perfectly and customize to your taste. Remember, you can swap ingredients or add heat to craft your ideal dish. Don’t forget about storage tips for long-lasting leftovers. Overall, this soup is versatile, easy, and perfect for meal prep or a cozy dinner. Enjoy your cooking journey and make this dish your ow

Flavorful Chicken Taco Soup
Ingredients
- 1 pound boneless, skinless chicken breasts
- 1 can black beans, rinsed and drained (15 oz)
- 1 can kidney beans, rinsed and drained (15 oz)
- 1 can corn, drained (15 oz)
- 1 can diced tomatoes with green chilies (14.5 oz)
- 1 packet taco seasoning (about 1 oz)
- 4 cups chicken broth
- 1 small onion, finely diced
- 2 cloves garlic, minced
- 1 red bell pepper, diced
- 1 tablespoon olive oil
- to taste salt and pepper
- as desired optional toppings: diced avocado, shredded cheese, sour cream, fresh cilantro, tortilla chips
Instructions
- In a large pot, heat the olive oil over medium heat. Add the finely diced onion and diced red bell pepper. Sauté for about 5 minutes, stirring occasionally, until the onions are translucent and the peppers are softened. Add the minced garlic and continue to sauté for an additional minute until the garlic is fragrant.
- Sprinkle the taco seasoning evenly over the sautéed vegetables. Stir well to ensure the spices coat the vegetables and release their flavors.
- Add the chicken breasts, rinsed black beans, rinsed kidney beans, drained corn, diced tomatoes with green chilies, and the chicken broth to the pot. Stir everything together to combine all ingredients thoroughly.
- Increase the heat to bring the mixture to a gentle boil. Once boiling, reduce the heat to low, cover the pot, and allow it to simmer for approximately 20-25 minutes, or until the chicken is fully cooked and tender.
- Carefully remove the cooked chicken from the pot and place it on a cutting board. Using two forks, shred the chicken into bite-sized pieces. Return the shredded chicken back to the pot, stirring well to mix it with the other ingredients.
- Taste the soup and season with salt and pepper according to your preference. For an extra kick, consider adding additional taco seasoning or a pinch of crushed red pepper flakes.
- Ladle the hot chicken taco soup into bowls. Allow each person to customize their servings with their favorite toppings, such as diced avocado, a sprinkle of shredded cheese, a dollop of sour cream, or fresh cilantro. Serve alongside crunchy tortilla chips for a delightful contrast in texture.


![- 2 slices of rustic sourdough bread - 1 cup cooked chicken, shredded - 1 cup marinara sauce - 1 cup shredded mozzarella cheese - ¼ cup freshly grated Parmesan cheese - 1 tablespoon extra virgin olive oil - 1 teaspoon garlic powder - 1 teaspoon dried Italian seasoning - Salt and pepper, to taste Gathering the right ingredients is key to making a great Lazy Chicken Parmesan Grilled Cheese. Start with rustic sourdough bread. This bread gives your sandwich a hearty base. Next, grab cooked chicken. Shredded rotisserie chicken is a fantastic choice. It adds flavor and saves time. For the sauce, you can use homemade or store-bought marinara. Either way, it brings rich taste. Now, mozzarella cheese is a must for that gooey, stretchy texture. The Parmesan cheese adds a nice sharp bite too. You will also need some simple seasonings. Extra virgin olive oil helps achieve that golden crust. Garlic powder brings out depth in flavor. Italian seasoning adds a nice herbal note. Finally, don’t forget salt and pepper to taste. With these ingredients, you'll create a delightful twist on a classic dish. For the full recipe, check out the [Full Recipe]. First, preheat your skillet over medium heat. This gets the skillet hot and ready. Next, add a tablespoon of olive oil. This will coat the bottom of the skillet. The oil helps keep the bread from sticking and adds flavor. In a mixing bowl, combine your shredded chicken and marinara sauce. You can use any chicken you like, but rotisserie chicken is fast and tasty. Then, add garlic powder, Italian seasoning, and a pinch of salt and pepper. Mix everything well. You want all the chicken to be coated in sauce and spices. Take one slice of the sourdough bread and place it in the hot skillet. Layer half of the shredded mozzarella cheese on top. Spoon the chicken mixture onto the cheese, spreading it evenly. Add the rest of the mozzarella cheese on top of the chicken. Finish with a sprinkle of grated Parmesan cheese. Place the second slice of sourdough on top to make a sandwich. Grill it for about 3-4 minutes. You want the bottom to be golden brown and the cheese to begin melting. Carefully flip the sandwich using a spatula. Grill the other side for another 3-4 minutes. You want both sides crispy and the cheese fully melted. Once done, take it out and slice it in half. Let it cool for a minute before serving. This helps the cheese set a bit. Enjoy your Lazy Chicken Parmesan Grilled Cheese! For more details, check out the Full Recipe. Using rotisserie chicken makes this recipe quick and easy. You can find it at most grocery stores. It saves time, as it is already cooked and seasoned. To shred chicken quickly, use two forks to pull it apart. This method works well and takes just minutes. You can also use your hands if the chicken is cool enough. For the best grilled cheese, choose rustic sourdough bread. It has a great texture and flavor. You can also try a hearty Italian bread or whole grain. To achieve a crispy crust, heat your skillet over medium heat. Make sure to coat the pan with olive oil evenly. This will help the bread brown nicely and not stick. To ensure the cheese melts perfectly, use a mix of mozzarella and Parmesan. The mozzarella adds stretch, while Parmesan adds a sharp flavor. Place a lid on the skillet to trap heat and help the cheese melt faster. This prevents the sandwich from getting soggy. Grill the sandwich until the bread is golden brown and the cheese is gooey. {{image_4}} You can easily boost the health of your Lazy Chicken Parmesan Grilled Cheese by adding veggies. Spinach is a great choice. It adds color and nutrients. Just toss in a handful of fresh spinach when you layer the chicken. Bell peppers work well too. Slice them thin, and add them with the chicken. They give a nice crunch and a pop of flavor. Other ingredients can add texture and taste. Try sun-dried tomatoes for a tangy bite. You can also add mushrooms for an earthy note. Each veggie brings its own special twist. Experiment with what you like best! If you love heat, spice up your sandwich! One easy way is to use spicy marinara sauce. It adds warmth and flavor. You can also add jalapeños for an extra kick. Slice them thin and layer them on top of the chicken. Using pepper jack cheese is another fun option. This cheese melts beautifully and has a nice heat. Mix it with mozzarella to keep things gooey and flavorful. Your taste buds will thank you! For those who need a gluten-free choice, there are great alternatives. Instead of sourdough, try gluten-free bread. Look for brands that are soft and hearty. They will hold up well when grilling. You can adjust the recipe easily. Ensure your marinara sauce is gluten-free too. Many brands offer this option. Always check the labels when shopping. This way, everyone can enjoy this delicious meal! For the full recipe, be sure to check the complete guide. To keep your Lazy Chicken Parmesan Grilled Cheese fresh, wrap it tightly in foil or plastic wrap. Place it in an airtight container. This method helps keep the flavors and moisture inside. You can store it in the fridge for up to three days. If you want to keep it longer, consider freezing it. It can last in the freezer for about one month. Just remember to let it cool completely before storing. Reheating your grilled cheese needs care. I recommend using a skillet or toaster oven for the best results. Heat the skillet over low to medium heat. Add a small amount of butter or oil to keep it crispy. Place the sandwich in the skillet and cover it with a lid. This helps the cheese melt without burning the bread. Heat for about 3-4 minutes on each side. If using a toaster oven, set it to 350°F (175°C). Bake for around 10-15 minutes until warm and crispy. Enjoy that delicious, gooey goodness just like the first time! Yes, you can prepare this dish in advance. Here are some tips for prepping. - Cook the chicken: Shred and mix it with marinara sauce. Store it in the fridge. - Slice the bread: Cut the sourdough and keep it in a sealed bag. - Grate cheese: Pre-grate the mozzarella and Parmesan. Store these in airtight containers. - Assemble before cooking: You can layer the sandwich without grilling. Wrap it tightly in plastic wrap. Making these steps ahead helps save time. Just grill when you are ready to eat! Yes, you can freeze Lazy Chicken Parmesan Grilled Cheese. Here are the best practices. - Assemble without grilling: Build the sandwich fully, but do not cook it. - Wrap tightly: Use plastic wrap or aluminum foil to cover each sandwich. - Store in a freezer bag: Label with the date, then place in the freezer. When you want to eat it, thaw in the fridge overnight. Reheat in a skillet to keep it crispy. Pairing sides can enhance your meal. Here are some tasty suggestions. - Salad: A fresh mixed greens salad adds crunch. - Soup: Tomato or basil soup complements the sandwich well. - Fries: Crispy fries or sweet potato fries are a fun choice. - Veggies: Roasted or steamed veggies give a healthy balance. These sides will make your meal even more delightful. Enjoy your Lazy Chicken Parmesan Grilled Cheese! You learned how to make Lazy Chicken Parmesan Grilled Cheese. This dish is tasty and easy. We covered main ingredients, cooking steps, and useful tips. I shared fun variations to fit your taste. Now, you can store leftovers and reheat them without losing flavor. Enjoy your cooking and make this sandwich again. It’s a great meal for busy days or fun gatherings. Happy grilling!](https://fastmealmate.com/wp-content/uploads/2025/06/c9cbfd60-7ee3-4aef-9602-f6c93f96b3d1-768x768.webp)

![- 1 lb lobster tails, halved lengthwise - 1 lb fresh sea scallops - 4 tablespoons unsalted butter, divided - 4 cloves garlic, finely minced - 1 lemon, juiced (about 2 tablespoons) - 2 tablespoons fresh parsley, finely chopped - Salt and freshly ground black pepper, to taste - Lemon wedges, for serving When I prepare Easy Garlic Butter Lobster Scallops, I love how fresh ingredients shine. The lobster tails and scallops are the stars of this dish. Using fresh seafood makes all the difference. Each bite bursts with flavor. Butter brings richness to the dish. I use unsalted butter to control the saltiness. Garlic adds a lovely aroma and taste. It’s important to finely mince the garlic. This helps to spread its flavor evenly. I always squeeze fresh lemon juice for brightness. The juice balances the rich butter. Chopped parsley adds a nice touch. It gives the dish a pop of color and freshness. Don’t forget about seasoning! Salt and black pepper enhance the seafood’s natural flavor. I like to season both the lobster and scallops well before cooking. Lastly, lemon wedges are a must. They add a fresh hit of citrus when served. I find that a squeeze of lemon elevates the whole meal. For the full recipe, check out the details above. Enjoy creating this flavorful delight! First, take the lobster tails and scallops out of the package. Gently pat them dry with a paper towel. This step is key for a nice sear later. Next, season them with salt and black pepper. Make sure to cover all sides for even flavor. Now, let’s get cooking! In a large skillet, melt 2 tablespoons of unsalted butter over medium heat. Once the butter is melted and bubbly, add the minced garlic. Sauté the garlic for about one minute until it is fragrant. Be careful not to let it burn. Next, add the lobster tails to the skillet. Place them cut-side down first. Sear the tails for about 3-4 minutes until they turn golden brown. Then, carefully flip them over and cook for another 2-3 minutes. They should look opaque and fully cooked. Remove them and set aside. Now, it’s time for the scallops. Add them to the same skillet, making sure not to overcrowd them. Sear each side for about 2-3 minutes until they get a beautiful golden crust. Once done, remove the scallops and place them with the lobster. Return the cooked lobster to the skillet. Squeeze in the fresh lemon juice and sprinkle the chopped parsley over everything. Gently toss the lobster and scallops in the garlic butter sauce. This will help all the flavors blend nicely. Finally, serve the lobster and scallops on a large platter. Drizzle any remaining garlic butter sauce over the seafood. Garnish with more parsley and add lemon wedges on the side. For the full recipe, check the detailed instructions above. Enjoy your tasty dish! To make your lobster and scallops shine, start with good searing. Searing gives seafood a nice crust. Heat your skillet until it's hot. Add butter and let it melt before placing the seafood in. This helps lock in flavors and moisture. Drying your seafood before cooking is very important. Use paper towels to pat the lobster tails and scallops dry. Removing excess moisture helps achieve that perfect golden sear. Wet seafood will steam instead of sear. Adding herbs and spices can elevate your dish. Fresh thyme or basil can add great flavor. A pinch of red pepper flakes can give it a nice kick. Don't be afraid to experiment with flavors you love. For sauces, consider making a light citrus sauce. A mix of lemon juice and olive oil works well. You can also add a splash of white wine for depth. These additions can enhance the overall taste of your seafood. Presentation matters when serving seafood. Arrange the lobster tails and scallops on a large platter. Place them in a way that looks inviting. You can stack the scallops for a layered look. Garnishing makes your dish pop. Use chopped parsley for a fresh touch. Lemon wedges add color and a burst of flavor. A well-presented dish makes a great impression, so take your time with this step. Want to try this delicious dish? Check out the [Full Recipe]. {{image_4}} If you cannot find lobster or scallops, you have options. You can use shrimp instead of lobster. Shrimp cooks fast and adds great flavor. For scallops, try using firm fish like cod or halibut. Both will work well in this dish. For dairy-free butter, consider using olive oil or coconut oil. Both options will give a nice taste. You can also find plant-based butter in stores. Just make sure it melts well for your sauce. You can cook your seafood in different ways. Grilling is a fun option. It gives a smoky flavor that pairs well with garlic. Just brush the lobster and scallops with butter before grilling. Sautéing is great for a quick meal. It lets the garlic and butter shine through. Broiling is another method to try. It cooks the seafood from above. This method creates a crispy top while keeping the inside juicy. You will get a different flavor profile that is equally delicious. For side dishes, consider a fresh salad or garlic bread. A light pasta with lemon pairs well, too. These sides will balance the rich flavors of the seafood. As for drinks, a crisp white wine like Sauvignon Blanc is perfect. It cuts through the richness of the butter. If you prefer non-alcoholic drinks, try sparkling water with lemon. It refreshes the palate nicely. For the full recipe, check the Easy Garlic Butter Lobster Scallops 🦞🧄 section. To keep your Easy Garlic Butter Lobster Scallops fresh, place them in an airtight container. This helps avoid any unwanted smells in your fridge. Make sure to refrigerate them within two hours of cooking. They can last up to three days in the fridge. If you notice any off smell or discoloration, it's best to toss them out. When you want to enjoy your leftovers, the best way to reheat is on the stove. Use low heat to warm them gently. This keeps the seafood tender. You can also use the microwave, but do it in short bursts to avoid overcooking. Cover the dish with a damp paper towel to keep moisture in. Remember, seafood can dry out quickly. Yes, you can freeze lobster scallops! However, freezing may change their texture. To freeze, place them in a freezer-safe bag or container. Remove as much air as possible before sealing. They can stay frozen for up to three months. When you're ready to use them, thaw in the fridge overnight. Avoid thawing at room temperature to keep them safe. If you're looking for the full recipe, check out the Easy Garlic Butter Lobster Scallops recipe above! You can tell when scallops are done by their color and texture. They should be opaque and firm. A golden crust on the outside shows they are well-seared. Avoid cooking them too long. Overcooked scallops become rubbery and tough. Common mistakes include overcrowding the pan and not drying them well. Always dry scallops with paper towels. This helps them sear nicely and not steam. Yes, you can use frozen lobster tails and scallops. Just make sure to choose high-quality seafood. Look for ones that are flash-frozen for best taste. To thaw, place them in the fridge overnight. If you're in a hurry, seal them in a bag and submerge in cold water for about 30 minutes. Cook them right after thawing for the best flavor. Pair your dish with light sides. A fresh salad with lemon vinaigrette works well. Roasted asparagus or green beans add great color and flavor. For a complete meal, serve with garlic bread and a glass of white wine. This combination enhances the rich flavors of the lobster and scallops. You can find the full recipe for Easy Garlic Butter Lobster Scallops and create a delightful feast! This blog post highlighted key ingredients for an easy garlic butter lobster and scallops dish. I walked you through preparation, cooking, tips for perfect seafood, and variations to keep meals exciting. You now have practical storage info and answers to common questions. No matter how you serve this dish, it promises flavor. Enjoy crafting a meal that impresses everyone at your table. Happy cooking!](https://fastmealmate.com/wp-content/uploads/2025/06/dfec37c8-f7d2-4a99-9114-2c33cea5f0b3-768x768.webp)
