
Creamy Garlic Tuscan Chicken Flavorful Dinner Delight


Looking for a comforting meal that impresses? My Creamy Garlic Tuscan Chicken is the answer! This dish features juicy chicken, rich cream, and vibrant veggies, delivering a burst of flavor in every bite. I’ll guide you step-by-step through the cooking process, so even beginners can enjoy this delightful dinner. Ready to create a dish the whole family will love? Let’s dive into the ingredients and get cooking!
Why I Love This Recipe
- Delicious Flavor Combination: This creamy garlic Tuscan chicken is a perfect blend of savory garlic, fresh spinach, and juicy tomatoes, creating a mouthwatering dish that’s hard to resist.
- Quick and Easy: With a prep time of only 15 minutes, this recipe is ideal for busy weeknights, making it easy to whip up a satisfying meal in no time.
- Perfect for Meal Prep: This dish keeps well in the fridge, making it a great option for meal prep. You can enjoy it throughout the week without losing flavor.
- Impressive Presentation: Serve this dish with vibrant colors and garnishes, making it not only delicious but also visually appealing for family gatherings or dinner parties.
Ingredients
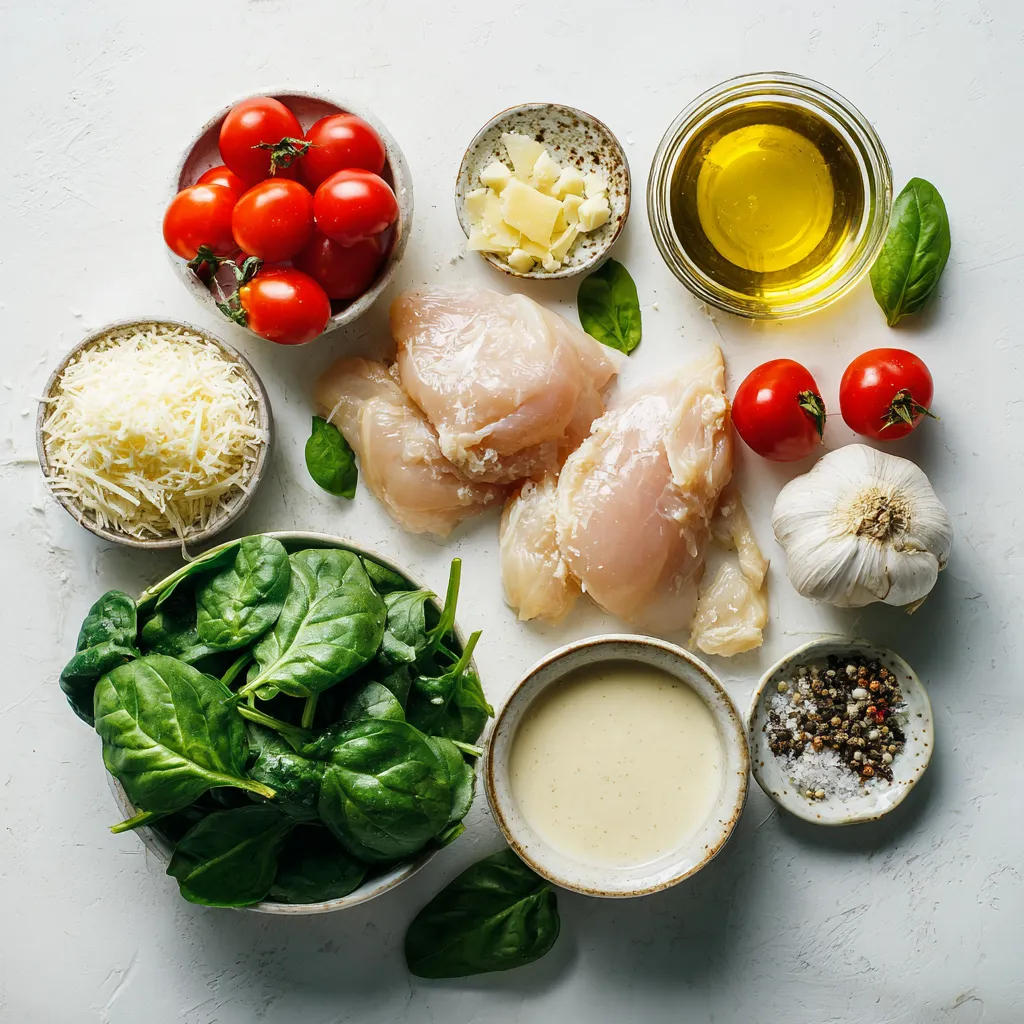
Let’s dive into the ingredients for this creamy garlic Tuscan chicken. Each item plays a key role in building the dish’s rich flavors. Here’s what you need:
– 4 boneless, skinless chicken breasts
– 2 tablespoons olive oil
– 4 cloves garlic, minced
– 1 cup heavy cream
– 1 cup cherry tomatoes, halved
– 2 cups fresh spinach
– 1 teaspoon Italian seasoning
– Salt and pepper to taste
– Grated Parmesan cheese, for garnish
– Fresh basil leaves, for garnish
This mix of ingredients creates a delightful meal. The chicken breasts provide a nice protein base. Olive oil adds richness, while garlic gives a strong flavor. Heavy cream makes the sauce smooth and creamy.
Cherry tomatoes add a burst of sweetness. Fresh spinach brings color and nutrition. Italian seasoning ties it all together with herbs. Salt and pepper enhance every bite. Parmesan cheese on top adds a savory finish, and fresh basil gives a bright touch.
Remember, the quality of each ingredient matters. Fresh items will give the best taste. Use good olive oil and fresh garlic for the best results. Enjoy gathering these ingredients, as they set the stage for a wonderful meal.
Step-by-Step Instructions
Preparing the Chicken
– Seasoning Tips: Start by seasoning both sides of each chicken breast. Use salt, pepper, and Italian seasoning. This mix gives a great flavor to the chicken.
– Searing for Flavor: Next, heat olive oil in a skillet over medium-high heat. Once it shimmers, add the chicken. Sear each side for 5-7 minutes until golden brown. Ensure the chicken reaches 165°F. This step locks in the juices and adds a nice crust.
Sautéing the Garlic
– Importance of Garlic Timing: After cooking the chicken, lower the heat to medium. Add minced garlic to the same skillet. Stir it for about a minute until fragrant. Watch it closely; burnt garlic tastes bitter and ruins the sauce.
Making the Cream Sauce
– Thickening Techniques: Pour in the heavy cream gradually while stirring. Increase heat slightly and let it simmer for 2-3 minutes. This helps the sauce thicken nicely and blend well with the garlic flavor.
Adding Vegetables
– Cooking Tips for Spinach and Tomatoes: Add halved cherry tomatoes and fresh spinach to the skillet. Stir them into the sauce and cook for 3-4 minutes. The spinach wilts down, and the tomatoes soften, adding a burst of flavor to the dish.
Combining Everything
– Ensuring Chicken is Coated: Place the seared chicken back into the skillet. Nestle each piece into the creamy sauce. Let it warm for 2-3 minutes. This step ensures the chicken is covered in the rich sauce.
Garnishing and Serving
– Presentation Tips: Serve the creamy Tuscan chicken on plates. Top it with grated Parmesan cheese and fresh basil leaves. For an elegant touch, place the chicken on a bed of sautéed spinach and tomatoes. Drizzle some extra sauce over the top for added flair.
Tips & Tricks
Cooking Chicken Perfectly
– Temperature Checks: Always check the internal temperature of your chicken. It should reach 165°F to ensure it’s safe to eat. Use a meat thermometer for accuracy. This step is key to juicy chicken.
– Searing Techniques: Start with medium-high heat to sear your chicken. This gives it a nice golden crust. Avoid overcrowding the pan, as it can lower the heat. Sear for 5-7 minutes on each side. This locks in flavor and moisture.
Enhancing Cream Sauce
– Flavor Boosters: To elevate your cream sauce, add a pinch of nutmeg or a squeeze of lemon juice. These ingredients add depth and brightness. You can also mix in some crushed red pepper flakes for a little heat.
Serving Suggestions
– Ideal Side Dishes: Serve your creamy garlic Tuscan chicken with garlic bread or a fresh salad. Roasted vegetables or a creamy polenta also pair well. These sides complement the rich sauce and provide a balanced meal.
Pro Tips
- Use Fresh Ingredients: Fresh spinach and ripe cherry tomatoes enhance the flavor and brightness of the dish. Whenever possible, opt for seasonal produce for the best results.
- Control the Heat: When sautéing garlic, keep the heat medium to avoid burning. Burnt garlic can impart a bitter taste to your sauce.
- Customize Your Sauce: Feel free to add other vegetables like bell peppers or mushrooms to the sauce for added texture and flavor. You can also substitute the heavy cream with a lighter option if desired.
- Rest the Chicken: Let the chicken rest for a few minutes after cooking before slicing. This helps retain its juices and ensures a more tender bite.

Variations
Different Proteins
You can switch the chicken for many other proteins. Try using shrimp or salmon. Both options cook quickly and pair well with the creamy sauce. You can also use pork chops for a hearty meal. Just adjust the cooking time to ensure your protein is cooked through.
Adding More Veggies
Adding veggies boosts flavor and nutrition. I suggest using bell peppers for sweetness or zucchini for a fresh taste. Broccoli or asparagus also work well, adding crunch and color. Don’t be shy! Toss in whatever you love to eat.
Sauces and Seasoning Adjustments
If you want to skip heavy cream, use alternatives. Coconut milk gives a sweet twist, while Greek yogurt adds tang. You can also use low-fat milk for a lighter dish. For a kick, add red pepper flakes or a splash of lemon juice. These options keep the dish exciting!
Storage Info
Storing Leftovers
To keep your creamy garlic Tuscan chicken fresh, store it in the fridge. Place it in an airtight container. It will last for about 3 to 4 days. Make sure to let it cool before sealing. This helps prevent condensation that can make the chicken soggy.
Reheating Instructions
When you’re ready to enjoy leftovers, the best way to reheat is on the stove. Place the chicken in a skillet over low heat. Add a splash of cream or broth to keep it moist. Heat it gently until warm. You can also use the microwave, but be careful not to overcook it.
Freezing Tips
If you want to save some for later, freezing is a great option. First, let the chicken cool completely. Then, place it in a freezer-safe bag or container. Remove as much air as possible. It will keep well for up to 3 months. To thaw, move it to the fridge overnight. Reheat as mentioned above for best results.
FAQs
How do I get my chicken tender and juicy?
To make chicken tender and juicy, start with fresh, high-quality chicken breasts. Here are some key tips:
– Brine the Chicken: Soak your chicken in a saltwater solution for at least 30 minutes. This helps keep the meat moist.
– Season Generously: Use salt and pepper along with herbs like Italian seasoning for extra flavor.
– Cook at the Right Temperature: Sear the chicken over medium-high heat until golden brown. Ensure the internal temperature reaches 165°F to keep it juicy.
– Rest the Chicken: Let the chicken rest for a few minutes after cooking. This lets the juices settle, making the meat more tender.
Can I make this dish ahead of time?
Yes, you can prepare this dish ahead of time. Here’s how:
– Cook the Chicken: Follow the recipe but stop before adding the cream sauce.
– Cool and Store: Place the chicken in an airtight container once cooled. Store it in the fridge for up to 2 days.
– Reheat with Sauce: When you are ready to eat, reheat the chicken in a skillet. Add the cream sauce and veggies to warm them through.
What can I serve with Creamy Garlic Tuscan Chicken?
Pair this dish with delicious sides to complete your meal. Here are some ideas:
– Garlic Bread: Perfect for soaking up the creamy sauce.
– Steamed Vegetables: Broccoli or green beans add a nice crunch.
– Pasta: Serve over fettuccine or penne for a hearty option.
– Salad: A fresh garden salad brightens the plate and balances the meal.
Is it possible to make this recipe low-carb?
Yes, you can make low-carb versions of this dish. Consider these suggestions:
– Use Zoodles: Swap pasta for spiralized zucchini for a low-carb alternative.
– Substitute Cream: Use coconut cream or a low-carb cream alternative.
– Add More Veggies: Increase the spinach and add bell peppers or mushrooms for extra flavor without the carbs.
– Skip the Cheese: Omit or reduce the Parmesan cheese to lower the carb count further.
This recipe is simple and packed with flavor. You learned how to make creamy garlic Tuscan chicken using fresh ingredients. I shared tips for cooking chicken perfectly and enhancing the cream sauce. Remember, you can customize this dish with different proteins and veggies. Storing and reheating leftovers is easy and keeps your meal fresh. Experiment with side dishes to complete your meal. Enjoy cooking and making this delicious recipe your ow

Creamy Garlic Tuscan Chicken
Ingredients
- 4 pieces boneless, skinless chicken breasts
- 2 tablespoons olive oil
- 4 cloves garlic, minced
- 1 cup heavy cream
- 1 cup cherry tomatoes, halved
- 2 cups fresh spinach
- 1 teaspoon Italian seasoning
- to taste salt and pepper
- for garnish grated Parmesan cheese
- for garnish fresh basil leaves
Instructions
- Prepare the Chicken: Begin by seasoning both sides of each chicken breast generously with salt, pepper, and Italian seasoning to ensure a flavorful base.
- Sear the Chicken: Heat the olive oil in a large skillet over medium-high heat until shimmering. Carefully place the seasoned chicken breasts in the skillet. Sear them for about 5-7 minutes on each side, or until they are golden brown and fully cooked (internal temperature should reach 165°F). Once cooked, transfer the chicken to a plate and keep warm.
- Sauté the Garlic: In the same skillet, lower the heat to medium. Add the minced garlic to the pan, stirring constantly for about 1 minute, or until it becomes aromatic. Be cautious to avoid burning the garlic, as it can turn bitter.
- Make the Cream Sauce: Gradually pour in the heavy cream while stirring to incorporate it with the garlic. Increase the heat slightly and let the mixture simmer gently for about 2-3 minutes, allowing it to thicken slightly.
- Add Vegetables: Introduce the halved cherry tomatoes and fresh spinach to the skillet. Stir them into the sauce and cook for an additional 3-4 minutes, or until the spinach wilts and the tomatoes soften, releasing their juices into the sauce.
- Combine Everything: Carefully place the seared chicken back into the skillet, nestling each piece into the creamy sauce. Allow the chicken to warm through for another 2-3 minutes, ensuring it is coated with the luscious sauce.
- Garnish and Serve: Serve the creamy Tuscan chicken on plates, topped with a generous sprinkle of grated Parmesan cheese and adorned with fresh basil leaves for a delightful finishing touch.
![- Fettuccine or Linguine: I love using fettuccine or linguine for this dish. These pastas hold the creamy sauce well. Their flat shape allows for a perfect bite every time. - Fresh Seafood: When choosing shrimp, look for firm, pink, and shiny ones. For scallops, they should be plump and slightly translucent. Fresh seafood makes all the difference in flavor. - Aromatics and Seasoning: Garlic and onion add depth to the dish. Use three cloves of garlic for a bold flavor. A small onion gives a nice sweetness. Fresh lemon juice and zest brighten the entire meal. - Fresh Basil Leaves: Adding fresh basil leaves boosts flavor and looks great. Tear them by hand for a rustic touch. Scatter them on top just before serving. - Grated Parmesan Cheese: Choose a good-quality Parmesan cheese for the best taste. Grate it fresh for a rich, nutty finish. It melts nicely into the pasta and adds creaminess. For the full recipe, visit the details above and enjoy the process! Start by boiling a large pot of salted water. Add the fettuccine or linguine. Cook it until it's al dente. This means it should be firm but cooked through. This step is key because overcooked pasta becomes mushy. After cooking, drain the pasta but save about ½ cup of the pasta water. This water can help thicken your sauce later. Next, heat 2 tablespoons of olive oil in a large skillet over medium heat. Wait until the oil shimmers before adding minced garlic and chopped onion. Sauté for about 3-4 minutes. You want the onion to become clear and fragrant. This step builds a great flavor base for your dish. Now it’s time to add the seafood. Place the shrimp and scallops in the skillet. Cook for about 4-5 minutes, stirring gently. The shrimp will turn pink, and the scallops will look opaque when done. Avoid overcooking them, or they will become rubbery. After the seafood is cooked, pour in a cup of heavy cream. Stir well to mix all the ingredients. Then, add the lemon zest, lemon juice, and red pepper flakes if you want some heat. Season with salt and black pepper. Let this sauce simmer for about 2-3 minutes. This time lets all the flavors blend together nicely. Finally, add the cooked pasta to the skillet. Toss everything gently to coat the noodles in the creamy sauce. If the sauce is too thick, add the reserved pasta water a little at a time. This helps reach the perfect consistency. Let it rest for a minute before serving to deepen the flavors. For the complete recipe, check the [Full Recipe]. To make the best seafood pasta, pay attention to the seafood. Always use fresh shrimp and scallops. Look for firm shrimp and plump scallops. Avoid overcooking seafood; it should be cooked just until it turns opaque. A common mistake is cooking seafood too long. This can make it tough and chewy. Spices and herbs bring your dish to life. Use fresh herbs like basil or parsley. Lemon zest adds brightness. A pinch of red pepper flakes adds heat. Try adding a dash of white wine for depth. These flavors work well with the creamy sauce and seafood. Plating is key to a great meal. Use large, shallow bowls for serving. Twirl the pasta for an elegant look. Garnish with fresh basil leaves and a sprinkle of Parmesan cheese. Drizzle a little extra olive oil on top for shine. This makes your dish appealing and appetizing. For a fun touch, consider adding a lemon wedge on the side. It gives a pop of color and flavor. These small details can impress your guests. For the complete recipe, check out the [Full Recipe]. {{image_4}} If you want to change up the seafood in this dish, there are great options. You can substitute shrimp and scallops with: - Crab meat - Lobster - Mussels - Clams These options can add unique flavors to your pasta. For example, crab meat gives a sweet taste, while mussels add a briny touch. Just make sure to adjust the cooking time, as some seafood cooks faster than others. You can switch up the pasta type for different health goals. Consider using: - Whole wheat pasta - Gluten-free pasta Whole wheat pasta has more fiber and nutrients than standard pasta. Gluten-free pasta is great for those with wheat allergies. Both options work well with the sauce and seafood. Just cook them according to package directions for the best texture. Want to try something new? You can play with the sauce for your dish. Here are some ideas: - Use marinara sauce for a classic Italian touch. - Try a basil pesto for a fresh and herbal flavor. Marinara sauce adds a rich tomato taste. Pesto brings in bright flavors and a creamy texture. Feel free to mix and match these sauces with your seafood for fun twists. You can find the full recipe to guide you through all these ideas. After enjoying your seafood pasta, store leftovers right away. Let the dish cool for about 30 minutes. Then, place it in an airtight container. This keeps it fresh for up to three days. Make sure to check for any signs of spoilage before eating. When reheating seafood pasta, keep the texture and flavor in mind. Use a skillet over low heat. Add a splash of water or broth to help with moisture. Stir gently to avoid breaking the seafood. Heat until it’s warm, about 5-7 minutes. You can also use the microwave. Just cover the dish loosely with a lid or wrap to keep it moist. To freeze your seafood pasta, let it cool completely first. Place it in a freezer-safe container. It can last up to two months in the freezer. To defrost, move the container to the fridge overnight. Reheat gently in a skillet or microwave, adding a splash of cream or broth to restore creaminess. Enjoy your delicious seafood pasta anytime! For the full recipe, check out the earlier section. You can tell shrimp and scallops are cooked when they change color. Shrimp should turn pink, and scallops should become opaque. For shrimp, look for a tight curl. For scallops, they should have a firm texture. If you cut into them, they should be white inside with no translucent areas. This means they are safe to eat. Yes, you can prepare this recipe ahead of time. Cook the pasta and seafood separately. Store them in airtight containers in the fridge. When you are ready to eat, simply reheat the seafood and mix it with the pasta and sauce. This makes it easy for busy weeknights or special occasions. A crisp white wine works best with seafood pasta. Look for a Sauvignon Blanc or Pinot Grigio. These wines have bright flavors that complement the seafood. If you prefer red, a light Pinot Noir can also be a good choice. The key is to avoid heavy wines that might overpower the dish. Yes, frozen seafood is a great option. Thaw your shrimp and scallops in the fridge overnight or under cold water. Avoid using hot water, as it can start to cook the seafood. Once thawed, pat them dry with a paper towel before cooking. This helps achieve a nice sear and prevents excess moisture in your dish. For the best flavor, try to use high-quality frozen seafood. You can find the full recipe [here](#). You've learned key ingredients for seafood pasta and how to cook it perfectly. Fettuccine or linguine, fresh seafood, and the right spices are essential. Remember to cook your pasta al dente and reserve some water. Proper techniques for sautéing and combining everything create a delicious cream sauce. Try different seafood, pasta types, and sauces for variety. Store and reheat your leftovers properly to keep the flavor. Now, you have what you need to make amazing seafood pasta at home. Enjoy your cooking adventure!](https://fastmealmate.com/wp-content/uploads/2025/06/7c1ca401-a8ff-43d0-aae3-34555c9d3a34-768x768.webp)
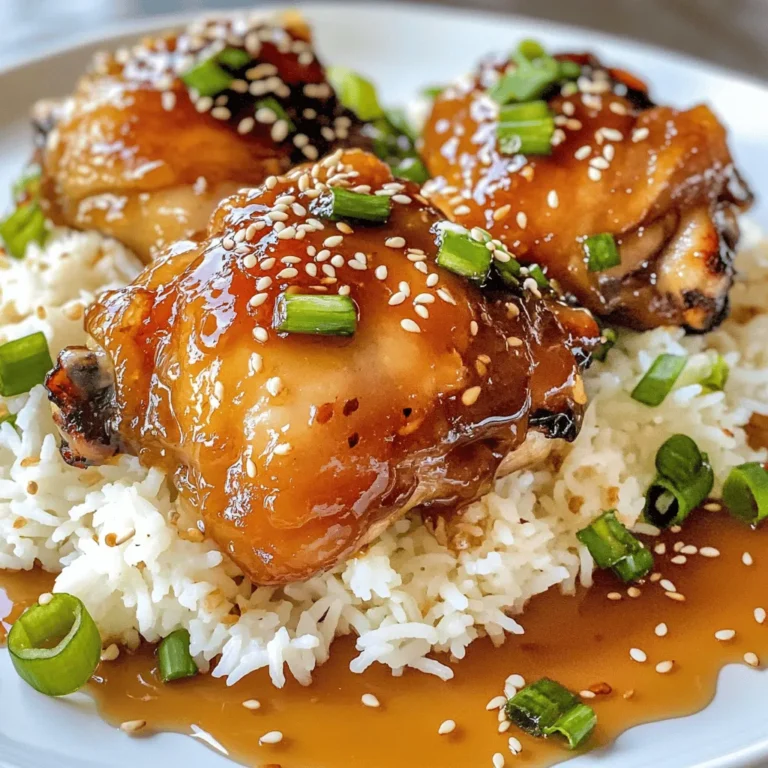
![To make this dish, gather these key ingredients: - 2 boneless, skinless chicken thighs - 2 tablespoons gochujang (Korean chili paste) - 1 tablespoon soy sauce - 1 tablespoon honey - 1 teaspoon sesame oil - 1 garlic clove, finely minced - 1 teaspoon fresh ginger, grated - 2 cups cooked rice (white or brown) - 1 cup Napa cabbage, shredded - 1 medium carrot, julienned - 2 green onions, finely chopped - 1 tablespoon sesame seeds - Salt and freshly ground black pepper to taste These ingredients create a bold and tasty flavor. The chicken absorbs the gochujang and other sauces, making each bite delicious. The fresh veggies add crunch and color. You can add more fun flavors with these optional items: - Kimchi for a tangy kick - Sliced cucumbers for freshness - Avocado for creaminess - Extra sesame seeds for crunch - More green onions for a pop of color Feel free to mix and match these extras. They add depth and make your bowl even more exciting. To prepare this dish, you will need: - A medium bowl for marinating - A grill pan or heavy skillet for cooking - A cutting board and knife for chopping - Measuring spoons for accuracy - A serving bowl to assemble your dish Having the right tools makes cooking easier. You’ll enjoy making this meal even more when you have everything at hand. Check out the Full Recipe for detailed steps! To start, you need a good marinade for the chicken. In a medium bowl, mix the gochujang, soy sauce, honey, sesame oil, minced garlic, and grated ginger. Whisk this mixture until it feels smooth. Now, add the chicken thighs. Make sure to coat them well with the marinade. Cover the bowl with plastic wrap. Let it sit in the fridge for at least 30 minutes. For richer flavor, you can marinate for up to 4 hours. Next, it’s time to cook the chicken. Preheat a grill pan or a heavy skillet on medium-high heat. When it gets hot, place the marinated chicken in the pan. Avoid crowding the pan. Cook each side for about 6 to 7 minutes. You want the chicken to be golden-brown and fully cooked. It should reach an internal temperature of 165°F (75°C). Once cooked, take the chicken out and let it rest for a few minutes. After resting, slice it into bite-sized pieces. While the chicken rests, let’s focus on the veggies. In the same pan, add a splash of oil if needed. Sauté the shredded Napa cabbage and julienned carrot for about 3 to 4 minutes. Stir them occasionally. You want them to be tender but still a bit crunchy. Lightly season with salt and black pepper to taste. Now it's time to put everything together. In a large serving bowl, start with a base of cooked rice. Layer the sautéed cabbage and carrots on top. Then, arrange the sliced grilled chicken over the vegetables. For the final touch, sprinkle chopped green onions and sesame seeds over the top. If you like it spicy, drizzle some extra gochujang on top. Enjoy your Easy Korean BBQ Chicken Rice Bowl! For the full recipe, check out the details above. Marinating chicken adds flavor and keeps it moist. Always use a mix of gochujang, soy sauce, honey, sesame oil, garlic, and ginger. Make sure to coat the chicken well. Cover the bowl and chill it in the fridge. Aim for at least 30 minutes. For a deeper taste, marinate for up to 4 hours. This extra time allows the flavors to soak in nicely. The right rice texture makes your bowl special. For this recipe, use either white or brown rice. Rinse the rice under cold water before cooking. This step removes excess starch and prevents stickiness. Cook the rice according to package instructions. Fluff it with a fork after cooking. This keeps the grains separate and light, perfect for a rice bowl. A beautiful bowl makes any meal more inviting. Use deep, colorful dishes for a striking look. Start with a base of rice, then layer on the veggies and chicken. Arrange the chicken slices neatly for a great visual. Finish with green onions and sesame seeds on top. You could also add small bowls of sauces for a fun touch. Use chopsticks to enhance the Korean BBQ feel. {{image_4}} You can swap chicken for other proteins. Try using pork, beef, or shrimp. Each option adds a new taste. If you choose beef, flank steak works well. For shrimp, use large, peeled ones. Just adjust cooking times as needed. You can easily make this dish vegan or vegetarian. Instead of chicken, use tofu or tempeh. Marinate them just like the chicken. For a twist, add marinated mushrooms for extra flavor. You can also use seitan for a meaty texture. Feel free to get creative with your veggies. You can use bell peppers, broccoli, or zucchini. Just chop them up and sauté them along with the cabbage and carrots. This way, your rice bowl stays colorful and fresh. Add your favorite greens for extra nutrition. After enjoying your Easy Korean BBQ Chicken Rice Bowl, store leftovers in an airtight container. Keep the chicken and veggies separate from the rice. This method helps keep everything fresh and tasty. Store it in the fridge for up to three days. If you want to keep it longer, consider freezing the chicken and veggies together. The rice can be stored separately. To reheat, use a microwave or skillet. If using a microwave, heat in short bursts to avoid drying out the chicken. You can add a splash of water to help keep moisture. If using a skillet, add a little oil and heat on low until warmed. This method helps maintain the chicken's juicy texture and the veggies' crunch. For meal prep, freeze the marinated chicken before cooking. This way, the flavors blend better. Place the chicken in a freezer bag and remove as much air as possible. You can freeze the sautéed veggies too. When ready to cook, thaw everything overnight in the fridge. This ensures your meal is quick and easy, with great taste. For the Full Recipe, be sure to check the instructions again before cooking! Yes, you can use chicken breast. Chicken breast cooks faster and is leaner. Just remember that it can dry out more easily than thighs. To keep it juicy, don’t overcook it. Adjust cooking time to about 5-6 minutes per side. If you need a substitute for gochujang, try miso paste mixed with a bit of chili powder. This mix gives a similar depth of flavor. You can also use sriracha for heat, but it won’t have the same sweetness. To add more spice, mix in extra gochujang. You can also add sliced fresh chilies or a dash of red pepper flakes. Adjust the heat to your liking. Remember, it’s easier to add spice than to take it away. Yes, you can prepare the chicken and veggies ahead of time. Marinate the chicken and store it in the fridge for up to 4 hours. Cook the chicken and veggies just before serving for the best flavor. For a full recipe, check out the [Full Recipe]. This blog post covered everything you need for an Easy Korean BBQ Chicken Rice Bowl. We explored essential and optional ingredients, plus equipment needed for cooking. I shared clear steps for marinating and cooking the chicken, sautéing veggies, and tips for perfect rice. We also looked at tasty variations and smart storage options. Ultimately, this dish is flexible and fun to make. Enjoy experimenting with flavors and keep your meals exciting!](https://fastmealmate.com/wp-content/uploads/2025/07/632ec05d-af1e-4ba2-bf58-6505b43008ee-768x768.webp)
. This recipe is friendly for all cooks. The steps are simple and clear. Even beginners can make great tacos. Preparing the ingredients takes a short time. The slow cooker does most of the work. You don't need to worry about constant stirring or checking. It’s an easy way to impress friends and family. - Prep Time: 20 minutes - Cook Time: 8 hours (low) or 4 hours (high) - Servings: 8-10 tacos With a bit of time, you will have a tasty meal ready to enjoy! This blog post guides you through making delicious birria tacos. You learned the key ingredients, like beef, chilies, and spices. I provided step-by-step instructions, including how to prepare chilies and cook the beef. You also discovered tips for storing leftovers and variations to try. Now, you can enjoy tasty birria tacos at home. With practice, you'll create the perfect meal for friends and family. Dive in and savor each bite!](https://fastmealmate.com/wp-content/uploads/2025/07/26480268-fadb-491b-986e-82dbbe9ddeca-768x768.webp)