No-Bake Peanut Butter Bars Simple and Tasty Treat

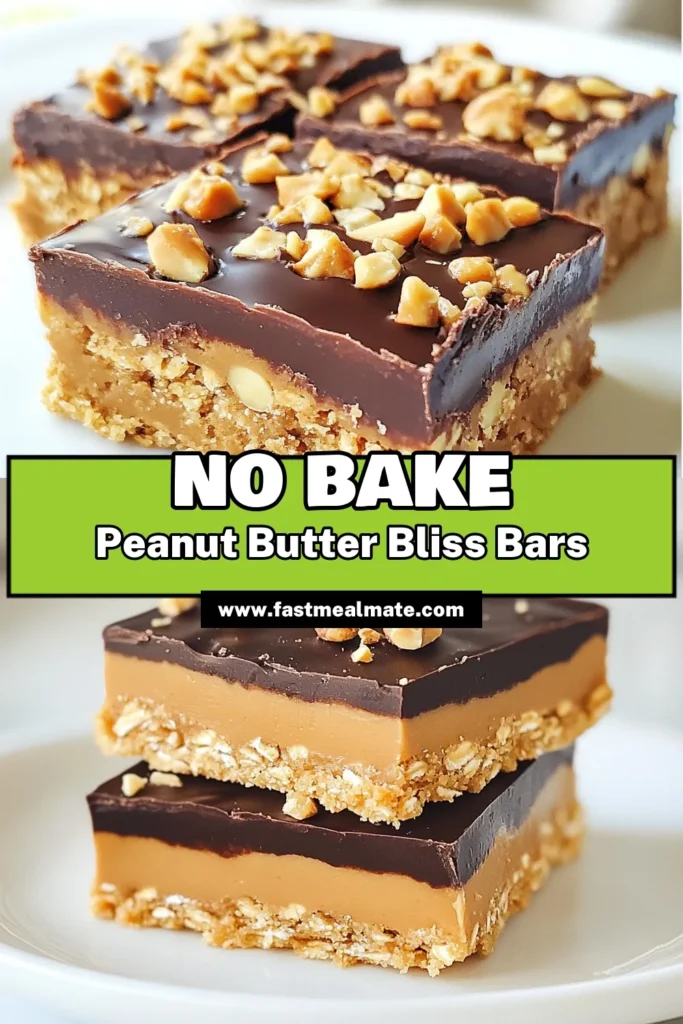
Are you craving a sweet treat but want to keep it simple? You’re in luck! These No-Bake Peanut Butter Bars are easy to make and super tasty. With just a few ingredients like creamy peanut butter and honey, you can whip up a delicious snack without turning on the oven. Join me as I guide you through making these delightful bars that everyone will love. Let’s get started!
Why I Love This Recipe
- Easy to Make: This recipe requires no baking, making it a quick and simple treat to prepare, perfect for any skill level.
- Healthy Ingredients: With wholesome ingredients like oats and peanut butter, these bars provide a nutritious energy boost without sacrificing flavor.
- Customizable: Add your favorite mix-ins such as nuts or dried fruit to make these bars uniquely yours, catering to your taste.
- Perfect for Snacking: These bars make for a delicious on-the-go snack or a sweet treat after meals, satisfying your cravings without guilt.
Ingredients
Main Ingredients for No-Bake Peanut Butter Bars
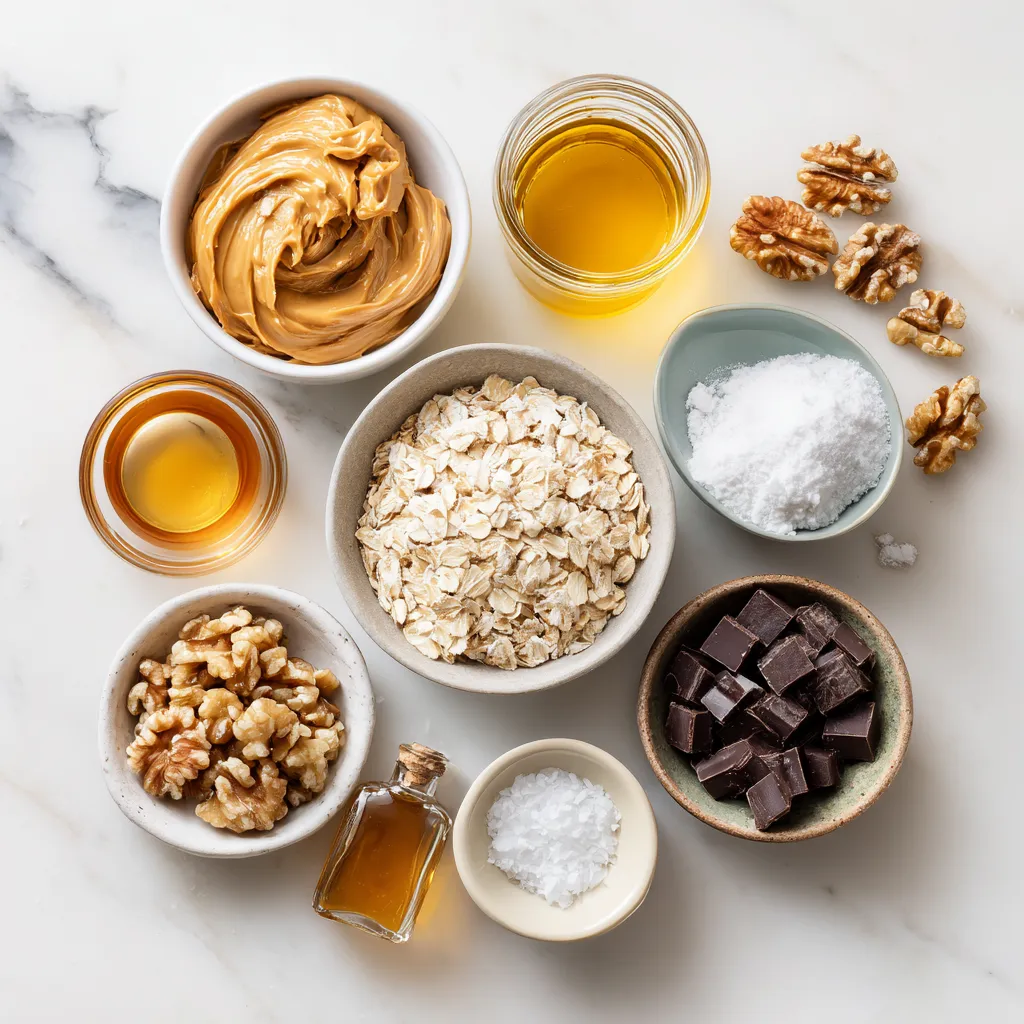
– 1 cup creamy peanut butter
– 1 cup rolled oats
– 1/2 cup honey or maple syrup
– 1/2 cup powdered sugar
Additional Flavors and Texture Enhancers
– 1/2 cup dark chocolate chips
– 1/4 cup coconut oil
– 1/4 tsp salt
– 1/2 tsp vanilla extract
– Optional: 1/4 cup chopped nuts (e.g., almonds or walnuts)
To make these no-bake peanut butter bars, you need some simple ingredients. First, creamy peanut butter is a must. It gives the bars their rich flavor and smooth texture. Next, rolled oats add a hearty bite and help bind the bars together.
For sweetness, you can use honey or maple syrup. Both options work well, but honey has a stronger flavor. Powdered sugar adds a light sweetness too. This mix makes a great base for the bars.
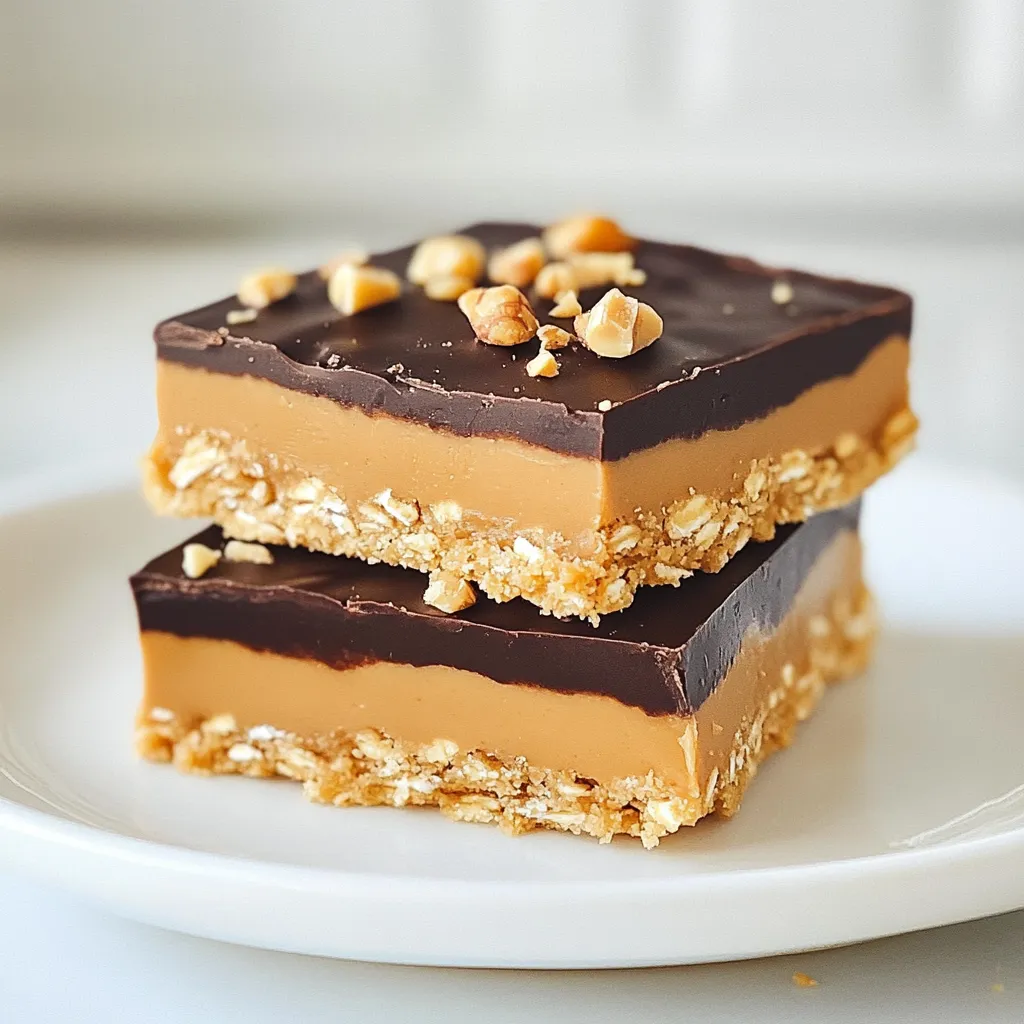
To take these bars to the next level, I love adding dark chocolate chips. They melt perfectly and create a smooth topping. Coconut oil helps the chocolate set and adds a nice gloss. Just a pinch of salt boosts the flavor and balances the sweetness.
Lastly, vanilla extract adds a warm note to the mix. If you want extra crunch, consider folding in chopped nuts. Almonds or walnuts work great, but feel free to use your favorite. Each bite will be packed with flavor and texture!
Step-by-Step Instructions
Preparing the Baking Dish
Line an 8×8-inch baking dish with parchment paper. This makes it easy to lift the bars later. Leave some paper hanging over the sides for a smooth removal.
Mixing the Base Ingredients
In a large bowl, mix 1 cup of creamy peanut butter, 1/2 cup of honey, 1/2 cup of powdered sugar, 1/4 teaspoon of salt, and 1/2 teaspoon of vanilla extract. Use a sturdy spatula to mix until smooth and well combined.
Incorporating Oats and Nuts
Gradually stir in 1 cup of rolled oats. Make sure every oat gets coated in the peanut butter mix. If you want extra crunch, fold in 1/4 cup of chopped nuts like almonds or walnuts.
Forming the Base Layer
Spoon the mixture into your lined baking dish. Press it down firmly with a spatula or your hands. Ensure the layer is even across the bottom.
Making the Chocolate Topping
In a microwave-safe bowl, add 1/2 cup of dark chocolate chips and 1/4 cup of coconut oil. Microwave in 20-second bursts, stirring well after each time, until the mixture is smooth and melted.
Assembling and Chilling
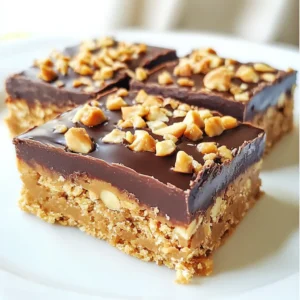
Pour the melted chocolate over the pressed peanut butter layer. Use a spatula to spread the chocolate evenly over the top. Place the dish in the fridge and chill for at least 2 hours. This helps the bars set and become firm.
Tips & Tricks
Achieving the Perfect Texture
For the best bars, use creamy peanut butter. Creamy peanut butter gives a smooth base. It helps the bars hold together well. If you prefer a crunch, use crunchy peanut butter. Crunchy peanut butter adds fun bits in every bite. Both types work, but creamy is my go-to.
Enhancing Flavor
You can easily add flavor to your bars. Try mixing in cocoa powder for a chocolate twist. A little cinnamon or nutmeg can make them warm and cozy. If you love coconut, add some shredded coconut. For a nutty crunch, chopped nuts like almonds or walnuts are great too. These add-ins make every bite more exciting!
Serving Suggestions
Serving your bars can be fun and creative. Try slicing them into fun shapes for kids. You can serve them with fresh fruit like bananas or strawberries. Arrange them on a pretty platter for guests. Drizzle extra melted chocolate on top for a fancy touch. Each way makes them look and taste even better!
Pro Tips
- Use Natural Peanut Butter: Opt for natural peanut butter without added sugars or oils for a healthier version of these bars.
- Chill for Best Results: Allow the bars to chill for longer than 2 hours if you want them to be extra firm and easier to cut.
- Customize with Add-Ins: Feel free to add in dried fruits or seeds for additional flavor and texture.
- Store Properly: Keep the bars in an airtight container in the refrigerator for up to a week for maximum freshness.
Variations
Dietary Options
You can easily make these bars vegan and gluten-free. Use maple syrup instead of honey. For a gluten-free option, choose certified gluten-free oats. These simple swaps keep the bars tasty and safe for many diets.
Flavor Variations
Want to mix it up? Add some fun ingredients! You can include coconut flakes for a tropical touch. Dried fruits like raisins or cranberries also add sweetness and chewiness. Just adjust the mix to your taste!
Nut-Free Alternatives
If you need a nut-free option, use sunbutter or soy nut butter instead of peanut butter. These seed butters work just as well and keep the bars creamy. They also offer a unique flavor twist that everyone can enjoy.
Storage Info
Best Methods for Storage
To keep your no-bake peanut butter bars fresh, store them in the refrigerator. Place them in an airtight container or wrap them tightly in plastic wrap. If you want to save some for later, you can freeze them. Just cut the bars into pieces first, then layer them between parchment paper in a freezer-safe bag or container.
Shelf Life
When stored properly, these bars last about one week in the fridge. If frozen, they can stay good for up to three months. This makes them great for meal prep or snacks whenever you need a quick treat.
Reheating & Serving
If you freeze the bars, let them thaw in the fridge overnight. For a quick snack, you can take them out and enjoy them cold. These bars taste great chilled, so there’s no need to heat them up. If you want some fun, drizzle a bit of melted chocolate on top before serving.
FAQs
Can I use natural peanut butter?
Yes, you can use natural peanut butter. Natural peanut butter has less sugar and no added oils. It gives a richer flavor and creamier texture. Just remember to stir it well before use. The oil may separate, so mix it back in for a smooth consistency.
How long do these bars need to chill?
These bars need to chill for at least 2 hours. This time allows the bars to firm up. The longer they chill, the firmer they become. I recommend checking after 2 hours. If they feel soft, give them more time in the fridge.
Can I add protein powder to the recipe?
Yes, you can add protein powder. It boosts nutrition and keeps you full longer. Start with 1/4 cup of protein powder. You may need to adjust the honey or peanut butter for balance. Make sure the mixture stays sticky enough to hold together.
Are these bars kid-friendly?
Definitely! These bars are very kid-friendly. They taste sweet and nutty, which kids love. The oats provide fiber, and peanut butter offers protein. You can even let kids help make them. It’s a fun, easy treat that they will enjoy.
In this post, we explored how to make no-bake peanut butter bars. We covered the main ingredients, mixing steps, and tips for the best texture. You can try different flavors or keep it simple. Remember to store your bars properly to maintain freshness. These treats are easy, tasty, and fit many diets. Now, you can enjoy making them for yourself or share with family and friends. Happy cookin
No-Bake Peanut Butter Paradise Bars
Ingredients
- 1 cup creamy peanut butter
- 1 cup rolled oats
- 1/2 cup honey or maple syrup
- 1/2 cup powdered sugar
- 1/2 cup dark chocolate chips
- 1/4 cup coconut oil
- 1/4 tsp salt
- 1/2 tsp vanilla extract
- 1/4 cup chopped nuts (optional, e.g., almonds or walnuts)
Instructions
- Prepare the Pan: Start by lining an 8x8-inch square baking dish with parchment paper. Make sure to leave some overhang on the sides to facilitate easy removal of the bars later.
- Combine the Base Ingredients: In a large mixing bowl, add the creamy peanut butter, honey (or maple syrup), powdered sugar, salt, and vanilla extract. Use a sturdy spatula or wooden spoon to mix until the ingredients are smooth, homogenous, and well combined.
- Incorporate the Oats: Gradually stir in the rolled oats, mixing until they are completely coated in the peanut butter mixture. If you are including chopped nuts, fold them in gently at this point for extra texture and crunch.
- Transfer to the Baking Dish: Spoon the peanut butter and oat mixture into the prepared baking dish. Press it down firmly using a spatula or your hands, ensuring it forms an even layer across the bottom of the dish.
- Melt the Chocolate Topping: In a microwave-safe bowl, combine the dark chocolate chips and coconut oil. Microwave in 20-second intervals, stirring thoroughly after each interval until the mixture is completely melted and smooth.
- Spread the Chocolate: Carefully pour the melted chocolate over the pressed peanut butter oat mixture. Use a spatula to spread the chocolate evenly, ensuring the top is well-covered.
- Chill to Set: Place the baking dish in the refrigerator and let it chill for at least 2 hours, or until the bars are fully set and firm to the touch.
- Cut and Serve: Once the bars are set, lift them out of the dish using the parchment overhang. Cut them into squares or rectangles to serve. Enjoy these delightful treats as a sweet snack or dessert!