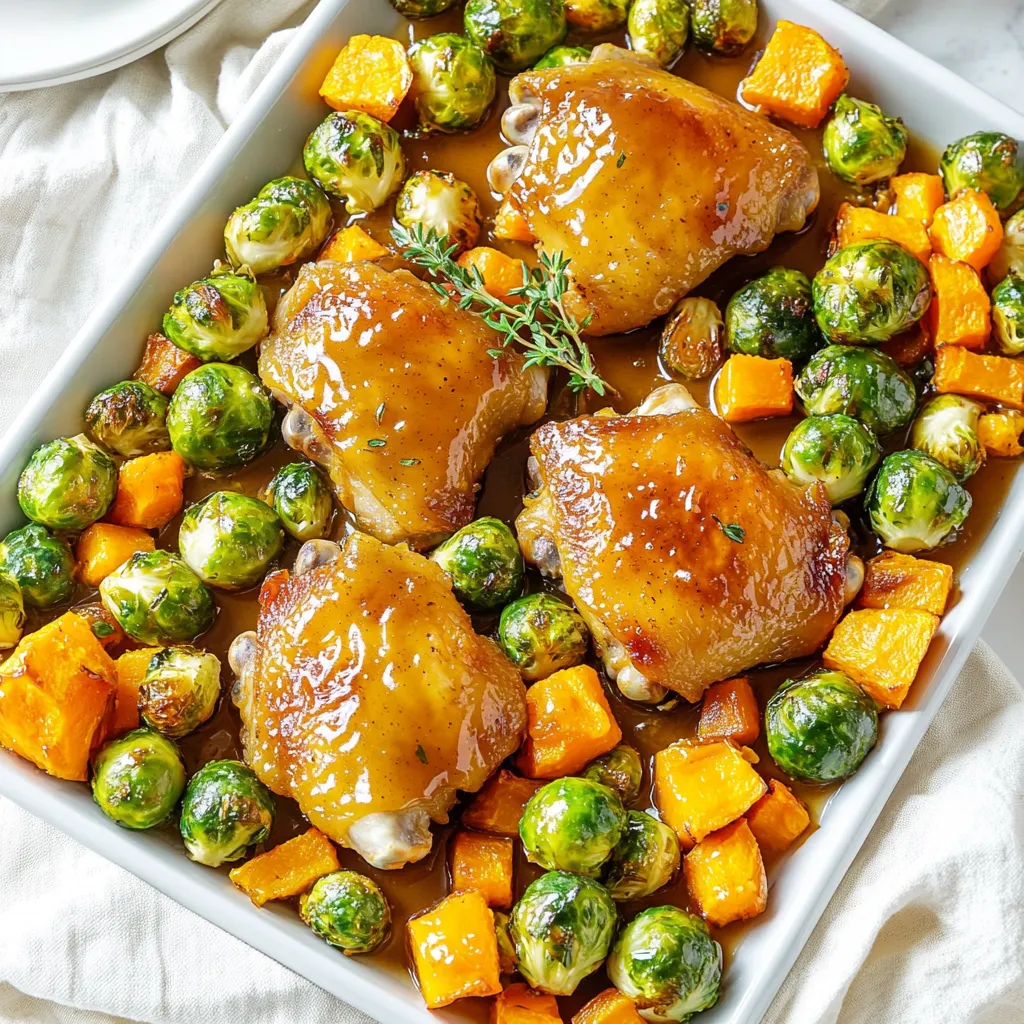
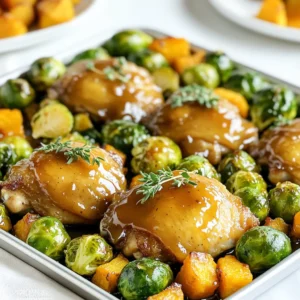
Sheet-Pan Maple Dijon Chicken with Sprouts and Squash

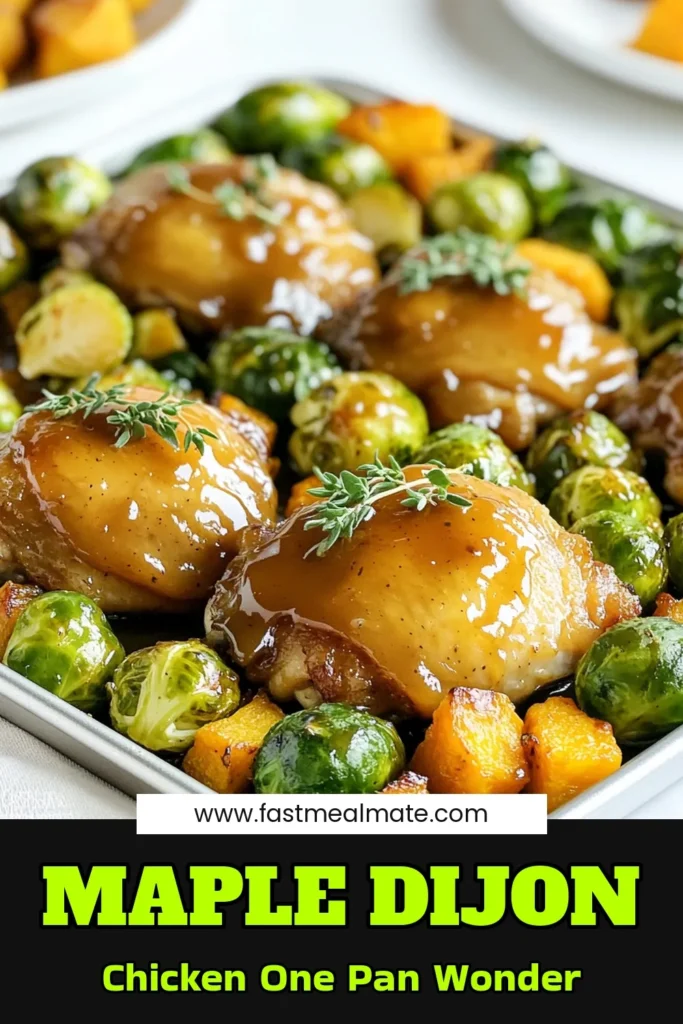
If you’re looking for a delicious and easy dinner option, you’ve found it! My Sheet-Pan Maple Dijon Chicken with Brussels Sprouts and Squash is perfect for busy weeknights. With tender chicken thighs, sweet maple syrup, and roasted veggies, this dish offers vibrant flavors and textures. Plus, you’ll enjoy the convenience of cooking everything on one pan. Let’s dive into the ingredients and get cooking!
Ingredients
Fresh Ingredients
– 4 boneless, skinless chicken thighs
– 2 cups Brussels sprouts, halved
– 2 cups butternut squash, peeled and cubed
For this recipe, I use boneless, skinless chicken thighs. They stay juicy and flavorful when baked. Brussels sprouts add a nice crunch, while butternut squash brings sweetness. Together, these ingredients create a balanced dish.
Marinade Components
– 1/4 cup Dijon mustard
– 1/4 cup pure maple syrup
– 1 tablespoon olive oil
The marinade is key. I mix Dijon mustard, pure maple syrup, and olive oil for a sweet and tangy flavor. This blend coats the chicken and veggies well, enhancing every bite.
Seasonings
– 1 teaspoon garlic powder
– 1 teaspoon smoked paprika
– Salt and freshly ground black pepper to taste
To season, I use garlic powder and smoked paprika. They add depth to the dish. Salt and pepper balance everything out. I recommend tasting the marinade before using it to adjust the seasoning to your liking.
This simple but flavorful list of ingredients sets the stage for a delicious meal. You can feel free to experiment with the ratios to match your taste.
Step-by-Step Instructions
Preheat Oven
Start by setting your oven to 425°F (220°C). This heat is perfect for roasting. A hot oven helps the chicken and veggies cook well.
Preparing the Marinade
In a small bowl, mix together the Dijon mustard, maple syrup, and olive oil. Add garlic powder, smoked paprika, salt, and pepper. Whisk until smooth. This glaze gives a sweet and tangy kick to the chicken.
Marinating the Chicken
Take your chicken thighs and place them in a big bowl or a zip-top bag. Pour half of the marinade over the chicken. Make sure each piece is well coated. Seal the bag or cover the bowl. Let it marinate for at least 20 minutes. Longer marinating adds more flavor.
Preparing the Vegetables
In another bowl, add the halved Brussels sprouts and cubed butternut squash. Pour the rest of the marinade on top. Toss the veggies until they are evenly coated. This step makes sure they absorb all the tasty flavors.
Arranging on the Baking Sheet
Grab a large, rimmed baking sheet. Place the marinated chicken in the center. Spread the Brussels sprouts and squash around the chicken. Arrange everything in a single layer. This helps everything cook evenly.
Baking Process
Put the baking sheet in the oven and bake for 25-30 minutes. The chicken should reach an internal temperature of 165°F (75°C). The veggies will become tender and slightly caramelized. Stir the veggies halfway through for even browning.
Serving Suggestions
After baking, take the sheet out of the oven. Let it rest for a few minutes. This allows the juices in the chicken to spread out. Garnish with fresh thyme or parsley before serving. This adds a nice touch to your dish!
Tips & Tricks
Ensuring Perfectly Cooked Chicken
Check the internal temperature of the chicken. Use a meat thermometer for accuracy. The chicken should reach 165°F (75°C) for safe eating. After baking, let it rest for 5 minutes. This helps keep the juices inside, making the chicken tender and juicy.
Getting the Right Veggie Texture
Different veggies cook at different times. Brussels sprouts take about 25-30 minutes to become tender. Butternut squash cooks well in the same time frame. Cut the squash into small cubes for even cooking. Stir the veggies halfway through to help them brown nicely.
Enhancing Flavor
You can add more flavor with extra spices. Try adding thyme or rosemary for a fresh taste. A sprinkle of red pepper flakes can add heat. For garnishing, fresh parsley or thyme brightens the dish. Drizzle leftover maple Dijon sauce on top before serving for extra flavor.
Variations
Substitute Ingredients
You can switch up the chicken type. Try chicken breasts or drumsticks instead of thighs. Each cut brings its own flavor and texture. You can also use turkey for a lean option. For veggies, don’t feel limited to Brussels sprouts and squash. Asparagus, carrots, or sweet potatoes work great too. Each vegetable will change the dish’s taste and look.
Flavor Modifications
Want a new taste? Add fresh herbs like rosemary or basil to the mix. They can brighten up the dish. For a kick, sprinkle in some red pepper flakes. If you enjoy a smoky flavor, more smoked paprika can help. You can also try a splash of balsamic vinegar or a squeeze of lemon juice for added depth.
Serving Options
This dish pairs well with grains like rice or quinoa. They soak up the sauce and balance the meal. If you prefer a lighter option, serve it on a bed of fresh greens or a salad. This adds crunch and freshness. You can also drizzle extra maple Dijon sauce over your grains or salad for more flavor.
Storage Info
Refrigeration Guidelines
Store leftovers in an airtight container. This keeps the chicken and veggies fresh. They will last for up to three days in the fridge. Make sure to cool them to room temperature before sealing. This helps to avoid moisture buildup that may spoil them faster.
Reheating Instructions
To reheat, use an oven or microwave. If using an oven, preheat to 350°F (175°C). Place the chicken and veggies in a baking dish. Cover with foil to keep moisture in. Heat for about 15-20 minutes or until warm. If using a microwave, heat in short bursts, stirring in between. This helps to keep the chicken moist and tender.
Freezing Tips
Yes, you can freeze this dish! Allow it to cool first. Then, transfer the chicken and veggies to a freezer-safe container. Use freezer bags for easier storage. They can stay frozen for up to three months. When ready to eat, thaw overnight in the fridge. Reheat as mentioned above for the best taste.
FAQs
How long does it take to marinate the chicken?
Marinating the chicken takes at least 20 minutes. If you have more time, let it marinate for a few hours or overnight. This allows the flavors to soak in deeply.
Can I use chicken breast instead of thighs?
Yes, you can use chicken breast instead of thighs. Just remember that chicken breasts cook faster and can dry out. Keep an eye on the cooking time to avoid that.
What is the best way to cut butternut squash?
To cut butternut squash, first peel it with a vegetable peeler. Then, slice it in half lengthwise. Scoop out the seeds and then cut each half into cubes. Make sure your knife is sharp for safety.
How do I know when the chicken is fully cooked?
The chicken is fully cooked when its internal temperature reaches 165°F (75°C). Use a meat thermometer to check the thickest part of the thigh. The juices should run clear, not pink.
Can I make this recipe in advance?
Yes, you can prepare the chicken and veggies in advance. Marinate the chicken and coat the veggies. Store them in the fridge for up to 24 hours. When ready, bake them as directed.
This blog covered a delicious chicken and veggie dish that’s easy to make. We discussed fresh ingredients like chicken thighs, Brussels sprouts, and butternut squash. The simple marinade of mustard, maple syrup, and olive oil enhances flavor. I shared step-by-step instructions, tips for cooking perfectly, and creative variations.
Enjoy experimenting with this recipe, and don’t be afraid to make it your own! With some practice, you’ll serve a meal full of taste and joy. Happy cooking!

![- 1 lb ground beef - 1 cup shredded cheddar cheese - 1 cup shredded mozzarella cheese - 1/2 cup grated Parmesan cheese - 1 tablespoon minced garlic - 1 teaspoon onion powder - 1 teaspoon garlic powder - 1/2 teaspoon salt - 1/2 teaspoon black pepper - 1 package (16 oz) refrigerated pizza dough - 1/2 cup unsalted butter, melted - 2 tablespoons fresh parsley, chopped (for garnish) I recommend using fresh ground beef for the best flavor and texture. Look for good-quality cheeses. A mix of sharp cheddar and creamy mozzarella works wonders. For the Parmesan, choose a block and grate it yourself. Fresh garlic adds a punch that garlic powder cannot match. Always opt for unsalted butter to control the saltiness in your dish. Each serving contains approximately: - Calories: 250 - Protein: 15g - Carbohydrates: 20g - Fat: 14g - Fiber: 1g - Sugar: 1g This dish packs flavor and comfort in each bomb. Enjoy the satisfaction of creating these tasty bites. For the full recipe, check the section above. First, preheat your oven to 375°F (190°C). This ensures the bombs bake evenly. While the oven warms up, grab a large mixing bowl. In this bowl, mix together the ground beef, shredded cheddar, mozzarella, and grated Parmesan cheese. Add minced garlic, onion powder, garlic powder, salt, and black pepper. Stir until all the ingredients blend well. This mixture is the heart of your cheeseburger bombs. Next, you need to handle the pizza dough. Lightly flour a clean surface to prevent sticking. Roll out the pizza dough into a large rectangle. Use a pizza cutter or knife to slice the dough into 12 equal squares. Each square should measure about 3 inches by 3 inches. For each square, place a generous spoonful of the cheeseburger filling right in the center. Now, fold the corners of each dough square over the filling. Pinch them tightly to create a seal. Place the sealed bombs seam-side down on your prepared baking sheet. Now it’s time to bake. Brush the tops of each bomb with melted butter. This gives them a nice, golden finish. Bake these tasty treats in the preheated oven for 18-20 minutes. They should puff up and turn a beautiful golden brown. After baking, let them cool for a few minutes on the baking sheet. This step helps enhance the flavors. For a fresh touch, sprinkle chopped parsley on top just before serving. For the full recipe, check the earlier section. Enjoy your Garlic Parmesan Cheeseburger Bombs! To make your Garlic Parmesan Cheeseburger Bombs pop with flavor, use quality spices. Fresh garlic adds a strong taste. Minced garlic blends well with the beef. Garlic powder boosts the garlic flavor. Onion powder adds depth and sweetness. The mix of cheddar, mozzarella, and Parmesan gives a rich, creamy texture. Try using sharp cheddar for a bolder taste. Always taste the mixture before sealing the bombs. Adjust the salt and pepper to your liking. A perfect golden crust makes your bombs look and taste great. Start by brushing the tops with melted butter. This adds flavor and helps with browning. Bake at 375°F for 18-20 minutes. Keep an eye on them as they bake. If they are not golden yet, let them bake a few more minutes. The crust should be puffed and golden brown. For a stunning display, use a large platter. Place the bombs in a circle, and sprinkle fresh parsley on top. This adds a nice pop of color. Serve with dipping sauces like ketchup or ranch for extra fun. You can also add a side of pickles or a fresh salad. This makes a great snack or meal for any gathering. Enjoy each tasty bite from your Garlic Parmesan Cheeseburger Bombs! For the complete recipe, click [Full Recipe]. {{image_4}} You can change the filling for your Garlic Parmesan Cheeseburger Bombs. For a vegetarian option, swap ground beef for cooked lentils or black beans. Add some diced bell peppers and chopped onions for flavor. If you want a spicy kick, mix in jalapeños or hot sauce. You can even use spicy sausage for a meaty twist. This way, everyone can enjoy these tasty bombs. If you need a gluten-free option, use gluten-free pizza dough. Many stores sell this now. If you feel adventurous, you can make homemade dough. Combine almond flour, coconut flour, and eggs for a gluten-free base. This change keeps the bombs delicious and safe for those with gluten issues. Experiment with different types of dough to find your favorite. Toppings can take your bombs to a new level. After baking, try adding melted cheese on top. You can also sprinkle some crispy bacon bits for extra flavor. Fresh herbs like chives or cilantro can add a burst of color and taste. Consider serving with a side of garlic butter for dipping. These creative touches make your Garlic Parmesan Cheeseburger Bombs truly special. For detailed steps, check the Full Recipe. After you enjoy your Garlic Parmesan Cheeseburger Bombs, store any leftovers right away. Let them cool to room temperature first. Then, place them in an airtight container. This keeps them fresh and tasty. You can also wrap them tightly in plastic wrap. Store them in the fridge for up to three days. If you want to keep them longer, freezing is a great option. When it’s time to eat those leftover bombs, reheating them properly is key. Preheat your oven to 350°F (175°C). Place the bombs on a baking sheet. Heat for about 10-15 minutes. This helps them regain their crispiness. You can also use a microwave. Heat them for about 30-45 seconds. However, the oven method is best for keeping that nice texture. If you want to freeze your Garlic Parmesan Cheeseburger Bombs, do it before baking. After shaping the bombs, place them on a baking sheet. Freeze them for about an hour until solid. Then, transfer them to a freezer-safe bag. They can last up to three months in the freezer. When you’re ready to bake, just add a few extra minutes to the cooking time. Enjoy the fresh taste anytime with this simple method! You can still enjoy these bombs without specific cheese. Use any cheese you like. Try gouda, pepper jack, or even cream cheese. Just make sure the cheese melts well. This keeps the bombs gooey and tasty. Yes, you can prepare these bombs ahead of time. Make the filling and fill the dough squares. Place them on a baking sheet. Cover and store them in the fridge. Bake them fresh when you are ready to eat. This saves time for your busy days. Dipping sauces make these bombs even better. Ketchup is a classic choice. Ranch dressing or garlic aioli adds a nice touch. You can also try spicy mustard or BBQ sauce. Each sauce brings a new flavor and fun to your meal. This blog post covered all you need for Garlic Parmesan Cheeseburger Bombs. I shared the key ingredients, step-by-step instructions, and handy tips to enhance flavor. You also learned about great variations to try and how to store your tasty treats. In my final thoughts, remember to have fun while cooking. Experiment with flavors and enjoy every bite of your creations. Happy cooking!](https://fastmealmate.com/wp-content/uploads/2025/06/70ca770e-dfd2-457a-a57a-f773e5b0e22d-768x768.webp)