Rotisserie Chicken Tostadas Flavorful and Quick Meal
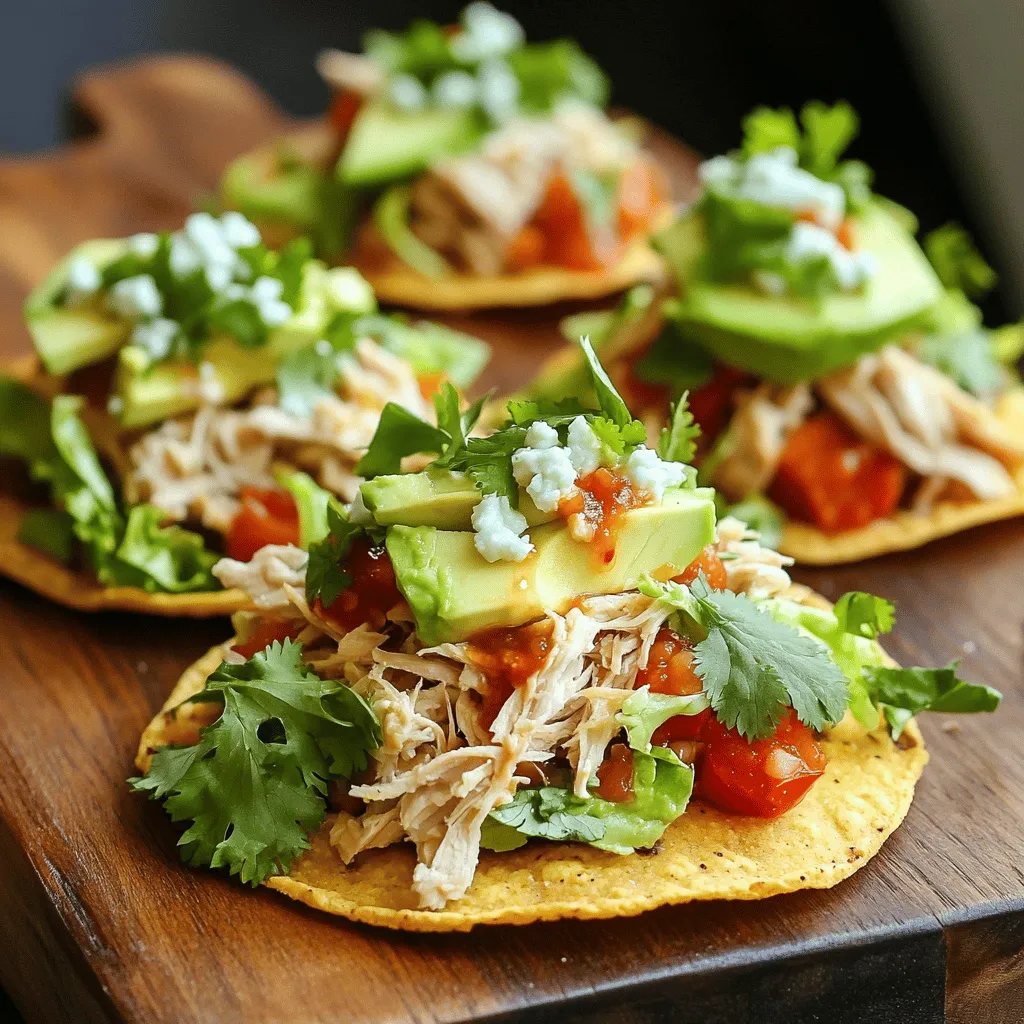
Looking for a fast and tasty meal? Rotisserie chicken tostadas are the answer! With crispy shells and layers of delicious toppings, these tostadas come together in no time. You’ll love how easy it is to use rotisserie chicken, fresh veggies, and zesty seasonings. Read on for a simple guide that will make dinner quick, fun, and flavorful—perfect for busy weeknights!
Ingredients
Main Ingredients for Rotisserie Chicken Tostadas
– 4 tostada shells
– 2 cups rotisserie chicken, shredded
– 1 cup refried beans
Fresh Toppings
– 1 cup freshly shredded lettuce
– 1 medium tomato, finely diced
– 1 ripe avocado, sliced
– 1/2 cup crumbled queso fresco
– 1/4 cup fresh cilantro, chopped
– 1/2 cup salsa of your choice
Seasoning and Flavor Enhancers
– Juice of 1 lime
– 1 teaspoon chili powder
– 1 tablespoon olive oil
– Salt and freshly ground black pepper, to taste
Using rotisserie chicken makes this dish quick. You can grab one from the store or make your own. The tostada shells provide a crispy base. They are easy to find, and baking them adds crunch.
You will want fresh toppings to add color and taste. Crisp lettuce and juicy tomatoes brighten the dish. Slices of avocado give a creamy texture. Queso fresco adds a salty touch. Fresh cilantro brings a burst of flavor.
Seasoning is key. Lime juice adds a zing. Chili powder gives a warm kick. Olive oil helps all the flavors mix well. Salt and pepper round everything out.
Together, these ingredients make a tasty meal. They create a mix of flavors and textures. You can enjoy these tostadas for lunch or dinner!
Step-by-Step Instructions
Preparing the Tostada Shells
1. Preheat your oven to 350°F (175°C). This step is key to making crispy tostada shells.
2. Place your tostada shells on a baking sheet. Make sure they have space between them.
3. Use a brush to coat each shell lightly with olive oil. This gives them a nice flavor.
4. Bake the shells for about 5-7 minutes. You want them to be warm and slightly crispy.
Making the Chicken Mixture
1. While the shells bake, get your chicken ready. Take 2 cups of shredded rotisserie chicken.
2. In a bowl, mix the chicken with the juice of 1 lime, 1 teaspoon of chili powder, and a pinch of salt and pepper.
3. Toss everything well until the chicken is coated. This mix adds great flavor to your tostadas.
Assembling the Tostadas
1. Once your tostada shells are baked, it’s time to build your meal.
2. Start by spreading a generous tablespoon of warm refried beans on each shell. This forms your base.
3. Next, add the seasoned chicken mixture on top of the beans. Make sure to spread it evenly.
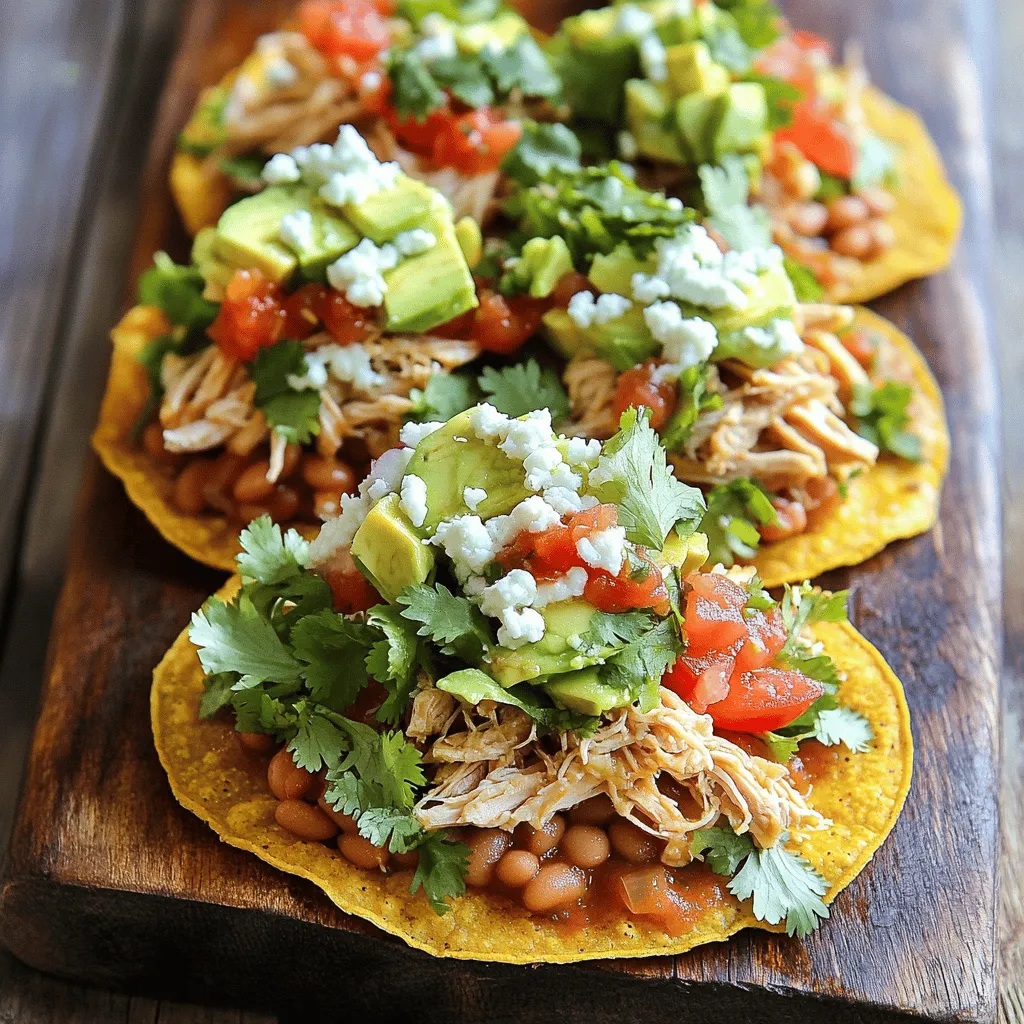
4. Now, layer on the fresh toppings. Start with shredded lettuce, then add diced tomatoes, and slices of avocado.
5. Finally, sprinkle some crumbled queso fresco and chopped cilantro on top. This adds color and taste.
6. For extra flavor, drizzle your favorite salsa over each tostada just before serving.
Tips & Tricks
Perfecting the Crispy Texture
– Baking tips for tostada shells: Preheat your oven to 350°F. Arrange the tostada shells on a baking sheet. Brush each shell lightly with olive oil. Bake for 5-7 minutes. You want them warm and slightly crispy.
– Avoiding sogginess with toppings: Use warm refried beans as a base layer. Spread them on the shells right before adding other toppings. This helps keep the tostadas crisp.
Time-Saving Techniques
– Using pre-prepped ingredients: Buy rotisserie chicken from the store. This saves you time on cooking. Use pre-shredded lettuce and diced tomatoes too. These small choices speed up your meal prep.
– Quick assembly ideas: Set up a topping bar. Lay out all your ingredients in bowls. Let everyone build their own tostadas. This makes it fun and fast!
Serving Suggestions
– Best sides to serve with tostadas: Serve with a simple side salad or corn. These add freshness and balance to your meal. You can also offer chips with salsa for extra crunch.
– Presentation tips for a beautiful dish: Arrange tostadas on a large platter. Garnish with lime wedges and chopped cilantro. This adds color and makes the dish pop. Guests will love the look!
Variations
Protein Alternatives
You can switch up the protein in your tostadas. Instead of rotisserie chicken, try these options:
– Grilled shrimp: Quick to cook and adds a nice flavor.
– Pulled pork: Use leftovers from your BBQ for a smoky twist.
– Sautéed beef: Ground beef with spices gives a hearty touch.
For a vegetarian option, use beans. Black or pinto beans work well. They are filling and tasty. Just mash or heat them up before spreading on the tostada.
Flavor Variations
Spice blends can change the taste of your tostadas. Here are some ideas:
– Cajun seasoning: Adds a kick and warmth.
– Taco seasoning: Brings classic flavors that everyone loves.
– Smoked paprika: Gives a unique, smoky taste.
Try unique toppings for more flavor:
– Pickled red onions: They add tang and crunch.
– Jalapeños: For those who prefer heat.
– Fresh corn: Sweet and crunchy, perfect for summer.
Meal Prep Versions
Making tostadas ahead of time saves you effort. Here are some tips:
– Prepare the ingredients: Cook and store your chicken or beans in advance.
– Assemble before serving: Keep toppings separate until you serve. This keeps everything fresh and crispy.
To freeze, store layers separately. Use airtight containers for best results.
When you’re ready to eat, reheat the tostada shells in the oven. This will keep them crunchy. Just warm the toppings on the stove. Enjoy your quick meal!
Storage Info
How to Store Leftover Tostadas
To keep your tostadas fresh, store each component separately. Place leftover tostada shells in a dry container. Use a paper towel to absorb moisture. For the chicken and beans, use airtight containers. This keeps all ingredients tasting great.
– Tostada shells: Store in a cool, dry place.
– Chicken and beans: Use airtight containers in the fridge.
– Toppings: Keep in separate containers to avoid sogginess.
Reheating Instructions
Reheat tostada shells in the oven for crispiness. Preheat the oven to 350°F (175°C). Place shells on a baking sheet for about 5 minutes. This brings back their crunch. For leftover toppings, heat them in the microwave. Cover the bowl with a damp paper towel. This keeps them from drying out.
– Tostada shells: 5 minutes in the oven.
– Toppings: Microwave with a damp paper towel.
Shelf Life and Use by Recommendations
Use the FIFO (First In, First Out) method for storing leftovers. This means eat older items first. Store chicken and beans for up to three days in the fridge. Check for spoilage signs like off smells, color changes, or odd textures. If you notice any of these, it’s best to discard them.
– Chicken and beans: Up to three days in the fridge.
– Signs of spoilage: Off smells, strange colors, or odd textures.
FAQs
How do I keep my tostadas from getting soggy?
To keep your tostadas crispy, avoid adding wet toppings. Focus on layering. Start with refried beans, then add chicken. Use fresh veggies like lettuce and tomatoes on top. Serve salsa on the side. Bake your tostadas until they are golden and crunchy. This helps keep them from getting soggy.
Can I use a different type of bean?
Yes, you can use different beans. Black beans work well. You can also try pinto beans or white beans. If you want a twist, use chickpeas for a unique flavor. Each option adds a different taste and texture to your tostadas.
What is the best salsa to use for tostadas?
For mild salsa, try a fresh tomato salsa or a mild green salsa. If you like heat, go for a spicy salsa verde or a chipotle salsa. These add depth and flavor to your tostadas. Always choose a salsa that matches your taste.
How can I customize the toppings for tostadas?
You can change your toppings to suit your taste. Try adding corn, jalapeños, or radishes for a crunch. Fresh herbs like basil or mint can add a unique twist. You can also use different cheeses, like cheddar or cotija, for more flavor. Get creative with your favorites!
What if I don’t have rotisserie chicken?
If you don’t have rotisserie chicken, you can use cooked chicken breast. Shred or chop it to match the texture. You can also use canned chicken or turkey. For a vegetarian option, try grilled veggies or tofu for a hearty filling.
Rotisserie chicken tostadas are simple and fun to make. We covered the main ingredients, like tostada shells and fresh toppings. I shared step-by-step instructions for a tasty result. Tips helped ensure the best texture, and I offered variations to keep things exciting.
In the end, enjoy this dish your way. Feel free to experiment with flavors or ingredients. With my guide, you can create something delicious every time. Happy cooking!


![Fresh strawberries are the star of this drink. They give a sweet and tart flavor. Choose ripe, bright red strawberries. They should smell sweet and feel firm. Slice them into small pieces for easy mixing. You will need 2 cups of fresh strawberries, hulled and sliced. Dried apricots add depth to the tea. They bring a chewy texture and a rich sweetness. Make sure to pick soft, bright apricots for the best taste. Chop them into small pieces to help them blend with the strawberries. You will need 1 cup of dried apricots, chopped into small pieces. These flavor enhancers boost the tea's taste. Black tea gives a strong base. Use either 2 tablespoons of loose black tea or 4 tea bags. Honey adds sweetness, so adjust to your taste. You will need 2 tablespoons of honey. Fresh lemon juice brightens the flavors and balances the sweetness. Squeeze juice from 1 lemon into the mix. Finally, fresh mint leaves provide a refreshing touch for garnish. For the full recipe, check the details above. Start by gathering your ingredients. You need fresh strawberries and dried apricots. - 2 cups fresh strawberries, hulled and sliced - 1 cup dried apricots, chopped into small pieces In a large heatproof bowl or pitcher, combine the sliced strawberries and chopped apricots. This mix brings together sweet and tart flavors. Pour 4 cups of boiling water over the fruit. Make sure all the fruit is under the water. Let it steep for about 10 minutes. This waiting time helps the flavors blend nicely. Next, we add the tea. You can use either loose black tea or tea bags. - 2 tablespoons loose black tea or 4 individual black tea bags Add the tea to the fruit mixture after the first steep. Let it sit for an extra 5 minutes. This step mixes the bold tea taste with the fruity flavor. After steeping, remove the tea bags or strain it through a fine mesh sieve. Press the fruit gently with a spoon to get all the good flavors out. While the tea is still warm, it’s time to add sweetness and zest. - 2 tablespoons honey (adjust according to your sweetness preference) - Juice of 1 fresh lemon Stir in the honey and lemon juice. Mix well until the honey dissolves. Let the tea cool at room temperature for about 10-15 minutes. Then, chill it in the fridge for at least 30 minutes. This chilling time enhances the taste. Serve the tea over ice in glasses. For a nice touch, add fresh mint leaves on top. This drink is a colorful and tasty way to enjoy a sunny day. For the full recipe, check out the [Full Recipe]. Using fresh and high-quality ingredients makes your tea stand out. Choose ripe strawberries with bright red color. Avoid any that look dull or have brown spots. For apricots, select dried ones that feel soft and moist, not hard or dry. These choices help create a sweet and fruity taste in your drink. When using tea, opt for loose black tea for a richer flavor. Sweetness is key to balancing flavors. If you like it sweeter, add more honey. Start with two tablespoons, then taste. You can always add more if needed. For a different twist, try using agave syrup or maple syrup. They both add a unique flavor. Always mix well until the sweetener dissolves, ensuring a smooth blend. Leftover strawberries and apricots can be stored. Place them in an airtight container in the fridge. They last for about three days. You can use leftover fruit in smoothies or yogurt. For leftover tea, store it in a sealed jar. Keep it in the fridge for up to a week. Enjoy it cold or heat it up for a warm drink. {{image_4}} You can swap strawberries and apricots for other fruits. Try peaches, raspberries, or mangoes. Each fruit will give a new twist to the tea. Peaches add a sweet, juicy taste, while raspberries bring a tart kick. Mangoes offer a tropical flair. Use what you love or what’s in season. I enjoy both iced and hot Strawberry Apricot Sunrise Tea. Serve it hot for a cozy feel. It warms you up on chilly days. For a refreshing treat, serve it iced. Pour the tea over ice and add mint leaves. This makes a perfect summer drink. You can enjoy it any time of year. Honey is great, but you can use other sweeteners too. Maple syrup adds a unique flavor. Agave nectar is another option, as it dissolves easily. For a sugar-free choice, try stevia. Adjust the amount to suit your taste buds. Sweetness can change the whole drink. You can store Strawberry Apricot Sunrise Tea in the fridge for up to three days. Use a clean, airtight container. This keeps the tea fresh and tasty. If you have leftovers, pour them into a pitcher. Seal it well, and place it in the fridge. Cold tea is perfect for hot days. If you want to keep the tea longer, freeze it. Pour the cooled tea into ice cube trays. Once frozen, pop the cubes into a freezer bag. This way, you can enjoy the tea later. Just remember, frozen tea is best used within three months. To serve chilled tea, just pour it over ice. If you want warm tea, heat it gently. Use a pot on low heat. Avoid boiling, as this can change the flavor. Stir in fresh mint for extra taste when serving. Enjoy the refreshing flavor of Strawberry Apricot Sunrise Tea! Strawberry Apricot Sunrise Tea is not just tasty; it also offers many health benefits. Strawberries are high in vitamin C, which boosts your immune system. They also have antioxidants that can help fight inflammation. Apricots provide vitamin A, which is great for your skin and eyes. Plus, they add natural sweetness without too much sugar. Black tea can improve heart health and boost focus. When you mix all these ingredients, you create a drink that is both delicious and good for you. Yes, you can use different types of tea! While black tea is the main choice here, you have options. Green tea adds a lighter flavor and more antioxidants. Herbal teas, such as chamomile or hibiscus, can offer unique tastes. If you prefer caffeine-free, herbal blends are perfect. Just adjust steeping times based on the type of tea you choose. Each tea will change the flavor and health benefits, so feel free to experiment. To make this tea more refreshing in summer, try a few simple tricks. First, serve it over ice, as it cools you down quickly. You can also add more lemon juice for a zesty kick. Fresh mint leaves not only add flavor but also a cooling effect. For a fruity twist, toss in additional fresh fruit slices, like peaches or citrus. Lastly, consider blending the tea with ice for a slushy drink. These tips will elevate your Strawberry Apricot Sunrise Tea to a perfect summer drink. This blog post covered how to make Strawberry Apricot Sunrise Tea. You learned about fresh strawberries, dried apricots, and flavor enhancers. We looked at preparing the fruit, steeping the tea, and tips for best quality. You now know variations, storage methods, and answers to common questions. Enjoy making this tasty tea. Experiment with different fruits and flavors. Treat yourself to a drink that's both fun and healthy. Enjoy every sip!](https://fastmealmate.com/wp-content/uploads/2025/06/c3c6e810-3cfa-4a88-aebb-572649891222-768x768.webp)
![- 4 medium-sized russet potatoes - 1 small onion - 2 large eggs - 1/4 cup all-purpose flour - 1 teaspoon baking powder - 1 teaspoon garlic powder - Salt and pepper to taste - 1/4 cup fresh parsley - Vegetable oil for frying Gather these simple ingredients. They are key to making crispy potato pancakes. The russet potatoes give a nice texture. The onion adds flavor. Eggs help bind everything together. Next, we need some dry ingredients. The flour gives structure. Baking powder helps them rise a bit. Garlic powder adds a tasty kick. For seasoning, use salt and pepper to taste. Fresh parsley brings a pop of color and freshness. Finally, vegetable oil is essential for frying. It helps achieve that golden crispiness. To see the full recipe, you can refer to the [Full Recipe]. Start by peeling four medium-sized russet potatoes. Grate them finely using a box grater. Next, do the same with one small onion. After grating, you need to remove moisture. Place the grated potatoes and onions in a clean kitchen towel. Wring out the mixture gently until it is dry. This step is key for crispy pancakes. In a large bowl, combine the grated potatoes and onions. Now, add two large beaten eggs. Stir until the eggs mix well with the potatoes and onions. In a separate bowl, whisk together the dry ingredients. You need 1/4 cup of all-purpose flour, 1 teaspoon of baking powder, and 1 teaspoon of garlic powder. Add salt and pepper to taste. Once well mixed, gradually fold this dry mixture into the potato mixture. Be gentle when folding to keep the texture light. Finally, stir in 1/4 cup of freshly chopped parsley for a burst of flavor. Heat a generous amount of vegetable oil in a skillet over medium-high heat. You want the oil to shimmer. Using a tablespoon or ice cream scoop, take the potato mixture and drop it into the hot oil. Flatten each scoop slightly with a spatula. Fry the pancakes for about 3-4 minutes on each side. Look for a golden brown color to know they are ready. Avoid overcrowding the skillet; cook them in batches if needed. Once done, transfer the pancakes to a plate lined with paper towels to absorb excess oil. Enjoy the crispy potato pancakes hot! For the full recipe, check out the [Full Recipe]. To make crispy potato pancakes, moisture control is key. After grating the potatoes and onion, place the mixture in a clean kitchen towel. Wring it out to remove extra moisture. This step is vital for crispiness. Next, heat your oil properly. Aim for medium-high heat. If the oil is too cool, the pancakes will absorb it and become soggy. If it's too hot, they may burn. You want that perfect shimmer before frying. When you cook your pancakes, avoid overcrowding the skillet. If you add too many at once, the temperature drops. This can lead to soggy pancakes. Cook them in small batches for the best results. To keep the pancakes warm, place them on a plate in an oven set to low heat. This way, they stay crispy while you finish cooking the rest. For garnishes, I love serving crispy potato pancakes with sour cream or applesauce. These toppings add a nice contrast to the crispy texture. You can also sprinkle fresh parsley on top for a pop of color. As for side dishes, consider serving them with a simple salad or sautéed greens. These pair well and balance the meal. For the full recipe, check out the detailed instructions. {{image_4}} You can boost your crispy potato pancakes with cheese. Cheddar adds a sharp bite, while feta gives a tangy twist. Just mix in some crumbled cheese before frying. Herbs and spices also enhance flavor. Chives add a mild onion taste, while dill brings a fresh note. Feel free to experiment with your favorite herbs. You can use different types of potatoes for unique flavors. Yukon Gold potatoes offer a buttery taste, while sweet potatoes add sweetness. If you want gluten-free options, try almond flour or chickpea flour. These swaps keep the pancakes crispy while adding new flavors. Serving styles can change the whole vibe of your dish. Make mini pancakes for appetizers at parties. They are easy to grab and enjoy. For brunch, stack them high and serve with toppings like sour cream or applesauce. This adds a fun twist to your meal. For the full recipe, check out the Crispy Potato Pancakes section above. To keep your crispy potato pancakes fresh, store them in an airtight container. Place parchment paper between each layer to avoid sticking. They stay good in the fridge for about 3 to 5 days. Always let them cool down before storing. This helps keep them crispy for later. If you want to save some for later, freezing is a great option. Let the cooked pancakes cool first. Then, place them in a single layer on a baking sheet. Freeze until solid, then transfer them to a freezer bag. They last about 2 to 3 months in the freezer. To reheat frozen pancakes, you can use an oven or a skillet. For the oven, preheat to 400°F and bake for about 10 to 15 minutes. If using a skillet, heat a bit of oil over medium heat and cook each pancake until warm and crispy. Enjoy them again with your favorite toppings! To keep your potato pancakes crispy, the key is moisture control. Always wring out the grated potatoes and onions to remove excess water. Use a hot pan with enough oil. Fry in small batches so the pancakes don't steam. After frying, place them on a wire rack instead of paper towels. This lets air circulate and keeps them from getting soggy. Yes, you can make potato pancakes ahead of time. Cook them, then store them in an airtight container. They will last up to two days in the fridge. To reheat, place them in a hot skillet for a few minutes on each side. This brings back their crispiness. You can also bake them in the oven at 375°F for about 10 minutes. Crispy potato pancakes pair well with many sides. Sour cream and applesauce are classic choices. You can also try Greek yogurt or a spicy sauce for a twist. Fresh herbs like chives or parsley add color and flavor. For a heartier meal, serve with a side salad or smoked salmon. You can customize potato pancakes in many ways. Add cheese like cheddar or feta for a rich taste. Fresh herbs like dill or chives add a nice touch. You can even mix in grated vegetables, like carrots or zucchini, for extra nutrition. Feel free to play with spices too, like paprika or cumin. Yes, you can bake potato pancakes. Preheat your oven to 425°F. Place the pancakes on a baking sheet lined with parchment paper. Brush them lightly with oil. Bake for about 20 minutes, flipping halfway through. They will be less greasy but still tasty. You may not get the same crispiness as frying, but they will still be good. Check the [Full Recipe] for more tips. Making crispy potato pancakes is simple and fun. We covered the key ingredients, like russet potatoes and eggs, and the steps for perfecting the mixture. I shared tips for achieving that golden, crispy texture and serving suggestions to elevate your dish. Remember, you can always customize your pancakes with different flavors or serving styles. Enjoy your cooking adventure and make these delicious pancakes your own. They’re sure to impress at any meal!](https://fastmealmate.com/wp-content/uploads/2025/06/8dba9489-4fe0-451f-83c3-8d1f72bb8948-768x768.webp)