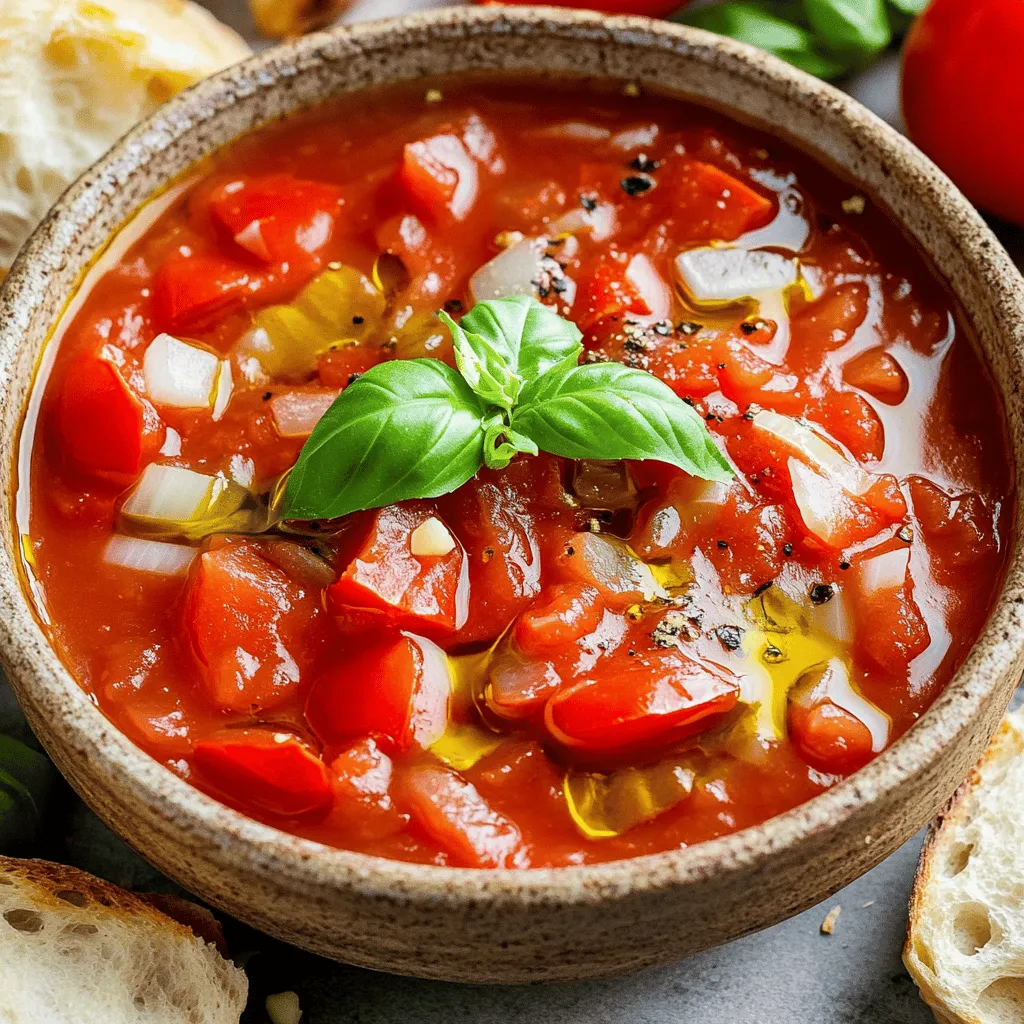
Homestyle Canned Tomato Sauce Flavorful and Fresh Recipe
 for more details and tips! Cooling your sauce is key before storing it. If you skip this step, you risk spoilage. Let your sauce cool to room temperature for about 30 minutes. This helps keep bacteria away. For storage, use airtight containers. Glass jars or plastic containers work well. Fill them, leaving some space at the top. This room allows for expansion during freezing. You can keep your tomato sauce in the fridge for about one week. After that, it may lose flavor and freshness. Always check for signs of spoilage. If you see mold or notice off smells, toss it out. Safety first! Freezing is a great option for long-term storage. You can pour your cooled sauce into freezer bags or containers. Make sure to label them with the date. This keeps your freezer organized. Aim to use your sauce within six months for the best taste. After this time, it may lose flavor. When ready to use, thaw it overnight in the fridge or heat it directly from the freezer on low heat. For homestyle canned tomato sauce, I recommend using Roma tomatoes. They have fewer seeds and thicker flesh, which gives you a rich sauce. Heirloom tomatoes are also great. They offer unique flavors, but they can be juicier. Choose what you like best! Yes, you can use canned tomatoes. They are convenient and save time. Canned tomatoes are often picked at peak ripeness, giving you good flavor. However, they may contain added salt or preservatives. This can change the taste of your sauce. Always check the label before using! If your sauce is too thin, there are easy ways to fix it. First, let it simmer longer. This allows excess water to evaporate. You can also add tomato paste. It thickens the sauce and adds more flavor. Another option is to use a blender for a smoother texture. Try these methods to get the right thickness! In this blog post, I shared how to make homestyle canned tomato sauce. We covered key ingredients like ripe tomatoes, onion, and olive oil. I provided step-by-step instructions for preparing, sautéing, and simmering. You learned tips for perfecting the sauce and several tasty variations. Finally, I gave guidelines for storage and answered common questions. Making your sauce allows for creativity and customization. Enjoy the process and the flavors you create!](https://fastmealmate.com/wp-content/uploads/2025/07/d3d80814-eb56-4e2c-a9cc-6b13653587fc.webp)
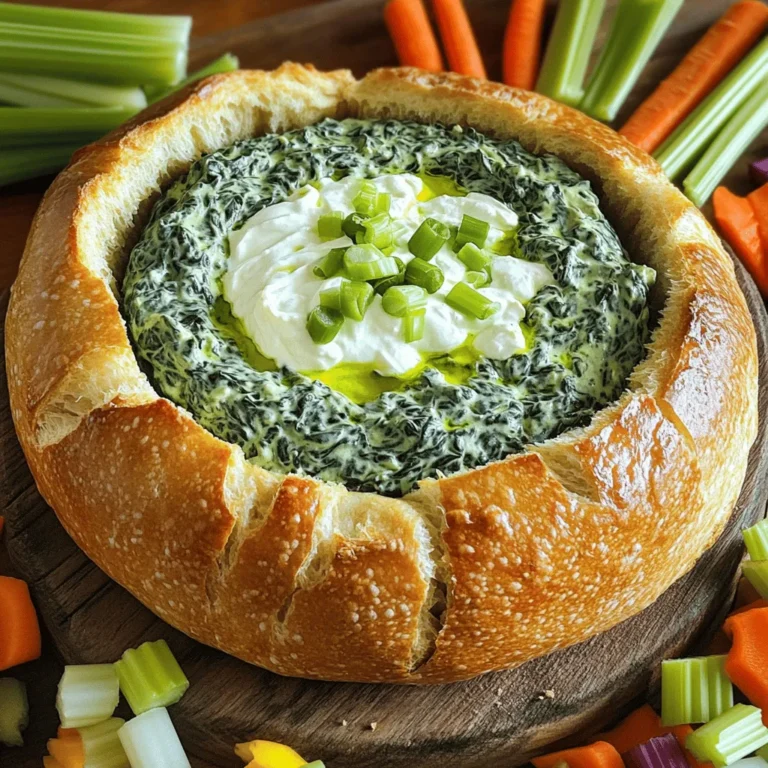
Are you ready to make a fresh, flavorful homestyle canned tomato sauce? This easy recipe uses ripe tomatoes, garlic, and onion to create a rich, tasty sauce you can enjoy year-round. Whether you want to complement your pasta or a cozy dish, I’ll guide you through each step. Let’s dive in and transform simple ingredients into something delicious and memorable!
Ingredients
Main Ingredients for Homestyle Canned Tomato Sauce
– 4 pounds ripe tomatoes, roughly chopped
– 1 large onion, finely diced
– 4 cloves garlic, minced
– 2 tablespoons extra virgin olive oil
The key to my homestyle canned tomato sauce starts with ripe tomatoes. They bring natural sweetness and bright flavor. Onions add depth, while garlic gives it a lovely aroma. Olive oil helps bind the flavors and adds richness.
Seasonings and Optional Ingredients
– 1 tablespoon sugar (optional, for balancing acidity)
– 1 tablespoon dried oregano
– 1 tablespoon dried basil
– 1 teaspoon red pepper flakes (optional, for a spicy kick)
– Salt and pepper to taste
Seasonings turn simple sauce into something special. I often add sugar to cut the acidity of tomatoes. Oregano and basil offer classic Italian notes. Red pepper flakes can add a fun heat, perfect for those who like spice.
Garnish Suggestions
– Fresh basil
– Serving pairings like pasta or crusty bread
A garnish of fresh basil brightens the dish. You can serve this sauce with pasta, on pizza, or alongside crusty bread. Each option adds a different layer of enjoyment to the meal.
Step-by-Step Instructions
Preparing the Tomatoes
Skin Removal Techniques
To start, you may want to remove the skins for a smooth sauce. First, score the bottoms of the ripe tomatoes with an X. Then, blanch them in boiling water for 30 seconds. Quickly move them to an ice bath to stop the cooking. After cooling, the skins will come off with ease.
Chopping Instructions
Once peeled, chop the tomatoes into rough pieces. You can leave the seeds if you prefer a chunkier sauce. Set the chopped tomatoes aside for later use.
Sautéing the Vegetables
Onion Preparation and Cooking Time
In a large pot, heat two tablespoons of olive oil over medium heat. While the oil warms, finely dice one large onion. Add the onion to the pot and sauté it for about five minutes. Stir it often until it turns soft and translucent.
Adding Garlic for Flavor Boost
Next, add four minced garlic cloves to the pot. Stir them in and cook for another one to two minutes. Be careful not to let the garlic burn. Burnt garlic can ruin the sauce’s taste.
Combining and Simmering
Mixing Ingredients for Optimal Flavor
Now, it’s time to add those chopped tomatoes. Toss them into the pot along with one tablespoon of dried oregano, one tablespoon of dried basil, and salt and pepper to taste. If you like a hint of sweetness, add one tablespoon of sugar. Stir everything together well.
Adjusting Heat and Cooking Duration
Bring the mixture to a gentle simmer. Lower the heat to maintain a steady bubble. Let it simmer uncovered for 45 minutes to 1 hour. Stir it occasionally. The sauce will thicken and flavors will deepen. Adjust the cooking time based on how thick you want your sauce.
Tips & Tricks
Perfecting Your Tomato Sauce
Temperature Control for Simmering
Keep your sauce at a low simmer. This lets the flavors blend well. If it bubbles too much, turn the heat down. A steady simmer helps your sauce thicken nicely.
Tweaking Seasonings Based on Preference
Taste your sauce during cooking. If it needs more flavor, add salt or herbs. Each cook has their own taste, so adjust as you like. You can also add a pinch of sugar to cut acidity.
Texture Adjustments
Using a Blender for a Smooth Finish
For a silky sauce, use a blender. An immersion blender works great. Blend until you reach your desired smoothness. This makes the sauce rich and creamy.
Maintaining Chunkiness for Rustic Appeal
If you like a chunky sauce, skip the blender. Just chop the tomatoes and other veggies coarsely. This gives your sauce a hearty feel. It pairs well with pasta or as a dip.
Canning and Storage Tips
Essential Canning Procedures
Use sterilized jars for canning. Fill them with hot sauce, leaving space at the top. Seal the jars and process them in boiling water. This keeps your sauce safe for months.
Refrigeration vs. Freezing
If you plan to eat soon, store the sauce in the fridge. It lasts about a week. For longer storage, freeze it in airtight containers. Label them with the date to track freshness.
Variations
Spice It Up
You can add heat to your sauce with red pepper flakes. Start with one teaspoon for a mild kick. If you want more heat, add more flakes as you taste. Other spices can also change the flavor. Try adding a pinch of smoked paprika for a smoky taste. A dash of cumin can bring warmth, while a sprinkle of thyme adds earthiness.
Vegetarian and Vegan Options
To make your sauce vegetarian or vegan, swap out any meat base for extra veggies. You can use bell peppers, mushrooms, or zucchini for depth. Add a handful of spinach for color and nutrition. For a richer texture, blend in some pureed beans.
Regional Variations
Italian styles often use only basil and garlic for a classic taste. You can add a splash of red wine for depth. In Spain, you might use saffron and bell peppers. In India, consider adding cumin and coriander for a unique twist. Each variation brings its flavor, showing how versatile this sauce can be.
Storage Info
Proper Cooling Techniques
Cooling your sauce is key before storing it. If you skip this step, you risk spoilage. Let your sauce cool to room temperature for about 30 minutes. This helps keep bacteria away.
For storage, use airtight containers. Glass jars or plastic containers work well. Fill them, leaving some space at the top. This room allows for expansion during freezing.
Refrigeration Guidelines
You can keep your tomato sauce in the fridge for about one week. After that, it may lose flavor and freshness. Always check for signs of spoilage. If you see mold or notice off smells, toss it out. Safety first!
Freezing Homestyle Tomato Sauce
Freezing is a great option for long-term storage. You can pour your cooled sauce into freezer bags or containers. Make sure to label them with the date. This keeps your freezer organized.
Aim to use your sauce within six months for the best taste. After this time, it may lose flavor. When ready to use, thaw it overnight in the fridge or heat it directly from the freezer on low heat.
FAQs
What is the best type of tomatoes for this sauce?
For homestyle canned tomato sauce, I recommend using Roma tomatoes. They have fewer seeds and thicker flesh, which gives you a rich sauce. Heirloom tomatoes are also great. They offer unique flavors, but they can be juicier. Choose what you like best!
Can I use canned tomatoes instead of fresh?
Yes, you can use canned tomatoes. They are convenient and save time. Canned tomatoes are often picked at peak ripeness, giving you good flavor. However, they may contain added salt or preservatives. This can change the taste of your sauce. Always check the label before using!
How do I thicken my tomato sauce if it is too thin?
If your sauce is too thin, there are easy ways to fix it. First, let it simmer longer. This allows excess water to evaporate. You can also add tomato paste. It thickens the sauce and adds more flavor. Another option is to use a blender for a smoother texture. Try these methods to get the right thickness!
In this blog post, I shared how to make homestyle canned tomato sauce. We covered key ingredients like ripe tomatoes, onion, and olive oil. I provided step-by-step instructions for preparing, sautéing, and simmering. You learned tips for perfecting the sauce and several tasty variations. Finally, I gave guidelines for storage and answered common questions.
Making your sauce allows for creativity and customization. Enjoy the process and the flavors you create!
 for more details and tips! Cooling your sauce is key before storing it. If you skip this step, you risk spoilage. Let your sauce cool to room temperature for about 30 minutes. This helps keep bacteria away. For storage, use airtight containers. Glass jars or plastic containers work well. Fill them, leaving some space at the top. This room allows for expansion during freezing. You can keep your tomato sauce in the fridge for about one week. After that, it may lose flavor and freshness. Always check for signs of spoilage. If you see mold or notice off smells, toss it out. Safety first! Freezing is a great option for long-term storage. You can pour your cooled sauce into freezer bags or containers. Make sure to label them with the date. This keeps your freezer organized. Aim to use your sauce within six months for the best taste. After this time, it may lose flavor. When ready to use, thaw it overnight in the fridge or heat it directly from the freezer on low heat. For homestyle canned tomato sauce, I recommend using Roma tomatoes. They have fewer seeds and thicker flesh, which gives you a rich sauce. Heirloom tomatoes are also great. They offer unique flavors, but they can be juicier. Choose what you like best! Yes, you can use canned tomatoes. They are convenient and save time. Canned tomatoes are often picked at peak ripeness, giving you good flavor. However, they may contain added salt or preservatives. This can change the taste of your sauce. Always check the label before using! If your sauce is too thin, there are easy ways to fix it. First, let it simmer longer. This allows excess water to evaporate. You can also add tomato paste. It thickens the sauce and adds more flavor. Another option is to use a blender for a smoother texture. Try these methods to get the right thickness! In this blog post, I shared how to make homestyle canned tomato sauce. We covered key ingredients like ripe tomatoes, onion, and olive oil. I provided step-by-step instructions for preparing, sautéing, and simmering. You learned tips for perfecting the sauce and several tasty variations. Finally, I gave guidelines for storage and answered common questions. Making your sauce allows for creativity and customization. Enjoy the process and the flavors you create!](https://fastmealmate.com/wp-content/uploads/2025/07/d3d80814-eb56-4e2c-a9cc-6b13653587fc-300x300.webp)

![- Fettuccine or Linguine: I love using fettuccine or linguine for this dish. These pastas hold the creamy sauce well. Their flat shape allows for a perfect bite every time. - Fresh Seafood: When choosing shrimp, look for firm, pink, and shiny ones. For scallops, they should be plump and slightly translucent. Fresh seafood makes all the difference in flavor. - Aromatics and Seasoning: Garlic and onion add depth to the dish. Use three cloves of garlic for a bold flavor. A small onion gives a nice sweetness. Fresh lemon juice and zest brighten the entire meal. - Fresh Basil Leaves: Adding fresh basil leaves boosts flavor and looks great. Tear them by hand for a rustic touch. Scatter them on top just before serving. - Grated Parmesan Cheese: Choose a good-quality Parmesan cheese for the best taste. Grate it fresh for a rich, nutty finish. It melts nicely into the pasta and adds creaminess. For the full recipe, visit the details above and enjoy the process! Start by boiling a large pot of salted water. Add the fettuccine or linguine. Cook it until it's al dente. This means it should be firm but cooked through. This step is key because overcooked pasta becomes mushy. After cooking, drain the pasta but save about ½ cup of the pasta water. This water can help thicken your sauce later. Next, heat 2 tablespoons of olive oil in a large skillet over medium heat. Wait until the oil shimmers before adding minced garlic and chopped onion. Sauté for about 3-4 minutes. You want the onion to become clear and fragrant. This step builds a great flavor base for your dish. Now it’s time to add the seafood. Place the shrimp and scallops in the skillet. Cook for about 4-5 minutes, stirring gently. The shrimp will turn pink, and the scallops will look opaque when done. Avoid overcooking them, or they will become rubbery. After the seafood is cooked, pour in a cup of heavy cream. Stir well to mix all the ingredients. Then, add the lemon zest, lemon juice, and red pepper flakes if you want some heat. Season with salt and black pepper. Let this sauce simmer for about 2-3 minutes. This time lets all the flavors blend together nicely. Finally, add the cooked pasta to the skillet. Toss everything gently to coat the noodles in the creamy sauce. If the sauce is too thick, add the reserved pasta water a little at a time. This helps reach the perfect consistency. Let it rest for a minute before serving to deepen the flavors. For the complete recipe, check the [Full Recipe]. To make the best seafood pasta, pay attention to the seafood. Always use fresh shrimp and scallops. Look for firm shrimp and plump scallops. Avoid overcooking seafood; it should be cooked just until it turns opaque. A common mistake is cooking seafood too long. This can make it tough and chewy. Spices and herbs bring your dish to life. Use fresh herbs like basil or parsley. Lemon zest adds brightness. A pinch of red pepper flakes adds heat. Try adding a dash of white wine for depth. These flavors work well with the creamy sauce and seafood. Plating is key to a great meal. Use large, shallow bowls for serving. Twirl the pasta for an elegant look. Garnish with fresh basil leaves and a sprinkle of Parmesan cheese. Drizzle a little extra olive oil on top for shine. This makes your dish appealing and appetizing. For a fun touch, consider adding a lemon wedge on the side. It gives a pop of color and flavor. These small details can impress your guests. For the complete recipe, check out the [Full Recipe]. {{image_4}} If you want to change up the seafood in this dish, there are great options. You can substitute shrimp and scallops with: - Crab meat - Lobster - Mussels - Clams These options can add unique flavors to your pasta. For example, crab meat gives a sweet taste, while mussels add a briny touch. Just make sure to adjust the cooking time, as some seafood cooks faster than others. You can switch up the pasta type for different health goals. Consider using: - Whole wheat pasta - Gluten-free pasta Whole wheat pasta has more fiber and nutrients than standard pasta. Gluten-free pasta is great for those with wheat allergies. Both options work well with the sauce and seafood. Just cook them according to package directions for the best texture. Want to try something new? You can play with the sauce for your dish. Here are some ideas: - Use marinara sauce for a classic Italian touch. - Try a basil pesto for a fresh and herbal flavor. Marinara sauce adds a rich tomato taste. Pesto brings in bright flavors and a creamy texture. Feel free to mix and match these sauces with your seafood for fun twists. You can find the full recipe to guide you through all these ideas. After enjoying your seafood pasta, store leftovers right away. Let the dish cool for about 30 minutes. Then, place it in an airtight container. This keeps it fresh for up to three days. Make sure to check for any signs of spoilage before eating. When reheating seafood pasta, keep the texture and flavor in mind. Use a skillet over low heat. Add a splash of water or broth to help with moisture. Stir gently to avoid breaking the seafood. Heat until it’s warm, about 5-7 minutes. You can also use the microwave. Just cover the dish loosely with a lid or wrap to keep it moist. To freeze your seafood pasta, let it cool completely first. Place it in a freezer-safe container. It can last up to two months in the freezer. To defrost, move the container to the fridge overnight. Reheat gently in a skillet or microwave, adding a splash of cream or broth to restore creaminess. Enjoy your delicious seafood pasta anytime! For the full recipe, check out the earlier section. You can tell shrimp and scallops are cooked when they change color. Shrimp should turn pink, and scallops should become opaque. For shrimp, look for a tight curl. For scallops, they should have a firm texture. If you cut into them, they should be white inside with no translucent areas. This means they are safe to eat. Yes, you can prepare this recipe ahead of time. Cook the pasta and seafood separately. Store them in airtight containers in the fridge. When you are ready to eat, simply reheat the seafood and mix it with the pasta and sauce. This makes it easy for busy weeknights or special occasions. A crisp white wine works best with seafood pasta. Look for a Sauvignon Blanc or Pinot Grigio. These wines have bright flavors that complement the seafood. If you prefer red, a light Pinot Noir can also be a good choice. The key is to avoid heavy wines that might overpower the dish. Yes, frozen seafood is a great option. Thaw your shrimp and scallops in the fridge overnight or under cold water. Avoid using hot water, as it can start to cook the seafood. Once thawed, pat them dry with a paper towel before cooking. This helps achieve a nice sear and prevents excess moisture in your dish. For the best flavor, try to use high-quality frozen seafood. You can find the full recipe [here](#). You've learned key ingredients for seafood pasta and how to cook it perfectly. Fettuccine or linguine, fresh seafood, and the right spices are essential. Remember to cook your pasta al dente and reserve some water. Proper techniques for sautéing and combining everything create a delicious cream sauce. Try different seafood, pasta types, and sauces for variety. Store and reheat your leftovers properly to keep the flavor. Now, you have what you need to make amazing seafood pasta at home. Enjoy your cooking adventure!](https://fastmealmate.com/wp-content/uploads/2025/06/7c1ca401-a8ff-43d0-aae3-34555c9d3a34-768x768.webp)