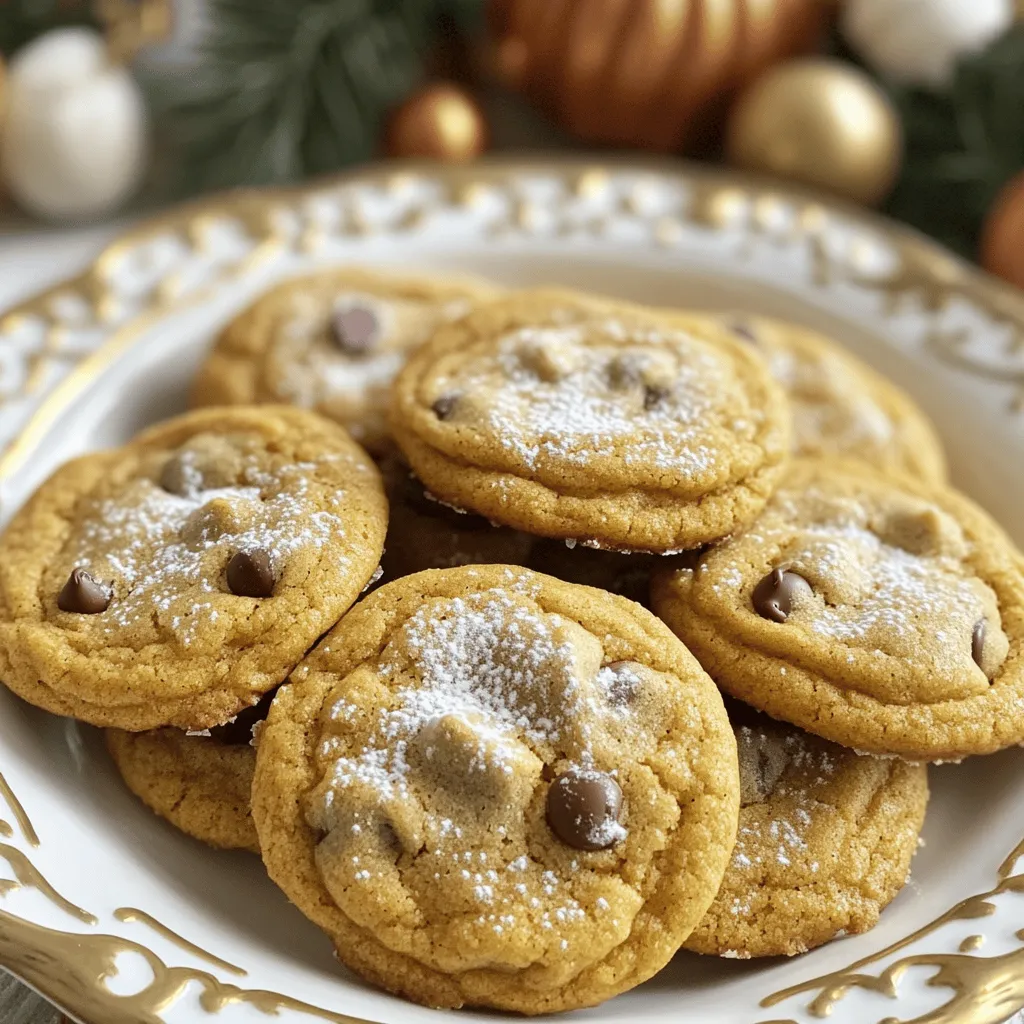
Chewy Pumpkin Spice Cookies Perfect for Fall Baking

Fall is here, and what better way to celebrate than with chewy pumpkin spice cookies? These delightful treats pack all the warm flavors of the season into each bite. In this blog post, I’ll guide you through the simple steps to make cookies that are soft, chewy, and oh-so-delicious. From selecting the finest ingredients to tips for perfecting texture, let’s dive into the world of fall baking together!
Ingredients
Detailed List of Ingredients
To make chewy pumpkin spice cookies, gather these items:
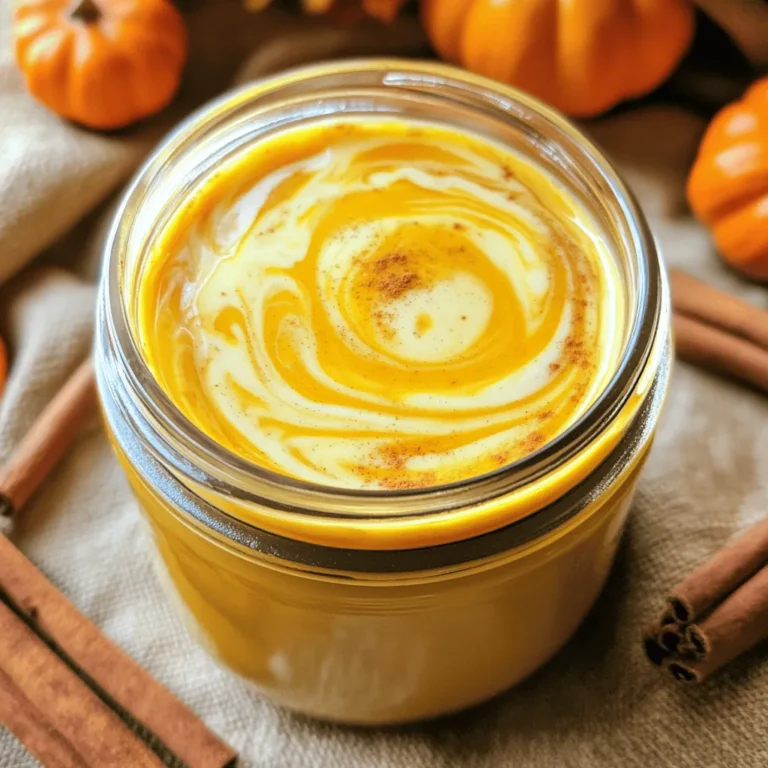
– 1 cup canned pumpkin puree
– 1/2 cup unsalted butter, softened at room temperature
– 1 cup brown sugar, firmly packed
– 1/2 cup granulated sugar
– 1 large egg, at room temperature
– 2 teaspoons vanilla extract
– 2 cups all-purpose flour
– 1 teaspoon baking soda
– 1 teaspoon baking powder
– 1 teaspoon ground cinnamon
– 1 teaspoon ground ginger
– 1/2 teaspoon ground nutmeg
– 1/4 teaspoon ground cloves
– 1/2 teaspoon salt
– 1 cup chocolate chips or chopped nuts (optional, for added texture)
Each ingredient plays a key role. The pumpkin puree gives moisture and flavor. The sugars create sweetness and help with browning. The spices add warmth, making these cookies perfect for fall.
Optional Add-ins and Toppings
You can customize your cookies with fun add-ins. Here are some ideas:
– Chocolate chips: Add a sweet touch and a nice texture.
– Chopped nuts: Use walnuts or pecans for crunch.
– White chocolate chips: For a creamy, sweet twist.
– Dried cranberries: They add a tart flavor and a pop of color.
Feel free to mix and match based on what you like!
Tips for Selecting Quality Ingredients
Choosing good ingredients makes a big difference. Here are some tips:
– Pumpkin puree: Look for 100% pure pumpkin, not pumpkin pie filling.
– Butter: Use unsalted butter for better control over salt levels.
– Sugars: Choose fresh brown sugar; it should be moist and clump together.
– Spices: Use fresh spices for a more intense flavor. Check the date on the jar.
With quality ingredients, your cookies will taste great and impress everyone!
Step-by-Step Instructions
Prepping the Oven and Baking Sheet
First, set your oven to 350°F (175°C). This temperature helps the cookies bake just right. While the oven heats, take a baking sheet and line it with parchment paper. This keeps the cookies from sticking. It also makes cleanup a breeze.
Creaming Butter and Sugars
In a large mixing bowl, add the softened butter, brown sugar, and granulated sugar. Use an electric mixer to beat them together. Mix for about 2-3 minutes. The mixture should turn light and fluffy. This step is key for soft, chewy cookies.
Mixing Wet and Dry Ingredients
Next, add the pumpkin puree, room-temperature egg, and vanilla extract to the bowl. Beat everything together until smooth. In another bowl, whisk together the flour, baking soda, baking powder, ground cinnamon, ground ginger, ground nutmeg, ground cloves, and salt. Make sure everything is mixed well.
Now, slowly add the dry mixture to the wet mixture. Stir gently until combined. It’s okay if a few lumps remain. This helps keep the cookies chewy.
Baking and Cooling Process
If you want some extra fun, now’s the time to fold in chocolate chips or chopped nuts. Use a tablespoon or cookie scoop to drop rounded dough onto the baking sheet. Leave at least 2 inches of space between each cookie.
Put the baking sheet in the oven and bake for 12-15 minutes. Look for lightly golden edges and soft centers. Once baked, let the cookies cool on the sheet for about 5 minutes. After that, move them to a wire rack to cool completely.
Tips & Tricks
Achieving the Perfect Chewy Texture
To make your cookies chewy, use plenty of brown sugar. Brown sugar has moisture, which helps cookies stay soft. Also, do not overmix your dough. Mix just until the dry ingredients blend in. This keeps the cookies tender. Lastly, underbake them slightly. Remove them when the edges are golden but the middle is still soft.
Common Mistakes to Avoid
One common mistake is using cold butter. Always use softened butter for better mixing. Another mistake is not measuring flour correctly. Too much flour makes cookies dry and hard. Use a spoon to scoop flour into a measuring cup, then level it off with a knife. Lastly, don’t skip the chilling step. If you chill the dough for 30 minutes, it helps shape the cookies and improves texture.
Alternate Baking Methods
If you want to switch things up, try making mini cookies. Just scoop smaller amounts of dough. Bake them for less time—around 8-10 minutes. You can also use a silicone mat instead of parchment paper. This can give you a nice, even bake. For a crispier edge, bake them at a higher temperature for a shorter time. Just watch them closely to prevent burning.
Variations
Chocolate Chip vs. Nut Variations
You can make chewy pumpkin spice cookies even better. Try adding chocolate chips for a sweet touch. The chocolate melts just right, creating a gooey center. If you prefer nuts, chop them up and fold them into the dough. Walnuts or pecans add a nice crunch. Both options work well, so pick your favorite!
Gluten-Free and Vegan Alternatives
Want to make these cookies gluten-free? Use almond flour or a gluten-free flour blend. Just make sure the flour has a good texture. For a vegan version, swap the butter for coconut oil. Use a flax egg instead of a regular egg. Mix one tablespoon of ground flaxseed with three tablespoons of water, then let it sit until it thickens. These swaps keep the cookies tasty and chewy.
Seasonal Flavor Additions
Get creative with seasonal flavors! Add a splash of maple syrup for a warm taste. You can also mix in dried cranberries or raisins for a fruity twist. If you love spice, try adding a pinch of cardamom or allspice. These little changes bring a fresh spin to your cookies. Enjoy experimenting!
Storage Info
Best Practices for Cookie Storage
To keep your chewy pumpkin spice cookies fresh, store them in an airtight container. A glass jar or a plastic box works well. Place parchment paper between layers of cookies to avoid sticking. Keep them at room temperature for up to one week. If you want to keep them longer, consider freezing them.
Freezing Instructions
Freezing these cookies is easy and a great way to save some for later. First, let the cookies cool completely. Then, arrange them in a single layer on a baking sheet. Freeze them for about two hours. Once frozen, transfer the cookies to a freezer-safe bag or container. They’ll stay fresh for up to three months. When you’re ready to enjoy them, just thaw at room temperature.
How to Refresh Cookies
If your cookies lose their softness, don’t worry! To refresh them, preheat your oven to 300°F (150°C). Place the cookies on a baking sheet and warm them for about 5-10 minutes. This will help them regain their chewy texture. You can also add a slice of bread to the container when storing. The bread keeps the cookies soft for longer.
FAQs
What makes cookies chewy?
Chewy cookies have a special texture due to specific ingredients and methods. The balance of butter and sugar plays a key role. When you use more brown sugar, it adds moisture and a nice chew. The egg also helps, as it binds the ingredients and adds richness. Lastly, mixing the dough just right keeps it soft and chewy. Avoid over-mixing; it can make the cookies tough.
Can I substitute pumpkin puree?
Yes, you can substitute pumpkin puree with other options. Mashed bananas or applesauce work well, adding moisture. However, these swaps change the flavor. If you want to keep the spice flavor, consider using butternut squash puree. This keeps the taste close to the original.
How long do chewy pumpkin spice cookies last?
Chewy pumpkin spice cookies last about one week when stored properly. Keep them in an airtight container at room temperature. If you want them to last longer, you can freeze them. They stay fresh for up to three months in the freezer. Just make sure to wrap them well to avoid freezer burn.
How to adjust the recipe for different serving sizes?
If you want to adjust the recipe, it’s easy. First, decide how many cookies you want. If you want half the amount, simply cut each ingredient in half. For double the cookies, double each ingredient. Always keep the baking time the same, but check for doneness.
To make great cookies, you need the right ingredients and steps. Choosing quality items matters, as does mixing well. Follow the tips to avoid mistakes and explore fun variations. Store cookies properly for lasting taste. Remember, chewy cookies come from the right blend of ingredients and care in baking. Enjoy the sweet results and share with friends or family! Happy baking!

![To make garlic butter shrimp, gather these simple ingredients: - 1 lb large shrimp, deveined and peeled - 6 tablespoons unsalted butter - 5 cloves garlic, finely minced - 1 teaspoon red pepper flakes - 1 lemon, zested and juiced - 2 tablespoons fresh parsley, finely chopped - Salt and freshly ground black pepper, to taste - Optional: 1 tablespoon extra virgin olive oil These ingredients create a dish full of flavor. The shrimp give a sweet and briny taste. The garlic brings a warm, earthy aroma. Butter adds richness and a smooth texture. Lemon juice brightens the dish and balances the flavors. Fresh parsley gives a pop of color and freshness. Feel free to adjust the red pepper flakes. If you like heat, add more! If you prefer a milder flavor, use less. The optional olive oil helps prevent butter from burning. It adds depth to the dish. Once you gather these ingredients, you're ready to dive into the world of garlic butter shrimp. For a full recipe, check out the section above. To start, heat a large skillet over medium heat. Add 3 tablespoons of unsalted butter and, if you like, 1 tablespoon of extra virgin olive oil. This oil helps keep the butter from burning and adds flavor. Once the butter melts, add 5 cloves of minced garlic along with 1 teaspoon of red pepper flakes. Sauté for about 1-2 minutes. Stir often until the garlic smells great and turns light golden brown. Watch closely, so the garlic doesn’t burn. Now, it’s time for the shrimp. Carefully add 1 pound of peeled and deveined shrimp to the skillet. Spread them out in a single layer. Season with salt and freshly ground black pepper. Let the shrimp cook for about 2-3 minutes without stirring. You will see them change color to pink and opaque. When they look good, gently flip the shrimp over. Add the zest and juice from 1 lemon along with the remaining 3 tablespoons of butter. Cook for another 2-3 minutes until the shrimp are fully cooked and coated in the buttery sauce. When the shrimp are done, take the skillet off the heat. Stir in 2 tablespoons of finely chopped parsley. Taste the dish and adjust seasoning by adding more salt or pepper if needed. Serve the garlic butter shrimp hot to enjoy the best flavor. For more details, check the Full Recipe. To make your garlic butter shrimp shine, focus on two key areas: garlic and seasoning. - Avoid burning garlic: Garlic burns fast. Keep your heat at medium. Stir it often. You want it golden, not dark. Burnt garlic tastes bad. - Adjust seasoning to preference: Taste is personal. Start with salt and pepper. Add more to match your liking. You can also play with red pepper flakes for heat. Now, let’s talk about how to serve your dish. Presentation matters, and there are tasty ways to enjoy it. - Pairing with rice or bread: Serve your shrimp over fluffy rice. Jasmine or basmati works great. If you prefer, slice some warm bread. It soaks up the sauce well. - Garnishing ideas: Fresh parsley adds color. A few lemon wedges brighten your plate. A sprinkle of extra red pepper flakes adds a kick. Need more help? Here are some useful tools. - Suggested video tutorial or high-quality images: Look for a video that shows the steps in action. It helps to see the cooking process. - Nutritional information: Check out the calories and nutrients in this dish. It’s good to know what you're eating. For the full recipe, click [Full Recipe]. Enjoy cooking! {{image_4}} You can play with the flavors in garlic butter shrimp. For a kick, try Spicy Garlic Butter Shrimp. Just add more red pepper flakes. Adjust the heat to your taste. This gives the dish a nice kick that many love. Another great option is Lemon Herb Garlic Shrimp. Add fresh herbs like thyme or basil for a fresh twist. You can also squeeze extra lemon juice for more brightness. This variation makes the dish feel light and refreshing. You can swap some ingredients for different flavors. Instead of butter, try using olive oil. This gives a different taste and is a healthier choice. You can also use ghee for a rich flavor. Adding vegetables can change the dish too. Toss in asparagus or cherry tomatoes. These add color and nutrients. They cook quickly and soak up the garlic butter sauce. If you need gluten-free options, this recipe is easy. Just make sure your red pepper flakes and any other spices are gluten-free. For a dairy-free option, use olive oil instead of butter. You can also try vegan butter. This keeps the flavor while making it suitable for those avoiding dairy. By making these small adjustments, you can enjoy garlic butter shrimp in many ways. For the full recipe, check out the details above. To store leftovers, place the garlic butter shrimp in an airtight container. Ensure the shrimp cool down first. This keeps them fresh and tasty. You should eat the leftovers within 2 days. The flavors stay best within this time. For reheating, I suggest using a skillet. Heat it on low and add a little butter. This method keeps the shrimp moist. Stir gently to avoid overcooked shrimp. If you use the microwave, heat in short bursts. Check every 30 seconds until warm. You can freeze cooked shrimp for later use. Place them in a freezer-safe bag and remove as much air as possible. They can last up to 3 months in the freezer. To defrost, place the shrimp in the fridge overnight. For a faster method, submerge the bag in cold water. This way, you can enjoy your garlic butter shrimp whenever you want. For the full recipe, check out the [Full Recipe]. Cook shrimp for about 2-3 minutes on each side. They turn pink and opaque. This short time keeps them tender and juicy. Overcooking makes them tough. Always check their texture before serving. Yes, you can use frozen shrimp. Thaw them first in cold water. It takes about 15-20 minutes. Pat them dry before cooking. This helps them sear nicely in the pan. Cooking frozen shrimp directly may not give the best results. You can pair garlic butter shrimp with many sides. Rice is a great choice, like jasmine or basmati. You can also serve it with crusty bread. A fresh salad or steamed veggies work well too. They balance the rich flavors of the shrimp. This recipe is very flexible. You can adjust the spice level by adding more or less red pepper flakes. Want a different flavor? Try adding fresh herbs like basil or cilantro. You can even add veggies like asparagus or bell peppers. The choice is yours! For the full recipe, check the earlier section. This blog post covered a simple garlic butter shrimp recipe with step-by-step instructions. You learned about key ingredients, cooking tips, and variations for flavor. Storing and reheating shrimp was also discussed. This dish is not only easy to make, but it’s also delicious too. Experiment with the ingredients or try new sides to make it your own. Enjoy your cooking, and have fun exploring different flavors and options!](https://fastmealmate.com/wp-content/uploads/2025/05/4326bcb2-842f-4d6f-96a8-35ed43fbf561-768x768.webp)