
Healthy Pumpkin Cream Cheese Muffins Delightful Treat
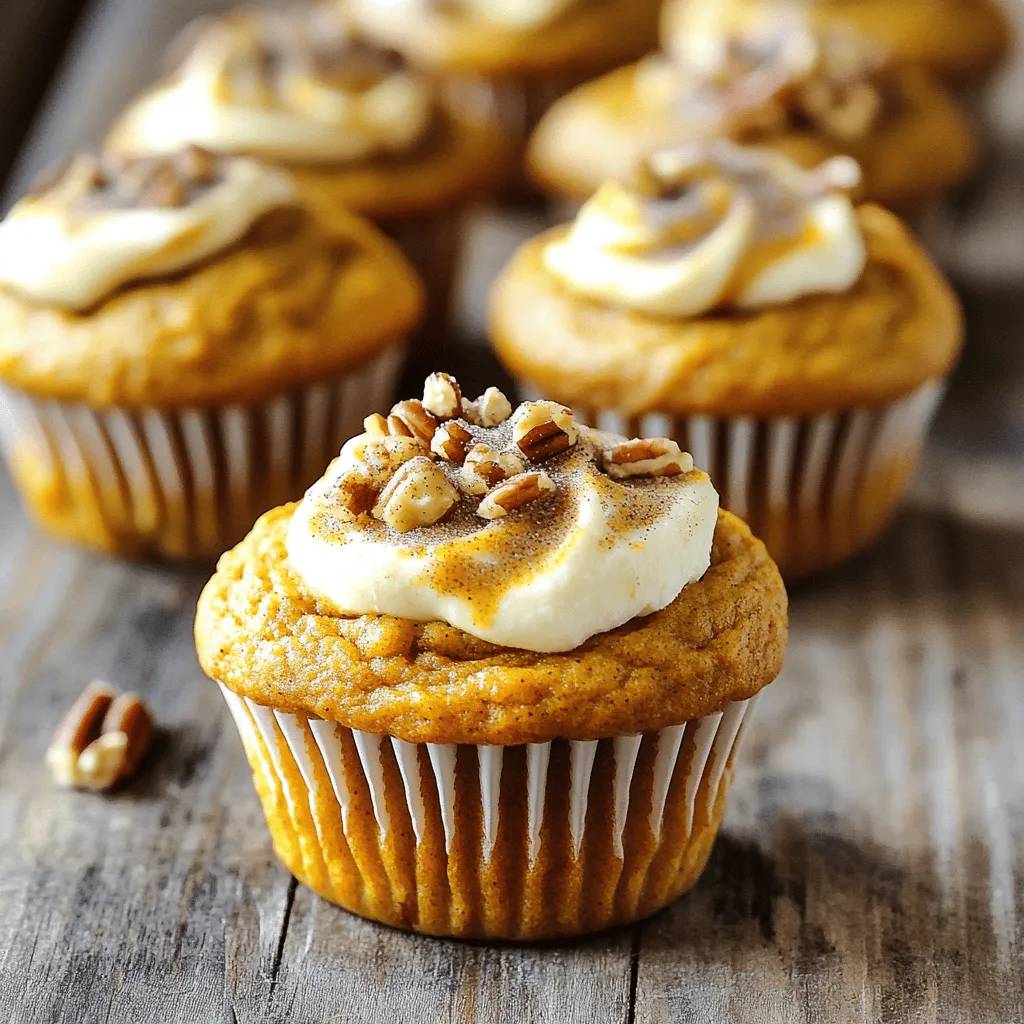
Are you ready for a treat that’s not just tasty but good for you too? These Healthy Pumpkin Cream Cheese Muffins combine the warmth of pumpkin with rich cream cheese, making each bite delightful. Packed with nutrients, they bring together flavor and health in every muffin. In this post, I’ll guide you through the ingredients, steps, and tips to create perfect muffins. Let’s dive into this fun and easy baking adventure!
Ingredients
Complete List of Ingredients
– 1 cup pure pumpkin puree
– 1/2 cup Greek yogurt
– 1/4 cup honey or maple syrup
– 2 large eggs
– 1 teaspoon vanilla extract
– 1 1/4 cups whole wheat flour
– 1 teaspoon baking powder
– 1 teaspoon baking soda
– 1 teaspoon ground cinnamon
– 1/2 teaspoon ground nutmeg
– 1/4 teaspoon salt
– 1/2 cup cream cheese, softened
– 1 tablespoon brown sugar (optional for topping)
– Chopped pecans or walnuts for garnish (optional)
Each ingredient in these muffins brings unique health benefits.
– Pumpkin puree is low in calories but high in fiber. It’s full of vitamins A and C, which help your immune system.
– Greek yogurt adds protein and healthy fats. It acts as a great binder in the batter.
– Honey or maple syrup provides natural sweetness and antioxidants. Choose raw honey for the best health boost.
– Whole wheat flour is a better option than white flour. It has more fiber and nutrients.
– Eggs are packed with protein and essential nutrients. They help bind the ingredients and add moisture.
– Spices like cinnamon and nutmeg not only add flavor but also have health benefits, such as anti-inflammatory properties.
For quality, I recommend brands like Chobani for yogurt and Bob’s Red Mill for flour. They ensure you get the best taste and nutrition.
Nutritional Information
Each muffin has about 150 calories. They also include:
– Protein: 4g
– Carbohydrates: 20g
– Fat: 6g
These muffins are rich in vitamins. You’ll find:
– Vitamin A from pumpkin, which is great for your eyes.
– Calcium and probiotics from Greek yogurt, benefiting your gut health.
– Antioxidants from honey that may help fight inflammation.
Dietary Alternatives
For gluten-free options, try using almond flour or a gluten-free blend. Both give a great texture to the muffins without the gluten.
If you need dairy-free options, use a dairy-free cream cheese like Tofutti or Kite Hill. These substitutes work well and still provide a creamy center in the muffins.
Step-by-Step Instructions
Preparation Steps
1. First, preheat your oven to 350°F (175°C). This is key for even baking.
2. Prepare a 12-cup muffin tin. You can use muffin liners or lightly grease each cup with oil or cooking spray.
3. In a large mixing bowl, combine the wet ingredients. Use one cup of pure pumpkin puree, half a cup of Greek yogurt, a quarter cup of honey or maple syrup, two large eggs, and one teaspoon of vanilla extract.
4. Whisk these ingredients together until they are smooth. This is important to ensure a great texture.
Combining Ingredients
1. In a separate bowl, mix the dry ingredients. Use one and a quarter cups of whole wheat flour, one teaspoon of baking powder, one teaspoon of baking soda, one teaspoon of ground cinnamon, half a teaspoon of ground nutmeg, and a quarter teaspoon of salt.
2. Whisk the dry ingredients thoroughly. This helps them blend well and ensures even flavor.
3. Carefully add the dry mix to the wet mixture. Stir gently until just combined. Do not over-mix! This leads to dense muffins, and we want them light and fluffy.
Baking the Muffins
1. Prepares the cream cheese filling in a small bowl. Beat half a cup of softened cream cheese until smooth. If you want, add one tablespoon of brown sugar for extra flavor.
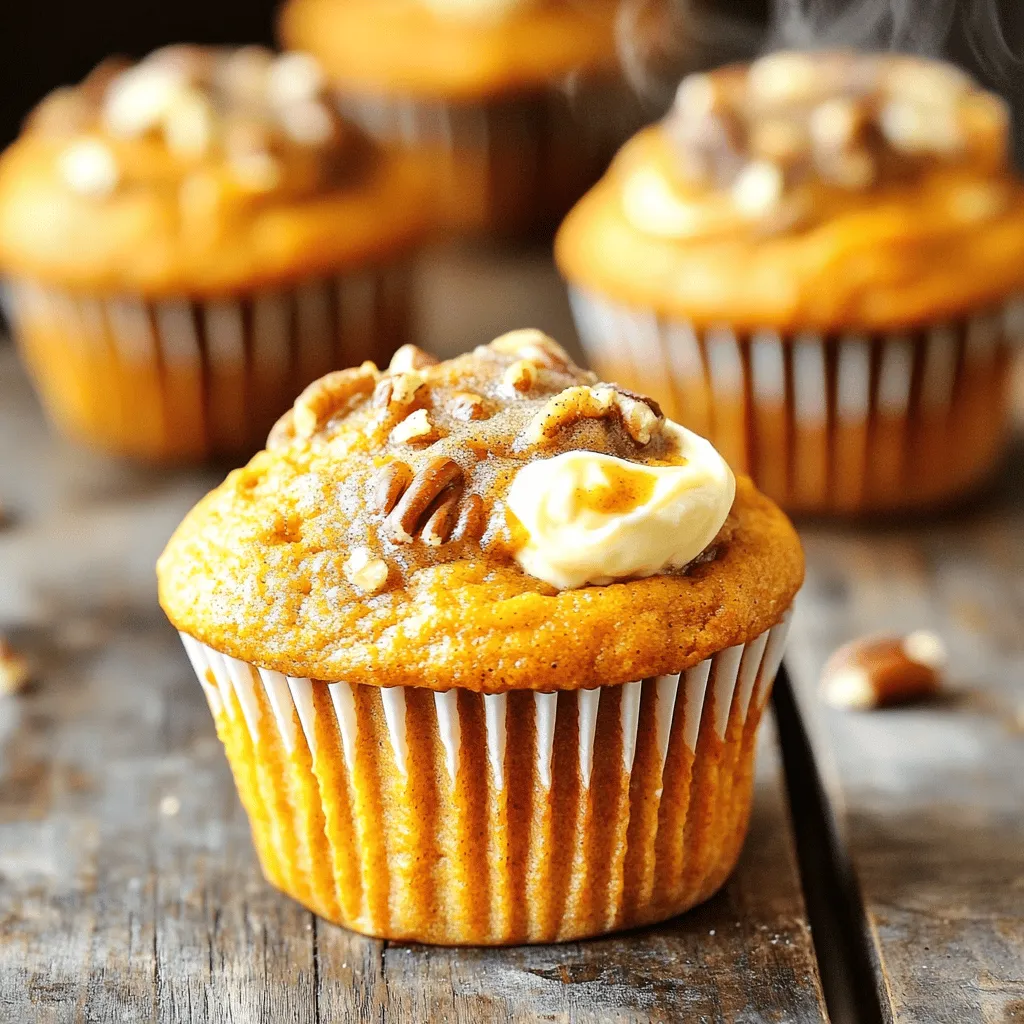
2. Fill each muffin cup halfway with pumpkin batter. Drop a teaspoon of cream cheese into the center. Top with more pumpkin batter, filling each cup about three-quarters full.
3. If you like, sprinkle chopped pecans or walnuts on top. You can also add a pinch of brown sugar for a sweet crust.
4. Place the muffin tin in the preheated oven. Bake for 18-20 minutes. To check for doneness, insert a toothpick into the center. It should come out clean.
5. Once done, remove the muffins from the oven and let them cool for five minutes in the tin. Then, transfer them to a wire rack to cool completely.Enjoy your baking!
Tips & Tricks
Essential Baking Tips
To make your healthy pumpkin cream cheese muffins shine, use the right tools. Here are my top picks:
– Muffin tin: A sturdy, non-stick muffin tin helps with easy release.
– Whisk: A medium whisk works best for mixing ingredients.
– Rubber spatula: Use this to fold your batter gently.
Avoid common mistakes:
– Don’t over-mix your batter. This can make muffins tough.
– Measure ingredients accurately. Too much flour can lead to dry muffins.
Ensuring Moisture and Flavor
Using ingredients at the right temperature is key. Here’s why:
– Eggs: Use room-temperature eggs for better mixing.
– Pumpkin puree: It should be at room temperature to blend smoothly.
When selecting pumpkin puree, look for:
– Canned puree: Choose 100% pure pumpkin, not pie filling.
– Fresh pumpkin: If using fresh, pick ripe ones with a firm skin.
Serving Suggestions
Pair your muffins with drinks for a perfect snack:
– Coffee: A warm cup enhances the spices in the muffins.
– Tea: Herbal teas work well for a lighter option.
For storing unsalted cream cheese:
– Keep it in the fridge, tightly wrapped.
– Use it within a week for the best taste.
Try these tips to elevate your baking experience!
Variations
Flavor Enhancements
You can make these muffins even better by adding chocolate chips or dried fruit. Chocolate chips give a sweet surprise in every bite. Dried fruit, like raisins or cranberries, adds a chewy texture. You can also play with spices. Try adding ginger, cloves, or even pumpkin pie spice for a twist.
Alternative Sweeteners
If you want to change the sweetness, you can use stevia, agave, or coconut sugar. Each option gives a unique flavor. Adjust the recipe based on your taste. Start with less sweetener and add more if needed. This way, you find the perfect balance for your muffins.
Savory Options
Feeling adventurous? You can turn these muffins into a savory treat. Add cheese and herbs like thyme or rosemary. This makes a great breakfast muffin. Swap out the cream cheese for a gooey cheese center. It’s a fun way to enjoy the same base recipe.
Storage Info
Short-Term Storage
To keep your muffins fresh at room temperature, place them in an airtight container. This helps prevent them from drying out. Line the container with a paper towel to absorb any moisture. I recommend using a glass or plastic container with a tight seal. This way, your muffins stay soft and delicious for a few days.
Long-Term Storage
For long-term storage, freezing is your best option. Allow the muffins to cool completely before freezing. Wrap each muffin in plastic wrap, then place them in a freezer bag. This keeps them fresh for up to three months. When you’re ready to enjoy them, take out a muffin and let it thaw in the fridge overnight or at room temperature for a few hours. You can also reheat them in a microwave for about 20 seconds for a warm treat.
Shelf Life
Healthy pumpkin cream cheese muffins stay fresh for about 3 to 5 days at room temperature. After that, they may start to dry out or lose flavor. Check for signs of spoilage. If you see mold or an off smell, it’s best to discard them. Always trust your senses; they guide you well in the kitchen. Enjoy your muffins while they are at their best!
FAQs
How do I make healthy pumpkin cream cheese muffins less sweet?
To make your muffins less sweet, reduce the honey or sugar. Start by cutting the amount by a tablespoon or two. You can also use spices like cinnamon or nutmeg to add flavor without extra sugar. This helps balance the taste while keeping the muffin moist.
Can I use fresh pumpkin instead of canned?
Yes, you can use fresh pumpkin! Fresh pumpkin gives a rich flavor. To prepare, choose a small sugar pumpkin. Cut it in half, remove the seeds, and bake it cut side down at 350°F (175°C) for about 45 minutes. Once it’s soft, scoop out the flesh and mash it for your recipe.
What if I don’t have whole wheat flour?
If you don’t have whole wheat flour, you can use all-purpose flour. It will still work but may change the texture slightly. You can also use oat flour or almond flour for a gluten-free option. Just remember that flour types can affect the muffins’ rising.
Can I make mini muffins instead?
Yes, mini muffins are a fun option! Use the same batter and fill each mini cup about halfway. Bake at 350°F (175°C) for about 12-15 minutes. Keep an eye on them. Check for doneness by inserting a toothpick, and enjoy these cute little treats!
These healthy pumpkin cream cheese muffins are not just tasty; they’re packed with benefits. We discussed the best ingredients and their health perks. You learned step-by-step instructions that ensure perfect muffins every time. Plus, I shared storage tips to keep them fresh longer.
Choosing the right ingredients and techniques really makes a difference. With these muffins, you can enjoy delicious flavors while also making smart dietary choices. Experiment with variations to keep it fun. Happy baking!

![- 1 lb ground beef - 1 cup shredded cheddar cheese - 1 cup shredded mozzarella cheese - 1/2 cup grated Parmesan cheese - 1 tablespoon minced garlic - 1 teaspoon onion powder - 1 teaspoon garlic powder - 1/2 teaspoon salt - 1/2 teaspoon black pepper - 1 package (16 oz) refrigerated pizza dough - 1/2 cup unsalted butter, melted - 2 tablespoons fresh parsley, chopped (for garnish) I recommend using fresh ground beef for the best flavor and texture. Look for good-quality cheeses. A mix of sharp cheddar and creamy mozzarella works wonders. For the Parmesan, choose a block and grate it yourself. Fresh garlic adds a punch that garlic powder cannot match. Always opt for unsalted butter to control the saltiness in your dish. Each serving contains approximately: - Calories: 250 - Protein: 15g - Carbohydrates: 20g - Fat: 14g - Fiber: 1g - Sugar: 1g This dish packs flavor and comfort in each bomb. Enjoy the satisfaction of creating these tasty bites. For the full recipe, check the section above. First, preheat your oven to 375°F (190°C). This ensures the bombs bake evenly. While the oven warms up, grab a large mixing bowl. In this bowl, mix together the ground beef, shredded cheddar, mozzarella, and grated Parmesan cheese. Add minced garlic, onion powder, garlic powder, salt, and black pepper. Stir until all the ingredients blend well. This mixture is the heart of your cheeseburger bombs. Next, you need to handle the pizza dough. Lightly flour a clean surface to prevent sticking. Roll out the pizza dough into a large rectangle. Use a pizza cutter or knife to slice the dough into 12 equal squares. Each square should measure about 3 inches by 3 inches. For each square, place a generous spoonful of the cheeseburger filling right in the center. Now, fold the corners of each dough square over the filling. Pinch them tightly to create a seal. Place the sealed bombs seam-side down on your prepared baking sheet. Now it’s time to bake. Brush the tops of each bomb with melted butter. This gives them a nice, golden finish. Bake these tasty treats in the preheated oven for 18-20 minutes. They should puff up and turn a beautiful golden brown. After baking, let them cool for a few minutes on the baking sheet. This step helps enhance the flavors. For a fresh touch, sprinkle chopped parsley on top just before serving. For the full recipe, check the earlier section. Enjoy your Garlic Parmesan Cheeseburger Bombs! To make your Garlic Parmesan Cheeseburger Bombs pop with flavor, use quality spices. Fresh garlic adds a strong taste. Minced garlic blends well with the beef. Garlic powder boosts the garlic flavor. Onion powder adds depth and sweetness. The mix of cheddar, mozzarella, and Parmesan gives a rich, creamy texture. Try using sharp cheddar for a bolder taste. Always taste the mixture before sealing the bombs. Adjust the salt and pepper to your liking. A perfect golden crust makes your bombs look and taste great. Start by brushing the tops with melted butter. This adds flavor and helps with browning. Bake at 375°F for 18-20 minutes. Keep an eye on them as they bake. If they are not golden yet, let them bake a few more minutes. The crust should be puffed and golden brown. For a stunning display, use a large platter. Place the bombs in a circle, and sprinkle fresh parsley on top. This adds a nice pop of color. Serve with dipping sauces like ketchup or ranch for extra fun. You can also add a side of pickles or a fresh salad. This makes a great snack or meal for any gathering. Enjoy each tasty bite from your Garlic Parmesan Cheeseburger Bombs! For the complete recipe, click [Full Recipe]. {{image_4}} You can change the filling for your Garlic Parmesan Cheeseburger Bombs. For a vegetarian option, swap ground beef for cooked lentils or black beans. Add some diced bell peppers and chopped onions for flavor. If you want a spicy kick, mix in jalapeños or hot sauce. You can even use spicy sausage for a meaty twist. This way, everyone can enjoy these tasty bombs. If you need a gluten-free option, use gluten-free pizza dough. Many stores sell this now. If you feel adventurous, you can make homemade dough. Combine almond flour, coconut flour, and eggs for a gluten-free base. This change keeps the bombs delicious and safe for those with gluten issues. Experiment with different types of dough to find your favorite. Toppings can take your bombs to a new level. After baking, try adding melted cheese on top. You can also sprinkle some crispy bacon bits for extra flavor. Fresh herbs like chives or cilantro can add a burst of color and taste. Consider serving with a side of garlic butter for dipping. These creative touches make your Garlic Parmesan Cheeseburger Bombs truly special. For detailed steps, check the Full Recipe. After you enjoy your Garlic Parmesan Cheeseburger Bombs, store any leftovers right away. Let them cool to room temperature first. Then, place them in an airtight container. This keeps them fresh and tasty. You can also wrap them tightly in plastic wrap. Store them in the fridge for up to three days. If you want to keep them longer, freezing is a great option. When it’s time to eat those leftover bombs, reheating them properly is key. Preheat your oven to 350°F (175°C). Place the bombs on a baking sheet. Heat for about 10-15 minutes. This helps them regain their crispiness. You can also use a microwave. Heat them for about 30-45 seconds. However, the oven method is best for keeping that nice texture. If you want to freeze your Garlic Parmesan Cheeseburger Bombs, do it before baking. After shaping the bombs, place them on a baking sheet. Freeze them for about an hour until solid. Then, transfer them to a freezer-safe bag. They can last up to three months in the freezer. When you’re ready to bake, just add a few extra minutes to the cooking time. Enjoy the fresh taste anytime with this simple method! You can still enjoy these bombs without specific cheese. Use any cheese you like. Try gouda, pepper jack, or even cream cheese. Just make sure the cheese melts well. This keeps the bombs gooey and tasty. Yes, you can prepare these bombs ahead of time. Make the filling and fill the dough squares. Place them on a baking sheet. Cover and store them in the fridge. Bake them fresh when you are ready to eat. This saves time for your busy days. Dipping sauces make these bombs even better. Ketchup is a classic choice. Ranch dressing or garlic aioli adds a nice touch. You can also try spicy mustard or BBQ sauce. Each sauce brings a new flavor and fun to your meal. This blog post covered all you need for Garlic Parmesan Cheeseburger Bombs. I shared the key ingredients, step-by-step instructions, and handy tips to enhance flavor. You also learned about great variations to try and how to store your tasty treats. In my final thoughts, remember to have fun while cooking. Experiment with flavors and enjoy every bite of your creations. Happy cooking!](https://fastmealmate.com/wp-content/uploads/2025/06/70ca770e-dfd2-457a-a57a-f773e5b0e22d-768x768.webp)

![To make Maine Blueberry Bread, you need the right ingredients. Here’s what you will need: - 1 ½ cups all-purpose flour - ½ teaspoon baking soda - 1 teaspoon baking powder - ½ teaspoon salt - 1/3 cup unsalted butter, softened - ½ cup granulated sugar - 1 large egg, at room temperature - 1 teaspoon pure vanilla extract - ½ cup plain Greek yogurt - 1 cup fresh or frozen blueberries - Zest of 1 lemon - 2 tablespoons fresh lemon juice These ingredients come together to create a soft, flavorful bread. The blueberries add sweetness, while the lemon gives a nice zing. You can customize your Maine Blueberry Bread with some fun add-ins. Here are a few ideas: - Chopped nuts, like walnuts or pecans - A sprinkle of cinnamon for warmth - Chocolate chips for a sweet twist - A handful of oats for texture Feel free to mix and match these options to suit your taste. Before you start, gather your tools to make the process smooth. You will need: - A 9x5-inch loaf pan - Mixing bowls (one large and one medium) - An electric mixer or whisk - A spatula for mixing - Measuring cups and spoons Having these items ready will help you stay organized and focused. For the full recipe, check the details provided earlier. First, preheat your oven to 350°F (175°C). This sets the stage for baking. Next, grab a 9x5-inch loaf pan. Grease it with butter or line it with parchment paper. This helps the bread come out easily later. In a medium bowl, whisk together the flour, baking soda, baking powder, and salt. Mix these dry ingredients well and set them aside for now. In another large bowl, cream the softened butter and sugar using an electric mixer. Beat this mixture for 3-4 minutes until it is light and fluffy. Then, add the egg, vanilla extract, lemon zest, and lemon juice. Mix until everything is combined well. Now, add the Greek yogurt to this mix and blend until smooth. Gradually add the dry ingredient mixture to the wet mixture. Stir gently until just combined. Be careful not to overmix; this keeps the bread soft. Finally, fold in the blueberries. Make sure they are evenly spread throughout the batter. Pour the batter into your prepared loaf pan. Smooth the top with a spatula to ensure it rises evenly. Place the loaf pan in the oven and bake for 50-60 minutes. To check if it’s done, insert a toothpick into the center. If it comes out clean, your bread is ready. Once baked, take the loaf out of the oven. Let it cool in the pan for about 10 minutes. After that, transfer the bread to a wire rack to cool completely. When you are ready to serve, slice the bread. For a tasty touch, add a pat of butter or a sprinkle of powdered sugar on top. This blueberry bread pairs perfectly with tea or coffee, making it a wonderful treat for breakfast or a snack. Enjoy your Maine Blueberry Bread! For the complete recipe, be sure to check the [Full Recipe]. When making Maine blueberry bread, avoid overmixing the batter. This can make the bread tough. Also, don’t skip the lemon juice. It brightens the flavor and balances the sweetness. If using frozen blueberries, do not thaw them. This keeps the batter from turning blue. For a soft and moist texture, use room temperature ingredients. This includes the butter, egg, and yogurt. They mix better and create a fluffy bread. Make sure your oven is preheated to 350°F (175°C). Baking at the right temperature is key for even cooking. You can add a pinch of cinnamon or nutmeg for warmth. A bit of cardamom can also bring a unique twist. Pure vanilla extract adds depth to the flavor. Feel free to experiment with different spices to find your favorite mix. For a citrusy kick, try adding a bit more lemon zest. For the full recipe, check the earlier sections. {{image_4}} You can swap blueberries for other fruits. Try raspberries, blackberries, or strawberries. Each fruit brings a unique taste. For a tropical twist, use diced mango or pineapple. These fruits change the flavor but keep the bread moist and delicious. To make this recipe gluten-free, use a gluten-free flour blend. Make sure it has xanthan gum to help with texture. Also, check that your baking powder and baking soda are gluten-free. These small changes will let you enjoy this bread without gluten. Nuts and chocolate can add flavor and texture. Walnuts or pecans work well in this bread. Just chop them coarsely and fold them into the batter. If you love chocolate, try adding chocolate chips. They melt and create sweet pockets in each slice. For the full recipe, check out the Maine Blueberry Bread section above. Store leftover Maine blueberry bread at room temperature. Wrap it in plastic wrap or foil. This keeps it fresh for up to three days. If you want to keep it longer, consider freezing. To freeze Maine blueberry bread, slice it first. Wrap each slice in plastic wrap. Place the wrapped slices in a freezer-safe bag. This method allows you to take out one slice at a time. The bread can last in the freezer for up to three months. Reheat blueberry bread for the best taste. Use a toaster oven or microwave. For a toaster oven, set it to 350°F (175°C) and heat for about 10 minutes. If using a microwave, warm a slice for 15-20 seconds. Enjoy it warm for a cozy flavor. You can buy Maine blueberries at local farms, farmers' markets, or grocery stores. Many stores offer fresh blueberries during the summer months. You can also find frozen Maine blueberries year-round in the freezer section. Online retailers may offer them as well, so check for local delivery options. Maine blueberries are unique due to their intense flavor and vibrant color. They grow wild in the state’s unique climate and soil. This gives them a sweet, tangy taste that stands out. Maine blueberries are also smaller than cultivated ones, making them more flavorful. Additionally, their high antioxidant levels make them a healthy choice. Fresh blueberries should be firm and plump. Look for a deep blue color with a hint of white bloom. Avoid any berries with wrinkles or soft spots. If they are still attached to the stem, that’s a good sign they are fresh. Smelling them can also help; they should have a sweet, fruity aroma. Yes, you can use other types of yogurt. Greek yogurt gives a rich texture, but you can use regular yogurt. Non-dairy options like almond or coconut yogurt work too. Just keep in mind that the flavor may change slightly. Choose a plain yogurt to maintain the taste of the bread. To make Maine blueberry bread vegan, substitute the egg with flaxseed meal or applesauce. For the butter, use a plant-based alternative like coconut oil or vegan butter. Ensure your yogurt is dairy-free. These swaps keep the bread moist and delicious while making it suitable for a vegan diet. You can still enjoy the same great flavor! Making Maine Blueberry Bread is fun and easy. We covered key ingredients, optional add-ins, and the right tools to use. I shared step-by-step instructions, common mistakes to avoid, and tips for great texture. You can even try different fruits or make it gluten-free. Lastly, I explained how to store extras and answered some questions about blueberries. Enjoy baking and sharing this delicious bread with friends!](https://fastmealmate.com/wp-content/uploads/2025/06/ff86cb4e-0a8a-479f-8f36-b1606605b05b-768x768.webp)