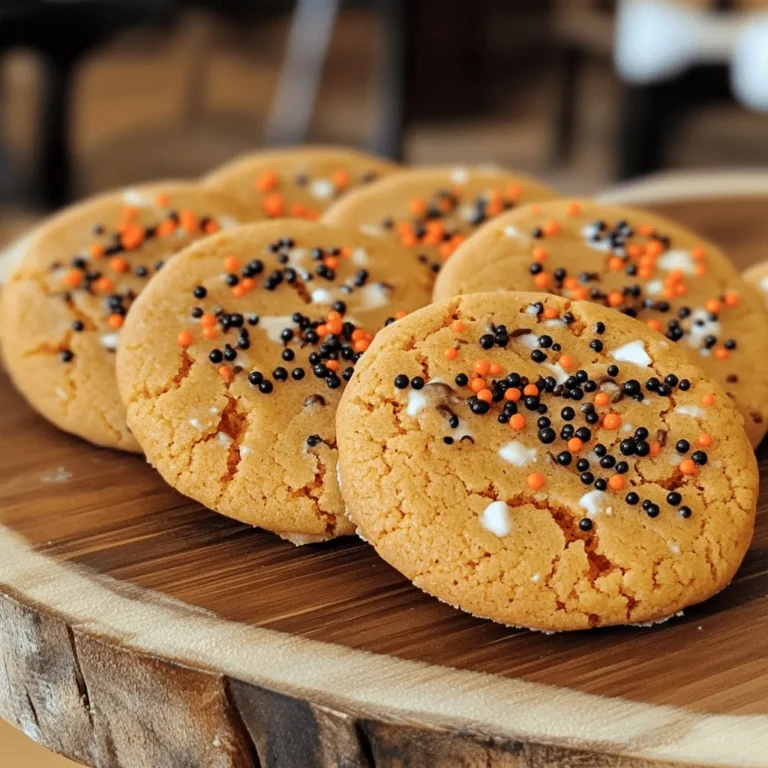
Homemade Pumpkin Spice Syrup Tasty Fall Flavor Drink
![To make a rich and tasty pumpkin spice syrup, gather these key ingredients: - 1 cup water - 1 cup granulated sugar - 1/2 cup pure pumpkin puree These ingredients form the base of your syrup. The water helps dissolve the sugar, while the pumpkin puree adds that classic pumpkin flavor. Spices are what truly make this syrup special. You’ll need: - 1 teaspoon ground cinnamon - 1/2 teaspoon ground nutmeg - 1/4 teaspoon ground ginger - 1/4 teaspoon ground cloves These spices bring warmth and depth to your syrup. Each spice adds its own unique note, creating a perfect fall blend. To round out the flavor, don't forget this important ingredient: - 1 teaspoon vanilla extract Vanilla extract adds a sweet aroma and enhances the other flavors. This small addition makes a big difference in taste. This recipe combines all these ingredients to create a syrup that brightens up any dish or drink. For the complete preparation steps, check out the Full Recipe. To start, you need to dissolve the sugar in water. Pour 1 cup of water into a medium saucepan. Add 1 cup of granulated sugar. Set the heat to medium. Stir the mixture until the sugar fully dissolves. You want the liquid to be clear and smooth. Next, add the pumpkin puree. Use 1/2 cup of pure pumpkin puree. Gently whisk it into the sugar-water mix. Make sure there are no lumps. It should blend nicely into a creamy base. Now, it’s time to add the spices. Measure out 1 teaspoon of ground cinnamon, 1/2 teaspoon of ground nutmeg, 1/4 teaspoon of ground ginger, and 1/4 teaspoon of ground cloves. Whisk these spices into the syrup base. This step gives your syrup that cozy fall flavor. Make sure to whisk thoroughly. You want all the spices to mix evenly. This will ensure every drop of syrup bursts with flavor. Next, bring your syrup to a gentle simmer. Slightly increase the heat until you see small bubbles. Once it starts simmering, reduce the heat to low. Allow the syrup to cook for 10-15 minutes. Stir occasionally to prevent sticking. This simmering step will help the flavors meld together. After the time is up, remove the saucepan from the heat. Stir in 1 teaspoon of vanilla extract for a lovely aroma. Allow the syrup to cool for a few minutes. Then strain it through a fine-mesh sieve or cheesecloth. This will remove any pumpkin pulp and keep the texture smooth. Once it cools completely, store it in a clean glass jar. Your homemade pumpkin spice syrup is ready to enjoy! For the full recipe, refer to the earlier section. To get the best texture for your syrup, start by straining it. After simmering, pour the syrup through a fine-mesh sieve or cheesecloth. This step removes any pumpkin pulp, giving you a smooth finish. If you skip this, you might end up with a chunky syrup that doesn’t mix well in drinks. You can customize your syrup to match your taste. If you love more spice, add an extra pinch of cinnamon or nutmeg. For a sweeter syrup, consider using brown sugar or honey instead of granulated sugar. Remember, the balance of flavors can make or break your syrup. Adjust it until it feels just right for you. This syrup shines in so many ways. Drizzle it over pancakes or waffles for a tasty breakfast treat. You can also add it to your coffee or hot chocolate for a cozy drink. Feeling adventurous? Mix it into cocktails for a fall twist. Your friends will love the rich flavors! You can find the full recipe here for more details. {{image_4}} You can switch up the main ingredients in your syrup. If you want to skip the pumpkin puree, you can use butternut squash puree instead. It gives a similar flavor and texture. Just make sure it is smooth for the best results. Another option is to use maple syrup instead of granulated sugar. This change adds a rich, warm flavor that pairs well with the spices. You can mix it with water to make the syrup thinner. This way, you still enjoy the sweet taste without all the white sugar. Why stick to just pumpkin spice? You can create themed syrups for other seasons too. In winter, try adding peppermint or gingerbread flavors. For spring, consider using fresh fruits like strawberries or lemons. Each season brings a chance to change the flavors. You can also infuse other flavors into your syrup. Adding vanilla gives it a creamy taste. If you love chocolate, mix in some cocoa powder. This creates a unique twist that makes your drinks even more special. If you follow a vegan diet, it’s easy to adapt this recipe. Just use maple syrup or agave nectar instead of sugar. This choice keeps it sweet and plant-based. For low-sugar options, you can use stevia or monk fruit sweetener. These alternatives provide sweetness without the extra calories. Adjust the amount based on your taste. If you need a gluten-free syrup, you’re in luck! All the ingredients are naturally gluten-free. So, enjoy this syrup in your favorite recipes without worry. For a complete guide on making this syrup, check out the Full Recipe. Store your homemade pumpkin spice syrup in a glass jar. Glass helps keep the syrup fresh longer. Make sure to seal the jar tightly after each use. Refrigerate the syrup to maintain its flavor and quality. Cold storage slows down spoilage. Your syrup will stay fresh for about two weeks in the fridge. Check it for any off-smells or mold. If the syrup looks cloudy or has an unusual texture, toss it out. Always trust your senses when it comes to freshness. Once you finish the syrup, don’t throw away the jar! You can use it for other sauces or spices. Clean the jar with hot soapy water. To sterilize it, you can boil the jar in water for a few minutes. This way, you keep your kitchen eco-friendly and tidy. For the full recipe and tips on making your own delicious pumpkin spice syrup, check out the [Full Recipe]. Homemade pumpkin spice syrup lasts about two weeks in the fridge. You want to store it in a clean glass jar. Always check for any off smells or mold before using. If it looks or smells strange, it’s best to toss it out. Yes, you can use this syrup in both hot and cold drinks. It adds a cozy flavor to your morning coffee or lattes. You can also mix it into iced tea or smoothies for a fall twist. The syrup blends well in any drink you choose. The best way to use pumpkin spice syrup is in your favorite beverages. You can drizzle it over pancakes or waffles for a sweet touch. It also tastes great in yogurt or oatmeal. Try mixing it into cocktails for a festive flavor. For the full recipe, check out the entire guide! In this blog post, we explored how to make homemade pumpkin spice syrup. We covered key ingredients like pumpkin puree, sugar, and essential spices. I shared step-by-step instructions to help you create this tasty syrup. Remember, you can adjust flavors and even try different ingredients for fun twists. Store your syrup properly for long-lasting freshness. Enjoy adding this syrup to drinks or breakfast dishes. Making your own syrup is easy and delicious—give it a try!](https://fastmealmate.com/wp-content/uploads/2025/07/fc2a1fa2-a46c-4404-8cf7-6e2e63d61871.webp)
Fall is here, and there’s no better way to celebrate than with homemade pumpkin spice syrup! This tasty treat brings warmth and flavor to your favorite drinks and dishes. Imagine drizzling it over pancakes or mixing it into your morning coffee. In this post, I’ll share my easy recipe, exciting variations, and tips for perfecting your syrup. Let’s get ready to embrace that cozy fall spirit together!
Ingredients
Key Ingredients for Homemade Pumpkin Spice Syrup
To make a rich and tasty pumpkin spice syrup, gather these key ingredients:
– 1 cup water
– 1 cup granulated sugar
– 1/2 cup pure pumpkin puree
These ingredients form the base of your syrup. The water helps dissolve the sugar, while the pumpkin puree adds that classic pumpkin flavor.
Essential Spices Used
Spices are what truly make this syrup special. You’ll need:
– 1 teaspoon ground cinnamon
– 1/2 teaspoon ground nutmeg
– 1/4 teaspoon ground ginger
– 1/4 teaspoon ground cloves
These spices bring warmth and depth to your syrup. Each spice adds its own unique note, creating a perfect fall blend.
Additional Flavor Enhancers
To round out the flavor, don’t forget this important ingredient:
– 1 teaspoon vanilla extract
Vanilla extract adds a sweet aroma and enhances the other flavors. This small addition makes a big difference in taste.
This recipe combines all these ingredients to create a syrup that brightens up any dish or drink.
Step-by-Step Instructions
Preparing the Syrup Base
To start, you need to dissolve the sugar in water. Pour 1 cup of water into a medium saucepan. Add 1 cup of granulated sugar. Set the heat to medium. Stir the mixture until the sugar fully dissolves. You want the liquid to be clear and smooth.
Next, add the pumpkin puree. Use 1/2 cup of pure pumpkin puree. Gently whisk it into the sugar-water mix. Make sure there are no lumps. It should blend nicely into a creamy base.
Incorporating Spices
Now, it’s time to add the spices. Measure out 1 teaspoon of ground cinnamon, 1/2 teaspoon of ground nutmeg, 1/4 teaspoon of ground ginger, and 1/4 teaspoon of ground cloves. Whisk these spices into the syrup base. This step gives your syrup that cozy fall flavor.
Make sure to whisk thoroughly. You want all the spices to mix evenly. This will ensure every drop of syrup bursts with flavor.
Simmering Process
Next, bring your syrup to a gentle simmer. Slightly increase the heat until you see small bubbles. Once it starts simmering, reduce the heat to low. Allow the syrup to cook for 10-15 minutes. Stir occasionally to prevent sticking.
This simmering step will help the flavors meld together. After the time is up, remove the saucepan from the heat. Stir in 1 teaspoon of vanilla extract for a lovely aroma.
Allow the syrup to cool for a few minutes. Then strain it through a fine-mesh sieve or cheesecloth. This will remove any pumpkin pulp and keep the texture smooth.
Once it cools completely, store it in a clean glass jar. Your homemade pumpkin spice syrup is ready to enjoy!
Tips & Tricks
Perfecting the Texture
To get the best texture for your syrup, start by straining it. After simmering, pour the syrup through a fine-mesh sieve or cheesecloth. This step removes any pumpkin pulp, giving you a smooth finish. If you skip this, you might end up with a chunky syrup that doesn’t mix well in drinks.
Adjusting Flavor Intensity
You can customize your syrup to match your taste. If you love more spice, add an extra pinch of cinnamon or nutmeg. For a sweeter syrup, consider using brown sugar or honey instead of granulated sugar. Remember, the balance of flavors can make or break your syrup. Adjust it until it feels just right for you.
Serving Suggestions
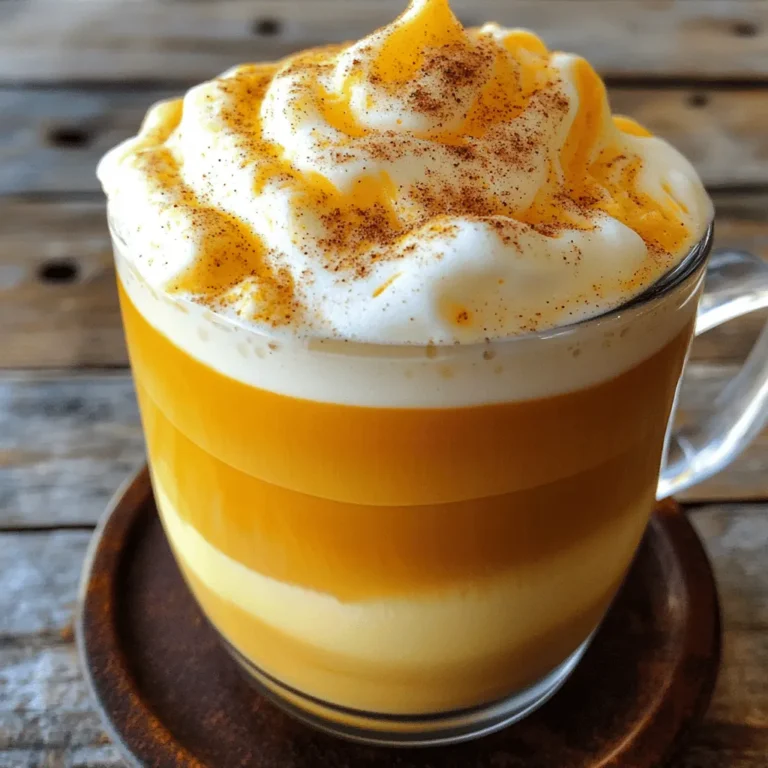
This syrup shines in so many ways. Drizzle it over pancakes or waffles for a tasty breakfast treat. You can also add it to your coffee or hot chocolate for a cozy drink. Feeling adventurous? Mix it into cocktails for a fall twist. Your friends will love the rich flavors!
Variations
Alternative Ingredients
You can switch up the main ingredients in your syrup. If you want to skip the pumpkin puree, you can use butternut squash puree instead. It gives a similar flavor and texture. Just make sure it is smooth for the best results.
Another option is to use maple syrup instead of granulated sugar. This change adds a rich, warm flavor that pairs well with the spices. You can mix it with water to make the syrup thinner. This way, you still enjoy the sweet taste without all the white sugar.
Themed Syrups
Why stick to just pumpkin spice? You can create themed syrups for other seasons too. In winter, try adding peppermint or gingerbread flavors. For spring, consider using fresh fruits like strawberries or lemons. Each season brings a chance to change the flavors.
You can also infuse other flavors into your syrup. Adding vanilla gives it a creamy taste. If you love chocolate, mix in some cocoa powder. This creates a unique twist that makes your drinks even more special.
Specific Diet Adjustments
If you follow a vegan diet, it’s easy to adapt this recipe. Just use maple syrup or agave nectar instead of sugar. This choice keeps it sweet and plant-based.
For low-sugar options, you can use stevia or monk fruit sweetener. These alternatives provide sweetness without the extra calories. Adjust the amount based on your taste.
If you need a gluten-free syrup, you’re in luck! All the ingredients are naturally gluten-free. So, enjoy this syrup in your favorite recipes without worry.
Storage Info
Best Practices for Storage
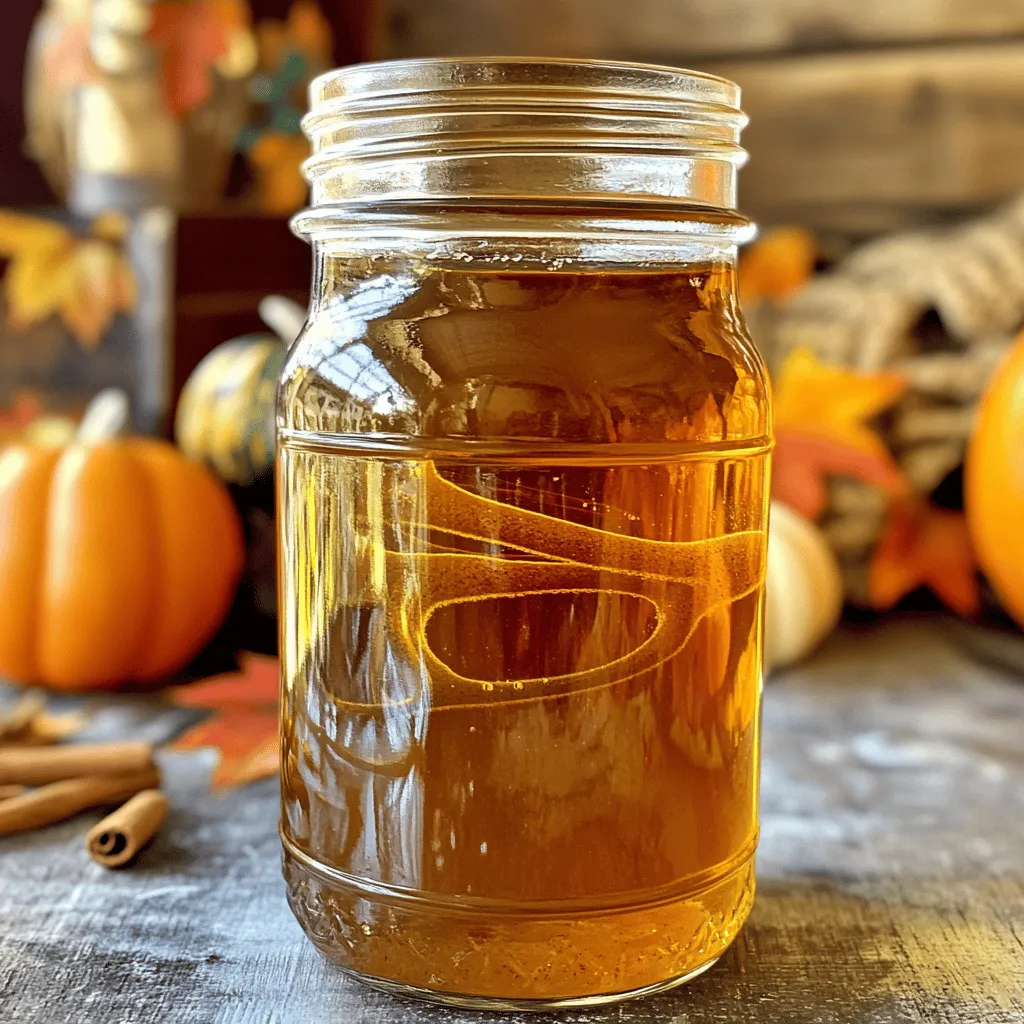
Store your homemade pumpkin spice syrup in a glass jar. Glass helps keep the syrup fresh longer. Make sure to seal the jar tightly after each use. Refrigerate the syrup to maintain its flavor and quality. Cold storage slows down spoilage.
Shelf Life
Your syrup will stay fresh for about two weeks in the fridge. Check it for any off-smells or mold. If the syrup looks cloudy or has an unusual texture, toss it out. Always trust your senses when it comes to freshness.
Reusing Syrup Containers
Once you finish the syrup, don’t throw away the jar! You can use it for other sauces or spices. Clean the jar with hot soapy water. To sterilize it, you can boil the jar in water for a few minutes. This way, you keep your kitchen eco-friendly and tidy.
FAQs
How long does homemade pumpkin spice syrup last?
Homemade pumpkin spice syrup lasts about two weeks in the fridge. You want to store it in a clean glass jar. Always check for any off smells or mold before using. If it looks or smells strange, it’s best to toss it out.
Can I use this syrup in hot and cold drinks?
Yes, you can use this syrup in both hot and cold drinks. It adds a cozy flavor to your morning coffee or lattes. You can also mix it into iced tea or smoothies for a fall twist. The syrup blends well in any drink you choose.
What is the best way to use pumpkin spice syrup?
The best way to use pumpkin spice syrup is in your favorite beverages. You can drizzle it over pancakes or waffles for a sweet touch. It also tastes great in yogurt or oatmeal. Try mixing it into cocktails for a festive flavor.
In this blog post, we explored how to make homemade pumpkin spice syrup. We covered key ingredients like pumpkin puree, sugar, and essential spices. I shared step-by-step instructions to help you create this tasty syrup. Remember, you can adjust flavors and even try different ingredients for fun twists. Store your syrup properly for long-lasting freshness. Enjoy adding this syrup to drinks or breakfast dishes. Making your own syrup is easy and delicious—give it a try!
![To make a rich and tasty pumpkin spice syrup, gather these key ingredients: - 1 cup water - 1 cup granulated sugar - 1/2 cup pure pumpkin puree These ingredients form the base of your syrup. The water helps dissolve the sugar, while the pumpkin puree adds that classic pumpkin flavor. Spices are what truly make this syrup special. You’ll need: - 1 teaspoon ground cinnamon - 1/2 teaspoon ground nutmeg - 1/4 teaspoon ground ginger - 1/4 teaspoon ground cloves These spices bring warmth and depth to your syrup. Each spice adds its own unique note, creating a perfect fall blend. To round out the flavor, don't forget this important ingredient: - 1 teaspoon vanilla extract Vanilla extract adds a sweet aroma and enhances the other flavors. This small addition makes a big difference in taste. This recipe combines all these ingredients to create a syrup that brightens up any dish or drink. For the complete preparation steps, check out the Full Recipe. To start, you need to dissolve the sugar in water. Pour 1 cup of water into a medium saucepan. Add 1 cup of granulated sugar. Set the heat to medium. Stir the mixture until the sugar fully dissolves. You want the liquid to be clear and smooth. Next, add the pumpkin puree. Use 1/2 cup of pure pumpkin puree. Gently whisk it into the sugar-water mix. Make sure there are no lumps. It should blend nicely into a creamy base. Now, it’s time to add the spices. Measure out 1 teaspoon of ground cinnamon, 1/2 teaspoon of ground nutmeg, 1/4 teaspoon of ground ginger, and 1/4 teaspoon of ground cloves. Whisk these spices into the syrup base. This step gives your syrup that cozy fall flavor. Make sure to whisk thoroughly. You want all the spices to mix evenly. This will ensure every drop of syrup bursts with flavor. Next, bring your syrup to a gentle simmer. Slightly increase the heat until you see small bubbles. Once it starts simmering, reduce the heat to low. Allow the syrup to cook for 10-15 minutes. Stir occasionally to prevent sticking. This simmering step will help the flavors meld together. After the time is up, remove the saucepan from the heat. Stir in 1 teaspoon of vanilla extract for a lovely aroma. Allow the syrup to cool for a few minutes. Then strain it through a fine-mesh sieve or cheesecloth. This will remove any pumpkin pulp and keep the texture smooth. Once it cools completely, store it in a clean glass jar. Your homemade pumpkin spice syrup is ready to enjoy! For the full recipe, refer to the earlier section. To get the best texture for your syrup, start by straining it. After simmering, pour the syrup through a fine-mesh sieve or cheesecloth. This step removes any pumpkin pulp, giving you a smooth finish. If you skip this, you might end up with a chunky syrup that doesn’t mix well in drinks. You can customize your syrup to match your taste. If you love more spice, add an extra pinch of cinnamon or nutmeg. For a sweeter syrup, consider using brown sugar or honey instead of granulated sugar. Remember, the balance of flavors can make or break your syrup. Adjust it until it feels just right for you. This syrup shines in so many ways. Drizzle it over pancakes or waffles for a tasty breakfast treat. You can also add it to your coffee or hot chocolate for a cozy drink. Feeling adventurous? Mix it into cocktails for a fall twist. Your friends will love the rich flavors! You can find the full recipe here for more details. {{image_4}} You can switch up the main ingredients in your syrup. If you want to skip the pumpkin puree, you can use butternut squash puree instead. It gives a similar flavor and texture. Just make sure it is smooth for the best results. Another option is to use maple syrup instead of granulated sugar. This change adds a rich, warm flavor that pairs well with the spices. You can mix it with water to make the syrup thinner. This way, you still enjoy the sweet taste without all the white sugar. Why stick to just pumpkin spice? You can create themed syrups for other seasons too. In winter, try adding peppermint or gingerbread flavors. For spring, consider using fresh fruits like strawberries or lemons. Each season brings a chance to change the flavors. You can also infuse other flavors into your syrup. Adding vanilla gives it a creamy taste. If you love chocolate, mix in some cocoa powder. This creates a unique twist that makes your drinks even more special. If you follow a vegan diet, it’s easy to adapt this recipe. Just use maple syrup or agave nectar instead of sugar. This choice keeps it sweet and plant-based. For low-sugar options, you can use stevia or monk fruit sweetener. These alternatives provide sweetness without the extra calories. Adjust the amount based on your taste. If you need a gluten-free syrup, you’re in luck! All the ingredients are naturally gluten-free. So, enjoy this syrup in your favorite recipes without worry. For a complete guide on making this syrup, check out the Full Recipe. Store your homemade pumpkin spice syrup in a glass jar. Glass helps keep the syrup fresh longer. Make sure to seal the jar tightly after each use. Refrigerate the syrup to maintain its flavor and quality. Cold storage slows down spoilage. Your syrup will stay fresh for about two weeks in the fridge. Check it for any off-smells or mold. If the syrup looks cloudy or has an unusual texture, toss it out. Always trust your senses when it comes to freshness. Once you finish the syrup, don’t throw away the jar! You can use it for other sauces or spices. Clean the jar with hot soapy water. To sterilize it, you can boil the jar in water for a few minutes. This way, you keep your kitchen eco-friendly and tidy. For the full recipe and tips on making your own delicious pumpkin spice syrup, check out the [Full Recipe]. Homemade pumpkin spice syrup lasts about two weeks in the fridge. You want to store it in a clean glass jar. Always check for any off smells or mold before using. If it looks or smells strange, it’s best to toss it out. Yes, you can use this syrup in both hot and cold drinks. It adds a cozy flavor to your morning coffee or lattes. You can also mix it into iced tea or smoothies for a fall twist. The syrup blends well in any drink you choose. The best way to use pumpkin spice syrup is in your favorite beverages. You can drizzle it over pancakes or waffles for a sweet touch. It also tastes great in yogurt or oatmeal. Try mixing it into cocktails for a festive flavor. For the full recipe, check out the entire guide! In this blog post, we explored how to make homemade pumpkin spice syrup. We covered key ingredients like pumpkin puree, sugar, and essential spices. I shared step-by-step instructions to help you create this tasty syrup. Remember, you can adjust flavors and even try different ingredients for fun twists. Store your syrup properly for long-lasting freshness. Enjoy adding this syrup to drinks or breakfast dishes. Making your own syrup is easy and delicious—give it a try!](https://fastmealmate.com/wp-content/uploads/2025/07/fc2a1fa2-a46c-4404-8cf7-6e2e63d61871-300x300.webp)
![- Cooked chicken breast - Greek yogurt - Dijon mustard - Garlic powder - Smoked paprika - Black pepper - Mixed greens - Cherry tomatoes - Cucumber - Whole wheat tortillas - Garnishing options The key to tasty Mini Chicken Wraps lies in the right ingredients. First, use cooked chicken breast. It is tender and full of protein. I recommend shredding the chicken for easy mixing. Next, Greek yogurt adds creaminess. It also gives a nice tang. Adding Dijon mustard brings a zesty kick to the wraps. Now, let's add some flavor! Garlic powder enhances the taste. Smoked paprika gives a subtle smokiness. Finally, a dash of black pepper adds warmth without being too spicy. For fresh fillings, I like to use mixed greens. They add color and crunch. Cherry tomatoes bring sweetness, and cucumber offers a refreshing bite. These fresh ingredients balance the rich flavors of the chicken mixture. Don’t forget the wraps! Whole wheat tortillas work best. They are healthy and keep everything together. You can also garnish your wraps with fresh herbs like cilantro. This adds a pop of color and flavor. For the full recipe, check out the [Full Recipe]. You will love how easy it is to make these delicious snacks! To start, gather your ingredients. In a large bowl, mix the chicken and other items. Combine 2 cups of shredded chicken, 1/2 cup of creamy Greek yogurt, and 1 tablespoon of Dijon mustard. Add 1 teaspoon of garlic powder, 1 teaspoon of smoked paprika, and 1/4 teaspoon of black pepper. Stir well until every piece is coated. You want a thick, creamy mix that sticks to the chicken. Next, lay out your whole wheat tortillas on a clean surface. Each tortilla should be flat and ready for filling. Scoop about 1/4 cup of the chicken mixture into the center of each tortilla. Spread it evenly, leaving a little space at the edges. Then, add a handful of mixed greens, halved cherry tomatoes, and thin cucumber slices. This creates a bright and tasty filling. Now it’s time to roll your wraps. First, fold the sides of the tortilla in. Then, roll it tightly from the bottom up. This secures all the yummy fillings inside. Once rolled, take a sharp knife and slice each wrap in half diagonally. This makes it easy to serve and looks great on a plate. For a fresh touch, sprinkle cilantro on top before serving. For the full recipe, refer to the earlier section. Enjoy making these tasty mini chicken wraps! Marinating chicken boosts its flavor. A simple marinade can include Greek yogurt, Dijon mustard, and spices. Let the chicken sit for at least 30 minutes. This adds depth and taste. You can also try adding fresh herbs like cilantro or basil. These herbs bring a burst of freshness to the wraps. You can prepare the wraps ahead of time. Simply make the chicken mixture and store it in the fridge. You can assemble the wraps just before serving. For a fun twist, serve with dips like hummus or salsa. These dips add more flavor and excitement to your meal. Pair with crunchy veggies like carrot sticks or bell peppers for a complete snack. Always ensure your chicken is fully cooked. It should reach an internal temperature of 165°F. Use a meat thermometer for accuracy. When handling raw chicken, wash your hands and surfaces. This keeps food safe from bacteria. Store leftovers in an airtight container in the fridge. Enjoy your mini chicken wraps fresh or as a quick snack later! For the full recipe, check out the section above. {{image_4}} You can switch things up by using beef or shrimp instead of chicken. Beef adds a rich flavor, while shrimp brings a nice bite. For a vegetarian option, try beans and cheeses. Black beans or chickpeas work great. They add protein and keep the wraps filling. The sauce you choose can change everything. For creamy options, you can use ranch or tzatziki. Both add a cool touch to your wraps. If you want heat, go for spicy sauces like sriracha or a tangy hot sauce. These add a kick that makes each bite exciting. Using lettuce leaves instead of tortillas gives a fresh twist. Lettuce wraps are crunchy and light. They are perfect for a low-carb meal. If you need gluten-free options, look for rice paper or corn tortillas. These wraps still hold all the tasty fillings while being friendly to different diets. For the full recipe, check out Savory Mini Chicken Wraps . You can store mini chicken wraps in the fridge for up to three days. This time frame helps keep them fresh and safe to eat. Use airtight containers to keep the wraps moist and tasty. Glass or plastic containers work well. Avoid using containers that allow air inside, as this can make the wraps dry. To freeze mini chicken wraps, wrap each one tightly in plastic wrap or foil. This step helps keep them from getting freezer burn. Place the wrapped wraps in a freezer-safe bag or container. Label the bag with the date so you know when you made them. You can freeze them for up to three months. To reheat frozen wraps, take them out and let them thaw in the fridge overnight. If you want a quicker option, you can microwave them for about one to two minutes. Make sure to check that they are hot all the way through before eating. Enjoy these tasty wraps any time, even after freezing! For the full recipe, check out the previous sections. To make Mini Chicken Wraps healthier, swap some ingredients. Here are a few low-calorie options: - Use low-fat Greek yogurt instead of regular. - Replace whole wheat tortillas with lettuce wraps. - Add more fresh veggies, like bell peppers or carrots. - Use less mustard or choose a lighter dressing. These swaps keep the flavor while cutting calories. Yes, using leftover chicken is a great idea! Here are best practices: - Ensure the chicken is fully cooked before using it. - Shred or chop the leftover chicken for easy mixing. - Store leftover chicken in the fridge no longer than 3-4 days. Using leftovers saves time and reduces waste, making your wraps quick and tasty. Mini Chicken Wraps go well with various dips. Here are some tasty suggestions: - Hummus adds a creamy and flavorful touch. - Salsa gives a fresh and zesty kick. - Ranch dressing adds a classic flavor. - Tzatziki sauce brings a cool, tangy element. Experiment with these dips to find your perfect match! Mini chicken wraps are tasty, easy to make, and full of flavor. We discussed key ingredients, like chicken, Greek yogurt, and fresh veggies. You learned how to prepare and assemble these wraps while keeping safety in mind. You also have tips for flavor enhancement and storage. Remember, you can customize these wraps in many ways. Think about using different proteins or sauces to suit your taste. Enjoy your cooking and create delicious meals that everyone will love!](https://fastmealmate.com/wp-content/uploads/2025/06/124e56a0-f478-4b5e-be65-4c059dfc39c0-768x768.webp)
![To make these tasty strawberry cream cheese rolls, gather these simple ingredients: - 1 cup fresh strawberries, diced - 1 tablespoon granulated sugar (optional; for sweetness) - 8 oz cream cheese, softened to room temperature - 1/4 cup powdered sugar - 1 teaspoon pure vanilla extract - 1 package (about 8 oz) crescent roll dough - 1 egg, beaten (for egg wash) - 1 tablespoon sesame seeds (for topping, optional) You can change some ingredients if needed. Here are some easy swaps: - Strawberries: Use any berry like blueberries or raspberries. - Cream Cheese: Neufchâtel cheese is a great lower-fat choice. - Sugar: Try honey or maple syrup for a natural sweetener. - Crescent Roll Dough: Use puff pastry if you want a flakier roll. - Egg Wash: Brush with milk or a non-dairy milk for a vegan option. Having the right tools makes the process easier. Here’s what you need: - Baking sheet - Parchment paper - Mixing bowls - Electric mixer or whisk - Rolling pin (optional) - Knife for cutting strawberries - Measuring cups and spoons Gathering these items will help you whip up these rolls with ease. Enjoy the process! First, we need to get the oven ready. Set your oven to 375°F (190°C). This step is key. Preheating helps the rolls bake evenly. While the oven heats, you can prep the other ingredients. Next, let’s work on the strawberries. Dice 1 cup of fresh strawberries. Place them in a bowl. If you want extra sweetness, add 1 tablespoon of granulated sugar. Gently stir them together. Let the strawberries sit for about 10 minutes. This process, called macerating, helps them soften and release their juices. Now, it’s time to make the filling. In a separate bowl, take 8 oz of softened cream cheese. Add 1/4 cup of powdered sugar and 1 teaspoon of pure vanilla extract. Beat these together until the mixture is smooth and creamy. Make sure there are no lumps. This filling is rich and tasty, perfect for our rolls. Let’s assemble our rolls. Unroll 1 package of crescent roll dough on a clean surface. Separate the dough into individual triangles. For each triangle, spread a generous spoonful of the cream cheese mixture on the wide end. Add a few pieces of the macerated strawberries on top. Roll the dough from the wider side to the tip, tucking in the filling as you go. Press the tip down gently to seal the roll. Now, we prepare for baking. Place the rolls on a parchment-lined baking sheet. To make them shiny and golden, brush the tops with a beaten egg. If you like, sprinkle sesame seeds on top for extra crunch. Now, put the baking sheet in your preheated oven. Bake the rolls for about 12-15 minutes. Look for a golden brown color. Once baked, take the rolls out of the oven. Let them cool for a few minutes on the baking sheet. The filling will be hot, so be careful! For a lovely presentation, serve the rolls on a nice platter. You can dust them with powdered sugar and add whole strawberries on the side for a fresh touch. Enjoy your sweet treat! For the full recipe, check out the details above. To make the best strawberry cream cheese rolls, focus on the texture. Always use softened cream cheese. This helps it blend well with the sugar and vanilla. If your cream cheese is too cold, it will be lumpy. For the strawberries, let them sit with sugar for about 10 minutes. This softens them and brings out their natural juice. When rolling the dough, avoid over-stretching. This keeps the rolls fluffy and light. Watch out for a few common mistakes. First, don’t skip the egg wash. This gives the rolls a lovely golden color. Second, be careful not to overfill. Too much filling can cause the rolls to burst open while baking. Lastly, always preheat your oven. This step is crucial for even baking. If you skip it, the rolls may not rise properly. Presentation matters, especially with these rolls. Serve them on a nice platter, dusted with powdered sugar. This makes them look extra special. You can also add whole strawberries around the rolls. This adds color and freshness to your dish. For a finishing touch, consider drizzling a little melted chocolate on top. These simple steps make your rolls shine on any table. For the complete recipe, check the Full Recipe section. Enjoy making your own delicious strawberry cream cheese rolls! {{image_4}} You can switch up the fruit in these rolls. Instead of strawberries, use raspberries, blueberries, or peaches. Each fruit brings a unique taste. Raspberries add a tart flavor, while blueberries offer a sweet touch. To use other fruits, chop them into small pieces. Mix them with sugar, just like you did with the strawberries. Let them sit to release their juices. This step helps enhance the flavor. If you're gluten-free, don't worry! You can still enjoy these rolls. Look for gluten-free crescent roll dough in stores. Many brands make tasty options. Just follow the same steps as the regular recipe. The end result will still be fluffy and delicious. Always check the ingredients to ensure they meet your needs. Feel free to add more flavors to the cream cheese filling. You can mix in lemon zest for a fresh twist. Alternatively, consider adding a dash of cinnamon for warmth. For a chocolatey treat, fold in some mini chocolate chips. These add-ins will create a fun twist on the classic rolls. You can also use flavored cream cheese, like strawberry or vanilla. This can save time while adding even more flavor. Check out the Full Recipe for these ideas and details! Store leftover strawberry cream cheese rolls in an airtight container. Keep them in the fridge for up to three days. If you want to keep them fresh for longer, consider wrapping each roll in plastic wrap before placing them in the container. This helps maintain their moisture and flavor. To reheat the rolls, preheat your oven to 350°F (175°C). Place the rolls on a baking sheet and cover them with foil. Heat for about 10-15 minutes, or until warm throughout. You can also use a microwave. Heat each roll for 15-20 seconds until warm. Just be careful not to overheat them, as this can make them tough. You can freeze these rolls for later enjoyment. Allow them to cool completely after baking. Then, wrap each roll tightly in plastic wrap, followed by aluminum foil. This helps prevent freezer burn. Store them in the freezer for up to two months. When you are ready to enjoy them, thaw them in the fridge overnight and reheat as described above. For the full recipe, check out the complete instructions above! You can prepare the rolls a day before. Follow the steps until the baking part. Once you assemble them, cover the rolls tightly with plastic wrap. Store them in the fridge overnight. When you're ready to bake, take them out and let them sit for about 20 minutes. Then, brush with egg wash and bake as usual. Yes, you can use frozen strawberries. Thaw them first and drain any excess juice. Dicing them will help them mix well with the cream cheese. The taste will still be great, but fresh strawberries do add a nice touch. These rolls pair well with a few items. Consider serving them with whipped cream or a scoop of vanilla ice cream. A light drizzle of chocolate sauce can elevate the flavor. Fresh mint leaves also add a nice touch and color. Check the color and texture of the rolls. They should be golden brown and puffed up. You can gently tap the top; it should sound hollow. If you're unsure, an instant-read thermometer can help. The internal temperature should reach 190°F (88°C) for a perfect bake. For the full recipe, refer to the [Full Recipe]. This blog post covered everything you need to make Strawberry Cream Cheese Rolls. We explored the ingredients, gave useful substitutions, and listed the best tools. Then, I provided simple steps for prepping, baking, and serving. I shared tips for great texture and ways to avoid common mistakes. In conclusion, enjoy these tasty rolls with your favorite flavors. They are fun to make and eat! Keep experimenting with variations and storage tips to make the most of your delicious treats. Happy baking!](https://fastmealmate.com/wp-content/uploads/2025/06/0240e1a4-5971-472f-af7e-a45e0386d654-768x768.webp)