Pumpkin Cream Cheese Swirl Muffins Tasty and Simple Treat
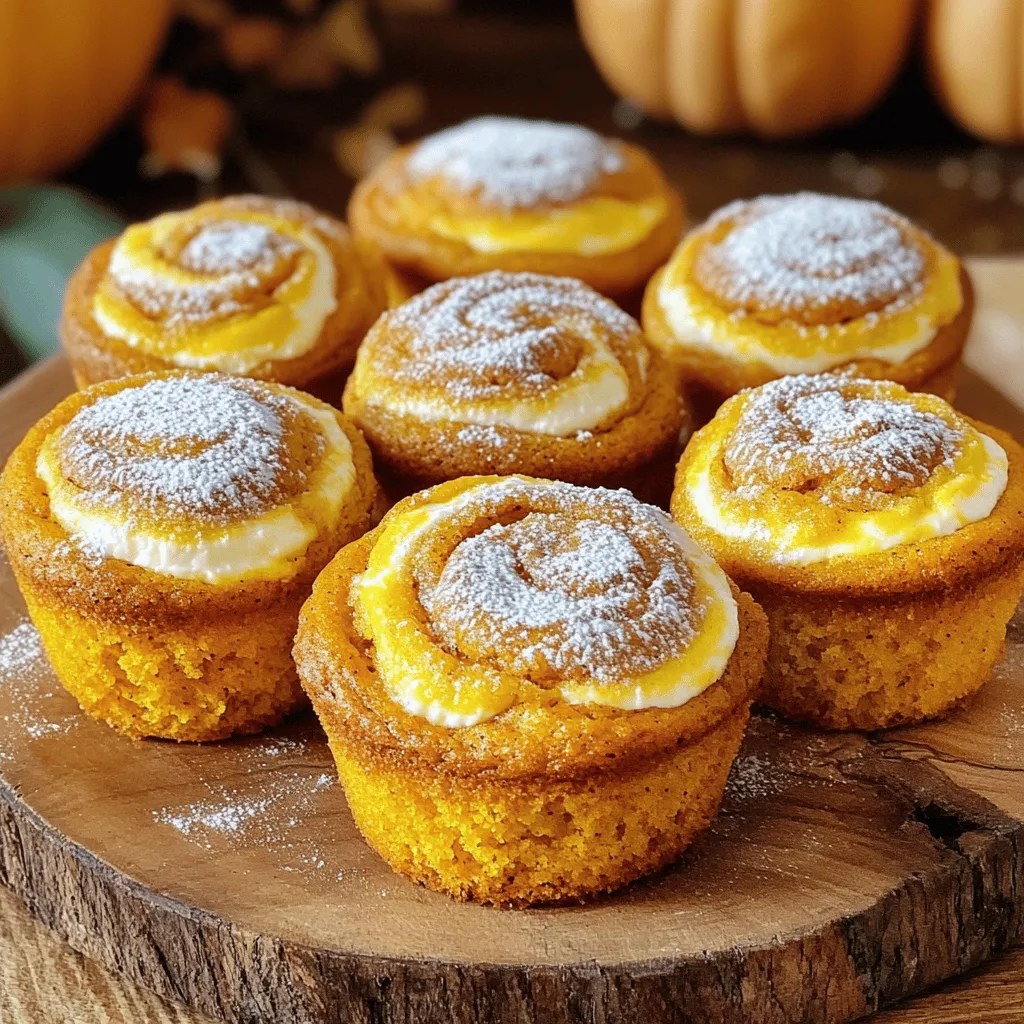
Craving a simple and delicious treat? These Pumpkin Cream Cheese Swirl Muffins are just what you need! With warm spices and creamy filling, they capture the essence of fall in every bite. Not only are they easy to make, but they also bring comfort and joy to your kitchen. Let’s dive into this tasty recipe that will have everyone asking for seconds. Get ready to bake the perfect fall muffin!
Ingredients
To make Pumpkin Cream Cheese Swirl Muffins, you need fresh, quality ingredients. Here’s the list to get you started:
Dry Ingredients
– 1 ½ cups all-purpose flour
– 1 tsp baking powder
– 1 tsp baking soda
– ½ tsp ground cinnamon
– ¼ tsp ground nutmeg
– ¼ tsp salt
Wet Ingredients
– ½ cup granulated sugar
– ½ cup packed brown sugar
– 1 cup canned pumpkin puree
– 2 large eggs, at room temperature
– ⅓ cup vegetable oil
– 1 tsp vanilla extract
Cream Cheese Filling
– 8 oz cream cheese, softened to room temperature
– ¼ cup powdered sugar
– ½ tsp vanilla extract
I recommend using canned pumpkin puree for its rich flavor. It simplifies the process, ensuring you get that delicious pumpkin taste. Ensure the cream cheese is soft. This makes mixing easier and gives a smooth filling.Enjoy gathering these ingredients!
Step-by-Step Instructions
Preparation Steps
– Preheat the oven to 350°F (175°C). Prepare a muffin tin with liners or non-stick spray.
– In a medium bowl, mix the all-purpose flour, baking powder, baking soda, ground cinnamon, ground nutmeg, and salt. Whisk until combined, then set aside.
– In a large bowl, whisk together the granulated sugar, brown sugar, pumpkin puree, eggs, vegetable oil, and vanilla extract. Mix until smooth and creamy.
Combining Ingredients
– Gradually add the dry mixture into the wet pumpkin mixture. Stir gently until just combined. Do not overmix; lumps are okay!
– In another bowl, beat the softened cream cheese until smooth. Add powdered sugar and vanilla extract. Mix until creamy.
Assembly
– Pour pumpkin batter into muffin cups, filling each about halfway. Spoon a dollop of cream cheese filling in the center of each cup. Top with more pumpkin batter, filling each cup about ¾ full.
– With a toothpick, gently swirl the cream cheese filling into the pumpkin batter for a marbled look.
– Bake muffins for 18-22 minutes. They are done when a toothpick comes out clean, though some cream cheese might stay on the toothpick.
– Let the muffins cool in the tin for 5 minutes. Transfer to a wire rack to cool completely.
Tips & Tricks
Achieving the Perfect Swirl
To get that perfect cream cheese swirl, follow these steps. First, use a toothpick or skewer to gently swirl the cream cheese into the pumpkin batter. Do not stir too much. You want to see the cream cheese and pumpkin mix without blending them completely. This gives your muffins that beautiful marbled look.
Another key point is to avoid overmixing the pumpkin batter. When you mix, do it gently until just combined. It’s okay if you see some small lumps. Overmixing can make your muffins tough.
Ensuring Great Texture
Using room temperature ingredients is very important. When eggs and cream cheese are at room temperature, they mix better. This creates a smoother batter and a more tender muffin.
Baking time also matters. Set your timer for about 18-22 minutes. To check if they are done, insert a toothpick into the center. If it comes out clean, your muffins are ready. Remember, the cream cheese may stay a little soft. That’s normal!
Presentation Tips
For a lovely presentation, arrange your muffins on a festive platter. Dust the tops with a light sprinkle of powdered sugar. This adds a nice touch! You can also serve them with a dollop of whipped cream on the side. It makes them even more tempting. Enjoy your delicious Pumpkin Cream Cheese Swirl Muffins!

Variations
Ingredient Substitutions
For a gluten-free option, you can use a 1:1 gluten-free flour blend. These blends work well in most recipes. If you want to try alternative sweeteners, consider using honey or maple syrup instead of sugar. These natural sweeteners add a nice flavor twist.
Flavor Additions
To make your muffins more exciting, try adding chocolate chips or nuts. They bring a delightful crunch and rich taste. You can also experiment with different spices. Try adding ginger or cloves for extra warmth and depth.
Seasonal Twists
If you want a fun seasonal twist, consider adding apple or pecan flavors. Chopped apples add moisture and sweetness. Chopped pecans give a nice crunch and nutty flavor. For a smaller treat, make mini muffins. They are perfect for snacks or a quick bite.
Storage Info
Short-Term Storage
Store your pumpkin cream cheese swirl muffins at room temperature. Use an airtight container to keep them fresh. This simple step prevents them from drying out or getting stale. Your muffins will stay tasty for about three days. If you want to keep them longer, consider putting them in the fridge. Just remember to let them come to room temperature before enjoying.
Long-Term Storage
For long-term storage, freezing is your best option. Wrap each muffin tightly in plastic wrap or aluminum foil. Then, place them in a freezer-safe bag or container. This method helps keep the muffins moist and flavorful. They can last up to three months in the freezer without losing taste.
To thaw, remove the muffins from the freezer. Let them sit at room temperature for about an hour. If you’re in a hurry, use the microwave. Heat them on low power for 10 to 15 seconds. For a warm muffin, pop it in the oven at 350°F (175°C) for about 5-10 minutes. Enjoy your delicious treats any time!
FAQs
How do I know when the muffins are done baking?
To check if your muffins are done, look for a few signs. First, they should be golden brown on top. Next, you can gently press the top with your finger. If it springs back, they are ready. Also, insert a toothpick in the center. If it comes out clean, your muffins are done. These tips help you bake the perfect pumpkin cream cheese swirl muffins every time.
Can I make these muffins ahead of time?
Yes, you can make these muffins ahead of time! Bake them and let them cool completely. Once cooled, store them in an airtight container at room temperature for up to three days. If you want to keep them longer, freeze them. Just place them in a freezer bag, and they will stay fresh for up to three months. Thaw them in the fridge or at room temperature before enjoying.
What can I use instead of cream cheese for the filling?
If you need an alternative to cream cheese, consider using mascarpone cheese. It has a similar texture and flavor. Greek yogurt is another great option, bringing creaminess and tang. You can also try cottage cheese blended smooth for a lower-fat choice. Each option gives a different taste, so feel free to experiment to find your favorite!
These muffins combine simple ingredients for a delightful treat. We covered dry and wet ingredients, along with a tasty cream cheese filling. Following the steps ensures a perfect bake. Tips for texture and dazzling presentation make these muffins shine. Storage advice keeps them fresh for days.
Experiment with flavors to suit the season or your taste. Enjoy making and sharing these tasty muffins. You’ll impress friends and family with your baking skills. So, get mixing and enjoy the results!


![- 1 pre-made 9-inch pie crust - 6 large eggs - 1 cup whole milk For this quiche, I use a pre-made pie crust. It saves time and gives a nice crunch. Next, I add large eggs and whole milk. These create a rich and creamy base that holds everything together. - 1 cup cooked turkey bacon, chopped into bite-sized pieces - 1 cup cherry tomatoes, halved - 1 cup fresh spinach, chopped - 1 cup shredded cheddar cheese The flavor comes from turkey bacon, cherry tomatoes, fresh spinach, and cheddar cheese. Turkey bacon gives a smoky taste. Cherry tomatoes add sweetness, while spinach brings freshness. Cheddar cheese melts wonderfully, making the quiche extra tasty. - 1 teaspoon garlic powder - 1 teaspoon onion powder - Salt and pepper to taste Seasoning is key for a great quiche. I use garlic powder and onion powder for depth. Adding salt and pepper enhances all the flavors. This blend makes every bite delicious. You can check the [Full Recipe] for more details on this savory dish. - Preheat the oven to 375°F (190°C). - Fit the pie crust into the pie dish. To start, you need to preheat your oven. This step is key to getting that perfect, fluffy texture in your quiche. Next, take your pre-made pie crust and carefully fit it into a 9-inch pie dish. Press it gently against the sides to make it even. Set it aside while you prepare the filling. - Whisk eggs and whole milk. - Incorporate garlic powder, onion powder, salt, and pepper. In a large mixing bowl, break open six large eggs. Pour in one cup of whole milk. Whisk them together until the mixture is smooth. This will be the base of your quiche. Now, add one teaspoon of garlic powder and one teaspoon of onion powder. Don't forget to season with salt and pepper to taste. Stir well to mix in all the flavors. - Fold in bacon, tomatoes, spinach, and cheese. - Pour the mixture into the crust. Now comes the fun part! Gently fold in the cooked turkey bacon, halved cherry tomatoes, chopped spinach, and shredded cheddar cheese. Make sure everything is evenly mixed. Then, pour this mixture into the prepared pie crust. Use a spatula to spread the ingredients evenly. This helps them cook nicely. - Bake for 35-40 minutes. - Check for doneness with a toothpick. Place your quiche in the preheated oven. Bake it for about 35 to 40 minutes. You want it to puff up and turn golden brown. To check if it’s done, insert a toothpick into the center. If it comes out clean, your quiche is ready. Enjoy this savory dish, and for the full recipe, be sure to check the details provided earlier. Getting the egg and milk ratio right is key. I use six large eggs and one cup of whole milk. This mix gives the quiche a creamy texture. Too much milk will make it runny, while too few eggs can lead to a dry quiche. After baking, let the quiche cool for about ten minutes. Cooling makes slicing much easier. If you cut it right away, it may fall apart. For sides, I love serving my quiche with a fresh green salad. The crispness of the salad complements the rich quiche. Another great option is fruit. Try fresh berries or sliced melons for a sweet touch. When it comes to seasonings, fresh herbs like basil or chives can really enhance the flavors. A sprinkle of smoked paprika can add a nice depth too. Serve each slice on a colorful plate for a fun look. Garnish with extra cherry tomato halves and a sprig of parsley. This adds color and makes it more appealing. For a pop of color, consider using a bright salad alongside the quiche. The mix of green, red, and yellow will catch the eye. It makes a simple meal look fancy with little effort. You can find the full recipe to create this beautiful dish and impress your guests! {{image_4}} You can make a crustless BLT quiche easily. Just skip the pie crust. Grease your pie dish with oil or butter. Then, pour your filling directly into the dish. Bake it the same way as the regular quiche. The crustless version is lighter and gluten-free. It saves time, too. You won’t have to roll out dough or worry about a soggy crust. Plus, it keeps the focus on the tasty filling. You can mix things up with different proteins. Try using ham or crispy pancetta instead of turkey bacon. Each protein adds its own flavor. You can also change up the veggies. Bell peppers add sweetness, while zucchini offers a mild taste. Feel free to get creative and use what you have on hand. If you want a low-fat quiche, use skim milk instead of whole milk. You can also reduce the amount of cheese. This keeps the quiche tasty without all the fat. For a gluten-free option, look for a gluten-free pie crust. Many stores offer these now. You can even make your own with almond flour or oat flour. This way, everyone can enjoy your quiche! For the full recipe, check out the detailed instructions above. To store leftover quiche, let it cool completely. This helps keep moisture in check. Place it in an airtight container. A glass or plastic container works great. Make sure to wrap it tightly with plastic wrap too. This keeps the flavors fresh. Reheat your quiche in the oven for the best texture. Preheat the oven to 350°F (175°C). Place the quiche in the oven for about 15-20 minutes. If you're in a hurry, you can use the microwave. Heat it for 1-2 minutes, but keep an eye on it. The crust may lose its crunch in the microwave. To freeze quiche, wrap it well in plastic wrap and then in foil. It keeps well for about 2-3 months. When you’re ready to eat, take it out of the freezer. Place it in the fridge to thaw overnight. For reheating, follow the same oven method as before. This ensures your quiche tastes just as good as fresh. To keep your quiche from being watery, control the moisture in your ingredients. Use dry turkey bacon and pat it with a towel to absorb grease. For vegetables, like spinach and tomatoes, squeeze out excess water before adding them. This simple step prevents sogginess. Baking the quiche properly also helps. A preheated oven allows the egg mixture to set quickly, locking in flavors without extra moisture. Yes, you can prepare your quiche the night before. To do this, assemble your quiche as normal. Cover it tightly with plastic wrap or foil and refrigerate. This way, the flavors meld together overnight. When ready to bake, remove it from the fridge and let it sit for about 15 minutes. This helps it cook evenly. Bake according to the instructions in the Full Recipe for a delicious breakfast or brunch! If you want an alternative to turkey bacon, try regular bacon for a richer flavor. For a vegetarian option, use mushrooms or tempeh. Both add great texture and taste to your quiche. You could also use smoked tofu for a unique twist. Each of these options brings its own flavor, so choose what you like best. You can tell your quiche is done when it’s puffed and golden on top. Insert a toothpick into the center; it should come out clean. If it has some egg mixture on it, bake for a few more minutes and check again. It’s important to let it cool for about 10 minutes after baking. This resting time makes slicing easier and helps the filling set. BLT quiche is a tasty dish that mixes flavors and textures. We covered key ingredients like pie crust, eggs, milk, turkey bacon, and veggies. The step-by-step guide helps you bake it perfectly, while tips on storing and reheating keep it fresh for later. You can even switch up the ingredients for new twists. Remember, cooking is about experimenting. Enjoy your time in the kitchen, and don’t be afraid to make it your own!](https://fastmealmate.com/wp-content/uploads/2025/06/6e495986-43c5-45ef-a717-6d7df2569586-768x768.webp)