Pumpkin Spice Snickerdoodles Tasty Fall Treats

If you love the cozy flavors of fall, you’ll adore these Pumpkin Spice Snickerdoodles! This sweet twist on a classic cookie blends warm spices with pumpkin goodness. I’ll guide you through the simple steps to make these tasty treats. From the right ingredients to baking tips, you’ll have everything you need to impress your friends and family. Let’s dive into this delightful fall recipe!
Ingredients
List of Ingredients
To make pumpkin spice snickerdoodles, you will need the following ingredients:
– 1 cup unsalted butter, softened to room temperature
– 1 cup granulated sugar
– 1 cup packed light brown sugar
– 1 cup pure pumpkin puree
– 2 large eggs, at room temperature
– 3 ½ cups all-purpose flour
– 2 teaspoons cream of tartar
– 1 teaspoon baking soda
– 1 teaspoon baking powder
– 1 teaspoon ground cinnamon
– ½ teaspoon ground nutmeg
– ½ teaspoon ground ginger
– ¼ teaspoon ground cloves
– ½ teaspoon salt
– 1 tablespoon pure vanilla extract
– ½ cup granulated sugar (for rolling)
– 2 teaspoons ground cinnamon (for rolling)
Ingredient Substitutions
If you want to switch things up, here are some easy swaps:
– Use coconut oil instead of butter for a dairy-free option.
– Substitute brown sugar with coconut sugar for a deeper flavor.
– If you don’t have pumpkin puree, use mashed banana or applesauce instead.
– Try almond flour instead of all-purpose flour for a gluten-free version.
Special Notes on Quality
Using high-quality ingredients makes a big difference. Here are some tips:
– Choose unsalted butter for better control of saltiness in cookies.
– Use pure pumpkin puree, not pumpkin pie filling, for the best taste.
– Fresh spices enhance the flavor profile. Check your spice jars for freshness.
– Organic sugars can add a richer flavor and better quality to your cookies.
These ingredients come together to create a rich, cozy treat perfect for fall. The blend of spices and pumpkin gives each bite a warm hug. Ready to bake?
Step-by-Step Instructions
Preparing the Dough
To start, preheat your oven to 350°F (175°C). This will help the cookies bake evenly. Line your baking sheets with parchment paper. This step stops the cookies from sticking. In a large bowl, beat the softened butter, granulated sugar, and brown sugar together. Mix them on medium speed until light and fluffy. This takes about 2-3 minutes. Next, add the pumpkin puree to the mixture. Mix until well combined. Then, add the eggs one at a time, beating well after each. Finally, stir in the vanilla extract.
In another bowl, mix together the flour, cream of tartar, baking soda, baking powder, salt, and spices. Whisk until there are no lumps. Slowly add this dry mixture to the wet mixture. Blend on low speed until just combined. Be careful not to overmix. This step is key for soft cookies.
Baking the Cookies
Now, make the rolling sugar. In a small bowl, mix ½ cup of granulated sugar with 2 teaspoons of ground cinnamon. Roll tablespoon-sized pieces of dough into balls. Then, coat each ball in the cinnamon sugar mixture. Place the dough balls on the lined baking sheets, leaving about 2 inches between them. This space allows the cookies to spread while baking. Bake for 10-12 minutes. You want the edges to turn golden brown, while the centers remain soft.
Cooling and Serving Suggestions
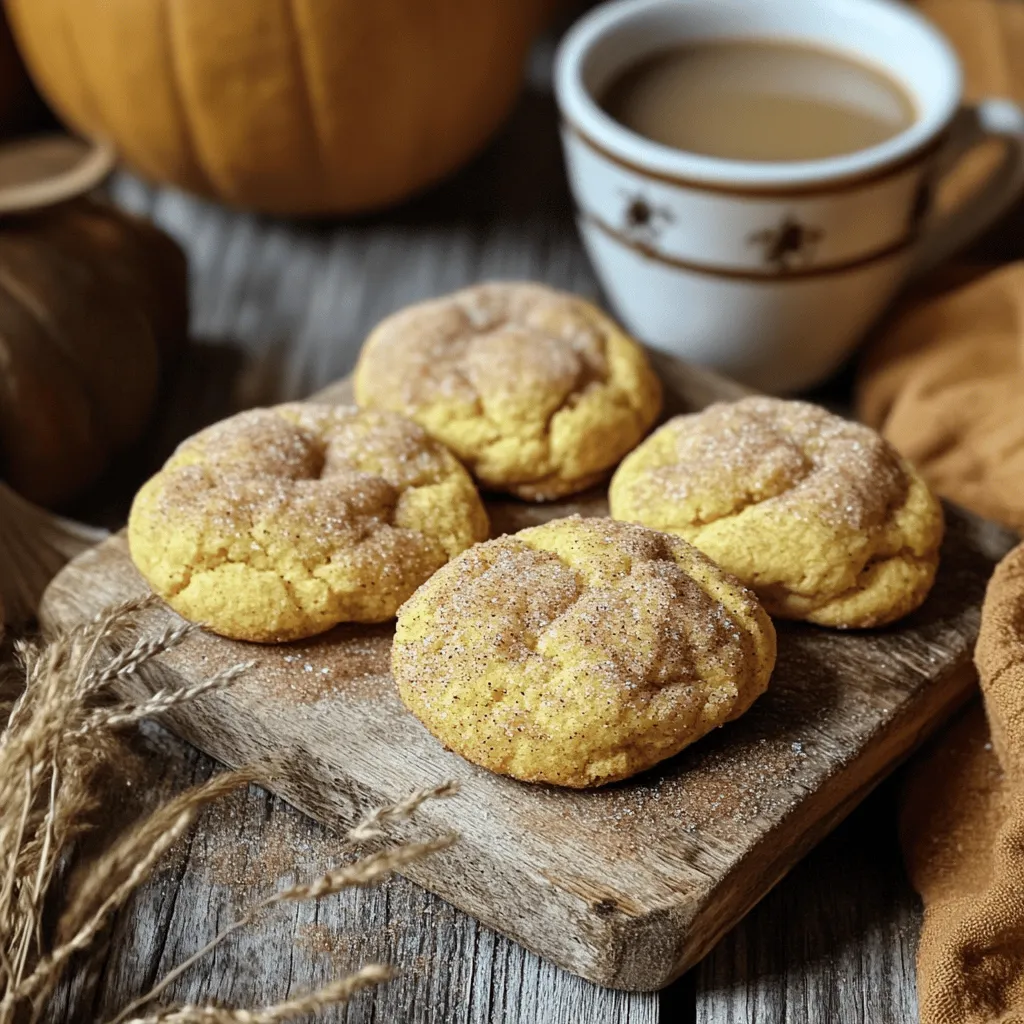
After baking, let the cookies cool on the baking sheets for about 5 minutes. This time helps them set. Then, move the cookies to a wire rack to cool completely. For serving, stack the warm cookies on a rustic wooden board. Lightly dust them with extra cinnamon sugar. They pair perfectly with a cup of chai or hot chocolate. Enjoy the warm aromas as you share these tasty treats with friends and family.
Tips & Tricks
How to Achieve the Perfect Texture
To get soft, chewy Pumpkin Spice Snickerdoodles, follow these steps:
– Use room temperature butter. It will blend well with sugars.
– Don’t overmix your dough. Mix until just combined for the best texture.
– Roll your dough balls tightly. This helps them hold their shape while baking.
Baking time is also key. Bake until the edges are golden, but the center is soft. This gives you that perfect cookie texture.
Common Mistakes to Avoid
Here are some mistakes to watch out for:
– Using cold butter. This can lead to a dense cookie.
– Skipping the chilling time. Chilling dough helps cookies spread less.
– Not measuring flour correctly. Too much flour makes cookies dry. Use the spoon and level method for measuring.
Avoid these pitfalls, and you’ll have great cookies every time!
Enhancements for Flavor
Want to amp up the flavor? Here are some ideas:
– Add a pinch of sea salt for balance.
– Mix in chocolate chips for a sweet twist.
– Use fresh spices instead of ground ones. They add a vibrant taste.
Try these tips to customize your Pumpkin Spice Snickerdoodles. Each bite will be delicious!
Variations
Gluten-Free Pumpkin Spice Snickerdoodles
You can make these cookies gluten-free! Simply swap out all-purpose flour for a good gluten-free blend. Look for one that includes xanthan gum. This will help the cookies hold their shape. You will still enjoy the warm spices and sweet pumpkin. Trust me, they will taste just as good!
Adding Nuts or Chocolate
Want to boost flavor and texture? Add nuts or chocolate chips! Chopped pecans or walnuts add crunch. For a sweet twist, mix in chocolate chips. Dark or white chocolate works great. Just fold them into the dough before rolling. This way, every bite will be a delight!
Alternative Spice Blends
Change up the spices for a new taste. Try adding cardamom for a floral note or allspice for warmth. Even a dash of cayenne pepper can give a fun kick! Mix and match spices to find your favorite blend. This will keep your pumpkin spice snickerdoodles fresh and exciting. You could even try a pumpkin pie spice mix for a classic touch.
Explore your creativity with these variations to make the most of your pumpkin spice snickerdoodles. Enjoy the process and share your creations!
Storage Info
How to Store Leftover Cookies
To store leftover pumpkin spice snickerdoodles, place them in an airtight container. This keeps them fresh and soft. You can layer parchment paper between the cookies to prevent sticking. Store the container at room temperature for up to one week. If you live in a warm area, consider refrigerating them.
Freezing Tips for Long-Term Storage
For longer storage, you can freeze the cookies. First, cool them completely. Then, wrap each cookie in plastic wrap. Place the wrapped cookies in a freezer-safe bag or container. They can last up to three months in the freezer. To enjoy, thaw them at room temperature or warm them in the oven.
Shelf Life and Signs of Spoilage
Pumpkin spice snickerdoodles last about one week at room temperature. After this, they may become dry or hard. If you see mold, or if the cookies smell off, it’s best to discard them. Always check for these signs to ensure you’re enjoying your treats at their best.
FAQs
Can I make Pumpkin Spice Snickerdoodles ahead of time?
Yes, you can make Pumpkin Spice Snickerdoodles ahead of time. Prepare the dough and chill it. This helps the flavors blend. You can store it in the fridge for up to three days. When ready to bake, roll the dough in cinnamon sugar and bake as directed.
What can I substitute for pumpkin puree?
If you don’t have pumpkin puree, you can use applesauce. It adds moisture and sweetness. You can also use sweet potato puree or butternut squash puree. Both can give a nice flavor. Make sure they are smooth and unsweetened for the best results.
How do I make these cookies chewier?
To make your cookies chewier, try adding more brown sugar. Brown sugar has more moisture than white sugar. You can also reduce the flour slightly. This can help keep the cookies soft. Do not overmix the dough. Overmixing can make cookies tough.It includes all the steps and tips to make the best cookies. Just follow the link to get started on your delicious fall treats!
Now you have all the tools to bake perfect Pumpkin Spice Snickerdoodles. We covered ingredients, steps, and helpful tips. Remember, using fresh spices makes a big difference. Keep an eye on texture to avoid common mistakes. You can also try fun variations, like gluten-free options or adding chocolate. Lastly, store your cookies well to keep them fresh. Enjoy baking and sharing these tasty treats!
![To make these tasty strawberry cream cheese rolls, gather these simple ingredients: - 1 cup fresh strawberries, diced - 1 tablespoon granulated sugar (optional; for sweetness) - 8 oz cream cheese, softened to room temperature - 1/4 cup powdered sugar - 1 teaspoon pure vanilla extract - 1 package (about 8 oz) crescent roll dough - 1 egg, beaten (for egg wash) - 1 tablespoon sesame seeds (for topping, optional) You can change some ingredients if needed. Here are some easy swaps: - Strawberries: Use any berry like blueberries or raspberries. - Cream Cheese: Neufchâtel cheese is a great lower-fat choice. - Sugar: Try honey or maple syrup for a natural sweetener. - Crescent Roll Dough: Use puff pastry if you want a flakier roll. - Egg Wash: Brush with milk or a non-dairy milk for a vegan option. Having the right tools makes the process easier. Here’s what you need: - Baking sheet - Parchment paper - Mixing bowls - Electric mixer or whisk - Rolling pin (optional) - Knife for cutting strawberries - Measuring cups and spoons Gathering these items will help you whip up these rolls with ease. Enjoy the process! First, we need to get the oven ready. Set your oven to 375°F (190°C). This step is key. Preheating helps the rolls bake evenly. While the oven heats, you can prep the other ingredients. Next, let’s work on the strawberries. Dice 1 cup of fresh strawberries. Place them in a bowl. If you want extra sweetness, add 1 tablespoon of granulated sugar. Gently stir them together. Let the strawberries sit for about 10 minutes. This process, called macerating, helps them soften and release their juices. Now, it’s time to make the filling. In a separate bowl, take 8 oz of softened cream cheese. Add 1/4 cup of powdered sugar and 1 teaspoon of pure vanilla extract. Beat these together until the mixture is smooth and creamy. Make sure there are no lumps. This filling is rich and tasty, perfect for our rolls. Let’s assemble our rolls. Unroll 1 package of crescent roll dough on a clean surface. Separate the dough into individual triangles. For each triangle, spread a generous spoonful of the cream cheese mixture on the wide end. Add a few pieces of the macerated strawberries on top. Roll the dough from the wider side to the tip, tucking in the filling as you go. Press the tip down gently to seal the roll. Now, we prepare for baking. Place the rolls on a parchment-lined baking sheet. To make them shiny and golden, brush the tops with a beaten egg. If you like, sprinkle sesame seeds on top for extra crunch. Now, put the baking sheet in your preheated oven. Bake the rolls for about 12-15 minutes. Look for a golden brown color. Once baked, take the rolls out of the oven. Let them cool for a few minutes on the baking sheet. The filling will be hot, so be careful! For a lovely presentation, serve the rolls on a nice platter. You can dust them with powdered sugar and add whole strawberries on the side for a fresh touch. Enjoy your sweet treat! For the full recipe, check out the details above. To make the best strawberry cream cheese rolls, focus on the texture. Always use softened cream cheese. This helps it blend well with the sugar and vanilla. If your cream cheese is too cold, it will be lumpy. For the strawberries, let them sit with sugar for about 10 minutes. This softens them and brings out their natural juice. When rolling the dough, avoid over-stretching. This keeps the rolls fluffy and light. Watch out for a few common mistakes. First, don’t skip the egg wash. This gives the rolls a lovely golden color. Second, be careful not to overfill. Too much filling can cause the rolls to burst open while baking. Lastly, always preheat your oven. This step is crucial for even baking. If you skip it, the rolls may not rise properly. Presentation matters, especially with these rolls. Serve them on a nice platter, dusted with powdered sugar. This makes them look extra special. You can also add whole strawberries around the rolls. This adds color and freshness to your dish. For a finishing touch, consider drizzling a little melted chocolate on top. These simple steps make your rolls shine on any table. For the complete recipe, check the Full Recipe section. Enjoy making your own delicious strawberry cream cheese rolls! {{image_4}} You can switch up the fruit in these rolls. Instead of strawberries, use raspberries, blueberries, or peaches. Each fruit brings a unique taste. Raspberries add a tart flavor, while blueberries offer a sweet touch. To use other fruits, chop them into small pieces. Mix them with sugar, just like you did with the strawberries. Let them sit to release their juices. This step helps enhance the flavor. If you're gluten-free, don't worry! You can still enjoy these rolls. Look for gluten-free crescent roll dough in stores. Many brands make tasty options. Just follow the same steps as the regular recipe. The end result will still be fluffy and delicious. Always check the ingredients to ensure they meet your needs. Feel free to add more flavors to the cream cheese filling. You can mix in lemon zest for a fresh twist. Alternatively, consider adding a dash of cinnamon for warmth. For a chocolatey treat, fold in some mini chocolate chips. These add-ins will create a fun twist on the classic rolls. You can also use flavored cream cheese, like strawberry or vanilla. This can save time while adding even more flavor. Check out the Full Recipe for these ideas and details! Store leftover strawberry cream cheese rolls in an airtight container. Keep them in the fridge for up to three days. If you want to keep them fresh for longer, consider wrapping each roll in plastic wrap before placing them in the container. This helps maintain their moisture and flavor. To reheat the rolls, preheat your oven to 350°F (175°C). Place the rolls on a baking sheet and cover them with foil. Heat for about 10-15 minutes, or until warm throughout. You can also use a microwave. Heat each roll for 15-20 seconds until warm. Just be careful not to overheat them, as this can make them tough. You can freeze these rolls for later enjoyment. Allow them to cool completely after baking. Then, wrap each roll tightly in plastic wrap, followed by aluminum foil. This helps prevent freezer burn. Store them in the freezer for up to two months. When you are ready to enjoy them, thaw them in the fridge overnight and reheat as described above. For the full recipe, check out the complete instructions above! You can prepare the rolls a day before. Follow the steps until the baking part. Once you assemble them, cover the rolls tightly with plastic wrap. Store them in the fridge overnight. When you're ready to bake, take them out and let them sit for about 20 minutes. Then, brush with egg wash and bake as usual. Yes, you can use frozen strawberries. Thaw them first and drain any excess juice. Dicing them will help them mix well with the cream cheese. The taste will still be great, but fresh strawberries do add a nice touch. These rolls pair well with a few items. Consider serving them with whipped cream or a scoop of vanilla ice cream. A light drizzle of chocolate sauce can elevate the flavor. Fresh mint leaves also add a nice touch and color. Check the color and texture of the rolls. They should be golden brown and puffed up. You can gently tap the top; it should sound hollow. If you're unsure, an instant-read thermometer can help. The internal temperature should reach 190°F (88°C) for a perfect bake. For the full recipe, refer to the [Full Recipe]. This blog post covered everything you need to make Strawberry Cream Cheese Rolls. We explored the ingredients, gave useful substitutions, and listed the best tools. Then, I provided simple steps for prepping, baking, and serving. I shared tips for great texture and ways to avoid common mistakes. In conclusion, enjoy these tasty rolls with your favorite flavors. They are fun to make and eat! Keep experimenting with variations and storage tips to make the most of your delicious treats. Happy baking!](https://fastmealmate.com/wp-content/uploads/2025/06/0240e1a4-5971-472f-af7e-a45e0386d654-768x768.webp)