Tie Dye Funfetti Cake Pops Delightful and Colorful Treat
![To make Tie Dye Funfetti Cake Pops, you need a few simple ingredients. Here’s what you’ll need: - 1 box Funfetti cake mix - 3 large eggs - 1 cup water - 1/2 cup vegetable oil - 1 cup icing (store-bought or homemade) - 1 cup white chocolate or candy melts - Food coloring (red, blue, yellow, green) - Sprinkles (for decoration) - Lollipop sticks These ingredients come together to create a fun, colorful treat. The Funfetti cake mix adds a sweet flavor and a joyful look. Eggs and water help bind the cake mix for a soft texture. Icing brings sweetness and moisture, while white chocolate adds a smooth coat. You can customize your colors with food coloring. This makes each pop look unique! Finally, sprinkles add that extra sparkle. To see the full process, check out the Full Recipe. Baking the Funfetti Cake First, preheat your oven to 350°F (175°C). In a large bowl, mix the Funfetti cake mix with three eggs, one cup of water, and half a cup of vegetable oil. Stir until the batter is smooth. Pour the batter into a greased 9x13 inch baking pan and bake for 25 to 30 minutes. Check with a toothpick; it should come out clean. Once done, let the cake cool completely in the pan. Crumbling the Cake After the cake is cool, break it apart into a large bowl. Use your hands to crumble the cake into fine pieces. Make sure there are no large chunks left. This step is key for good texture. Incorporating Icing Next, add half a cup of icing to your crumbled cake. Use your hands or a spatula to mix it all together. The cake crumbs should be moist and hold together when squeezed. If it feels dry, add a bit more icing. Dividing and Coloring the Mixture Now, split the moist cake mixture into four bowls. Add a few drops of food coloring to each one—red, blue, yellow, and green. Mix well until the colors are bright and even. This is where the fun begins! Rolling Cake Balls Take a tablespoon of each colored mixture and roll it into a ball. Alternate the colors to create a tie-dye look. Place the cake balls on a baking sheet lined with parchment paper. Make sure they look fun and colorful. Chilling the Cake Pops Put the baking sheet with the cake balls in the fridge for at least 30 minutes. This helps them firm up and hold their shape. While they chill, you can prepare the chocolate for coating. For the complete instructions, check the Full Recipe. Mixing Techniques To get that fun tie-dye look, I recommend using a swirling method. Take small amounts of each color and gently mix without fully blending. This keeps the colors distinct. Use a spoon or your hands, and be gentle. If you mix too hard, you lose the fun swirls. Color Combination Ideas For vibrant pops, try red, blue, yellow, and green. These colors stand out well together. You can also experiment with pastel shades for a softer look. Imagine a light pink, mint green, and baby blue blend. The key is to choose colors that excite you. Best Practices for Melting When melting chocolate or candy melts, use a microwave-safe bowl. Heat in short bursts of 20 seconds, stirring in between. This prevents burning. If the chocolate is too thick, add a small amount of coconut oil. This will help it coat the pops smoothly. Alternate Coating Options If you want a twist, try using dark or milk chocolate instead of white. You can also use colored candy melts for a fun effect. Each option adds a unique flavor and look. Don't forget to sprinkle on some fun toppings right after dipping while the chocolate is still wet! For the full recipe, check out the instructions above. {{image_4}} You can switch up the flavor of your Tie Dye Funfetti Cake Pops. Here are some ideas: - Different Cake Mixes: Try other cake mixes like vanilla or chocolate. Each mix gives a unique taste. You can even find gluten-free options to suit different diets. Experiment with flavors that you love. - Alternative Icing Flavors: Use different icing flavors for fun twists. Chocolate, cream cheese, or even peanut butter can add a delightful kick. Choose flavors that match your cake mix for the best taste. Making your cake pops look great is just as fun as eating them. Here are some ways to jazz them up: - Themed Sprinkles: Choose sprinkles that match your event. Use holiday-themed sprinkles for parties or bright colors for birthdays. You can mix and match to create a fun look. - Decorative Wrapping Options: Wrap each cake pop in colorful cellophane. Tie with a ribbon for a nice touch. You can also use clear bags for a simple, yet stylish look. These make great gifts or party favors. For the full recipe, check out the [Full Recipe]. You want your tie-dye funfetti cake pops to stay fresh and tasty. Here’s how to store them properly: - Room Temperature vs. Refrigeration: You can keep cake pops at room temperature for up to two days. Just place them in an airtight container. If it’s warm outside, it’s best to keep them in the fridge. They can last in the fridge for up to a week. - Freezing Cake Pops for Later: If you want to save some for later, freezing is a great option. Wrap each cake pop in plastic wrap or foil. Then, place them in a freezer-safe bag. They can stay in the freezer for up to three months. When you’re ready to eat them, let them thaw in the fridge overnight. - How Long They Last: Tie-dye funfetti cake pops can last about 5 to 7 days in the fridge. If you freeze them, they can last up to three months. - Signs of Spoilage: Check for any changes in smell or appearance. If they smell off or have a strange texture, it’s time to toss them. Mold is a clear sign they should not be eaten. Always trust your senses! To keep your cake pops moist, add more icing. Start with half a cup and mix until the crumbs hold together. If the mix feels dry, add more icing, a little at a time. Baking time also matters. Bake the cake for 25 to 30 minutes. Check with a toothpick; it should come out clean. Overbaking can dry out your cake, so keep an eye on it. Yes! You can use any colors you like. I recommend gel food coloring. It gives bright and bold colors without making the batter too runny. To create unique palettes, mix colors. For example, mix blue and yellow for green. Let your imagination run wild! If you want alternatives to icing, consider cream cheese or whipped cream. Both add flavor and moisture. For healthier options, try yogurt or a fruit puree. They can keep your cake pops moist while reducing sugar content. You now know how to make fun Tie-Dye Funfetti Cake Pops. We discussed the simple ingredients needed, from cake mix to chocolate. I shared step-by-step instructions to guide you through baking and shaping. You learned tips for a great tie-dye effect and how to melt chocolate properly. We explored fun variations, storage tips, and answered common questions. Now, get creative and enjoy making these tasty treats for any occasion. Let your imagination run wild with flavors and colors!](https://fastmealmate.com/wp-content/uploads/2025/07/83373fa8-848b-4df7-80a1-d15ce22469bd.webp)
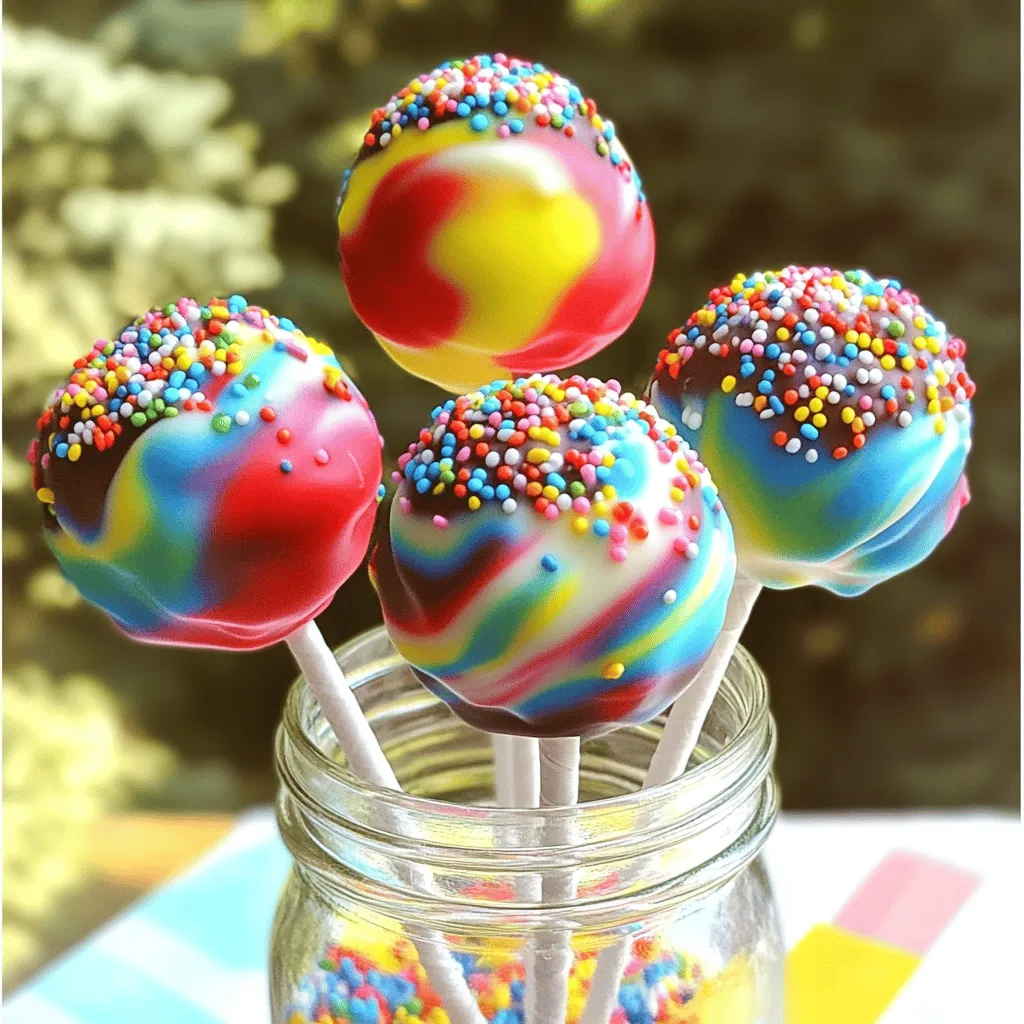
Get ready for a baking adventure with Tie Dye Funfetti Cake Pops! These vibrant treats are as fun to make as they are to eat. I’ll guide you through each simple step, from baking the cake mix to creating the perfect tie-dye effect. Plus, I’ll share tips to ensure your cake pops impress. Whether for a party or just because, these colorful delights are sure to brighten your day! Let’s dive in!
Ingredients
To make Tie Dye Funfetti Cake Pops, you need a few simple ingredients. Here’s what you’ll need:
– 1 box Funfetti cake mix
– 3 large eggs
– 1 cup water
– 1/2 cup vegetable oil
– 1 cup icing (store-bought or homemade)
– 1 cup white chocolate or candy melts
– Food coloring (red, blue, yellow, green)
– Sprinkles (for decoration)
– Lollipop sticks
These ingredients come together to create a fun, colorful treat. The Funfetti cake mix adds a sweet flavor and a joyful look. Eggs and water help bind the cake mix for a soft texture. Icing brings sweetness and moisture, while white chocolate adds a smooth coat.
You can customize your colors with food coloring. This makes each pop look unique! Finally, sprinkles add that extra sparkle.
Step-by-Step Instructions
Preparing the Cake
Baking the Funfetti Cake
First, preheat your oven to 350°F (175°C). In a large bowl, mix the Funfetti cake mix with three eggs, one cup of water, and half a cup of vegetable oil. Stir until the batter is smooth. Pour the batter into a greased 9×13 inch baking pan and bake for 25 to 30 minutes. Check with a toothpick; it should come out clean. Once done, let the cake cool completely in the pan.
Crumbling the Cake
After the cake is cool, break it apart into a large bowl. Use your hands to crumble the cake into fine pieces. Make sure there are no large chunks left. This step is key for good texture.
Mixing and Coloring
Incorporating Icing
Next, add half a cup of icing to your crumbled cake. Use your hands or a spatula to mix it all together. The cake crumbs should be moist and hold together when squeezed. If it feels dry, add a bit more icing.
Dividing and Coloring the Mixture
Now, split the moist cake mixture into four bowls. Add a few drops of food coloring to each one—red, blue, yellow, and green. Mix well until the colors are bright and even. This is where the fun begins!
Shaping and Chilling
Rolling Cake Balls
Take a tablespoon of each colored mixture and roll it into a ball. Alternate the colors to create a tie-dye look. Place the cake balls on a baking sheet lined with parchment paper. Make sure they look fun and colorful.
Chilling the Cake Pops
Put the baking sheet with the cake balls in the fridge for at least 30 minutes. This helps them firm up and hold their shape. While they chill, you can prepare the chocolate for coating.
Tips & Tricks
Achieving the Perfect Tie-Dye Effect
Mixing Techniques
To get that fun tie-dye look, I recommend using a swirling method. Take small amounts of each color and gently mix without fully blending. This keeps the colors distinct. Use a spoon or your hands, and be gentle. If you mix too hard, you lose the fun swirls.
Color Combination Ideas
For vibrant pops, try red, blue, yellow, and green. These colors stand out well together. You can also experiment with pastel shades for a softer look. Imagine a light pink, mint green, and baby blue blend. The key is to choose colors that excite you.
Melting Chocolate
Best Practices for Melting
When melting chocolate or candy melts, use a microwave-safe bowl. Heat in short bursts of 20 seconds, stirring in between. This prevents burning. If the chocolate is too thick, add a small amount of coconut oil. This will help it coat the pops smoothly.
Alternate Coating Options
If you want a twist, try using dark or milk chocolate instead of white. You can also use colored candy melts for a fun effect. Each option adds a unique flavor and look. Don’t forget to sprinkle on some fun toppings right after dipping while the chocolate is still wet!
Variations
Flavor Variations
You can switch up the flavor of your Tie Dye Funfetti Cake Pops. Here are some ideas:
– Different Cake Mixes: Try other cake mixes like vanilla or chocolate. Each mix gives a unique taste. You can even find gluten-free options to suit different diets. Experiment with flavors that you love.
– Alternative Icing Flavors: Use different icing flavors for fun twists. Chocolate, cream cheese, or even peanut butter can add a delightful kick. Choose flavors that match your cake mix for the best taste.
Decoration Ideas
Making your cake pops look great is just as fun as eating them. Here are some ways to jazz them up:
– Themed Sprinkles: Choose sprinkles that match your event. Use holiday-themed sprinkles for parties or bright colors for birthdays. You can mix and match to create a fun look.
– Decorative Wrapping Options: Wrap each cake pop in colorful cellophane. Tie with a ribbon for a nice touch. You can also use clear bags for a simple, yet stylish look. These make great gifts or party favors.
Storage Info
Storing Cake Pops
You want your tie-dye funfetti cake pops to stay fresh and tasty. Here’s how to store them properly:
– Room Temperature vs. Refrigeration: You can keep cake pops at room temperature for up to two days. Just place them in an airtight container. If it’s warm outside, it’s best to keep them in the fridge. They can last in the fridge for up to a week.
– Freezing Cake Pops for Later: If you want to save some for later, freezing is a great option. Wrap each cake pop in plastic wrap or foil. Then, place them in a freezer-safe bag. They can stay in the freezer for up to three months. When you’re ready to eat them, let them thaw in the fridge overnight.
Shelf Life
– How Long They Last: Tie-dye funfetti cake pops can last about 5 to 7 days in the fridge. If you freeze them, they can last up to three months.
– Signs of Spoilage: Check for any changes in smell or appearance. If they smell off or have a strange texture, it’s time to toss them. Mold is a clear sign they should not be eaten. Always trust your senses!
FAQs
How to Make Tie Dye Funfetti Cake Pops More Moist?
To keep your cake pops moist, add more icing. Start with half a cup and mix until the crumbs hold together. If the mix feels dry, add more icing, a little at a time.
Baking time also matters. Bake the cake for 25 to 30 minutes. Check with a toothpick; it should come out clean. Overbaking can dry out your cake, so keep an eye on it.
Can You Use Other Colors for Tie-Dye?
Yes! You can use any colors you like. I recommend gel food coloring. It gives bright and bold colors without making the batter too runny.
To create unique palettes, mix colors. For example, mix blue and yellow for green. Let your imagination run wild!
What Can I Substitute for Icing?
If you want alternatives to icing, consider cream cheese or whipped cream. Both add flavor and moisture.
For healthier options, try yogurt or a fruit puree. They can keep your cake pops moist while reducing sugar content.
You now know how to make fun Tie-Dye Funfetti Cake Pops. We discussed the simple ingredients needed, from cake mix to chocolate. I shared step-by-step instructions to guide you through baking and shaping. You learned tips for a great tie-dye effect and how to melt chocolate properly. We explored fun variations, storage tips, and answered common questions. Now, get creative and enjoy making these tasty treats for any occasion. Let your imagination run wild with flavors and colors!
![To make Tie Dye Funfetti Cake Pops, you need a few simple ingredients. Here’s what you’ll need: - 1 box Funfetti cake mix - 3 large eggs - 1 cup water - 1/2 cup vegetable oil - 1 cup icing (store-bought or homemade) - 1 cup white chocolate or candy melts - Food coloring (red, blue, yellow, green) - Sprinkles (for decoration) - Lollipop sticks These ingredients come together to create a fun, colorful treat. The Funfetti cake mix adds a sweet flavor and a joyful look. Eggs and water help bind the cake mix for a soft texture. Icing brings sweetness and moisture, while white chocolate adds a smooth coat. You can customize your colors with food coloring. This makes each pop look unique! Finally, sprinkles add that extra sparkle. To see the full process, check out the Full Recipe. Baking the Funfetti Cake First, preheat your oven to 350°F (175°C). In a large bowl, mix the Funfetti cake mix with three eggs, one cup of water, and half a cup of vegetable oil. Stir until the batter is smooth. Pour the batter into a greased 9x13 inch baking pan and bake for 25 to 30 minutes. Check with a toothpick; it should come out clean. Once done, let the cake cool completely in the pan. Crumbling the Cake After the cake is cool, break it apart into a large bowl. Use your hands to crumble the cake into fine pieces. Make sure there are no large chunks left. This step is key for good texture. Incorporating Icing Next, add half a cup of icing to your crumbled cake. Use your hands or a spatula to mix it all together. The cake crumbs should be moist and hold together when squeezed. If it feels dry, add a bit more icing. Dividing and Coloring the Mixture Now, split the moist cake mixture into four bowls. Add a few drops of food coloring to each one—red, blue, yellow, and green. Mix well until the colors are bright and even. This is where the fun begins! Rolling Cake Balls Take a tablespoon of each colored mixture and roll it into a ball. Alternate the colors to create a tie-dye look. Place the cake balls on a baking sheet lined with parchment paper. Make sure they look fun and colorful. Chilling the Cake Pops Put the baking sheet with the cake balls in the fridge for at least 30 minutes. This helps them firm up and hold their shape. While they chill, you can prepare the chocolate for coating. For the complete instructions, check the Full Recipe. Mixing Techniques To get that fun tie-dye look, I recommend using a swirling method. Take small amounts of each color and gently mix without fully blending. This keeps the colors distinct. Use a spoon or your hands, and be gentle. If you mix too hard, you lose the fun swirls. Color Combination Ideas For vibrant pops, try red, blue, yellow, and green. These colors stand out well together. You can also experiment with pastel shades for a softer look. Imagine a light pink, mint green, and baby blue blend. The key is to choose colors that excite you. Best Practices for Melting When melting chocolate or candy melts, use a microwave-safe bowl. Heat in short bursts of 20 seconds, stirring in between. This prevents burning. If the chocolate is too thick, add a small amount of coconut oil. This will help it coat the pops smoothly. Alternate Coating Options If you want a twist, try using dark or milk chocolate instead of white. You can also use colored candy melts for a fun effect. Each option adds a unique flavor and look. Don't forget to sprinkle on some fun toppings right after dipping while the chocolate is still wet! For the full recipe, check out the instructions above. {{image_4}} You can switch up the flavor of your Tie Dye Funfetti Cake Pops. Here are some ideas: - Different Cake Mixes: Try other cake mixes like vanilla or chocolate. Each mix gives a unique taste. You can even find gluten-free options to suit different diets. Experiment with flavors that you love. - Alternative Icing Flavors: Use different icing flavors for fun twists. Chocolate, cream cheese, or even peanut butter can add a delightful kick. Choose flavors that match your cake mix for the best taste. Making your cake pops look great is just as fun as eating them. Here are some ways to jazz them up: - Themed Sprinkles: Choose sprinkles that match your event. Use holiday-themed sprinkles for parties or bright colors for birthdays. You can mix and match to create a fun look. - Decorative Wrapping Options: Wrap each cake pop in colorful cellophane. Tie with a ribbon for a nice touch. You can also use clear bags for a simple, yet stylish look. These make great gifts or party favors. For the full recipe, check out the [Full Recipe]. You want your tie-dye funfetti cake pops to stay fresh and tasty. Here’s how to store them properly: - Room Temperature vs. Refrigeration: You can keep cake pops at room temperature for up to two days. Just place them in an airtight container. If it’s warm outside, it’s best to keep them in the fridge. They can last in the fridge for up to a week. - Freezing Cake Pops for Later: If you want to save some for later, freezing is a great option. Wrap each cake pop in plastic wrap or foil. Then, place them in a freezer-safe bag. They can stay in the freezer for up to three months. When you’re ready to eat them, let them thaw in the fridge overnight. - How Long They Last: Tie-dye funfetti cake pops can last about 5 to 7 days in the fridge. If you freeze them, they can last up to three months. - Signs of Spoilage: Check for any changes in smell or appearance. If they smell off or have a strange texture, it’s time to toss them. Mold is a clear sign they should not be eaten. Always trust your senses! To keep your cake pops moist, add more icing. Start with half a cup and mix until the crumbs hold together. If the mix feels dry, add more icing, a little at a time. Baking time also matters. Bake the cake for 25 to 30 minutes. Check with a toothpick; it should come out clean. Overbaking can dry out your cake, so keep an eye on it. Yes! You can use any colors you like. I recommend gel food coloring. It gives bright and bold colors without making the batter too runny. To create unique palettes, mix colors. For example, mix blue and yellow for green. Let your imagination run wild! If you want alternatives to icing, consider cream cheese or whipped cream. Both add flavor and moisture. For healthier options, try yogurt or a fruit puree. They can keep your cake pops moist while reducing sugar content. You now know how to make fun Tie-Dye Funfetti Cake Pops. We discussed the simple ingredients needed, from cake mix to chocolate. I shared step-by-step instructions to guide you through baking and shaping. You learned tips for a great tie-dye effect and how to melt chocolate properly. We explored fun variations, storage tips, and answered common questions. Now, get creative and enjoy making these tasty treats for any occasion. Let your imagination run wild with flavors and colors!](https://fastmealmate.com/wp-content/uploads/2025/07/83373fa8-848b-4df7-80a1-d15ce22469bd-300x300.webp)


![For a perfect classic patty melt, you will need: - 1 lb ground beef - 1 medium onion, thinly sliced - 4 slices of Swiss cheese - 4 slices of hearty rye bread These ingredients bring together the rich flavors that make this dish so special. The ground beef forms the juicy patty, while the onion adds a sweet touch. Swiss cheese melts beautifully, making every bite creamy. Rye bread gives it a unique flavor and crunch. To take your patty melt to the next level, consider adding: - 1 tablespoon Worcestershire sauce - 1 teaspoon garlic powder - 1 tablespoon mayonnaise (for spreading) Worcestershire sauce adds a deep umami flavor. Garlic powder brings a hint of warmth without being overpowering. Mayonnaise can add a nice creamy texture if you choose to spread it on the bread. Don’t forget these key seasonings: - Salt and black pepper to taste - 2 tablespoons unsalted butter, divided Seasoning your beef with salt and pepper ensures that it tastes great. Butter is essential for grilling the bread to a golden crisp. It enhances the flavor and makes the outside crunchy, while the inside stays soft. For the full recipe, check out the details above! To start, I melt 1 tablespoon of butter in a skillet over medium heat. I add thinly sliced onions and a pinch of salt. Stir the onions often. This helps them caramelize nicely. The cooking time is about 15 to 20 minutes. Keep an eye on the heat. You want them golden brown and sweet. Once done, take them off the heat and set them aside. In a mixing bowl, I combine 1 pound of ground beef with Worcestershire sauce and garlic powder. I add salt and pepper for taste. Mix gently to keep the beef tender. Next, I divide the mixture into two equal parts. Shape each part into a patty, about ¾ inch thick. Now, it’s time to cook the patties. I return the skillet to the stove, adding the remaining butter. I turn the heat to medium-high. I cook the patties for about 4 to 5 minutes per side. You can adjust the time based on how you like your meat cooked. During the last minute, I add a slice of Swiss cheese on top of each patty. This makes it melt beautifully. If you like, spread mayonnaise on one side of each slice of rye bread. I take two slices and place a cheesy patty on the unbuttered side of each. Then, I add a generous helping of the caramelized onions. Finally, I close the sandwiches with the other slices of bread, making sure the buttered side is facing up. Next, I wipe the skillet to remove any bits left behind. I heat the skillet over medium-low heat. I grill the assembled sandwiches for about 3 to 4 minutes per side. I want them to be golden brown and crispy. Using a spatula, I press down gently on the sandwiches. This helps everything cook evenly and stay melty inside. For the full recipe, check the main article. - Best cooking temperatures: Start with medium-high heat. This helps to brown the outside and keep the inside juicy. - Checking for doneness: Use a meat thermometer. Aim for 160°F for ground beef. A quick poke with your finger can also help; if it feels firm, it’s likely done. - Choosing the right type of rye bread: Look for hearty rye bread with good texture. The flavor of the rye pairs well with the meat and cheese. - Alternative bread options: If rye isn't your favorite, try sourdough or whole wheat. Both provide a nice crunch and flavor. - Best side dishes to pair with patty melts: Crispy fries or sweet potato fries are classic choices. A fresh side salad adds a nice crunch. - Ideal garnish ideas for presentation: A sprinkle of fresh parsley or dill can brighten up your plate. You can also add pickles on the side for extra tang. For the complete recipe, check the Full Recipe section. {{image_4}} You can switch up the meat in your patty melt. Try ground turkey or even a veggie patty for a healthier twist. Both options keep the sandwich tasty. For cheese, Swiss is classic, but you can use cheddar or pepper jack for a kick. These swaps change the flavor, keeping it fresh and exciting. The patty melt has many faces. In classic forms, it stays true to its roots. But gourmet versions take it to new heights. Chefs add toppings like sautéed mushrooms or spicy sauces. You can find global inspirations too. Some cultures use different breads or spices. Each region puts its own spin on this beloved dish, making it unique. If you need a gluten-free option, choose gluten-free bread. Many brands make great choices that hold up well. For a vegan patty melt, use a plant-based patty and vegan cheese. These swaps keep the spirit of a patty melt while fitting dietary needs. Experiment with these variations to make your patty melt your own. Check out the Full Recipe for more ideas! To keep your leftover patty melts fresh, use proper refrigeration techniques. First, let the patty melts cool down to room temperature. This step helps avoid condensation, which can make your sandwiches soggy. Next, wrap each patty melt tightly in plastic wrap or aluminum foil. You can also place them in an airtight container. The best container types are glass or BPA-free plastic. These containers keep out moisture and protect from odors in the fridge. When you’re ready to enjoy leftovers, reheating correctly is key. You can use a skillet, oven, or microwave. The skillet method brings back the original texture and flavor. Heat the skillet over medium heat. Place the patty melt in the pan and cover it with a lid. This step helps the cheese melt without drying out the bread. Heat for about 3-4 minutes on each side. If you prefer the oven, preheat it to 350°F (175°C). Wrap the patty melt in foil to keep it from drying out. Heat for about 10-15 minutes. This keeps the bread crisp while warming the filling. Avoid the microwave if you want to keep your patty melt from getting soggy. Microwaving can make the bread soft and chewy. If you must use it, heat for only 30 seconds and check if it’s warm enough. Enjoy your delicious patty melts again! For the full recipe, refer back to the classic patty melt section. A burger is usually served on a bun. A patty melt uses bread like rye. In a burger, you find toppings like lettuce and tomato. In a patty melt, you get melted cheese and onions. The cooking method differs too. A burger is grilled, while a patty melt is cooked in a skillet. Yes, you can prepare the meat and onions in advance. Cook the patties and caramelize the onions. Store them in the fridge. When you're ready to eat, just assemble and grill the sandwich. This saves time on busy days. Some great sides include: - Crispy fries - Sweet potato fries - Coleslaw - Salad - Pickles These sides balance the rich flavors of the patty melt. You can use lean ground beef for fewer calories. Try whole grain rye bread instead of regular. Add fresh veggies like spinach or tomato. You can also skip the mayonnaise or use a light version. These changes make your meal tasty and healthier. The patty melt has roots in the United States. It gained popularity in diners during the 1940s. Many believe it started in California. The mix of flavors and textures made it a favorite comfort food. Absolutely! While Swiss is classic, you can try: - Cheddar - Pepper jack - American - Gouda Each cheese adds a unique taste to your patty melt. Experiment to find your favorite! For the complete recipe, check out the [Full Recipe]. A classic patty melt combines simple, tasty ingredients for a satisfying meal. We covered essential items like ground beef, Swiss cheese, and rye bread. You learned steps to prepare, assemble, and grill your sandwich for that perfect finish. Tips on customization and storage enhance your experience. Remember that variations let you make it your own. Enjoy your cooking and the delicious patty melts you create!](https://fastmealmate.com/wp-content/uploads/2025/06/2e833bb9-ccca-4b03-bda9-565aa6b9e8a1-768x768.webp)