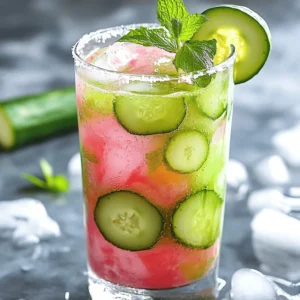
Cucumber Melon Detox Glow Juice Refreshing Delight
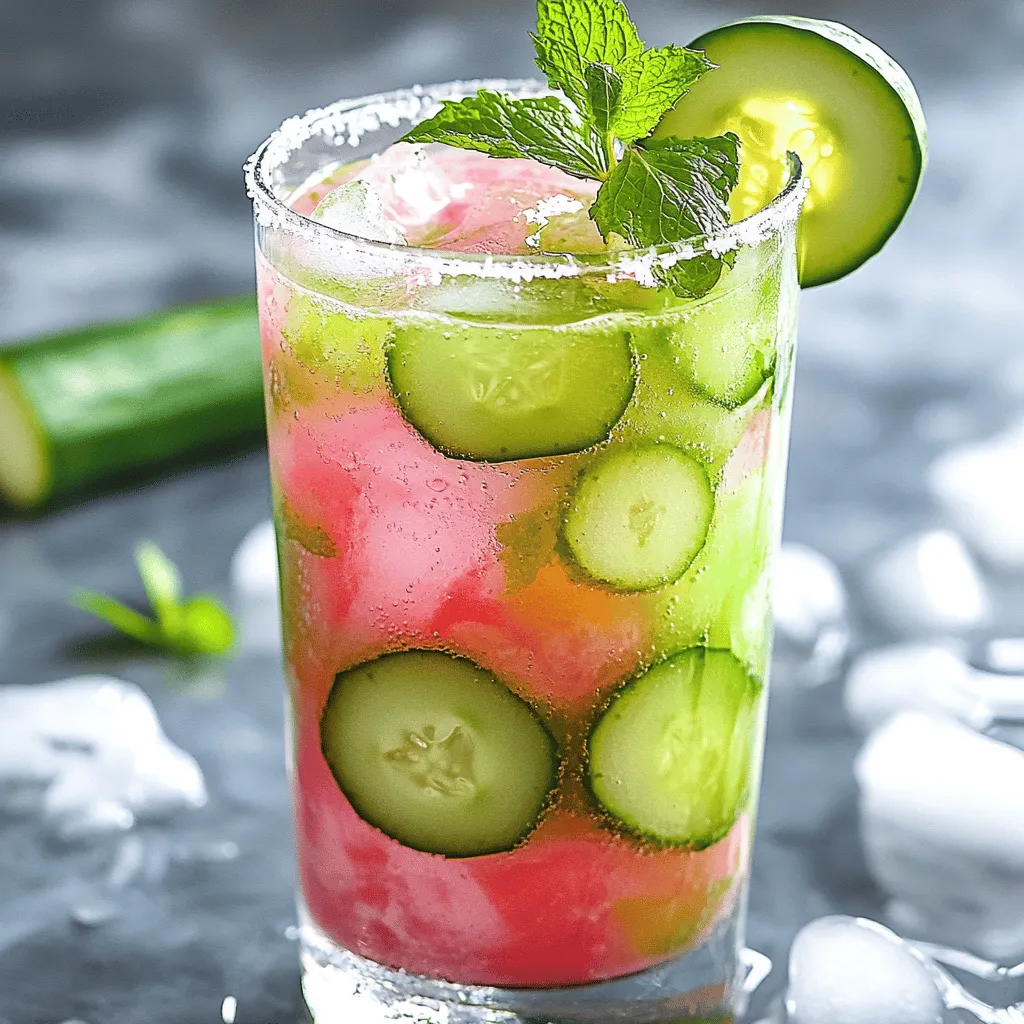
Looking for a delicious way to boost your health? This Cucumber Melon Detox Glow Juice is packed with fresh, vibrant ingredients that hydrate and rejuvenate your body. You’ll get the cooling crunch of cucumber, the sweet burst of watermelon, and the zing of green apple—all while detoxifying in a refreshing way. Join me as I share the step-by-step guide to creating this tasty drink and discover its amazing health benefits!
Ingredients
Main Ingredients for Cucumber Melon Detox Glow Juice
– 1 medium cucumber, peeled and diced
– 2 cups watermelon, cubed and seeds removed
– 1 green apple, cored and chopped
Additional Ingredients
– 1 tablespoon fresh mint leaves, roughly torn
– 1 tablespoon freshly squeezed lime juice
– 1 tablespoon honey (optional, for added sweetness)
– 2 cups cold water
Ingredient Health Benefits
What are the nutritional benefits of cucumber?
Cucumbers are low in calories. They hydrate your body well. They also provide vitamins like K and C. These nutrients support your skin and bone health. Cucumbers help keep your skin fresh and glowing.
How does watermelon help in hydration and detox?
Watermelon is about 92% water. This high water content keeps you hydrated. It also contains vitamins A and C. These vitamins work as antioxidants to fight toxins. Watermelon can help flush out harmful substances from your body.
What are the advantages of green apple for skin health?
Green apples are rich in vitamin C. This vitamin helps in collagen production. Collagen is key for skin elasticity. They also contain fiber, which aids digestion. Healthy digestion can lead to clearer skin over time.
This refreshing juice not only tastes great but also boosts your health.
Step-by-Step Instructions
Preparation Steps
Start by preparing your ingredients. First, peel the cucumber and cut it into small pieces. For the watermelon, make sure to remove all the seeds. Then, cut the watermelon into cubes. Lastly, core and chop the green apple into small parts. Removing the seeds from the watermelon is crucial. Seeds can make the juice taste bitter and gritty. Plus, you want a smooth, refreshing drink.
Blending Process
Now, let’s blend! Add the diced cucumber, cubed watermelon, and chopped green apple into the blender. Toss in the torn mint leaves too. Pour in the cold water to help mix everything. Blend on high speed until the mixture is smooth. If you want a sweeter juice, add honey and blend for a few more seconds. This makes the juice taste even better.
Straining the Juice
To get the juice ready, you need to strain it. Use a fine mesh sieve or cheesecloth over a big bowl. Carefully pour the blended mix into the sieve. Use a spatula or spoon to press down on the pulp. This helps extract all the juice you can. You can throw away the pulp or save it for smoothies or salads. After straining, stir in the fresh lime juice for a zesty kick.
Enjoy your refreshing Cucumber Melon Detox Glow Juice!
Tips & Tricks
Enhancing Flavor
To make your juice even better, try these ideas:
– Use maple syrup, agave nectar, or stevia as sweeteners.
– For a minty kick, add more fresh mint leaves or even mint extract.
Fresh mint makes the juice taste cool and refreshing. You can muddle the mint before blending to release more flavor.
Presentation Tips
Serving your juice can be fun! Here are a few ideas:
– Use tall glasses filled with ice to show off the juice’s color.
– Garnish with mint sprigs or cucumber slices on the rim.
If you have leftover pulp, don’t toss it! You can add it to smoothies or salads. It adds flavor and nutrients, making your meals even better.
Meal Pairings
What snacks go well with this juice? Here are some tasty ideas:
– Pair it with whole grain crackers and hummus.
– Enjoy it with a light salad or veggie sticks.
Smoothies or salads can also complement your detox juice. A simple berry smoothie or a fresh garden salad will enhance your healthy meal!

Variations
Alternative Ingredients
You can switch up fruits in your juice. Cantaloupe and honeydew work great. They add sweet and fresh notes. Try mixing them with cucumber for a tasty twist. You can also add fresh herbs. Basil or cilantro gives a unique flavor. These herbs bring a fresh touch to your drink.
Health-Focused Variations
If you want a low-sugar version, skip the honey. The natural sweetness from fruits is enough. You can also add superfoods. Chia seeds or flaxseeds boost nutrition. They add fiber and healthy fats. This makes your juice even better for your body.
Seasonal Twists
Use seasonal fruits to change things up. In summer, add ripe peaches or berries. In fall, try apples or pears for warmth. You can also warm your juice in colder months. Heat it gently on the stove for a cozy drink. This way, you enjoy the fresh flavors all year round.
Storage Info
How to Store Leftover Juice
Store leftover juice in glass jars or BPA-free plastic containers. These options keep the juice fresh and tasty. Make sure to seal the containers tightly. This helps prevent air from getting in. Place the juice in the fridge right away. It needs to stay cold to keep fresh.
Shelf Life
The juice will last about 2 to 3 days in the fridge. After that, the taste and quality might drop. Look for signs that the juice is no longer good. If it smells off or has changed color, it’s best to throw it away.
Freezing Options
You can freeze the juice for later use! Pour the juice into ice cube trays for easy portions. Once frozen, transfer the cubes to a freezer bag. This way, you can use just what you need. Each cube is a great size for a single serving!
FAQs
What is Cucumber Melon Detox Glow Juice?
Cucumber Melon Detox Glow Juice is a bright and fresh drink made from simple, healthy ingredients. This juice combines cucumber, watermelon, and green apple, creating a delightfully refreshing flavor. Cucumber hydrates, while watermelon adds sweetness and nutrients. Green apple boosts the flavor and provides fiber. Together, these ingredients help to detoxify your body and give your skin a healthy glow.
How often can I drink detox juices?
I recommend enjoying detox juices like this one once a day. Drinking them daily can help flush out toxins and keep you hydrated. However, listen to your body. If you feel any discomfort, adjust your intake accordingly. Balance is key to a healthy diet.
Can I make Cucumber Melon Detox Glow Juice in advance?
Yes, you can make this juice ahead of time! Store it in a sealed container in the fridge for up to 24 hours. This makes it easy to have a quick, refreshing drink ready when you need it. Just remember to shake it well before drinking, as some separation may occur.
Are there side effects associated with detox juices?
Most people can enjoy detox juices with no issues. However, some may experience mild stomach discomfort, especially if they have not consumed a lot of fiber before. It’s wise to start slow if you’re new to detox juices. Always consult a doctor if you have health concerns before making changes to your diet.
Cucumber Melon Detox Glow Juice is a refreshing and healthy drink. It uses simple ingredients like cucumber, watermelon, and green apple. We discussed preparation steps and how to blend them for the best taste. Remember, you can customize flavors and make tasty pairings.
In the end, this juice is great for hydration and boosting skin health. It’s easy to make and perfect for any season. Enjoy the benefits and flavors as you sip your way to wellness.

![- 2 cups grated zucchini or yellow squash - 1 cup breadcrumbs (preferably seasoned) - 1/2 cup grated parmesan cheese - 1/4 cup finely chopped onion - 2 cloves garlic, minced - 2 large eggs - 1 teaspoon dried oregano - 1/2 teaspoon salt - 1/4 teaspoon black pepper - 1/4 cup fresh parsley, chopped (optional) - Skillet - Cooking oil - Mixing bowl - Kitchen towel Mom's squash patties use simple ingredients. The main ones are zucchini or yellow squash. You need seasoned breadcrumbs to add flavor. Parmesan cheese gives a nice touch. Onions and garlic boost the taste. Eggs help bind everything together. Spices like oregano, salt, and pepper add extra flavor. Fresh parsley adds color and freshness to the mix. For cooking, you will need a skillet and some oil. A mixing bowl helps combine all ingredients. A kitchen towel is handy for squeezing out squash moisture. This is part of the [Full Recipe]. Start by grating the zucchini or yellow squash. I use a box grater for this. Then, take the grated squash and put it in a clean kitchen towel or cheesecloth. Squeeze it hard to drain as much moisture as you can. This step is key. If there is too much moisture, the patties will be soggy. We want them crispy and delicious. In a large bowl, combine the drained squash with the other ingredients. Add breadcrumbs, grated parmesan cheese, chopped onion, minced garlic, eggs, dried oregano, salt, and black pepper. If you like, toss in some chopped parsley too. Mix everything well using your hands or a spoon. The mixture should feel a bit sticky and hold together well. This texture helps the patties stay intact while cooking. Next, heat a large skillet on medium heat. Pour in enough olive oil to cover the bottom of the pan. Wait until the oil shimmers, but don’t let it smoke. This shows it’s hot enough for frying. Scoop about 1/4 cup of the squash mix and shape it into a patty. Gently place it in the hot skillet. Don’t overcrowd the pan. Leave space between each patty for even cooking. Cook the patties for about 4 to 5 minutes on each side. They should turn golden brown and crispy. Keep an eye on the heat. Adjust it as needed to prevent burning. You might need to fry in batches, depending on your skillet size. Once cooked, take them out and place them on a plate lined with paper towels. This will soak up any extra oil and keep the patties crispy. Follow these steps, and you'll have lovely, golden squash patties ready to enjoy! For the full recipe, check out the earlier section. To get the best texture, you want your patties crispy, not soggy. Start by squeezing out moisture from the grated squash. Use a clean kitchen towel for this. If you skip this step, your patties may fall apart or become mushy. Keep the right ratio of ingredients. Too much squash can lead to sogginess. Aim for two cups of squash to one cup of breadcrumbs. This balance helps create a sturdy patty. Cooking time is key. Heat your skillet to medium. This temperature helps the patties cook evenly. If the heat is too low, they won’t crisp up. If it’s too high, they may burn. Fry each side for 4-5 minutes. Check for a golden brown color. Don’t rush this process. Undercooked patties can be mushy, while overcooked ones can taste dry. For serving, add tasty condiments. A dollop of yogurt or sour cream works great. Fresh herbs like parsley add color and flavor. You can also pair these patties with a salad or roasted veggies. They make a lovely side for grilled meats too. Explore different sauces like tzatziki or spicy ketchup for extra flavor. Enjoy making these patties your own! {{image_4}} You can change the squash for variety. Try using butternut squash or pattypan squash. Each type gives a unique taste and texture. You can also add more veggies. Grated carrots or bell peppers mix well. Fresh herbs, like basil or thyme, add a fresh kick. You can bake these patties instead of frying them. Just place them on a baking sheet and drizzle with olive oil. Bake at 400°F for 20 minutes, flipping halfway through. This method makes them a bit healthier. An air fryer is another option. It cooks them fast and gives a nice crisp without much oil. Set the air fryer to 375°F and cook for about 12-15 minutes. Adding cheese can elevate the flavor. Try feta, cheddar, or even goat cheese. Each brings a different taste. You can also play with spices. Add a pinch of cumin for warmth or smoked paprika for depth. Experimenting with flavors can lead to your perfect batch of patties. Check out the Full Recipe for more ideas! To store leftovers, let the patties cool first. Place them in an airtight container. This helps to keep them fresh. You can store them in the fridge for up to three days. To extend freshness, reheat only what you will eat. This avoids sogginess in the remaining patties. For freezing, make sure the patties are fully cooled. Arrange them in a single layer on a baking sheet. Place the sheet in the freezer until they are solid. Then transfer them to a freezer bag. This method helps prevent them from sticking together. When ready to eat, reheat frozen patties in the oven. Bake them at 350°F for about 15 minutes or until hot. The expected freshness duration is about three days in the fridge. Frozen patties can last up to three months. Signs of spoilage include a sour smell or a change in color. If you notice any of these, it’s best to discard them. Fry the patties for about 4 to 5 minutes on each side. This cooking time gives them a nice golden color and crispy texture. Make sure to keep an eye on them. If the heat is too high, they may burn. Adjust the heat as needed for even cooking. Yes, you can make these patties gluten-free. Instead of breadcrumbs, use gluten-free breadcrumbs or crushed gluten-free crackers. You can also use ground oats as a substitute. Just check the labels to ensure they're gluten-free. These patties pair well with many side dishes and sauces. Here are some great options: - A fresh salad with lemon vinaigrette - Creamy yogurt or sour cream for dipping - Applesauce for a sweet contrast - Grilled vegetables or a medley of roasted root veggies - A slice of lemon to brighten the dish For the full recipe, check out Mom's Heavenly Squash Patties. Enjoy! This blog post covered how to make delicious squash patties. We looked at key ingredients, preparation steps, and cooking tips. I shared ways to adjust the recipe and storage methods for leftovers. Making these patties can be fun and simple. You can explore new flavors and textures that suit your taste. Enjoy these tips, and I hope you create something tasty. Experimenting in the kitchen leads to great meals!](https://fastmealmate.com/wp-content/uploads/2025/06/c31883a2-1cc5-40ff-adb3-b1ed6b0d87a1-768x768.webp)
![To make Maine Blueberry Bread, you need the right ingredients. Here’s what you will need: - 1 ½ cups all-purpose flour - ½ teaspoon baking soda - 1 teaspoon baking powder - ½ teaspoon salt - 1/3 cup unsalted butter, softened - ½ cup granulated sugar - 1 large egg, at room temperature - 1 teaspoon pure vanilla extract - ½ cup plain Greek yogurt - 1 cup fresh or frozen blueberries - Zest of 1 lemon - 2 tablespoons fresh lemon juice These ingredients come together to create a soft, flavorful bread. The blueberries add sweetness, while the lemon gives a nice zing. You can customize your Maine Blueberry Bread with some fun add-ins. Here are a few ideas: - Chopped nuts, like walnuts or pecans - A sprinkle of cinnamon for warmth - Chocolate chips for a sweet twist - A handful of oats for texture Feel free to mix and match these options to suit your taste. Before you start, gather your tools to make the process smooth. You will need: - A 9x5-inch loaf pan - Mixing bowls (one large and one medium) - An electric mixer or whisk - A spatula for mixing - Measuring cups and spoons Having these items ready will help you stay organized and focused. For the full recipe, check the details provided earlier. First, preheat your oven to 350°F (175°C). This sets the stage for baking. Next, grab a 9x5-inch loaf pan. Grease it with butter or line it with parchment paper. This helps the bread come out easily later. In a medium bowl, whisk together the flour, baking soda, baking powder, and salt. Mix these dry ingredients well and set them aside for now. In another large bowl, cream the softened butter and sugar using an electric mixer. Beat this mixture for 3-4 minutes until it is light and fluffy. Then, add the egg, vanilla extract, lemon zest, and lemon juice. Mix until everything is combined well. Now, add the Greek yogurt to this mix and blend until smooth. Gradually add the dry ingredient mixture to the wet mixture. Stir gently until just combined. Be careful not to overmix; this keeps the bread soft. Finally, fold in the blueberries. Make sure they are evenly spread throughout the batter. Pour the batter into your prepared loaf pan. Smooth the top with a spatula to ensure it rises evenly. Place the loaf pan in the oven and bake for 50-60 minutes. To check if it’s done, insert a toothpick into the center. If it comes out clean, your bread is ready. Once baked, take the loaf out of the oven. Let it cool in the pan for about 10 minutes. After that, transfer the bread to a wire rack to cool completely. When you are ready to serve, slice the bread. For a tasty touch, add a pat of butter or a sprinkle of powdered sugar on top. This blueberry bread pairs perfectly with tea or coffee, making it a wonderful treat for breakfast or a snack. Enjoy your Maine Blueberry Bread! For the complete recipe, be sure to check the [Full Recipe]. When making Maine blueberry bread, avoid overmixing the batter. This can make the bread tough. Also, don’t skip the lemon juice. It brightens the flavor and balances the sweetness. If using frozen blueberries, do not thaw them. This keeps the batter from turning blue. For a soft and moist texture, use room temperature ingredients. This includes the butter, egg, and yogurt. They mix better and create a fluffy bread. Make sure your oven is preheated to 350°F (175°C). Baking at the right temperature is key for even cooking. You can add a pinch of cinnamon or nutmeg for warmth. A bit of cardamom can also bring a unique twist. Pure vanilla extract adds depth to the flavor. Feel free to experiment with different spices to find your favorite mix. For a citrusy kick, try adding a bit more lemon zest. For the full recipe, check the earlier sections. {{image_4}} You can swap blueberries for other fruits. Try raspberries, blackberries, or strawberries. Each fruit brings a unique taste. For a tropical twist, use diced mango or pineapple. These fruits change the flavor but keep the bread moist and delicious. To make this recipe gluten-free, use a gluten-free flour blend. Make sure it has xanthan gum to help with texture. Also, check that your baking powder and baking soda are gluten-free. These small changes will let you enjoy this bread without gluten. Nuts and chocolate can add flavor and texture. Walnuts or pecans work well in this bread. Just chop them coarsely and fold them into the batter. If you love chocolate, try adding chocolate chips. They melt and create sweet pockets in each slice. For the full recipe, check out the Maine Blueberry Bread section above. Store leftover Maine blueberry bread at room temperature. Wrap it in plastic wrap or foil. This keeps it fresh for up to three days. If you want to keep it longer, consider freezing. To freeze Maine blueberry bread, slice it first. Wrap each slice in plastic wrap. Place the wrapped slices in a freezer-safe bag. This method allows you to take out one slice at a time. The bread can last in the freezer for up to three months. Reheat blueberry bread for the best taste. Use a toaster oven or microwave. For a toaster oven, set it to 350°F (175°C) and heat for about 10 minutes. If using a microwave, warm a slice for 15-20 seconds. Enjoy it warm for a cozy flavor. You can buy Maine blueberries at local farms, farmers' markets, or grocery stores. Many stores offer fresh blueberries during the summer months. You can also find frozen Maine blueberries year-round in the freezer section. Online retailers may offer them as well, so check for local delivery options. Maine blueberries are unique due to their intense flavor and vibrant color. They grow wild in the state’s unique climate and soil. This gives them a sweet, tangy taste that stands out. Maine blueberries are also smaller than cultivated ones, making them more flavorful. Additionally, their high antioxidant levels make them a healthy choice. Fresh blueberries should be firm and plump. Look for a deep blue color with a hint of white bloom. Avoid any berries with wrinkles or soft spots. If they are still attached to the stem, that’s a good sign they are fresh. Smelling them can also help; they should have a sweet, fruity aroma. Yes, you can use other types of yogurt. Greek yogurt gives a rich texture, but you can use regular yogurt. Non-dairy options like almond or coconut yogurt work too. Just keep in mind that the flavor may change slightly. Choose a plain yogurt to maintain the taste of the bread. To make Maine blueberry bread vegan, substitute the egg with flaxseed meal or applesauce. For the butter, use a plant-based alternative like coconut oil or vegan butter. Ensure your yogurt is dairy-free. These swaps keep the bread moist and delicious while making it suitable for a vegan diet. You can still enjoy the same great flavor! Making Maine Blueberry Bread is fun and easy. We covered key ingredients, optional add-ins, and the right tools to use. I shared step-by-step instructions, common mistakes to avoid, and tips for great texture. You can even try different fruits or make it gluten-free. Lastly, I explained how to store extras and answered some questions about blueberries. Enjoy baking and sharing this delicious bread with friends!](https://fastmealmate.com/wp-content/uploads/2025/06/ff86cb4e-0a8a-479f-8f36-b1606605b05b-768x768.webp)
![- 1 cup brewed Earl Grey tea (cooled) - 1 cup frozen blueberries - 1 ripe banana - 1 tablespoon honey or maple syrup (to taste) - 1/2 cup almond milk (or milk of choice) - 1 cup ice cubes - 1/2 teaspoon vanilla extract - A small pinch of salt The Blueberry Earl Grey Frappe is a treat. Each ingredient plays a key role in flavor and health. Benefits of Earl Grey tea: Earl Grey tea comes from black tea mixed with bergamot oil. This blend gives it a lovely flavor. It also offers health perks like antioxidants. These can help protect your cells. Nutritional value of blueberries: Blueberries are tiny superfoods. They are low in calories yet high in vitamins. They also have fiber, which helps digestion. Their antioxidants may support heart health too. Advantages of using bananas: Bananas add natural sweetness to your frappe. They provide potassium, which is good for your heart. Plus, they help create a creamy texture when blended. Alternatives for almond milk: If you don't have almond milk, try oat or soy milk. These options work well and keep the frappe creamy. Sweetener options: You can swap honey for agave or stevia. Each sweetener adds a unique taste. Adjust the amount based on your liking. Using fresh vs. frozen blueberries: Frozen blueberries keep the frappe cold and thick. Fresh blueberries can be used, but they will change the texture. If using fresh, add more ice to keep it cool. For the full recipe, check the above details. Enjoy creating this refreshing drink! Start by brewing a strong cup of Earl Grey tea. Choose high-quality loose leaf or bagged tea. Use boiling water for the best flavor. Once brewed, let it cool to room temperature. This takes about 10 to 15 minutes. For faster cooling, pour the tea into a wide bowl. You can also prepare the tea ahead of time. Just refrigerate it for at least one hour. Once your tea is cool, gather your ingredients for the frappe. Add the cooled tea to a blender. Include one cup of frozen blueberries, one ripe banana, and one tablespoon of honey or maple syrup. Pour in half a cup of almond milk and one cup of ice cubes. Don’t forget half a teaspoon of vanilla extract and a small pinch of salt. Blend everything on high speed. Aim for a smooth and creamy texture. If you find it too thick, add more almond milk. Blend again until well mixed. Now it’s time to serve your Blueberry Earl Grey Frappe. Pour the frappe into chilled glasses. For a nice touch, garnish with fresh blueberries on top. You can also sprinkle some lemon or orange zest for added brightness. This will enhance the flavor and make it look beautiful. Enjoy your refreshing drink! Check the [Full Recipe] for all details. To get the best texture in your Blueberry Earl Grey Frappe, blend well. I recommend mixing until smooth and creamy. If the drink feels too thick, add a splash more almond milk. If it's too thin, add a few more ice cubes. Sweetness is key to balance. Start with one tablespoon of honey or maple syrup. Taste it after blending. If you want it sweeter, add more syrup and blend again. Adjust to your taste! You can brew Earl Grey tea in advance. Store it in the fridge for up to three days. This way, your frappe is quick to make. Just remember to cool it down first. For freezing blueberries, spread them in a single layer on a baking sheet. Freeze for a couple of hours. Once frozen, transfer them to a bag. This keeps them fresh and ready for your frappe. This frappe pairs well with light snacks. Think of yogurt, granola, or even a slice of lemon cake. The flavors mix well together! To boost the taste, add a little citrus zest. A sprinkle of lemon or orange zest adds a bright twist. It enhances the drink’s flavor and makes it even more refreshing. For more tips, check out the Full Recipe. {{image_4}} You can play with your Blueberry Earl Grey Frappe! Try adding other fruits. Strawberries add a sweet punch. Mango gives a tropical flair. Both will mix well with the blueberry flavor. Next, think about spices. A dash of cinnamon adds warmth. Nutmeg gives a nice twist too. Just a pinch is enough to elevate your drink. Be bold and experiment to find your favorite mix! Making this frappe dairy-free is easy. Use almond milk, oat milk, or coconut milk. They all work great. If you want it sweeter, try agave syrup or coconut sugar. These are great vegan substitutes for honey. For a vegan drink, ensure all your ingredients are plant-based. Double-check your sweetener. Always look for options that suit your diet. This way, you can enjoy your treat without worry. Want a different take? Try making a cold brew version! Start by steeping your Earl Grey tea in cold water. Let it sit in the fridge for 6 to 12 hours. This method brings out a smoother flavor. Once you’re ready, blend the cold brew with your ingredients. You can add some extra fruit for a fun twist. The cold brew style will give your frappe a unique taste. It’s perfect for hot summer days! You can find the full recipe for this refreshing drink to get started. To keep your brewed Earl Grey tea fresh, store it in an airtight container. Place it in the fridge. It stays good for about three days. If you want to keep its flavor strong, don’t add any sweeteners yet. They might make the tea taste off after a day. For frozen blueberries, keep them in their original bag. Seal it tightly to avoid freezer burn. Use them within six months for the best taste. If you buy fresh blueberries, wash and dry them first. Then, freeze them in a single layer on a baking sheet. Once frozen, transfer them to a sealed bag. If you have leftover frappe, store it in the fridge. Use a tightly sealed jar or container. It stays fresh for about one day. The frappe might separate a bit, but that’s okay. Just give it a good shake before drinking. For longer storage, you can freeze the leftover frappe. Pour it into ice cube trays or freezer-safe containers. This way, it can last for up to a month. When you want a quick drink, blend a few cubes with some almond milk, and enjoy. You can reblend any leftover frappe. Just pour it back into the blender. Add a splash of milk to help it blend smoothly again. This makes it creamy and delicious once more. If you stored the frappe in the fridge, drink it cold. For a refreshing treat, consider adding fresh fruit or a dollop of yogurt. You can also mix in a bit of honey or maple syrup for added sweetness. Enjoy your Blueberry Earl Grey Frappe! For the full recipe, check the details above. To make your Blueberry Earl Grey Frappe vegan, you can easily swap a few ingredients. Use plant-based milk, like almond or oat milk, in place of dairy milk. For sweetening, choose maple syrup instead of honey. This keeps the flavor vibrant while ensuring it's plant-friendly. Yes, you can use fresh blueberries! However, the texture may change. Frozen blueberries give a thicker, frostier drink. Fresh blueberries will make the frappe lighter but may not chill it as well. You might want to add extra ice to cool it down. The flavor will still be delicious, though! You can often find this refreshing drink at specialty coffee shops or tea cafes. Look for places that focus on creative beverages. Chains like Starbucks may offer seasonal versions. Always ask if they can make it with Earl Grey and blueberries. It's a great way to try this unique flavor combo before making your own. For the full recipe, check the detailed ingredients and instructions in the earlier section! In this article, we explored how to make a Blueberry Earl Grey Frappe. We covered the key ingredients, from brewed tea to blueberries and bananas, and highlighted their health benefits. You learned simple steps to blend and serve your frappe, along with helpful tips for perfecting it. Lastly, we shared variations and storage tips to keep it fresh. Try this recipe at home, and enjoy a tasty and healthy drink that refreshes and energizes! Your taste buds will thank you!](https://fastmealmate.com/wp-content/uploads/2025/06/c77c6fd4-2277-427b-99cf-97ef587db48b-768x768.webp)