
Ingredient Zucchini Bread Simple and Tasty Recipe
Are you ready to bake something delicious? Zucchini bread is a perfect treat that’s easy to make and oh-so-tasty. In this guide, I’ll share my simple and tasty recipe for ingredient zucchini bread. From choosing fresh zucchini to mixing in your favorite add-ins, I’ll show you every step. Whether you want a sweet snack or a healthy twist, this recipe has it all. Let’s get started!
Ingredients
Detailed List of Ingredients
– Zucchini: This is the star of the show. Zucchini adds moisture and a subtle flavor to the bread. It helps keep the bread soft and tender. You can use green or yellow zucchini.
– Types of flour: I use both all-purpose and whole wheat flour in this recipe. All-purpose flour gives a light texture, while whole wheat flour adds a nutty taste and extra fiber. Combining them makes a perfect balance.
– Optional ingredients: You can add nuts like walnuts or chocolate chips for extra flavor and texture. Walnuts add crunch, while chocolate chips bring sweetness. Feel free to mix them in or leave them out.
Ingredient Substitutions
– Gluten-free flour options: If you need a gluten-free version, use a 1:1 gluten-free flour blend. This will keep the texture similar to traditional zucchini bread.
– Sugar alternatives: For a healthier option, you can use coconut sugar or maple syrup instead of granulated sugar. Both will add a unique taste while lowering the glycemic index.
How to Choose Fresh Zucchini
– Tips for selecting high-quality zucchini: Look for zucchini that is firm and has smooth skin. The color should be bright and even. Avoid any that are soft or have blemishes.
– Storage tips for zucchini before use: Store zucchini in the fridge in a plastic bag. It lasts about a week. If you have too much, you can also freeze grated zucchini for later use in this bread or other recipes.
Step-by-Step Instructions
Preparation Steps
1. Preheat your oven. Set it to 350°F (175°C). This helps the bread bake evenly.
2. Prepare the loaf pan. Grease a 9×5 inch pan with cooking spray or butter. This keeps the bread from sticking.
3. Mix the wet ingredients. In a medium bowl, combine the grated zucchini, vegetable oil, granulated sugar, brown sugar, beaten eggs, and vanilla extract. Stir until well mixed.
Dry Ingredient Mixture
1. Measure your ingredients. Use the right tools. Proper measuring ensures your bread rises well.
2. Combine dry ingredients. In a large bowl, whisk together all-purpose and whole wheat flour, baking soda, baking powder, salt, cinnamon, and nutmeg. This ensures even mixing.
3. Mix wet and dry. Gently add the dry mixture to the wet zucchini mix. Use a spatula or wooden spoon. Be careful not to overmix. This keeps your bread light and fluffy.
Baking Process
1. Bake the bread. Pour the batter into the prepared loaf pan. Smooth the top for even baking.
2. Set baking time. Place the pan in the oven for 50-60 minutes. Check for doneness by inserting a toothpick. It should come out clean or with a few moist crumbs.
3. Cool the bread. Remove it from the oven and let it cool in the pan for about 10 minutes. Then, turn it out onto a wire rack to cool completely.Enjoy baking your delicious zucchini bread!
Tips & Tricks
Achieving the Perfect Texture
To get the best texture, avoid overmixing the batter. Mix just until everything blends. Overmixing can make the bread tough. It’s better to have a few lumps in the batter than a dense loaf.
Cooling the bread before slicing is key. Let it sit in the pan for about 10 minutes. This helps keep the shape. Then turn it out onto a wire rack. Let it cool completely before cutting. This way, you’ll have neat slices.
Enhancing Flavor
Spices can really lift the taste of your zucchini bread. I recommend using ground cinnamon and nutmeg. These spices add warmth and depth. You can also try adding a pinch of ginger or allspice for fun.
To store leftover zucchini bread, wrap it tightly in plastic wrap. Keep it in an airtight container at room temperature. This keeps the bread fresh for several days. For longer storage, freeze slices in a plastic bag. Just thaw them when you’re ready to enjoy.
Presentation Ideas
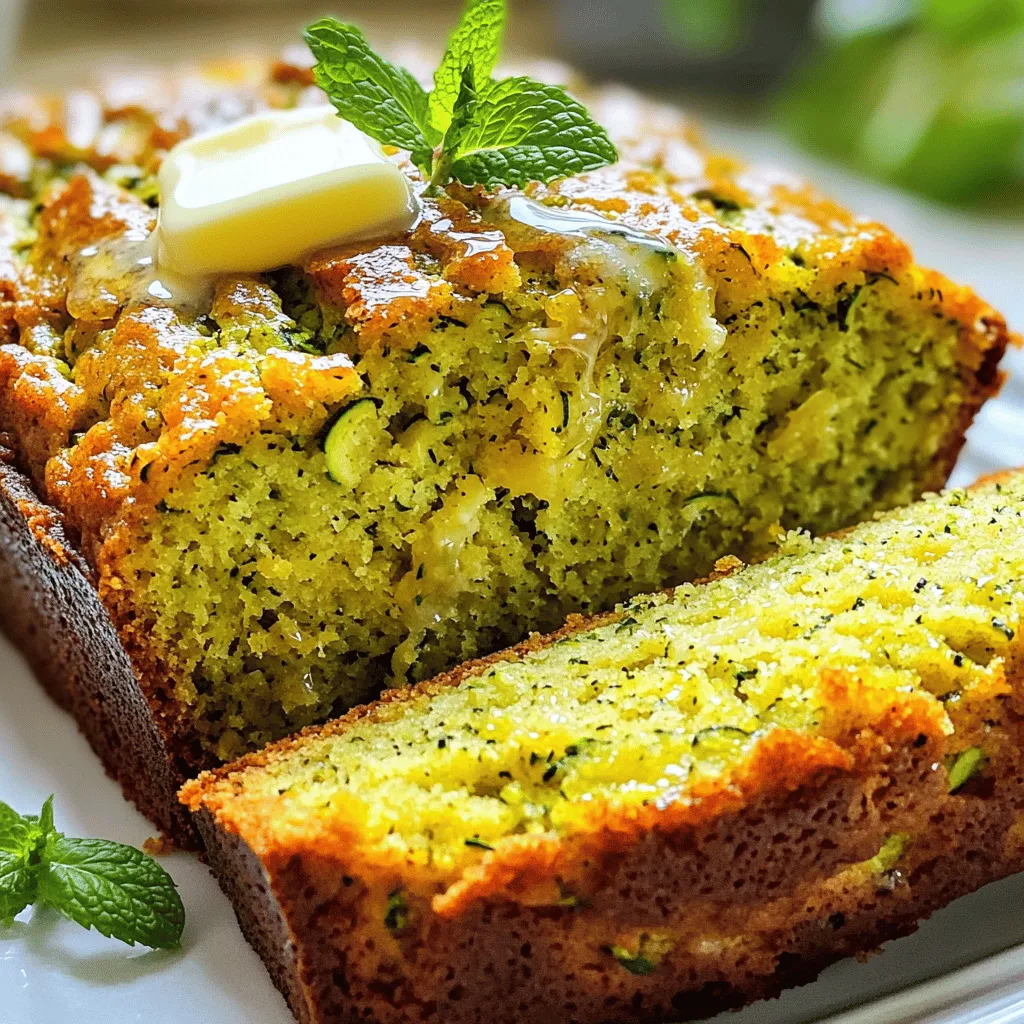
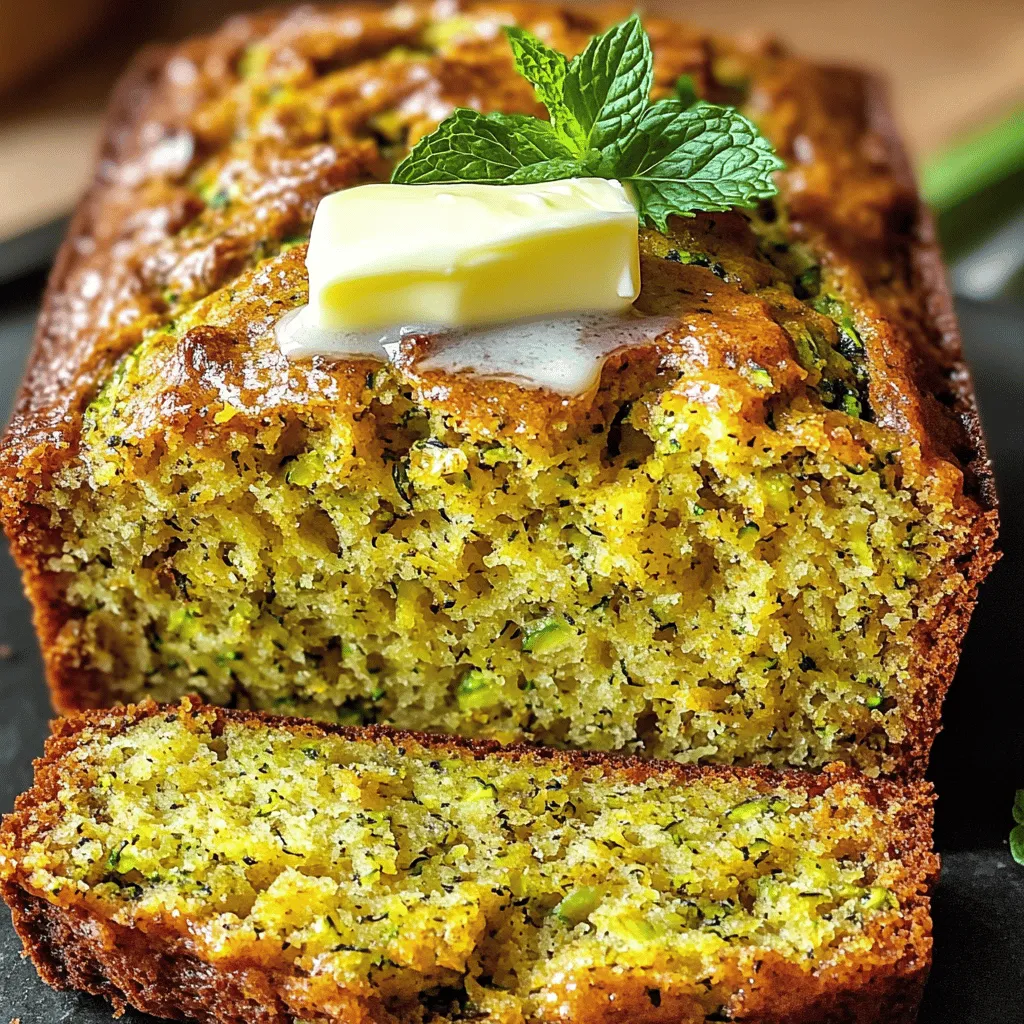
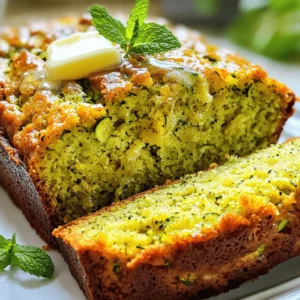
When serving zucchini bread, slice it into thick pieces. You can serve it warm, adding a pat of butter or cream cheese. This adds a nice touch.
For a lovely presentation, garnish each slice with fresh mint. It not only looks great but adds a fresh aroma too. You can also sprinkle a bit of powdered sugar on top for extra sweetness. Enjoy the delightful blend of flavors!
Variations
Sweet and Savory Additions
You can easily change zucchini bread by adding new flavors. For a savory twist, try adding herbs like rosemary or thyme. These herbs add a nice touch and boost the bread’s flavor. You can also mix in fruits like blueberries. They add sweetness and moisture, making the bread even tastier.
Different Dietary Options
If you follow a vegan diet, you can make a vegan zucchini bread. Replace the eggs with flaxseed meal or applesauce. For those watching carbs, try using almond flour instead of regular flour. This keeps the bread low in carbs while still being delicious.
Flavor Combinations
Mixing spices can change the taste of your zucchini bread. Try adding ginger or cloves for a warm flavor. You can also use different nuts, like pecans or hazelnuts, instead of walnuts. They add a crunchy texture and a unique flavor to the bread.
Storage Info
How to Store Zucchini Bread
To keep your zucchini bread fresh, store it in an airtight container. This method prevents air from drying it out. If you have leftovers, place parchment paper between slices. This helps keep them separated and easy to grab.
If you want to freeze your zucchini bread, wrap it tightly in plastic wrap. Then, place it in a freezer bag. This method protects the bread from freezer burn. You can freeze it for up to three months. When you’re ready to enjoy it, thaw it in the fridge overnight.
Shelf Life
Homemade zucchini bread lasts about 1 week at room temperature. If you store it in the fridge, it can last up to 2 weeks. Look for signs that it has gone bad. These include mold, an off smell, or a change in texture. If you see any of these signs, it’s best to toss it.
Reheating Tips
To reheat zucchini bread, use the oven. Preheat it to 350°F (175°C). Wrap the bread in aluminum foil to keep it moist. Heat for about 10-15 minutes. You can also use a microwave. Heat slices on a microwave-safe plate for about 15-20 seconds. This method is quick but may make the bread a bit dry.
If you have leftover bread, try making French toast. Dip slices in a mixture of eggs and milk, then cook on a hot skillet. Or, crumble it over yogurt for a tasty parfait. These ideas add fun twists to your leftover zucchini bread.
FAQs
Can I use other vegetables in zucchini bread?
Yes, you can! Zucchini is great, but other veggies work too. You can use grated carrots, shredded squash, or even sweet potatoes. These add unique flavors and nutrients. Each veggie brings its own taste, making your bread special. Just remember to adjust the moisture. If you use wetter veggies, reduce the oil or sugar in your recipe.
Is it necessary to peel the zucchini?
No, you do not need to peel the zucchini. Keeping the skin on adds color and nutrients. The skin has fiber, which is good for digestion. It also helps the bread hold its shape. Plus, the skin gives your bread a lovely green hue, making it more appealing.
What’s the best way to test if the bread is done?
A toothpick works best. Insert it in the center of the bread. If it comes out clean or with a few crumbs, the bread is done. If it has wet batter, give it more time. You can also gently press the top. If it springs back, it’s ready. Avoid opening the oven too often, as this can lower the temperature and affect baking.
Zucchini bread is a delightful mix of flavor and health. This post covered its important ingredients, from fresh zucchini to flour types. We discussed smart ingredient swaps for different diets and how to choose the best zucchini. You learned the steps to bake, tips for texture, and ways to enhance flavor. Variations allow you to get creative, while storage advice helps keep your bread fresh. Zucchini bread is versatile, and now you can make it your own. Enjoy experimenting with this recipe, and share it with friends!


![- 1 lb (450g) boneless, skinless chicken thighs, cut into bite-sized pieces - 4 tablespoons unsalted butter, divided - 4 cloves garlic, minced finely - 1 large lemon, zested and juiced - 1 teaspoon dried thyme - 1 teaspoon paprika - Salt and freshly ground black pepper to taste - Fresh parsley, chopped (for garnish) These ingredients make the dish shine. The chicken thighs give a tender bite. Garlic adds a strong aroma. Lemon brings brightness and tang. Butter makes everything rich and smooth. Thyme and paprika add depth and warmth. - Red pepper flakes for heat - Fresh herbs like basil or cilantro - A splash of white wine for extra richness - Honey for a touch of sweetness Adding some of these can make your dish unique. Red pepper flakes can spice things up. Fresh herbs can add a pop of freshness. A splash of wine creates a deeper flavor. Honey can balance the tartness of lemon. - Large skillet for cooking - Cutting board for prepping the chicken - Sharp knife for cutting the chicken - Measuring spoons for accuracy - Tongs for turning the chicken These tools will help you cook efficiently. A large skillet allows even cooking. A cutting board keeps the workspace tidy. A sharp knife ensures safe and quick cutting. Measuring spoons keep your flavors balanced. Tongs help with easy flipping and serving. For the detailed cooking steps and more, check the Full Recipe. Start by gathering your ingredients. You will need: - 1 lb boneless, skinless chicken thighs, cut into bite-sized pieces - 4 tablespoons unsalted butter, divided - 4 cloves garlic, minced finely - 1 large lemon, zested and juiced - 1 teaspoon dried thyme - 1 teaspoon paprika - Salt and freshly ground black pepper to taste - Fresh parsley, chopped (for garnish) Next, melt 2 tablespoons of butter in a skillet over medium heat. As it melts, season the chicken thighs with paprika, salt, and pepper. This step adds great flavor. Once the butter is bubbling, add the chicken pieces to the skillet. Spread them out evenly for the best sear. Sear the chicken for 5-7 minutes. Turn the chicken occasionally until it turns golden brown on all sides. This browning adds depth to the dish. When done, remove the chicken and set it aside on a plate. In the same skillet, melt the remaining 2 tablespoons of butter. Add the minced garlic and sauté it for about 30 seconds. Stir constantly to prevent burning. Once fragrant, stir in the lemon juice and zest, along with the dried thyme. Let this simmer for 1-2 minutes. This step melds all the flavors together. Now, return the cooked chicken to the skillet. Toss it in the lemon garlic butter sauce until well coated. Cook everything together for another 2 minutes. This helps the chicken absorb the sauce and heat through completely. Once finished, remove the skillet from the heat. Sprinkle fresh parsley over the chicken bites for a vibrant look. Serve the chicken bites in a large dish or individual bowls. Drizzle any remaining garlic butter sauce over the top. Add lemon wedges and extra parsley for an inviting presentation. For the full recipe, check the earlier section. To get juicy chicken, use boneless, skinless thighs. They cook faster and stay moist. Cut the chicken into even pieces for uniform cooking. Sear the chicken in a hot skillet. This gives a nice brown crust. Cook it for 5-7 minutes, flipping halfway through. Always check for doneness; the chicken should reach 165°F (75°C) inside. For a richer sauce, use high-quality butter. Add fresh herbs like rosemary or basil. If you like heat, toss in red pepper flakes. A splash of white wine adds depth, too. For extra zing, use fresh lemon juice instead of bottled. Don’t forget to taste and adjust seasoning. Every bite should burst with flavor. Prep your ingredients before you start cooking. Chop garlic and zest the lemon ahead of time. Use a sharp knife for quick cutting. Consider using a pre-made garlic butter if you’re short on time. You can also marinate the chicken a few hours before cooking. This step adds flavor and cuts down on cooking time. Feel free to explore the [Full Recipe] for complete instructions! {{image_4}} You can swap chicken thighs for other proteins. Try shrimp for a quick cook. Just sauté until they turn pink. You can use pork tenderloin, cut into small pieces. It cooks fast and absorbs flavor well. Even beef cubes work if you like a heartier bite. Adjust cooking time to match the protein you choose. For a vegetarian version, use mushrooms or tofu. Both soak up flavors like a sponge. Sauté mushrooms until golden brown. For tofu, press to remove water, then cut into cubes. Cook until crispy on all sides. Toss these in the lemon garlic butter sauce just like the chicken. If you have allergies, there are easy swaps. Use olive oil instead of butter for a dairy-free option. You can replace garlic with garlic powder if you're sensitive to fresh garlic. For a low-sodium version, use less salt and a salt substitute. Adjust the recipe to fit your taste and needs. Check out the Full Recipe for more ideas and details! To keep your leftover chicken bites fresh, place them in an airtight container. Make sure to let them cool to room temperature first. Store the container in the refrigerator. They will stay good for up to three days. Label the container with the date for easy tracking. Reheating is simple! You can use a skillet or microwave. For the skillet, heat a little butter over medium heat. Add the chicken bites and stir until warmed through. This keeps the flavors intact. If using a microwave, place the chicken in a microwave-safe dish. Cover it with a damp paper towel and heat in 30-second intervals until hot. If you want to freeze the chicken bites, make sure they are cool first. Place them in a freezer-safe bag or container. Remove as much air as possible to avoid freezer burn. They can last for up to three months in the freezer. When ready to eat, thaw them in the fridge overnight. Then reheat them as mentioned above. Enjoy your Lemon Garlic Butter Chicken Bites again! For the full recipe, check out the earlier section. Yes, you can use chicken breast instead of thighs. Chicken breast is leaner and will cook faster. Just make sure to cut it into similar bite-sized pieces. You may need to adjust the cooking time to keep it juicy. Lemon Garlic Butter Chicken Bites pair well with many sides. Here are a few ideas: - Steamed rice - Pasta with olive oil - Roasted vegetables - A fresh green salad - Garlic bread These options balance the rich flavors of the chicken and add variety to your meal. This recipe is not spicy. It focuses on lemon, garlic, and herbs for flavor. If you want some heat, you can add red pepper flakes. Start with a small amount and taste as you go. To keep the chicken juicy, follow these tips: - Do not overcook the chicken. Use a meat thermometer to check for doneness. - Let the chicken rest for a few minutes after cooking. This helps keep the juices inside. - Use the butter and garlic sauce generously. It adds moisture and flavor. Following these steps will help you achieve tender and juicy chicken bites. For the complete recipe, check out the [Full Recipe]. This blog covered how to make Lemon Garlic Butter Chicken Bites. We looked at key and optional ingredients, as well as the tools you need. I provided step-by-step cooking instructions and tips for perfect chicken. We explored variations, storage methods, and answered common questions. Now, you have all the tools to whip up this dish with ease. Enjoy cooking and share your tasty results!](https://fastmealmate.com/wp-content/uploads/2025/05/97cbb791-292c-4238-a79b-781f43956dc5-768x768.webp)
![To make a delicious Pineapple Cucumber Salad, gather the following ingredients: - Ripe pineapple - Large cucumbers - Red bell pepper - Red onion - Fresh mint leaves - Fresh cilantro - Lime juice - Honey (optional) - Salt and pepper This list has all you need for a fresh and tasty salad. The ripe pineapple brings sweetness, while the cucumbers add crunch. The red bell pepper adds a nice pop of color and flavor. Red onion gives a sharp taste that balances the sweet and fresh notes. Fresh mint and cilantro boost the herb flavor, making every bite refreshing. Lime juice ties everything together with a zesty kick. If you like a touch of sweetness, add honey. Finally, season with salt and pepper to bring out all the flavors. When you have everything ready, you can create a vibrant and healthy dish. This salad is perfect for a quick snack or as a side. For the full recipe, check the earlier section. Enjoy making this simple yet flavorful dish! To make the pineapple cucumber salad, start by cutting the pineapple. You want it ripe and juicy. Peel it, then cut it into bite-sized cubes. This makes each piece easy to eat. Next, take the cucumbers. Wash them well, then cut them into similar-sized dice. This helps the salad look nice and makes every bite fresh. Now, let’s chop some vegetables and herbs. Grab the red bell pepper and red onion. Cut the red bell pepper into small pieces. This adds a sweet crunch to the mix. For the red onion, chop it finely for a hint of sharpness. Finally, take fresh mint and cilantro. Chop them finely as well. They bring a burst of flavor and freshness to our salad. In a large mixing bowl, place the diced pineapple and cucumbers. Add the chopped red bell pepper and red onion. Make sure to distribute everything evenly. This will give you a perfect mix of flavors in every bite. Then, sprinkle in the fresh mint and cilantro. Their bright flavors will really make the salad pop. Now it's time to prepare the dressing. In a small bowl, whisk together the lime juice and honey, if you choose to use it. Mix until the honey dissolves completely. This creates a tangy-sweet dressing that will add a lovely zing. Drizzle the dressing over your salad. Use a large spoon to gently toss everything together. Make sure all the ingredients are well coated with the dressing. This is key to bringing out the flavors. Next, season with salt and pepper to taste. Start with a little and adjust based on your preference. This simple step elevates the flavor of your salad. After mixing, cover the bowl tightly with plastic wrap. Place it in the fridge for at least 30 minutes. This chilling time allows the flavors to meld together beautifully. Enjoy this refreshing dish as a bright addition to any meal. You can find the full recipe to make this salad at any time. To make your pineapple cucumber salad shine, focus on freshness. Select ripe fruits and vegetables. A ripe pineapple smells sweet at the base and feels slightly soft when pressed. For cucumbers, look for firm ones with smooth skin. These choices boost your salad's flavor. When seasoning, use salt and pepper to taste. Start with a little. You can always add more. Lime juice adds brightness, while honey can sweeten it up. Mix well to blend all flavors. Serve your salad in a clear glass bowl. This highlights the bright colors of the pineapple, cucumber, and peppers. For added charm, layer the ingredients. This creates a beautiful effect. Garnish with fresh mint leaves right before serving. This enhances the salad's look and adds a lovely scent. You can also sprinkle some lime zest on top for extra flair. This salad pairs well with grilled chicken or fish. The fresh flavors complement the smoky taste of grilled meats. You can also enjoy it with tacos or rice dishes. For drinks, a refreshing mint lemonade or iced tea suits this salad perfectly. Serve it at summer barbecues, picnics, or family gatherings. It adds a tropical vibe to any meal. Don't forget to check the Full Recipe for all the details! {{image_4}} You can change this salad in fun ways. Start by adding other fruits. Consider using mango, kiwi, or strawberries. Each fruit brings its sweet twist. You can also add a little crunch with diced apples. They pair well with the pineapple and cucumber. Next, incorporate different herbs. Besides mint and cilantro, try basil or parsley. These herbs will give the salad a fresh feel. Each herb adds its own flavor, making the salad unique. Experiment and find your favorite mix! Many people want meals that fit their diet. This salad is easy to tweak for vegan or gluten-free diets. All the main ingredients are naturally vegan. Just skip the honey for a vegan option. If you want a low-sugar version, leave out the honey. The pineapple will add enough sweetness. You can also swap lime juice with lemon juice for a tart taste. Adjust these ingredients to suit your health needs. Enjoy the fresh flavors without worry! For the full recipe, check out [Full Recipe]. To keep your leftover salad fresh, store it in the fridge. Use an airtight container to prevent moisture loss. This helps the flavors stay vibrant. If you don’t have one, plastic wrap works too but may not seal as well. Avoid storing in a glass bowl without a lid, as this can lead to quicker spoilage. The salad stays fresh for about 2 days when stored correctly. After that, the flavors might fade. Check for signs of spoilage, such as a sour smell or mushy cucumbers. If you notice these signs, it's best to toss the salad. Keeping an eye on freshness ensures you enjoy the best taste and texture. For the full recipe, refer back to the beginning! What can I substitute for honey? You can use agave syrup or maple syrup instead of honey. Both add sweetness. You can also skip it if you prefer a tart taste. Can I make the salad ahead of time? Yes, you can make this salad a few hours ahead. Chill it in the fridge. This allows the flavors to blend nicely. How do I keep the cucumbers from becoming soggy? To prevent soggy cucumbers, salt them first. Let them sit for a bit, then rinse and dry. This removes extra water. What are the nutritional benefits of this salad? This salad is low in calories and high in vitamins. Pineapple adds vitamin C, while cucumbers hydrate. Mint and cilantro provide antioxidants. Can I serve it warm? This salad is best served cold. Serving it warm may change the texture. Enjoy it fresh for the best taste! This blog post covered how to make a refreshing pineapple cucumber salad. I shared the key ingredients and provided step-by-step instructions. You learned tips to enhance flavor and options for meal pairings. We also explored variations and important storage tips. Remember, this salad is versatile and easy to customize. Enjoy experimenting with different fruits and herbs. Fresh flavors make this dish a winner for any occasion.](https://fastmealmate.com/wp-content/uploads/2025/06/6ff9bfd2-b4bb-4aa9-9811-0e757a52e6a8-768x768.webp)

