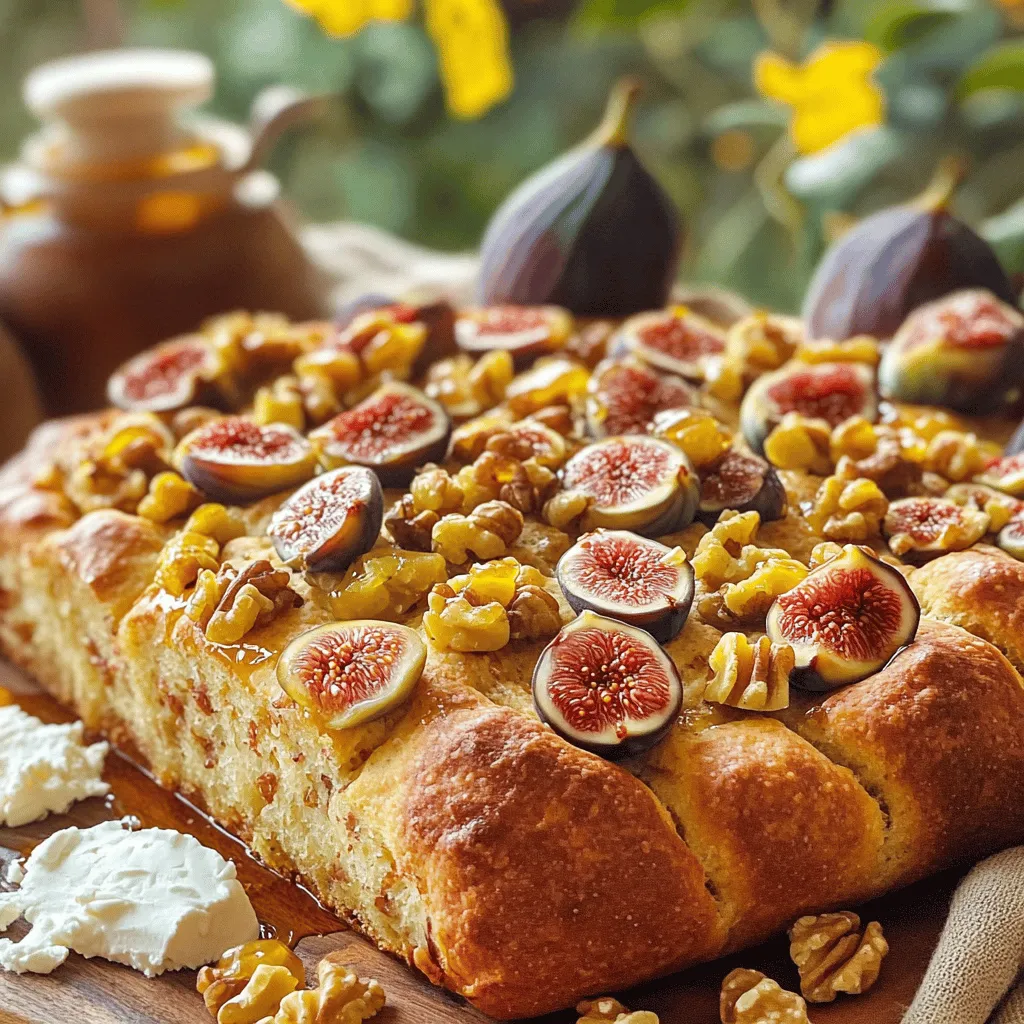
Fresh Fig and Walnut Soda Bread Delightful Recipe

Looking for a tasty way to enjoy fresh figs? This Fresh Fig and Walnut Soda Bread is a delightful blend of sweet and nutty flavors. With just a few simple ingredients, you can bake a loaf that’s perfect for breakfast or as a snack. I’ll guide you through each step to achieve a soft texture and rich taste. Let’s dive into this easy and rewarding recipe—you won’t want to miss it!
Ingredients
Main Ingredients
Gather the following ingredients to make Fresh Fig and Walnut Soda Bread:
– 2 cups whole wheat flour
– 1 cup all-purpose flour
– 1 teaspoon baking soda
– 1 teaspoon salt
– 1 cup chopped fresh figs (about 10-12 figs)
– ½ cup chopped walnuts
– 1 tablespoon honey
– 1 ¼ cups buttermilk (or substitute with milk mixed with 1 tablespoon vinegar)
Measurement Details
Using the right amounts is key for great bread. Here are the specific quantities:
– Whole wheat flour: 2 cups for a hearty base
– All-purpose flour: 1 cup for lightness
– Baking soda: 1 teaspoon for rising
– Salt: 1 teaspoon for flavor
– Fresh figs: 1 cup, chopped for sweetness
– Walnuts: ½ cup, chopped for crunch
– Honey: 1 tablespoon for a hint of sweetness
– Buttermilk: 1 ¼ cups to keep the bread moist
Optional Add-ins
You can enhance the flavor with these add-ins:
– Cinnamon: A teaspoon can add warmth.
– Rosemary: A teaspoon of fresh rosemary adds a herbal touch.
– Orange zest: A teaspoon for a citrus kick.
Feel free to mix and match to create your perfect loaf!
Step-by-Step Instructions
Prepping the Oven and Baking Sheet
Start by preheating your oven to 400°F (200°C). This temperature is perfect for baking soda bread. While the oven heats, prepare your baking sheet by lining it with parchment paper. This makes cleanup easy and helps the bread not stick.
Combining Dry Ingredients
In a large mixing bowl, combine 2 cups of whole wheat flour, 1 cup of all-purpose flour, 1 teaspoon of baking soda, and 1 teaspoon of salt. Whisk these ingredients together well. This mixing helps distribute the baking soda evenly. It also prevents clumping, which can cause uneven baking.
Incorporating Figs and Walnuts
Next, take 1 cup of chopped fresh figs and ½ cup of chopped walnuts. Carefully fold these into the flour mixture. Use a spatula or your hands to gently mix them in. Be careful not to mash the figs as you fold. You want to keep their shape for texture in the bread.
Mixing Wet Ingredients
In another bowl, prepare your wet mixture. Combine 1 ¼ cups of buttermilk with 1 tablespoon of honey. Whisk these together until the honey fully dissolves. This mixture adds moisture and sweetness to your dough.
Forming the Dough
Now, pour the wet ingredients into the dry ingredients. Mix gently with a spatula or your hands until a shaggy dough forms. The dough should be slightly sticky with visible flour lumps. Avoid overworking it, as this can lead to tough bread.
Shaping and Scoring the Loaf
Lightly flour a clean surface and transfer the dough onto it. Shape the dough into a round loaf about 1.5 inches thick. Be gentle to keep air pockets in the dough. Place the loaf on your prepared baking sheet. Using a sharp knife, score an X across the top. This helps the bread bake evenly and lets steam escape.
Baking the Bread
Finally, bake your loaf in the preheated oven for 30-35 minutes. Check if it’s done by tapping the bottom. If it sounds hollow, it’s ready! The bread should have a deep golden brown color. Once baked, let it cool on a wire rack for at least 15 minutes before slicing. This resting time helps the flavors develop and makes slicing easier.
Tips & Tricks
Ensuring the Perfect Texture
To avoid overworking the dough, mix gently. When you combine the wet and dry ingredients, use a spatula or your hands. Stop mixing once the dough looks shaggy. This keeps air in the dough, making it light and fluffy. If you knead too much, the bread can become dense. Remember, a little stickiness is good!
Tips for Measuring Ingredients
Accurate measurements are vital for great bread. Use dry measuring cups for flour. Scoop the flour and level it off with a knife. Avoid packing it down. For liquids, use a clear liquid measuring cup. Pour in the buttermilk until it reaches the line. This ensures the right amount, which helps the bread rise well.
Cooling and Serving Suggestions
Once your bread is out of the oven, let it cool on a wire rack. This prevents sogginess. Wait at least 15 minutes before slicing. Serve it warm for the best taste. Pair your bread with creamy goat cheese and a drizzle of honey. Add whole figs and walnuts for a beautiful display. This makes for a delightful treat!
Variations
Different Nut Alternatives
You can easily switch walnuts for other nuts. Almonds, pecans, or hazelnuts work well in this recipe. Each nut brings a unique flavor. Almonds add a sweet crunch. Pecans offer a buttery taste. Hazelnuts give a rich, earthy note. Just chop the nuts and fold them in like you do with walnuts. This small change can make a big difference.
Flavor Enhancements
Adding herbs or spices can elevate your soda bread. Try mixing in fresh rosemary for an aromatic touch. Thyme adds a lovely depth of flavor. For a hint of warmth, consider cinnamon or nutmeg. These spices blend well with the figs. A pinch of sea salt on top before baking can enhance all the flavors. Experiment with what you like best to make it your own.
Gluten-Free Option
If you need a gluten-free soda bread, it is simple to adjust the recipe. Substitute whole wheat and all-purpose flour with a gluten-free flour blend. Make sure the blend has a good binding agent like xanthan gum. This will help the bread hold together. You may need to adjust the liquid slightly. Keep an eye on the dough; it should still be sticky. This way, everyone can enjoy fresh fig and walnut soda bread!
Storage Info
Short-Term Storage
To keep your Fresh Fig and Walnut Soda Bread fresh, place it in a paper bag. This bag allows the bread to breathe, keeping the crust crisp. Do not seal it in plastic. Plastic traps moisture and makes the crust soft. Store the bag at room temperature for up to three days. If you find the bread getting stale, toasting it can bring back some life.
Long-Term Storage
For long-term storage, freezing is best. First, let the bread cool completely. Then, wrap it tightly in plastic wrap. After that, place it in a freezer bag and remove as much air as possible. This method helps to keep the bread’s flavor and texture. You can freeze it for up to three months. When you are ready to enjoy, thaw it overnight in the fridge.
Reheating Tips
To reheat your bread, preheat your oven to 350°F (175°C). Remove the plastic wrap and place the bread directly on the oven rack. Bake for about 10-15 minutes until warmed through. This method revives the crust’s crunch and keeps the inside soft. Alternatively, you can slice the bread and toast it in a toaster for quick serving. Enjoy your soda bread warm for the best taste!
FAQs
Can I use dried figs instead of fresh?
Yes, you can use dried figs. They add a nice sweetness, but they change the texture. Dried figs are chewier and less juicy than fresh ones. If using dried figs, chop them smaller. Soak them in warm water for about 10 minutes to soften. This helps bring back some moisture. Remember, the taste will be sweeter with dried figs.
What can I serve with Fresh Fig and Walnut Soda Bread?
This bread pairs well with many foods. Try spreading cream cheese or goat cheese on a warm slice. A drizzle of honey on top adds extra sweetness. You can also enjoy it with fresh fruit like cheese or charcuterie. It makes a great snack or breakfast.
How do I know when my bread is done baking?
Look for a golden brown crust. Tap the bottom; it should sound hollow. You can also use a thermometer. The inside should reach 190°F (88°C). If it sounds hollow and is golden, it’s done. Trust your senses and check for these signs.
How long does the bread last?
Fresh Fig and Walnut Soda Bread lasts about 2-3 days at room temperature. Keep it wrapped in a cloth or in a bread box. For longer storage, freeze it. Wrap it tightly in plastic wrap and then foil. It will stay good for up to 3 months in the freezer.
Can I make this soda bread vegan?
Yes, you can make it vegan! Replace buttermilk with almond milk mixed with a tablespoon of lemon juice. Use maple syrup or agave instead of honey. This keeps the taste but makes it suitable for vegans. These simple swaps work well.
What is the role of buttermilk in this recipe?
Buttermilk adds moisture and flavor. It helps make the bread soft and tender. The acidity in buttermilk also reacts with baking soda. This reaction creates bubbles, making the bread rise. It gives the bread a nice crumb and a slightly tangy taste.
This blog covered how to make Fresh Fig and Walnut Soda Bread. We explored key ingredients, from whole wheat flour to buttermilk, and discussed measurements for success. You learned step-by-step instructions on preparing, baking, and serving the bread. We also shared tips for texture and variations, like gluten-free alternatives.
Making good soda bread is fun and rewarding. It adds a flavorful touch to any meal. With these tips, you can bake confidently and share your tasty creations with others. Enjoy your baking adventure!

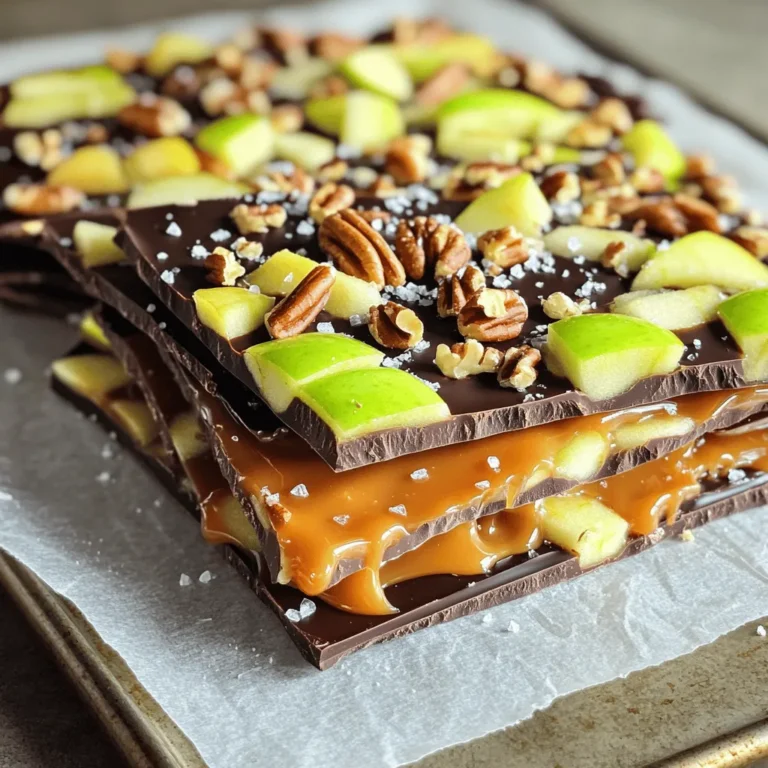
![Caramel apple cookies blend sweet apples and rich caramel in a soft cookie. This recipe makes about 24 cookies. You will love the warm flavors of fall in every bite. - 1 cup unsalted butter, softened to room temperature - 1 cup packed brown sugar - 1/2 cup granulated sugar - 2 large eggs - 1 teaspoon pure vanilla extract - 2 1/4 cups all-purpose flour - 1 teaspoon baking soda - 1/2 teaspoon fine sea salt - 1 teaspoon ground cinnamon - 1 cup fresh apples, diced (peeled and cored) - 1/2 cup caramel sauce (plus extra for drizzling) - 1/2 cup chopped walnuts or pecans (optional) - A pinch of sea salt for garnish You can customize your cookies! Try adding chocolate chips for extra sweetness. Use almond flour for a gluten-free option. If you want a nut-free treat, skip the walnuts or pecans. You can even swap the apples for pears for a unique twist. Enjoy experimenting! Start by preheating your oven to 350°F (175°C). This helps the cookies bake evenly. Next, line a baking sheet with parchment paper. This step prevents the cookies from sticking. In a large bowl, cream together one cup of softened butter, one cup of packed brown sugar, and half a cup of granulated sugar. Use an electric mixer on medium speed until the mix is light and fluffy. Next, add two large eggs. Beat them in one at a time. After that, stir in one teaspoon of pure vanilla extract until it blends in well. In another bowl, whisk together two and a quarter cups of all-purpose flour, one teaspoon of baking soda, half a teaspoon of fine sea salt, and one teaspoon of ground cinnamon. Gradually sift the dry mix into the wet mix. Stir gently until just combined. Be careful not to overmix; this keeps the cookies soft. Now, fold in one cup of diced apples and half a cup of caramel sauce. If you like, add half a cup of chopped walnuts or pecans too. Using a tablespoon or a cookie scoop, drop rounded portions of dough onto the prepared baking sheet. Leave about two inches between each cookie to allow for spreading. Place the baking sheet in the preheated oven. Bake the cookies for 10 to 12 minutes. Keep an eye on them. The edges should turn lightly golden, while the centers may look slightly underbaked. They will set as they cool. Once baked, remove the cookies from the oven. Let them cool on the baking sheet for about five minutes. After that, transfer the cookies to a wire rack to cool completely. For a delightful finish, drizzle extra caramel sauce over the cookies. Sprinkle a tiny pinch of sea salt on top of each one to enhance the flavor. This recipe makes about 24 cookies. Enjoy every bite of your caramel apple cookies! For a full recipe, check out the [Full Recipe]. To get the best texture in your caramel apple cookies, use softened butter. This helps create a nice, soft dough. Mix well but don’t overdo it. Overmixing can lead to tough cookies. When you add the apples, make sure they are diced small, so they blend into the dough. Avoid adding too much caramel sauce; it can make the dough too wet. For making these cookies, you need a few simple tools: - Mixing bowls - Electric mixer - Baking sheets - Parchment paper - Cookie scoop or tablespoon - Wire rack for cooling Using the right tools will make the process easier and more fun. One common mistake is not measuring ingredients correctly. Use proper measuring cups and spoons. Another mistake is baking cookies at the wrong temperature. Always preheat your oven before baking. Watch the cookies closely in the oven. If you take them out too soon, they may fall apart. If you leave them too long, they can get hard. Follow the Full Recipe carefully for the best results. {{image_4}} You can switch up the flavors in your caramel apple cookies. Try adding: - 1/2 cup of chocolate chips for a sweet touch. - 1 teaspoon of nutmeg for a warm spice flavor. - A splash of maple syrup for a unique twist. Experimenting helps you discover new favorites! Want to make these cookies fit your needs? Here are simple swaps: - For gluten-free cookies, use a 1:1 gluten-free flour blend. - To make them vegan, replace the butter with coconut oil and the eggs with flax eggs. - Substitute the caramel sauce with homemade date caramel for a healthy option. These swaps keep the taste delicious while catering to different diets. Make your cookies shine each fall! Add these seasonal spices: - A teaspoon of pumpkin spice for a cozy flavor. - A hint of ginger for a warm, zesty kick. - Chopped pecans or walnuts for a crunch that complements the apples. These twists make your caramel apple cookies perfect for any autumn gathering. For the full recipe, check out the earlier section! To keep your caramel apple cookies fresh, store them properly. Use an airtight container to keep out air and moisture. Place parchment paper between layers to prevent sticking. Store them at room temperature for up to one week. If you want to enjoy them longer, consider freezing them. Freezing your cookies is simple. Wait until they cool completely. Then, wrap them tightly in plastic wrap or foil. Place them in a freezer-safe bag. You can freeze them for up to three months. When you're ready to eat, just thaw them at room temperature. To regain that fresh-baked taste, reheat your cookies. Preheat your oven to 350°F (175°C). Place the cookies on a baking sheet. Heat for about 5 to 7 minutes. Check to avoid overbaking. The cookies should feel warm and soft again. Enjoy them warm with a drizzle of caramel sauce for a delightful touch! To make your caramel apple cookies chewy, focus on a few key steps. First, use brown sugar in your dough. Brown sugar has molasses, which adds moisture. Second, do not overmix the dough. Overmixing can make cookies tough. Third, underbake them slightly. When you take them out, they should look set but soft in the middle. They will continue to cook as they cool. This will give you that perfect chewy texture that you crave. Yes, you can make the dough ahead of time! Just prepare the dough as you normally would. After mixing, cover it tightly with plastic wrap or place it in an airtight container. You can store it in the fridge for up to 2 days. When ready to bake, let it sit at room temperature for about 10-15 minutes before scooping and baking. This makes it easy to enjoy fresh cookies whenever you want. Caramel apple cookies pair well with several treats. A scoop of vanilla ice cream adds creaminess and balances the sweet flavors. You can also serve them with warm caramel sauce for dipping. For a cozy touch, try them with a cup of hot apple cider. This drink brings out the fall flavors and makes for a delightful combination. You can get the full recipe for these tasty cookies to impress your friends and family. This post covered how to make delicious caramel apple cookies. We went through essential ingredients, preparation, and baking. I shared tips to avoid common mistakes and variations for your tastes. You learned how to store and reheat these cookies for the best flavor. With simple steps, you can bake a treat that impresses everyone. Enjoy experimenting with different flavors and adjustments. Happy baking!](https://fastmealmate.com/wp-content/uploads/2025/07/9c1a808e-f093-4e89-97b6-472e42d8d3a6-768x768.webp)

![- 1 cup unsalted butter, softened to room temperature - 1/2 cup powdered sugar, plus additional for dusting - 1 teaspoon pure vanilla extract - 1/2 teaspoon almond extract - 2 cups all-purpose flour - 1/2 cup finely chopped almonds - 1/4 teaspoon salt - 1/2 cup raspberry preserves When making Raspberry Almond Snowball Cookies, each ingredient plays a key role. The butter makes the cookies rich and tender. Powdered sugar adds a sweet touch and helps with that snowy look. Vanilla and almond extracts give the cookies a warm, nutty flavor. The flour gives structure to the cookies. Chopped almonds add a nice crunch. Salt balances the sweetness. Finally, raspberry preserves are the surprise inside. They burst with flavor when you take a bite. - For a different sweet taste, try using honey or maple syrup instead of powdered sugar. - If you want a dairy-free option, use vegan butter. It works well in this recipe. - For a gluten-free treat, swap all-purpose flour with almond flour or a gluten-free mix. These substitutions can change the flavor and texture, but they keep the spirit of the cookies alive. Experimenting with these ingredients can lead to fun and tasty variations! For the full recipe, check out the detailed steps to create this delightful treat. First, preheat your oven to 350°F (175°C). This step helps your cookies bake evenly. While the oven heats, line a baking sheet with parchment paper. This keeps the cookies from sticking, making cleanup easy. Next, in a large bowl, mix 1 cup of softened butter with 1/2 cup of powdered sugar. Then, add 1 teaspoon of pure vanilla extract and 1/2 teaspoon of almond extract. Beat this mixture with an electric mixer until light and fluffy. This takes about 2-3 minutes. Now, gradually add 2 cups of all-purpose flour and 1/4 teaspoon of salt to the butter mixture. Mix on low speed until just combined. Be careful not to overmix; we want a nice texture. Gently fold in 1/2 cup of finely chopped almonds. For the fun part, scoop about 1 tablespoon of dough. Flatten it slightly in your hand. Add 1/2 teaspoon of raspberry preserves in the center. Carefully fold the dough edges around the preserves, sealing it tightly into a ball. Place the cookie balls on your prepared baking sheet. Make sure they are about 2 inches apart. This spacing allows them to spread while baking. Bake the cookies for 12-15 minutes. Keep an eye on them; you want the bottoms to turn lightly golden. After baking, let the cookies cool on the baking sheet for about 5 minutes. This helps them firm up a bit. Then, gently transfer them to a wire rack to cool completely. Once cool, take some extra powdered sugar and dust it generously over the cookies. This adds a lovely snowy look. Enjoy these delightful treats with your friends or family! For the full recipe, check out the details provided. To make the best cookies, start with room temperature butter. Soft butter mixes well, creating a light and fluffy dough. Cold butter makes it hard to blend. Another tip is to prevent cookies from spreading too much. Chill your cookie dough for at least 30 minutes before baking. This helps them keep their shape while baking. When you arrange your cookies, think about a nice display. Use a decorative plate to showcase them beautifully. You can also garnish with fresh raspberries or a sprinkle of almond slices. This adds color and makes them look even more inviting. A light-colored dish contrasts nicely with the snowy dusting of sugar. Want to boost the flavor? Try adding a pinch of cinnamon or a dash of lemon zest. This can give your cookies a unique twist. You can also adjust the sweetness by using different types of raspberry preserves. For a tart flavor, opt for low-sugar preserves. For a sweeter taste, choose regular preserves. You can find the full recipe [here]. {{image_4}} You can play with flavors in your Raspberry Almond Snowball Cookies. Try different fruit preserves like strawberry or apricot. Each fruit adds a unique twist. You might also add chocolate chips or cocoa powder. This makes the cookies richer and more indulgent. Mixing in these flavors can make each batch fun and exciting. For those with dietary needs, there are great options. You can make gluten-free cookies by using almond flour or a gluten-free flour blend. These swaps keep the cookies light and tasty. If you want a vegan version, substitute the butter with coconut oil or vegan butter. Use a plant-based milk in place of any dairy. These changes keep the spirit of the cookies while catering to different diets. You can make themed cookies for special occasions. For holidays, add colorful sprinkles or food coloring to the dough. This gives the cookies a festive touch. For parties, consider making mini cookie versions. Smaller cookies are great for sharing and look lovely on a platter. Each theme allows you to share the joy of baking with your loved ones. If you want the full recipe, check out the details above! To keep your Raspberry Almond Snowball Cookies fresh, store them in an airtight container. This helps to lock in moisture and flavor. You can use glass jars or plastic containers with tight lids. Place parchment paper between layers of cookies to prevent sticking. Keep the cookies at room temperature for up to a week. If you want to keep them longer, then freezing is a great option. You can freeze both unbaked and baked cookies. For unbaked cookies, scoop them onto a baking sheet lined with parchment paper. Freeze until solid, then transfer them to a freezer bag. This way, you can bake fresh cookies anytime. For baked cookies, let them cool completely first. Place them in a freezer-safe container or bag, separating layers with parchment paper. When you are ready to enjoy them, thaw baked cookies at room temperature. If you want a warm treat, pop them in the oven at 350°F for a few minutes. Reheating brings back their delightful texture. For unbaked cookies, just bake them straight from the freezer. Add a couple of extra minutes to the bake time to ensure they cook through. How long do Raspberry Almond Snowball Cookies last? These cookies stay fresh for about one week. Store them in an airtight container. If you want them to last longer, you can freeze them. Can I make the dough ahead of time? Yes, you can make the dough and chill it in the fridge. Wrap it tightly in plastic. This way, you can bake them later. What can I do if my cookies turn out too crumbly? If your cookies are too crumbly, you might need more butter. Add a little melted butter to the dough. Mix gently until it holds together. Can I substitute almond extract with something else? Yes, you can use vanilla extract or even a bit of coconut extract. Each will give a different flavor but will still taste great. What is the best way to measure flour for this recipe? Use the spoon and level method. Scoop flour into a measuring cup, then level it off with a knife. Don’t pack it down for the best results. What to serve with these cookies? These cookies pair well with fresh fruit, like raspberries or strawberries. You can also serve them with vanilla ice cream for a tasty treat. Ideal beverages to pair with Raspberry Almond Snowball Cookies Enjoy these cookies with a warm cup of tea or coffee. A glass of milk also complements their sweet and nutty flavor nicely. In this blog post, I covered how to make Raspberry Almond Snowball Cookies. We explored the key ingredients and tips for perfecting texture and flavor. You can use alternatives like vegan butter and gluten-free flour too. I shared storage methods for keeping cookies fresh and ways to freeze them. Try different fruit preserves or chocolate chips for fun variations. Remember, cookies taste best when shared and enjoyed fresh. Give this recipe a try, and I bet you will love it!](https://fastmealmate.com/wp-content/uploads/2025/07/7fd5f108-97a5-4fb0-86b3-b9219b799aa8-768x768.webp)