Classic Zucchini Bread Simple and Tasty Recipe
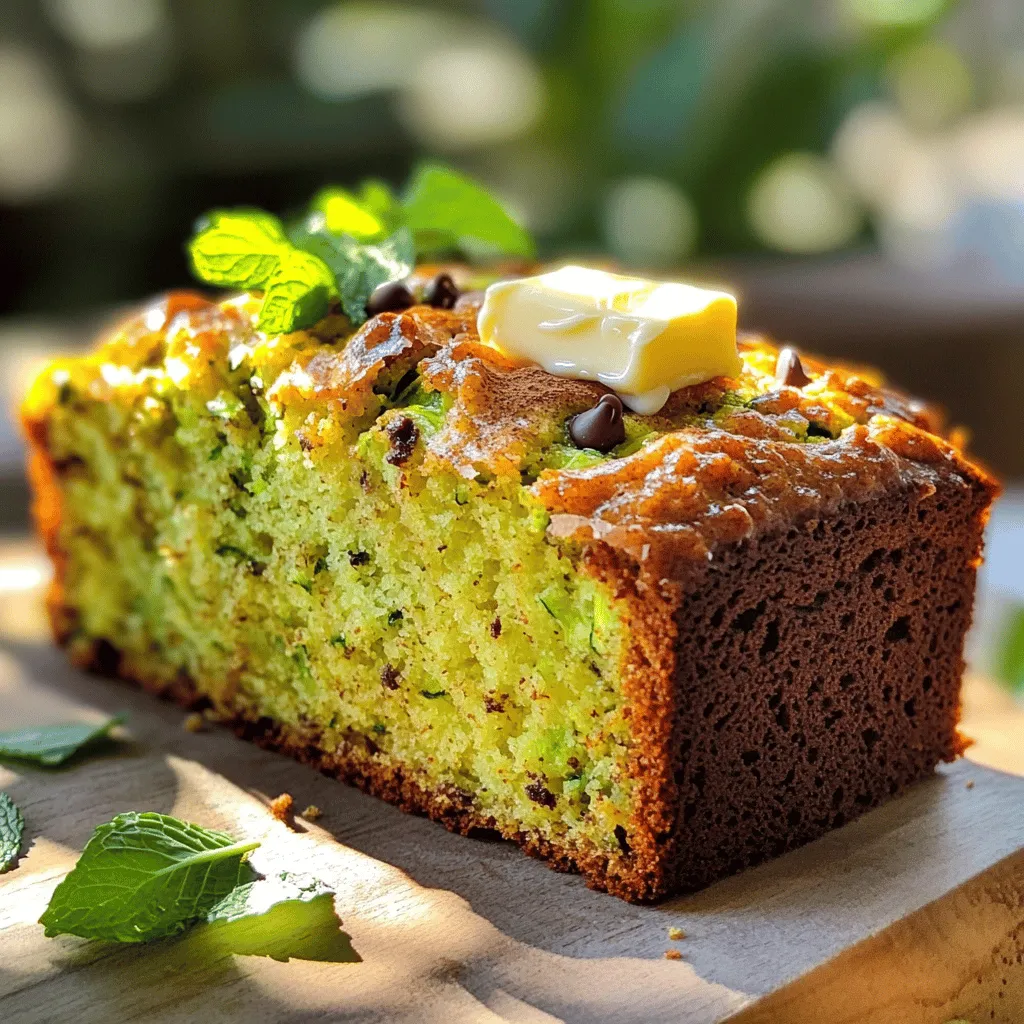
If you’re looking for a simple and tasty way to use up seasonal zucchini, you’ve come to the right place! Classic Zucchini Bread is moist, flavorful, and perfect for any time of day. I’ll guide you through each step—from mixing the ingredients to adding fun twists. Whether you’re a baking pro or just starting, this recipe is easy to follow. Ready to create a delicious treat? Let’s get started!
Ingredients
List of Ingredients
– 2 cups grated zucchini
– 1 cup granulated sugar
– 1/2 cup packed brown sugar
– 1/2 cup vegetable oil
– 3 large eggs
– 2 teaspoons pure vanilla extract
– 2 cups all-purpose flour
– 1 teaspoon baking powder
– 1 teaspoon baking soda
– 1 teaspoon ground cinnamon
– 1/2 teaspoon salt
– 1/2 cup chopped walnuts or pecans (optional)
– 1/2 cup semi-sweet chocolate chips (optional)
To make classic zucchini bread, start with fresh grated zucchini. You need about two medium zucchinis. Grating them releases moisture, which keeps the bread soft.
Next, use both granulated and brown sugar. The granulated sugar adds sweetness, while brown sugar gives it a deeper flavor.
You’ll also need vegetable oil and eggs. The oil adds moisture, and the eggs bind the ingredients. For a lovely aroma, add pure vanilla extract.
All-purpose flour forms the base of the bread. You must also add baking powder and baking soda. These leavening agents help the bread rise and become fluffy.
To spice things up, use ground cinnamon. This gives the bread a warm, inviting flavor.
Finally, consider adding mix-ins. Chopped walnuts or pecans add crunch. Semi-sweet chocolate chips bring extra sweetness, making the bread even more delicious.Enjoy your baking!
Step-by-Step Instructions
Preparation Steps
1. Preheat the oven and prepare the loaf pan. Start by preheating your oven to 350°F (175°C). This step is key to getting a nice rise. While it warms up, grease a 9×5 inch loaf pan. You can also use parchment paper for easy removal later.
2. Combine zucchini and sugars. In a large bowl, add 2 cups of grated zucchini. Mix in 1 cup of granulated sugar and 1/2 cup of packed brown sugar. Stir well so the sugars blend with the zucchini. This adds sweetness and moisture to the bread.
3. Mix wet ingredients for the batter. Next, pour in 1/2 cup of vegetable oil, crack in 3 large eggs, and add 2 teaspoons of pure vanilla extract. Mix everything until the batter looks smooth and well-combined. This mixture provides a rich base for your bread.
Mixing and Baking
1. Combine dry ingredients. In another bowl, whisk together 2 cups of all-purpose flour, 1 teaspoon of baking powder, 1 teaspoon of baking soda, 1 teaspoon of ground cinnamon, and 1/2 teaspoon of salt. This mix will give your bread lift and flavor.
2. Fold wet and dry mixtures together. Gently fold the dry ingredients into the wet mixture. Mix just until combined. Be careful not to overmix; doing so can make your bread tough and less fluffy.
3. Add optional ingredients and pour into the pan. If you want, fold in 1/2 cup of chopped walnuts or pecans and 1/2 cup of semi-sweet chocolate chips. They add great texture and flavor. Then, pour the batter into your prepared loaf pan, spreading it evenly.
Baking Process
1. Bake time and doneness test. Place the loaf pan in the oven. Bake for 50-60 minutes. To check if it’s done, stick a toothpick in the center. It should come out clean or with a few moist crumbs.
2. Cooling the zucchini bread. Once baked, take the bread out of the oven. Let it cool in the pan for about 10 minutes. After that, transfer it to a wire rack to cool completely. This step helps set the texture perfectly.
Now you have a delicious loaf of zucchini bread to enjoy!
Tips & Tricks
Baking Tips
– Avoiding Overmixing: When mixing your batter, stir gently. Overmixing can make the bread tough. Mix just until you see no dry flour.
– Using the Right Zucchini: Choose medium zucchinis. They should feel firm and not too big. Big zucchinis can have more seeds and less flavor.
– Measuring Ingredients Accurately: Use measuring cups for dry ingredients. For liquids, use a clear measuring cup with markings. Accurate measurements help your bread rise and taste great.
Serving Suggestions
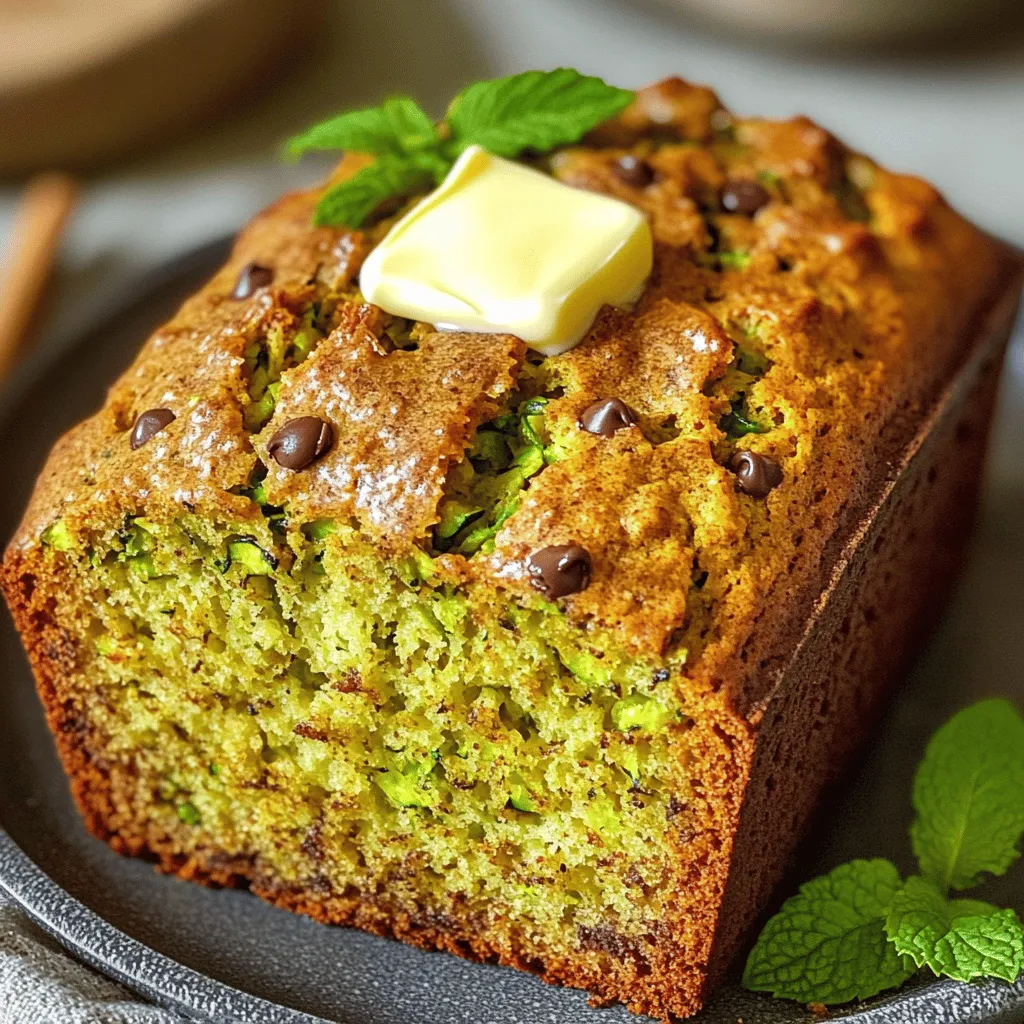
– Ideal Pairings: Serve your zucchini bread warm. Try spreading a little butter on top. Cream cheese also tastes great with it.
– Presentation Tips for Serving: Slice the bread while warm. Arrange the slices on a plate. You can sprinkle cinnamon on top for color. A mint leaf can add freshness.
Common Mistakes to Avoid
– How to Prevent Dryness: Make sure to use enough zucchini. If it’s dry, your bread will be dry. Adding a bit more oil can help keep it moist.
– Not Preparing the Loaf Pan Properly: Greasing the pan is a must. You can also use parchment paper to help lift the bread out easily. This way, your loaf stays intact.
Variations
Ingredient Substitutions
You can easily change some ingredients in this zucchini bread. If you need a gluten-free option, try using almond flour or a gluten-free mix. Both work well and keep the bread tasty.
For sugar, consider using honey, maple syrup, or coconut sugar. Each adds a unique flavor. Just remember, these alternatives might change the texture a bit. Adjust your liquid ingredients if needed.
Flavor Variations
Want to spice things up? Adding ground nutmeg or ginger gives a warm flavor to your bread. Just a pinch can make a big difference.
You can also mix in dried fruits like raisins or cranberries. Shredded coconut adds a fun texture too. Get creative and try what you love!
Serving Variations
You can serve this zucchini bread as muffins or in mini loaves. Muffins are great for a quick snack. Mini loaves make perfect gifts or party treats.
Both options bake faster than a full loaf. Just adjust the bake time to about 20-25 minutes for muffins or mini loaves. Enjoy your delicious creations!
Storage Info
Short-term Storage
To store zucchini bread at room temperature, wrap it tightly in plastic wrap or foil. This keeps it moist and fresh. Place it in a cool, dry spot away from sunlight. It will stay good for about 2-3 days.
For refrigeration, put the bread in an airtight container. This helps it last longer, up to a week. Just remember to let it warm up a bit before eating. It tastes best when it’s slightly warm.
Long-term Storage
If you want to save zucchini bread for later, freezing is a great option. Wrap the cooled loaf tightly in plastic wrap, then place it in a freezer bag. Remove as much air as possible. This will protect it from freezer burn. It can last up to 3 months in the freezer.
When you’re ready to eat it, thaw the bread in the fridge overnight or at room temperature for a few hours. To reheat, slice the bread and warm it in the oven at 350°F for about 10 minutes. This helps restore its soft texture.
Shelf Life
Zucchini bread lasts about 2-3 days at room temperature. In the fridge, it can last up to a week.
Look for signs of spoilage like mold, an off smell, or dry texture. If any of these appear, it’s best to toss the bread. Enjoy your Classic Zucchini Bread Delight fresh and delicious!
FAQs
How to make zucchini bread moist?
To keep zucchini bread moist, use fresh zucchini. Grate it and squeeze out excess water. This helps hold moisture in the bread. Adding oil also keeps it soft. Another trick is to avoid overbaking. Check your bread early to prevent dryness.
Zucchini plays a big role in moisture. It has a high water content, which keeps the bread tender. The more zucchini you use, the more moisture you get. Just remember to grate it finely for even distribution.
Can I make zucchini bread without eggs?
Yes, you can make zucchini bread without eggs. Use substitutes like unsweetened applesauce or mashed bananas. Each substitute gives a different flavor. For every egg, replace it with 1/4 cup of applesauce.
Another option is to use flaxseed meal. Mix one tablespoon of flaxseed with three tablespoons of water. Let it sit for a few minutes. This creates a gel-like mixture perfect for baking.
What to do with leftover zucchini bread?
You can enjoy leftover zucchini bread in many ways. Slice it and toast it for breakfast. Spread cream cheese or butter on top. You can also turn it into French toast. Just dip the slices in an egg mixture and cook them.
If you want to repurpose it, try making a bread pudding. Simply tear the bread into pieces, mix with eggs, milk, and spices, and bake. This gives new life to your leftover zucchini bread!
You learned about fresh ingredients and easy steps to bake zucchini bread. Mastering this recipe brings joy with every bite. I shared tips to enhance flavor and avoid common mistakes. Don’t forget variations and storage info for long-lasting enjoyment. Zucchini bread is not just tasty; it’s a versatile treat. Now, go on and create your own delicious version!


![- 1 pound boneless, skinless chicken thighs, cut into 1-inch cubes - 1/4 cup soy sauce - 1/4 cup honey - 2 tablespoons rice vinegar - 1 tablespoon sesame oil - 2 cloves garlic, finely minced - 1 teaspoon fresh ginger, grated - 1 red bell pepper, cut into 1-inch squares - 1 yellow bell pepper, cut into 1-inch squares - 1 zucchini, sliced into thick rounds The main ingredients are key to a great teriyaki dish. Chicken thighs are juicy and flavorful. The soy sauce and honey create a sweet and salty marinade. Rice vinegar adds a slight tang. Garlic and ginger bring warmth and depth to the flavor. The colorful veggies add crunch and a fresh touch. - 1 teaspoon cornstarch mixed with 1 tablespoon cold water (optional, for thickening the sauce) - Sesame seeds, for garnish - Fresh cilantro, for garnish Cornstarch helps thicken the teriyaki sauce. This makes it stick better to the chicken. Sesame seeds and cilantro are perfect for garnishing. They add a nice look and extra flavor. - Bamboo skewers (soaked in water for at least 30 minutes) - Grill or grill pan You need skewers to hold the chicken and veggies. Soaking them in water prevents burning. A grill or grill pan cooks the skewers evenly. It gives the chicken those beautiful grill marks. For the full recipe and more tips, check out the Full Recipe section. To start, we need to mix the marinade. In a medium bowl, combine the soy sauce, honey, rice vinegar, sesame oil, minced garlic, and grated ginger. Whisk these ingredients together until they blend well. This mixture is key to our teriyaki chicken skewers. Marinating is very important. It lets the chicken soak up all the nice flavors. Aim for at least 30 minutes. For the best taste, try to marinate for 1 to 2 hours. This makes a big difference in flavor. Now, it’s time to thread the chicken and veggies onto the skewers. First, take your soaked bamboo skewers and start with a piece of chicken. Then, add a square of red bell pepper, followed by a piece of yellow pepper. Next, add a thick slice of zucchini. Repeat this pattern. This colorful arrangement is not just tasty; it looks great too! Make sure the pieces fit snugly but not so tightly that they can't cook well. A nice visual appeal will impress everyone at the table. When it’s time to cook, we can grill the skewers. Preheat your grill or grill pan to medium-high heat. Place the skewers on the grill and cook them for about 10 to 12 minutes. Turn them occasionally for even cooking. If you prefer, you can also bake or broil the skewers. Just adjust the cooking time. Cook until the chicken is fully done and has lovely grill marks. For added flavor, brush the skewers with the thickened teriyaki sauce while they cook. Check the Full Recipe for more details on each step! To make a great teriyaki marinade, you need balance. Start with soy sauce for saltiness. Add honey for sweetness. Rice vinegar brings in acidity, which brightens the flavors. Garlic and ginger give depth. Ensure you mix these well. A good marinade coats the chicken evenly. For extra flavor, let the chicken sit in the marinade for longer. Aim for 1 to 2 hours for the best taste. If you want more richness, try adding a splash of orange juice. This will enhance the flavor profile. Grilling your skewers right is key. First, preheat your grill to medium-high heat. This helps get those beautiful grill marks. Place the skewers on the grill and leave them alone for a few minutes. Avoid moving them too much; let them sear. Flip them only once or twice. If you brush them with the thickened sauce, it adds a nice glaze. Keep an eye on the time; cook them for about 10-12 minutes. Common mistakes include overcrowding the grill. Give each skewer space so they cook evenly. Also, don’t skip the resting time after grilling; it helps the juices redistribute. When serving, presentation matters. Lay the skewers on a big platter. Drizzle with any leftover teriyaki sauce for extra flavor. Sprinkle sesame seeds and chopped cilantro on top. It adds color and looks inviting. For side dishes, think simple. Steamed rice or a fresh salad pairs well. You could also serve grilled veggies for a complete meal. These combinations elevate your dish and make for a delicious feast. Remember, the Full Recipe will guide you through the process! {{image_4}} You can swap chicken for other proteins like beef or tofu. Beef gives a rich, hearty taste. Tofu offers a plant-based option that absorbs flavors well. Adjust cooking times depending on what you use. Beef may need longer than chicken, while tofu cooks quicker. Always check for doneness to keep your meal safe. Feel free to include seasonal vegetables. Bell peppers, zucchini, and onions add color and crunch. Try mushrooms or cherry tomatoes for even more variety. These colorful additions not only taste great but also make your dish visually appealing. Mixing different veggies can create a vibrant plate that excites the eyes. You can use store-bought teriyaki sauce for speed. Homemade sauce allows you to control flavors better. If you want a kick, try adding chili flakes for spice. For a sweeter twist, mix in some pineapple juice. These variations help you customize the sauce to fit your taste. Check the [Full Recipe] for details on how to make your own sauce! After enjoying your teriyaki chicken skewers, you may have some leftovers. It’s best to store them right away. Place the skewers in an airtight container. This keeps them fresh and prevents odors. You can refrigerate them for up to four days. For longer storage, wrap them tightly in plastic wrap and place them in a freezer bag. You can freeze them for up to three months. Just remember to label the bag with the date. When it’s time to enjoy leftovers, reheating correctly matters. You want to keep the chicken moist. The oven works best for this. Preheat it to 350°F (175°C). Place the skewers on a baking sheet and cover them with foil. Heat for about 10-15 minutes until warm. The microwave is quicker but can dry out the chicken. If you use it, heat in short bursts of 30 seconds. Check often to avoid overcooking. Leftover teriyaki chicken skewers can last up to four days in the fridge. If frozen, they remain safe for three months. Always check for signs of spoilage before eating. If the chicken smells bad or looks off, don’t eat it. Look for a change in color or texture too. When in doubt, throw it out. Enjoying your teriyaki chicken skewers fresh is the best way to experience their flavor. For the full recipe, refer to the earlier sections. The best chicken for skewers is thighs. They stay juicy and tender when cooked. Breasts can dry out quickly. They have less fat, which makes them less forgiving. Thighs are more flavorful and can handle marinating well. Yes, you can make teriyaki chicken skewers in advance. Marinate the chicken for at least 30 minutes. For the best taste, marinate for 1 to 2 hours. You can even marinate them overnight. Cook them right before serving for the best results. You can serve teriyaki chicken skewers with many tasty sides. Rice, like jasmine or brown rice, pairs well. You can also offer stir-fried veggies for crunch. A fresh salad with sesame dressing adds a nice touch. Consider serving with grilled pineapple for a sweet twist. Explore these options to find what you love! This article covered making delicious teriyaki chicken skewers. We explored key ingredients like chicken, marinade, and vegetables. You learned how to prepare the marinade, assemble skewers, and cook on the grill. We also shared tips for flavor, grilling techniques, and serving ideas. You can mix in different proteins or vegetables and make it your own. Remember to store any leftovers properly to enjoy later. Now, get ready to impress with your new skewering skills!](https://fastmealmate.com/wp-content/uploads/2025/06/9b1dc869-68dc-4727-be9c-b0e6615ca1ac-768x768.webp)