Lemon Grilled Salmon Fresh and Flavorful Delight
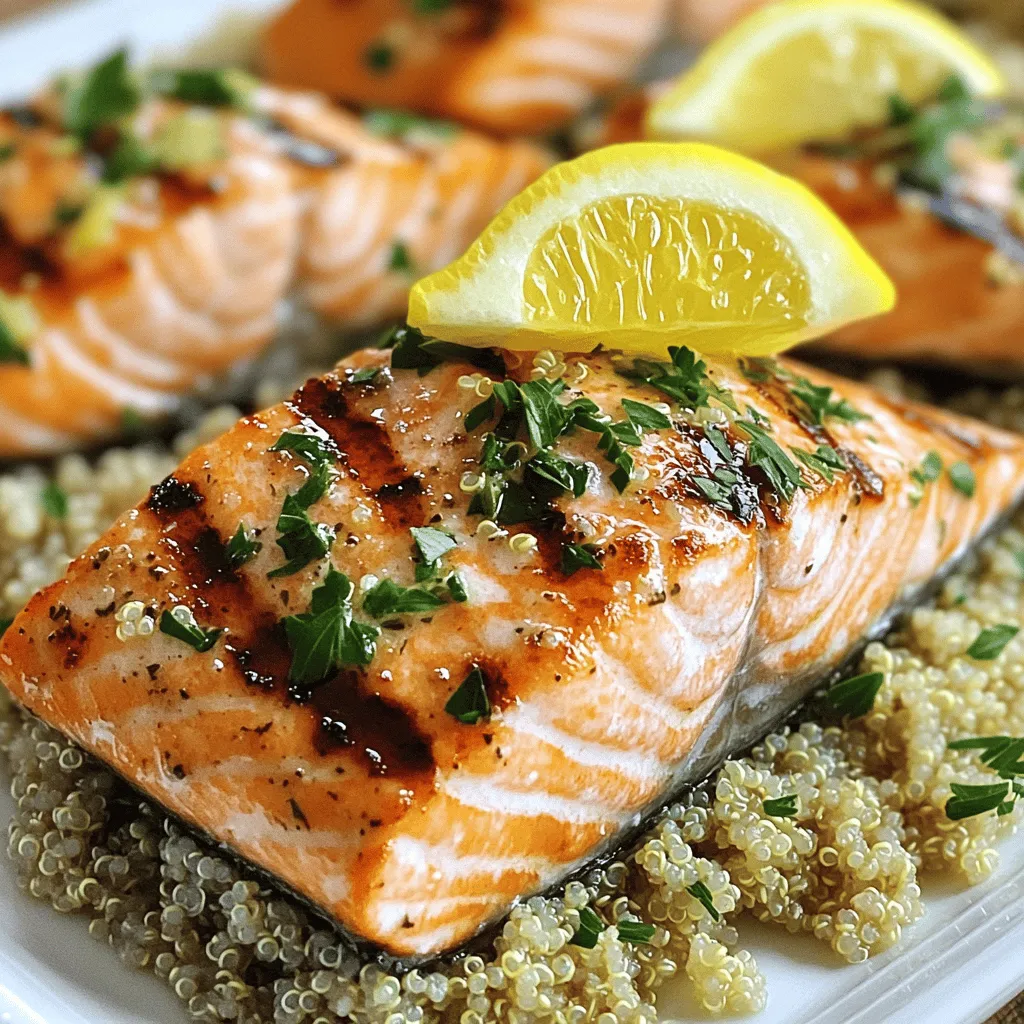
Are you ready to elevate your dinner game? In this guide, I’ll show you how to make Lemon Grilled Salmon, a fresh and flavorful delight that everyone will love. With simple ingredients like juicy salmon fillets and zesty lemon, your taste buds will thank you. Plus, I’ll share tips for cooking perfect herbed quinoa and ways to enhance this dish. Let’s dive in and get grilling!
Ingredients
Main Ingredients for Lemon Grilled Salmon
– 4 salmon fillets (approximately 6 ounces each)
– 2 tablespoons extra virgin olive oil
– Zest and juice of 2 fresh lemons
– 2 cloves garlic, finely minced
– Sea salt and freshly cracked black pepper to taste
– 1 teaspoon dried oregano
– 1 teaspoon dried thyme
Herbed Quinoa Ingredients
– 1 cup quinoa, thoroughly rinsed
– 2 cups vegetable broth or water
– 1 tablespoon extra virgin olive oil
– 1 tablespoon fresh lemon juice
– 1/4 cup fresh parsley, finely chopped
– Sea salt and freshly cracked black pepper to taste
Gather these ingredients to make your lemon grilled salmon and herbed quinoa. You will love the fresh taste. The lemon gives the salmon a bright and zesty flavor. The quinoa adds a nice texture and nutty taste. This combination makes for a complete meal.
Step-by-Step Instructions
How to Marinate the Salmon
To start, you need to make the marinade. Gather these ingredients:
– 2 tablespoons extra virgin olive oil
– Zest and juice of 2 fresh lemons
– 2 cloves garlic, finely minced
– Sea salt and freshly cracked black pepper to taste
– 1 teaspoon dried oregano
– 1 teaspoon dried thyme
In a small bowl, mix the olive oil, lemon zest, lemon juice, minced garlic, oregano, thyme, salt, and pepper. Whisk it well until combined.
Now, take your salmon fillets and place them in a shallow dish. Pour the marinade over the salmon. Make sure each fillet gets well-covered. Cover the dish with plastic wrap and put it in the fridge. Let it marinate for at least 30 minutes. This step adds so much flavor to the fish.
Cooking Herbed Quinoa
While the salmon marinates, it’s time to cook the herbed quinoa. You will need:
– 1 cup quinoa, thoroughly rinsed
– 2 cups vegetable broth or water
– 1 tablespoon extra virgin olive oil
– 1 tablespoon fresh lemon juice
– 1/4 cup fresh parsley, finely chopped
– Sea salt and freshly cracked black pepper to taste
First, bring the vegetable broth or water to a boil in a medium saucepan. Add a sprinkle of salt. Once boiling, add the rinsed quinoa.
Lower the heat, cover the pot, and let it simmer for about 15 minutes. When the quinoa is fluffy and all the liquid is gone, it’s done! Remove it from heat. Fluff the quinoa with a fork. Stir in the olive oil, lemon juice, parsley, and more salt and pepper to taste.
Grilling the Salmon
Now, it’s time to grill the salmon. Preheat your grill to medium-high heat. Take the salmon out of the fridge. Let any excess marinade drip off.
Place the fillets on the grill, skin-side down. Grill for about 5 to 7 minutes on each side. Turn the salmon only once. It’s done when it flakes easily with a fork.
Plating Suggestions
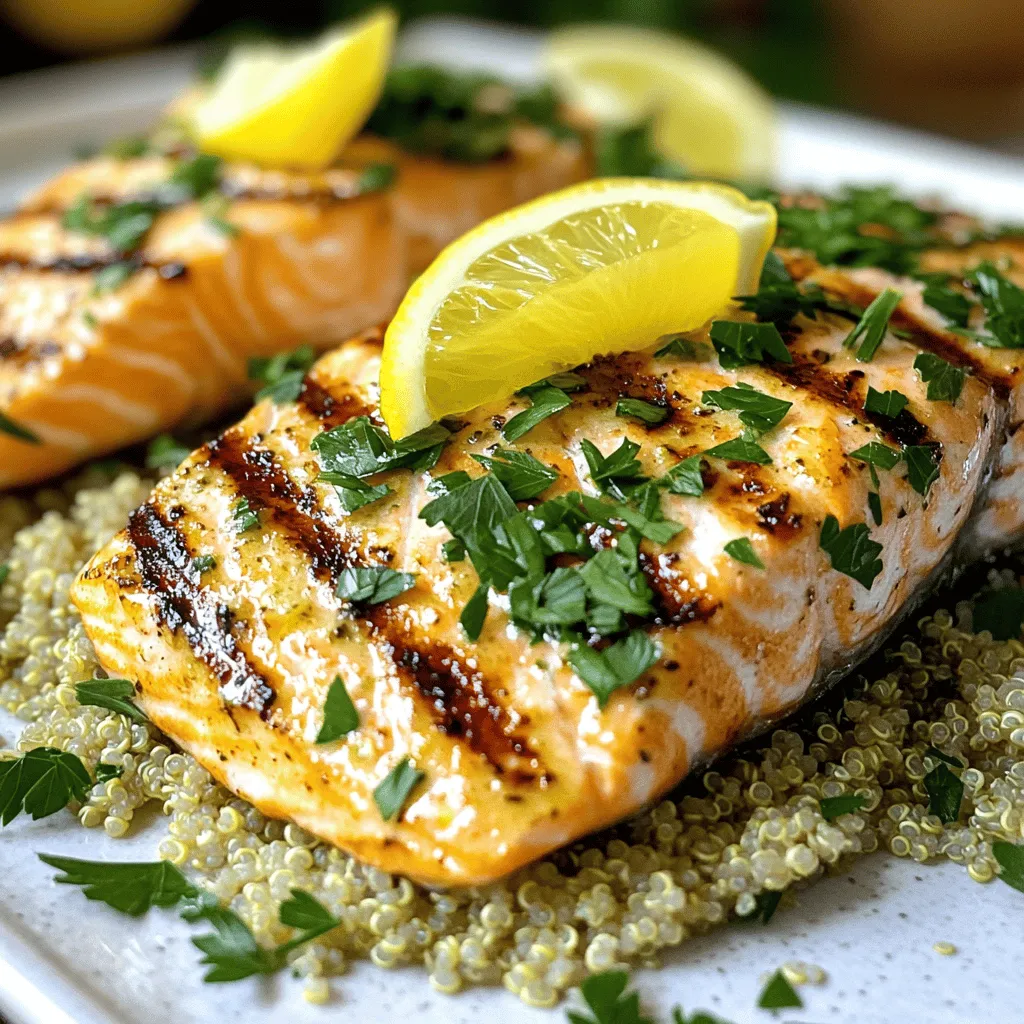
When your salmon is ready, it’s time to plate. Start by creating a mound of herbed quinoa on each plate. Gently place a grilled salmon fillet on top of the quinoa.
For a nice touch, garnish with fresh parsley sprigs. You can also add a lemon wedge on the side. This gives an extra burst of citrus flavor. Enjoy this fresh and flavorful dish!
Tips & Tricks
Best Practices for Grilling Salmon
– Ideal grill temperature: Set your grill to medium-high heat. This ensures that the salmon cooks evenly. A good temperature is around 375°F to 400°F.
– Checking for doneness: To know if salmon is ready, look for its color. It should change from bright pink to a lighter, opaque shade. You can also use a fork to gently poke the fish. If it flakes easily, it’s done.
Enhancing Flavor Profiles
– Additional herbs and spices: You can mix in fresh dill or cilantro for extra flavor. A bit of smoked paprika adds a nice twist as well.
– Citrus alternatives: While lemon is fantastic, try lime or orange for a different taste. These fruits add a fresh zing to the dish.
Prep and Cook-time Saving Tips
– Make-ahead options: You can marinate the salmon a day in advance. This helps deepen the flavors and saves time on cooking day.
– Efficient kitchen techniques: Use a rice cooker for the quinoa. It frees up your stove and helps you focus on grilling the salmon perfectly.
Variations
Alternative Protein Options
You can swap salmon with other fish. Try trout or halibut. These fish taste great with lemon. They grill well and cook similar to salmon. For a vegetarian twist, use tofu or tempeh. Marinate them just like the salmon for rich flavor.
Flavor Profile Tweaks
Want to spice things up? Add chili flakes to your marinade. This gives a nice kick to the dish. You can also change herbs. Use dill or basil instead of oregano and thyme. Each herb brings a unique taste that complements the lemon well.
Serving Style Variations
Pair your lemon grilled salmon with many side dishes. Roasted veggies or a fresh green salad are great choices. You can also create a salad version. Flake the grilled salmon over mixed greens. Add a lemon vinaigrette for a tasty meal.
Storage Info
Storing Leftovers
To keep your lemon grilled salmon fresh, store it properly. Place the leftover salmon in an airtight container. Refrigerate it right away. This keeps the fish safe to eat for up to three days.
If you want to store it for longer, freezing is a great option. Wrap each salmon fillet in plastic wrap. Then, place them in a freezer bag. This way, they can last for up to three months.
Reheating Tips
When it’s time to enjoy your leftovers, reheating is key. You can use several methods to reheat grilled salmon. The oven works well for even heating. Preheat your oven to 275°F (135°C). Place the salmon on a baking sheet and heat for about 15 minutes.
You can also use a microwave. Place the salmon on a plate and cover it with a damp paper towel. Heat it in short bursts of 30 seconds. Check to see if it is warm enough.
For the herbed quinoa, you can reheat it in a pan or microwave. Add a splash of water or broth to keep it moist. Heat it until it’s warm, stirring often. Enjoy your delicious meal again!
FAQs
What is the best way to know when salmon is done?
To check if salmon is done, use a meat thermometer. The safe internal temperature for salmon is 145°F. You can also check for visual cues. When salmon flakes easily with a fork, it is ready. Look for a firm texture and a light pink color inside. If it is still translucent, it needs more time.
Can I marinate salmon overnight?
Yes, you can marinate salmon overnight. This longer marination adds more flavor. The acid in the lemon juice helps to tenderize the fish. Just be careful not to marinate for too long, as it can make the fish mushy. A good practice is to marinate for 30 minutes to 2 hours for the best taste and texture.
What sides go well with lemon grilled salmon?
Lemon grilled salmon pairs well with many sides. Try herbed quinoa, which complements the salmon’s flavor. You can also serve it with roasted vegetables, like asparagus or zucchini. For a fresh touch, a simple salad works great too. Pair your meal with a chilled white wine, like Sauvignon Blanc, for a refreshing drink.
In summary, we explored making lemon grilled salmon and herbed quinoa. You learned about key ingredients, marinating techniques, and cooking methods. I shared tips for grilling and crafting delicious variations.
Final thoughts: This meal is healthy, bright, and full of flavor. Try it today for an easy, satisfying dinner. Enjoy the many ways to make it your own!

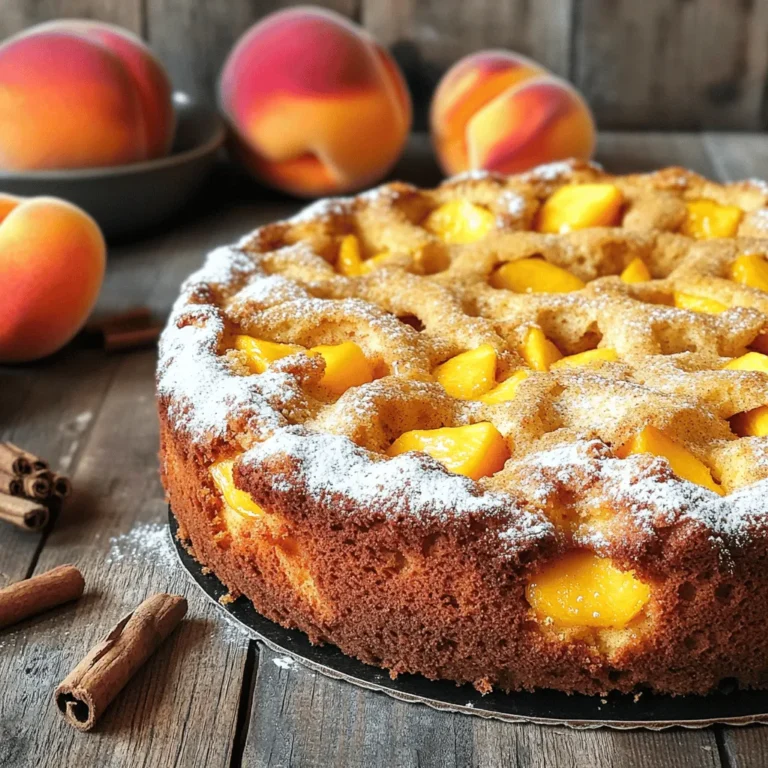
![- 4 ripe peaches, sliced into wedges - 1 cup granulated sugar, divided - 1 teaspoon pure vanilla extract - 1 teaspoon ground cinnamon - 1 cup all-purpose flour - 1 tablespoon baking powder - 1/2 teaspoon sea salt - 1 cup whole milk - 1/2 cup unsalted butter, melted and slightly cooled - 1 teaspoon freshly squeezed lemon juice - Optional: Creamy vanilla ice cream for serving You need four ripe peaches for the base. They should be juicy for the best taste. Use one cup of granulated sugar, split in half. One half will sweeten the peaches, and the other half will go into the batter. You will also need one teaspoon each of pure vanilla extract and ground cinnamon for flavor. One cup of all-purpose flour and one tablespoon of baking powder will make the batter rise. Add half a teaspoon of sea salt to balance the sweetness. One cup of whole milk helps create a smooth batter. Lastly, you need half a cup of unsalted butter, melted, and one teaspoon of freshly squeezed lemon juice to brighten the flavor. You can make this dish even better by adding creamy vanilla ice cream when you serve it. The cold ice cream pairs well with the warm cobbler. If you want extra flavor, consider adding a pinch of nutmeg or using brown sugar instead of granulated sugar. These choices can add depth to your peach cobbler. Use the full recipe to explore all the possibilities! Start by gathering 4 ripe peaches. Slice them into wedges. Place the sliced peaches in a large mixing bowl. Add 1/2 cup of granulated sugar to the peaches. Pour in 1 teaspoon of pure vanilla extract. Sprinkle 1 teaspoon of ground cinnamon over the peaches. Squeeze in 1 teaspoon of freshly squeezed lemon juice. Gently toss the peaches until they are well-coated. Set this bowl aside for about 10 minutes. This waiting time allows the peaches to macerate and release their juices. In another bowl, add 1 cup of all-purpose flour. Measure 1 tablespoon of baking powder and add it to the flour. Next, sprinkle in 1/2 teaspoon of sea salt. Finally, add the remaining 1/2 cup of granulated sugar. Whisk these dry ingredients together until they are mixed well. This step ensures even flavor throughout the cobbler. Now, it’s time to mix the wet and dry ingredients. Gradually pour in 1 cup of whole milk into the dry mix. Stir gently until the batter is just combined. Be careful not to overmix; lumps are okay! Next, add 1/2 cup of melted and slightly cooled unsalted butter. Mix until the batter is smooth and free of lumps. Once done, pour the batter into a greased 9x13 inch baking dish. Spread it evenly across the bottom. Then, take your peach mixture and spoon it over the batter carefully. Do not stir. The peaches will sink while baking. Now you’re ready to bake your Easy Peach Cobbler. Check the [Full Recipe] for baking time and tips. To make the best peach cobbler, use ripe peaches. They should be soft to touch. Slice them evenly for a nice look. Mixing in sugar and cinnamon enhances the sweetness and flavor. Letting peaches sit for ten minutes helps them release juices. This makes the filling juicy and tasty. One mistake is overmixing the batter. This can make your cobbler tough. Another common issue is using unripe peaches. They won't have the same flavor. Don’t stir the peach mixture into the batter. This can ruin the layered look. Also, avoid opening the oven door too often. It can cause uneven baking. Always preheat your oven for even cooking. Use a greased baking dish to prevent sticking. Bake until the top is golden brown, checking with a toothpick. Let it cool for ten minutes before serving. This helps the flavors settle. For a treat, top with creamy vanilla ice cream. It adds a rich taste that pairs well with the cobbler. For the full recipe, check the previous sections. {{image_4}} You can swap peaches for other fruits. Try using fresh plums, cherries, or even berries. Each fruit brings its own taste. For example, blueberries add a sweet burst of flavor. Raspberries can give a nice tartness. The method stays the same; just change the fruit. This keeps your dessert fresh and fun! You can make this cobbler gluten-free easily. Just switch out the all-purpose flour for a gluten-free blend. Many brands offer great options that work well in baking. Check the mix for a good rise. You can also use almond flour for a nutty taste. The cobbler will still be delicious and warm. Toppings can make your cobbler even better. Consider adding a sprinkle of oats on top for crunch. You can also mix in nuts like pecans for added flavor. Drizzling honey over your serving can add a sweet touch. Want a dessert with flair? Top your cobbler with whipped cream or ice cream for a special treat. Each topping can change the whole experience! For the full recipe, check out the Peachy Dream Cobbler. To store leftover peach cobbler, let it cool completely. Once cooled, cover the dish tightly with plastic wrap or aluminum foil. You can also transfer it to an airtight container. This will keep it fresh for up to three days in the fridge. When you want to enjoy your cobbler again, preheat your oven to 350°F (175°C). Place the cobbler in an oven-safe dish. Cover it with foil to keep it moist. Heat for about 15-20 minutes, until it’s warm. You can also microwave it for about 30 seconds, but the oven gives a better texture. If you want to freeze peach cobbler, wrap it tightly in plastic wrap. Then, place it in a freezer bag. It can last up to three months in the freezer. To thaw, move it to the fridge overnight. Reheat it in the oven for the best taste. You can also bake it straight from frozen; just add a few extra minutes to the cooking time. Enjoy your peach cobbler again with these easy storage tips! The best peaches for cobbler are freestone peaches. They are sweet and juicy. Their flesh comes off the pit easily, making slicing simple. Yellow peaches work well too. They have a nice balance of sweet and tart flavors. For a unique twist, try ripe white peaches. They are sweeter and less acidic. Yes, you can prep your peach cobbler ahead. Prepare the peach filling and batter separately. Store each in the fridge for up to a day. When ready to bake, combine them and follow the baking steps. If you want to bake it later, just keep it covered. No, peeling peaches is not necessary. The skin adds texture and flavor. Many people enjoy the rustic look. If you prefer a smoother texture, you can peel them. It’s really up to your taste. To achieve a crispier crust, try these tips: - Use cold butter in the batter. - Don’t overmix the batter; lumps are fine. - Bake the cobbler in a preheated oven. - For extra crunch, sprinkle a little sugar on top before baking. You can serve Easy Peach Cobbler with: - Creamy vanilla ice cream - Fresh whipped cream - A drizzle of caramel sauce - A sprinkle of nuts for crunch Each option adds a new layer of flavor to your dessert! Enjoy it warm for the best taste. For the full recipe, check out the details above. In this blog post, we explored how to make an easy peach cobbler. We covered key ingredients, step-by-step prep, and helpful tips for success. We also discussed fun variations and smart storage methods. As you bake your cobbler, remember that fresh peaches shine. Enjoy personalizing your dish with other fruits too. Making peach cobbler can be fun and tasty. With practice, you’ll master this classic dessert.](https://fastmealmate.com/wp-content/uploads/2025/06/359a1da5-912a-4431-92dc-d72eb97db899-768x768.webp)


![To make Minute Cajun Shrimp and Corn Chowder, you need some key ingredients: - 1 lb large shrimp, peeled and deveined - 2 cups corn kernels (fresh or frozen) - 1 medium onion, diced - 2 cloves garlic, minced - 1 red bell pepper, diced - 2 medium potatoes, peeled and diced These ingredients form the base of your chowder. The shrimp give it a nice protein punch. The corn adds sweetness, while the onion and garlic bring out savory flavors. Next, we need our liquids to make this chowder rich and tasty: - 4 cups chicken or vegetable broth - 1 cup coconut milk The broth adds depth, while coconut milk gives creaminess. You can use chicken broth for a richer taste, or vegetable broth if you want a lighter option. Now, let's spice things up! - 2 tablespoons Cajun seasoning - 1 teaspoon smoked paprika - Salt and fresh cracked pepper to taste - 2 tablespoons olive oil - Fresh parsley, chopped (for garnish) Cajun seasoning brings the heat and flavor. Smoked paprika adds a nice touch, giving a warm, smoky flavor. Salt and pepper are essential for balance. Olive oil helps to sauté the veggies, and parsley makes it pretty. For the full recipe, check out [Full Recipe]. 1. Heat 2 tablespoons of olive oil in a large pot over medium heat. 2. Once the oil shimmers, add 1 diced onion, 2 minced garlic cloves, and 1 diced red bell pepper. 3. Sauté these ingredients for about 4-5 minutes until the onions are soft and fragrant. 4. Next, add 2 diced potatoes to the pot. Cook for another 5 minutes, stirring often. 1. Sprinkle in 2 tablespoons of Cajun seasoning and 1 teaspoon of smoked paprika. 2. Stir well to coat the vegetables with the spices. 3. Pour in 4 cups of chicken or vegetable broth and bring the mixture to a gentle simmer. 4. Cook for 10-15 minutes until the potatoes are fork-tender. 1. Add 2 cups of corn and 1 pound of peeled shrimp to the pot. 2. Gradually stir in 1 cup of coconut milk until blended. 3. Cook for an additional 5 minutes until the shrimp turn pink and opaque. 4. Taste the chowder and adjust the seasoning with salt and fresh cracked pepper as needed. 5. Let it rest for a few minutes to thicken before serving. This process ensures you create a delicious and comforting chowder that captures the essence of Cajun cooking. For the full recipe, check the earlier section. For this chowder, I recommend sautéing the vegetables rather than boiling them. Sautéing brings out the sweet flavors in the onion and red bell pepper. Use medium heat and keep an eye on them. Avoid letting them brown too much, as this can change the taste. To avoid overcooking the shrimp, add them near the end of cooking. They only need about five minutes to cook through. When they turn pink and opaque, they are done. Remove them from the heat right away to keep them tender. To boost the taste, consider adding a pinch of cayenne pepper or paprika. Both will add depth without overwhelming the dish. Fresh herbs like thyme or cilantro can also brighten the chowder. If you want a different creamy texture, you can swap coconut milk for heavy cream or even Greek yogurt. Each option adds richness while changing the flavor slightly. Serve the chowder in deep bowls for a cozy feel. A sprinkle of fresh parsley on top adds color and freshness. You could also add a dash of extra Cajun seasoning for a nice touch. Pair your chowder with crusty bread or cornbread. Both make great sides for dipping. They also complement the rich flavors of the chowder. For a refreshing twist, serve with a light salad on the side. {{image_4}} You can easily make this chowder fit your diet. - Gluten-free options: Use gluten-free broth and check labels on your seasonings. They should not have gluten. - Dairy alternatives: Swap coconut milk with almond milk or oat milk. This keeps it creamy without dairy. Feeling creative? Here are some fun swaps. - Other seafood options: You can use crab or lobster instead of shrimp. Both add a rich flavor. - Additional vegetables to include: Try adding diced carrots or celery. They add crunch and more flavor. Adjusting the flavors can make this dish your own. - Changing the spice level: If you like it mild, use less Cajun seasoning. For a spicy kick, add more! - Using different types of broth for variations: Chicken broth gives a warm taste, but vegetable broth offers a lighter flavor. Try both to see which you prefer. For the full recipe, refer to the original instructions to get started! To store leftovers, let the chowder cool first. Pour it into an airtight container. This keeps it fresh longer. I recommend using glass or BPA-free plastic containers. They seal well and do not absorb odors. If you want to freeze the chowder, follow these steps: 1. Cool the chowder completely. 2. Divide it into portions in freezer-safe bags or containers. 3. Remove as much air as possible before sealing. For reheating frozen chowder, thaw it in the fridge overnight. Heat it gently on the stove over low heat. Stir often to prevent sticking. In the fridge, you can keep the chowder for about 3 to 4 days. If you freeze it, it lasts for up to 3 months. Always check for freshness before eating. Making Minute Cajun shrimp and corn chowder takes just 30 minutes. You spend about 10 minutes prepping the ingredients. Then, you cook everything for 20 minutes. It's a quick meal for busy days. Yes, you can use frozen shrimp. Just make sure to thaw them first. Frozen shrimp are often easier to find and save time. They cook just as well in the chowder. If you don't have Cajun seasoning, you can use a mix of spices. Try paprika, cayenne pepper, garlic powder, and onion powder. You can also make a simple blend at home. This helps you customize the flavors to your taste. For a milder chowder, reduce the cayenne pepper. This blog post shared a simple recipe for Cajun shrimp and corn chowder. You learned about the main ingredients, broths, and seasonings that bring flavor. I also outlined step-by-step instructions for perfect results. Helpful tips and dietary variations enhance your chowder experience. In the end, this chowder is flexible and easy to make. Enjoy experimenting with flavors and ingredients your way. Make it your own, and savor every bite.](https://fastmealmate.com/wp-content/uploads/2025/07/c6449679-e116-43ab-bcba-93cf12d2671e-768x768.webp)