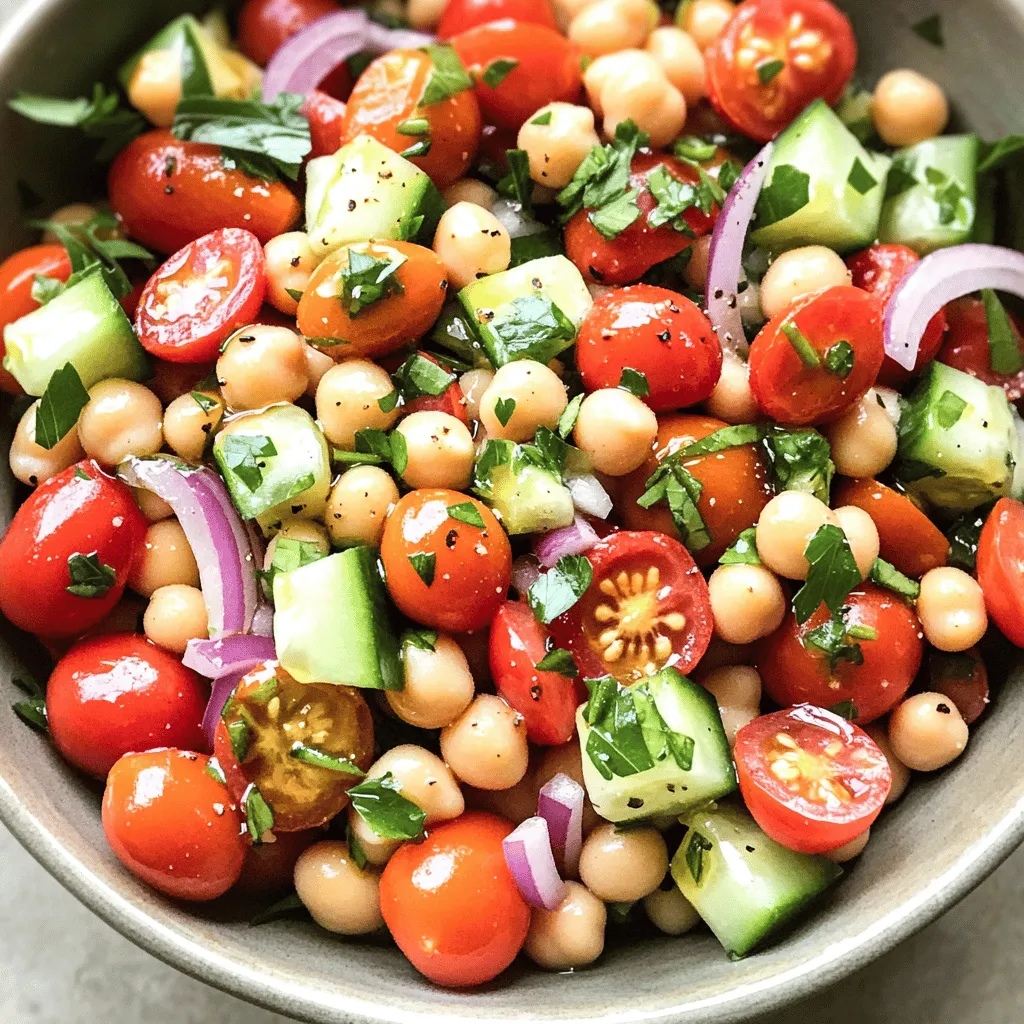
Tomato and Herby Bean Salad Fresh and Flavorful Dish
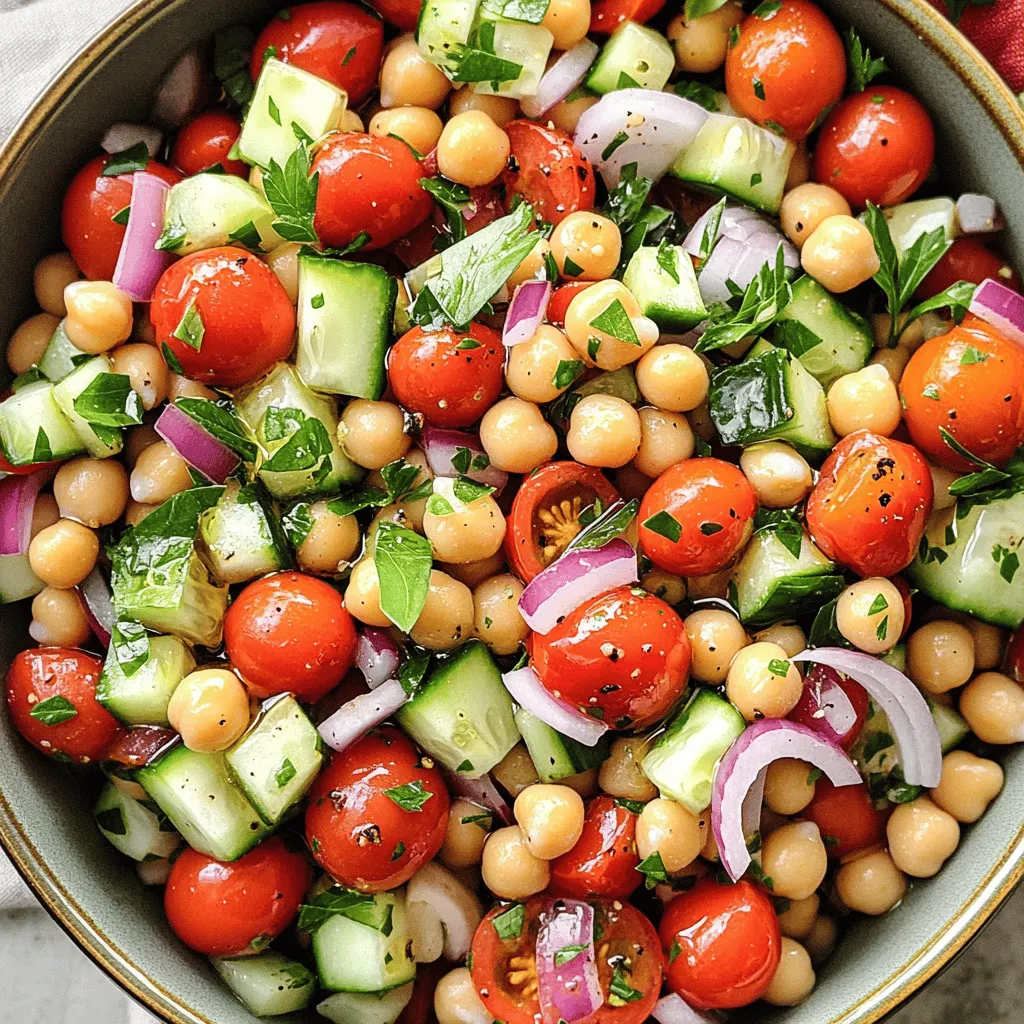
Looking for a dish that bursts with flavor and freshness? You’ve found it! My Tomato and Herby Bean Salad is perfect for any meal or gathering. With vibrant ingredients like cherry tomatoes, chickpeas, and fresh herbs, this salad is packed with nutrients and taste. Whether you’re a seasoned chef or a kitchen novice, you’ll love how easy it is to whip up this delightful dish. Let’s dive into the ingredients that make it shine!
Ingredients
Essential Ingredients
– 1 can (15 oz) chickpeas, thoroughly drained and rinsed
– 1 can (15 oz) cannellini beans, thoroughly drained and rinsed
– 2 cups cherry tomatoes, halved lengthwise
– 1 small red onion, finely diced
– 1 cucumber, peeled and diced into small cubes
– 1/2 cup fresh parsley, finely chopped
– 1/4 cup fresh basil, finely chopped
– 3 tablespoons extra virgin olive oil
– 2 tablespoons balsamic vinegar
– 1 clove garlic, minced into a paste
– Salt and freshly ground black pepper to taste
Optional Add-Ins
– Crumbled feta cheese
– Avocado slices
– Bell peppers for added crunch
When making a Tomato and Herby Bean Salad, the ingredients are key. Each item adds its own unique taste and texture. The chickpeas and cannellini beans are your main proteins. They make the salad hearty and filling. The cherry tomatoes bring a juicy burst of flavor. Their sweetness balances the other ingredients.
The red onion adds a nice sharpness, while the cucumber gives a fresh crunch. Fresh parsley and basil bring vibrant herbal notes that brighten every bite. The extra virgin olive oil and balsamic vinegar make a simple yet tasty dressing. Garlic enhances the flavor, adding depth.
Do not forget salt and pepper. They are vital for bringing all these flavors together. You can also customize your salad with optional add-ins. Crumbled feta adds creaminess, while avocado gives a rich texture. Bell peppers provide extra crunch and color.
This combination creates a beautiful and tasty dish.
Step-by-Step Instructions
Preparing the Base
– Add chickpeas and cannellini beans to a large mixing bowl.
– Incorporate halved cherry tomatoes, diced red onion, and cucumber.
I love starting with the base. The chickpeas and cannellini beans give this salad a great protein boost. They also add a nice creamy texture. Next, the cherry tomatoes bring in a burst of sweetness. The red onion adds a crisp bite, while the cucumber gives a refreshing crunch. Together, these ingredients make the perfect mix.
Making the Dressing
– Whisk together olive oil, balsamic vinegar, and minced garlic in a small bowl.
– Season the dressing with salt and pepper to taste.
Now, let’s make the dressing. I whisk together the olive oil, balsamic vinegar, and minced garlic until they blend smoothly. This dressing balances the salad with tang and richness. Don’t forget to taste it! A pinch of salt and a dash of pepper can elevate the flavors.
Combining Ingredients
– Drizzle the dressing over the bean and vegetable mixture.
– Gently fold in the chopped parsley and basil.
Once the dressing is ready, drizzle it over the beans and veggies. I like to fold everything together gently. This way, I avoid mashing the beans. The fresh parsley and basil add a herby brightness, which makes the salad even more inviting.
Final Touches
– Taste and adjust seasoning as needed.
– Let sit for 15 minutes at room temperature to enhance flavors.
After combining, I always taste the salad. If it needs more salt or pepper, I add it in. Then, I let it sit for about 15 minutes at room temperature. This resting time helps all the flavors come together beautifully.Enjoy your fresh and flavorful creation!
Tips & Tricks
Enhancing Flavor
– Letting the salad sit longer helps the flavors mix well.
– Fresh lemon juice adds a bright, zesty touch.
Presentation Tips
– Serve the salad in a large, shallow bowl for a beautiful display.
– Top with extra herbs or crumbled feta for a nice finish.
Preparation Tips
– Chop and prepare all ingredients ahead for quick assembly.
– Cut vegetables into similar sizes for a neat look.
Use these tips to elevate your Tomato and Herby Bean Salad.
Variations
Different Bean Options
You can switch up the beans in this salad. Replace chickpeas or cannellini beans with black beans or pinto beans. This change gives your salad a new taste and feel. If you want a homemade touch, try using dried beans. Just soak and cook them first for the best results.
Herb Alternatives
Herbs make this salad shine! You can try using cilantro or mint instead of parsley and basil. Each herb offers a unique flavor that can change the whole dish. If fresh herbs aren’t around, you can use dried herbs. Just use less, as dried herbs are stronger than fresh ones.
Dietary Substitutions
To make this salad vegan, simply skip the feta cheese. It still tastes great without it! If you need to avoid gluten, look for gluten-free vinegar options. This way, everyone can enjoy this fresh and tasty dish.
Storage Info
Best Practices for Storing
To keep your Tomato and Herby Bean Salad fresh, place it in an airtight container in the fridge. This helps lock in flavors and maintain crispness. It’s wise to store the dressing separately. This keeps the veggies crunchy and prevents sogginess.
Shelf Life
For the best taste, enjoy your salad within 2-3 days. The flavors will blend and deepen, making it taste even better. However, the veggies may lose their crunch over time, so eat it sooner rather than later.
Freezing Recommendations
Freezing this salad isn’t a good idea. Fresh ingredients change texture when frozen. Instead, you might freeze individual servings of beans. This way, you can add them to other meals later without losing quality.
FAQs
How can I make Tomato and Herby Bean Salad ahead of time?
You can make this salad ahead by preparing the salad and dressing separately. Store them in airtight containers. Mix them together just before serving. This keeps the salad fresh and flavorful.
Can I add protein to my salad?
Yes! You can easily add grilled chicken or tofu for extra protein. This addition makes the salad more filling and satisfying. You can also try adding boiled eggs or nuts for a different twist.
Is this salad suitable for meal prep?
Absolutely! This salad is perfect for meal prep. It stays fresh for days in the fridge. Just remember to store the dressing separately to keep the veggies crunchy.
What can I serve alongside this salad?
This salad pairs well with grilled meats like chicken or fish. It also works great as a side dish for any main meal. You can serve it with burgers, steaks, or even pasta dishes for a complete meal.
This blog outlined a fresh and tasty Tomato and Herby Bean Salad. It covered essential ingredients, preparation steps, and tips to enhance flavor. You can add your favorite proteins or herbs to customize it. Proper storage helps maintain its freshness. This salad is perfect for meal prep and pairs well with many dishes. Enjoy making it your own!
![- 8 oz chorizo sausage, casing removed and crumbled - 1 can (14 oz) diced tomatoes with green chilies - 4 cups chicken broth - Avocado slices - Fresh cilantro - 1 teaspoon ground cumin - 1 teaspoon smoked paprika - Salt and pepper to taste Gathering the right ingredients is key to making your soup flavorful. Chorizo sausage gives this dish its rich, spicy taste. I love using diced tomatoes with green chilies for added depth. Chicken broth serves as the base, making the soup hearty and satisfying. You can add avocado slices for creaminess and fresh cilantro for a bright flavor. These optional ingredients really elevate the dish. For spices, ground cumin and smoked paprika enhance the chorizo's flavor. Don’t forget to season with salt and pepper. Taste as you go to find the right balance. Check out the Full Recipe for all the detailed steps and tips! To start, I heat a large pot over medium heat. I add one tablespoon of olive oil and let it warm. Next, I add 8 ounces of crumbled chorizo. I cook it for about 5 to 7 minutes. The goal is to get it browned and crispy. Once it’s ready, I use a slotted spoon to move the chorizo to a plate. I leave the tasty fat in the pot for flavor. Now it's time for the veggies. I recommend using a medium onion, three cloves of minced garlic, and one diced bell pepper. I like to mix colors for fun. I add the onion, garlic, and bell pepper to the pot. I sauté them for about 5 minutes. I stir often until they become soft and fragrant. This step builds a great base for the soup. I now mix the cooked chorizo back into the pot. I add one can of diced tomatoes with green chilies, four cups of chicken broth, one can of drained black beans, and one cup of corn. I stir in one teaspoon each of ground cumin and smoked paprika. I mix everything well to combine. This step is key for flavor. Next, I bring the soup to a gentle boil. Once boiling, I reduce the heat to low. I let it simmer uncovered for about 15 to 20 minutes. I stir occasionally to keep it from sticking. Letting it simmer allows all the flavors to meld nicely. After simmering, I taste the soup. I adjust the seasoning with salt and pepper to my liking. This final step is important. It ensures that every bowl bursts with flavor right before serving. For a great presentation, I ladle the soup into bowls. I sprinkle fresh chopped cilantro on top. This adds color and freshness. I also like to serve warm crusty bread or tortilla chips on the side. It makes for a perfect dip! For extra creaminess, I add avocado slices on top for those who enjoy it. You can find the full recipe for this spicy delight above. To make your Spicy Chorizo Soup milder, remove the seeds from the bell pepper. You can also omit the diced tomatoes with green chilies. Instead, use plain diced tomatoes. If you want more heat, add sliced jalapeños or a dash of cayenne pepper. For spice reduction, try adding a dollop of sour cream or yogurt. This will cool down the heat and add creaminess. You can boost the soup’s flavor by adding herbs like fresh cilantro or parsley. A squeeze of lime juice at the end brightens the taste. You can also mix in spices like oregano or thyme. If you want more protein, consider adding cooked chicken or shrimp. For extra veggies, toss in some spinach or zucchini. These additions make the soup more colorful and nutritious. You can use a Dutch oven for even heat distribution. A slow cooker is great for making the soup in advance. Just let it simmer on low for hours. If you prefer a quicker method, an Instant Pot works wonders too. It cuts down on cooking time while still infusing flavors. For best results, let the soup sit for a bit. This allows the flavors to meld beautifully before serving. {{image_4}} You can make a tasty vegetarian version of this soup. Instead of chorizo, use a plant-based sausage or mushrooms. Both options add great flavor and texture. For added depth, mix in smoked paprika, chipotle powder, or even a dash of liquid smoke. These spices will give your soup that smoky taste without meat. Fresh herbs like cilantro or parsley can also enhance the flavors. If you want to change up the beans, you can use pinto beans or chickpeas. They both work well and add protein. For corn, fresh corn is the best, but frozen or canned works too. Seasonal veggies, like zucchini or bell peppers, can also add freshness. Just chop them and toss them in when cooking the onions. To make sure your soup is gluten-free, check all labels on your ingredients. Some broths may contain gluten. You can use gluten-free chicken broth instead. If your soup needs thickening, try using cornstarch or a gluten-free flour. This way, your soup stays hearty and delicious without any gluten. To keep your Spicy Chorizo Soup fresh, use airtight containers. Glass or plastic containers work well. Let the soup cool before sealing. Store it in the fridge for up to three days. After that, the flavors may fade. When it’s time to enjoy your soup again, reheat it gently. You can use the stove or microwave. If using the stove, heat it over medium heat, stirring often. For the microwave, heat in short bursts, stirring in between. If the soup thickens, add a splash of broth to loosen it up. To freeze the soup, let it cool completely first. Use freezer-safe containers or bags. Leave some room for expansion as it freezes. The soup can last up to three months in the freezer. When ready to eat, thaw it overnight in the fridge. Reheat on the stove or in the microwave, just like before. You can store Spicy Chorizo Soup in the fridge for about 3 to 4 days. Use an airtight container to keep it fresh. If you want to keep it longer, consider freezing it. In the freezer, it can last for about 2 to 3 months. Just remember to let it cool before you store it. Yes, you can prepare this soup a day or two ahead. To do this, make the soup as usual, then cool it down. Store it in the fridge in a sealed container. When you are ready to eat, just reheat it on the stove or in the microwave. This soup often tastes even better after the flavors have had time to meld. You can serve Spicy Chorizo Soup with warm crusty bread or tortilla chips. A side salad also pairs well. If you want something extra, try avocado slices or fresh cilantro on top. These add freshness and flavor. Yes, you can use other types of sausage. Italian sausage or turkey sausage are great alternatives. They will change the flavor a bit but still make a tasty soup. Just choose a sausage you enjoy. Spicy Chorizo Soup can be healthy if you make smart choices. It has protein from the chorizo and fiber from the beans and corn. To make it even healthier, you can add more veggies. Just watch the amount of salt and oil you use. Overall, it is a filling and nutritious meal. For the full recipe, check the [Full Recipe]. This blog post explored making a tasty Spicy Chorizo Soup. We covered the key ingredients, like chorizo and tomatoes, and the optional toppings. Each cooking step helps build great flavor. I shared tips for adjusting spice levels and even variations for different diets. You can store and freeze leftovers easily too. Give this recipe a try. It’s simple and packed with flavor! You can enjoy it any time. Follow the steps, and you will create a great dish that everyone loves.](https://fastmealmate.com/wp-content/uploads/2025/06/b127f9eb-a221-480e-915b-a87f661d3241-768x768.webp)