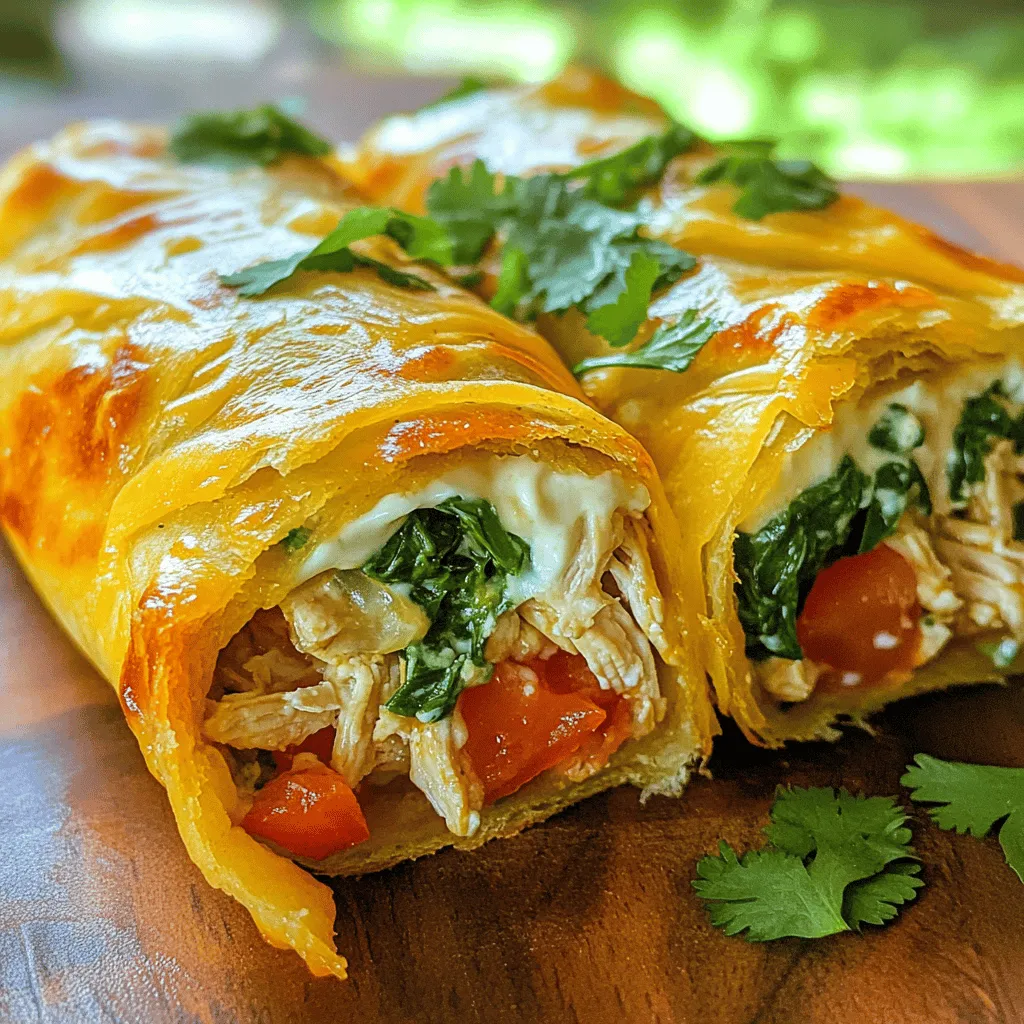
Cheesy Garlic Chicken Wraps Flavorful and Simple Meal
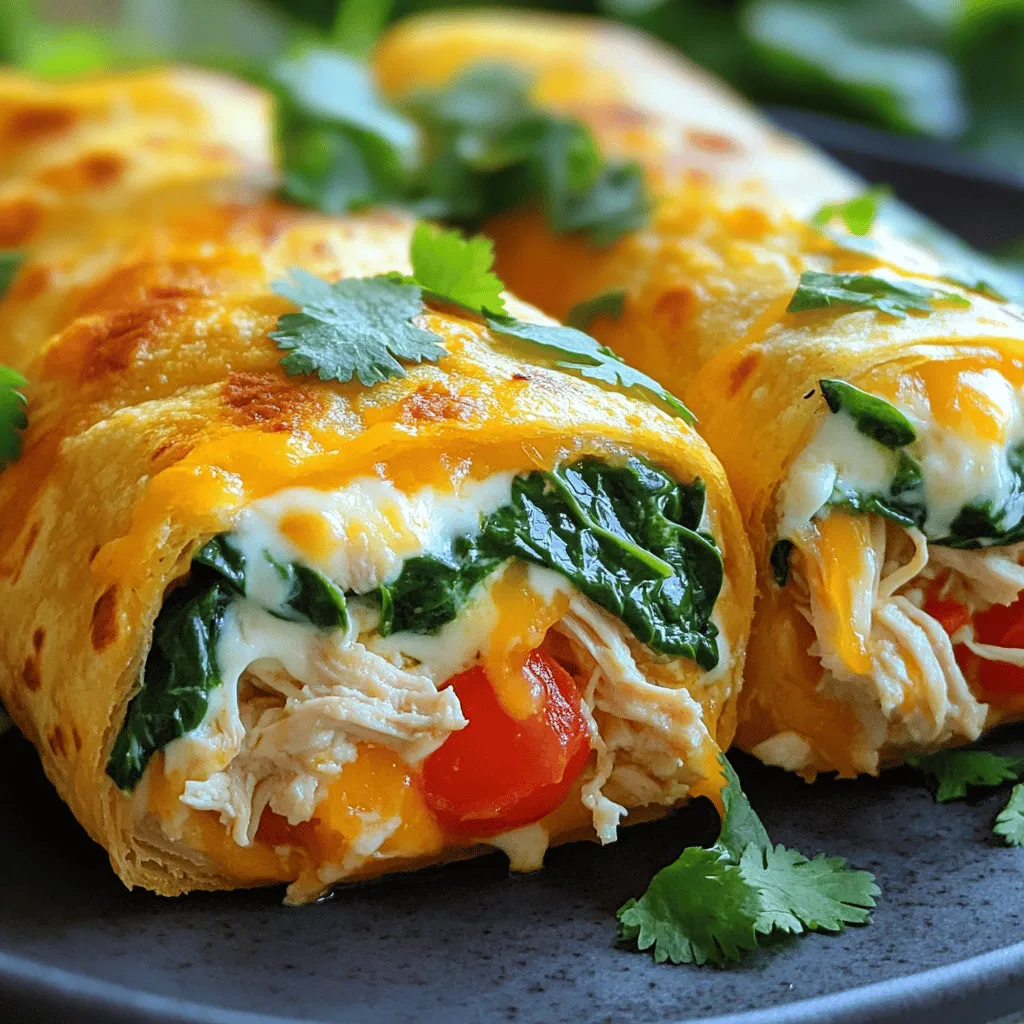
If you’re craving a quick and tasty meal, Cheesy Garlic Chicken Wraps are a must-try! This flavorful dish combines tender chicken, gooey cheese, and zesty garlic—all wrapped in a warm tortilla. It’s simple to make and perfect for busy weeknights or fun lunches. Let me show you how to whip up these delicious wraps that everyone will love! Get ready for some cheesy goodness!
Ingredients
Main Ingredients for Cheesy Garlic Chicken Wraps
– 2 cups cooked chicken, shredded
– 1 cup shredded mozzarella cheese
– 1/2 cup cream cheese, softened to room temperature
Tortilla and Additional Ingredients
– 4 large flour tortillas
– 3 cloves garlic, minced
– 1 tablespoon extra virgin olive oil
Seasoning and Garnish
– 1/2 teaspoon smoked paprika
– 1/4 teaspoon freshly ground black pepper
– 1/4 teaspoon sea salt
– 1 cup fresh spinach leaves, washed and dried
– 1 medium tomato, diced into small cubes
– 1/4 cup fresh cilantro, chopped (optional for garnish)
Gather these ingredients to create a rich and creamy filling. The combination of chicken and cheeses makes it so tasty. Minced garlic adds a nice kick. Smoked paprika gives your wraps a subtle warmth. Fresh spinach and tomatoes add color and crunch. Don’t forget the cilantro for a fresh touch.Enjoy the fun of mixing these ingredients and creating your wraps!
Step-by-Step Instructions
Preparation Steps
– Step 1: Sautéing Garlic
Start by heating the extra virgin olive oil in a medium skillet over medium heat. Add the minced garlic and sauté it for about one minute. You want it fragrant but not browned. Browning can make the garlic bitter.
– Step 2: Mixing the Filling
In a mixing bowl, combine the shredded chicken, shredded mozzarella cheese, and softened cream cheese. Add the sautéed garlic, smoked paprika, black pepper, and salt. Stir well until the mixture is smooth and the cheeses blend together.
Assembling the Wraps
– Step 3: Filling the Tortilla
Lay one tortilla flat on a clean surface. Scoop a generous amount of the cheesy chicken filling and place it in the center. Top with a handful of fresh spinach and diced tomato. If you like, add chopped cilantro for extra flavor.
– Step 4: Rolling the Wrap
Fold in the sides of the tortilla toward the center. Then, carefully roll it up from the bottom to form a tight wrap. Press gently as you roll to keep the filling inside. Repeat this with the remaining tortillas and filling.
Cooking the Wraps
– Step 5: Grilling in the Skillet
Heat the skillet again if needed. Place the wraps seam-side down in the skillet. Grill for about 2-3 minutes on each side until golden brown and crispy.
– Step 6: Slicing and Serving
Once grilled, let the wraps rest for a minute. Slice each wrap diagonally for easy handling. Serve hot, possibly with your favorite dipping sauce.
Tips & Tricks
Best Practices for Cooking
– Ensuring Optimal Grilling Temperature
Start by heating your skillet over medium heat. This helps get a nice golden-brown finish. If it’s too hot, the outside may burn while the inside stays cold.
– Tips for Evenly Melting Cheese
Mix your cheeses well with the chicken filling. This allows the cheese to melt smoothly. Using room temperature cream cheese can help it blend better too.
Enhancing Flavor
– Adding Spices or Herbs
For a kick, try adding red pepper flakes or Italian herbs. Fresh basil or oregano can also add great flavor. Just a pinch can change the taste.
– Customizing the Filling
You can swap the chicken for shrimp or beef. Adding black beans or corn can make it heartier. Think about what you like and mix it in.
Perfecting the Wrap Technique
– Avoiding Filling Spillage
When filling the tortilla, don’t overstuff it. Keep the filling in the center, leaving space on the edges. This helps prevent messes when rolling.
– Making a Tighter Roll
Start rolling from the bottom, tucking the filling in as you go. Roll it tightly, and press gently to keep it closed. A tight wrap holds the fillings nicely.
Variations
Different Protein Options
You can change the protein in these wraps for a new taste. Using grilled shrimp or steak adds a different flair. For shrimp, just grill it until it’s pink and firm. If you prefer steak, use thin slices of grilled meat. Both options blend well with the cheese and garlic flavors.
If you want a vegetarian version with grilled veggies, consider zucchini, bell peppers, and mushrooms. Grill them until they’re tender. They add a nice crunch and a smoky taste. This version is perfect for meat-free meals!
Cheese Alternatives
Feel free to switch up the cheese for your wraps. Switching to cheddar or pepper jack offers a sharp or spicy kick. Cheddar melts well and gives a rich flavor. Pepper jack adds heat and zest. Both options make the wraps extra tasty.
You can also try cream cheese options and variations. Mix in herbs or spices to the cream cheese for a new twist. Garlic or chive cream cheese can make the filling even creamier and more flavorful.
Additional Toppings and Sides
Don’t forget about toppings! Suggested dipping sauces like ranch or salsa can elevate your wraps. A creamy ranch balances the garlic well. Salsa adds freshness and a bit of spice.
Serving your wraps with a salad or rice is a great idea. A simple side salad with mixed greens pairs nicely. If you prefer rice, consider a cilantro lime rice for a fresh touch. These sides complement the wrap and make it a full meal.
Enjoy experimenting with these variations to find your perfect cheesy garlic chicken wrap!
Storage Info
Storing Leftovers
Refrigeration Guidelines
You can keep your Cheesy Garlic Chicken Wraps in the fridge. Store them in an airtight container. They stay fresh for 3 to 4 days. Make sure they cool down before sealing them. This keeps them from getting soggy.
Freezing for Long-term Storage
If you want to keep them longer, freezing works great. Wrap each one in plastic wrap and place them in a freezer bag. They can stay frozen for up to 3 months. Just remember to label the bag with the date.
Reheating Instructions
Best Methods for Reheating
To reheat, you have a few good options. The oven is best for even heating. Preheat it to 350°F (175°C) and bake for about 10-15 minutes. You can also use a skillet over medium heat. Just heat them for a few minutes on each side.
Ensuring Crispy Texture
To keep that crispy texture, avoid microwaving them. Microwaves can make the wraps soggy. If you must use a microwave, place a paper towel under the wrap. This step helps absorb moisture.
Shelf Life
How Long Can You Keep Them?
Cheesy Garlic Chicken Wraps last in the fridge for 3 to 4 days. In the freezer, they can last for about 3 months.
Signs of Spoilage to Watch Out For
Look for any off smells or changes in color. If the wraps feel slimy or sticky, it’s best to throw them out. Always trust your senses when it comes to food safety.
FAQs
How can I make Cheesy Garlic Chicken Wraps spicier?
To add heat, try these tips:
– Mix in diced jalapeños or other hot peppers.
– Use spicy cheese, like pepper jack.
– Add hot sauce to the filling.
– Sprinkle red pepper flakes inside before rolling.
These options give you the kick you want!
Can I make the wraps ahead of time?
Yes, you can prep the wraps in advance! Here’s how:
– Assemble the wraps and wrap them in plastic.
– Store them in the fridge for up to 2 days.
– When ready to eat, just grill them as directed.
This makes meal time quick and easy!
What are the best sides to serve with Cheesy Garlic Chicken Wraps?
Here are some great side dish ideas:
– Crisp salad with mixed greens.
– Fresh fruit salad for a sweet touch.
– Crunchy potato chips or fries for a fun crunch.
– Steamed veggies for a healthy option.
These sides pair well with the wraps!
How do I know when the wraps are done cooking?
Look for these signs:
– The wraps should be golden brown on both sides.
– The cheese inside should be melted and gooey.
– When you cut them, the filling should stay inside.
These cues show you are ready to enjoy your meal!
Cheesy garlic chicken wraps offer a quick and tasty meal option. We covered main ingredients, like chicken, cheese, and garlic. You learned step-by-step how to prepare, assemble, and cook these wraps. I also shared tips for flavor and storage.
Incorporate your favorite proteins or cheese for fun variations. With practice, you’ll master this easy recipe. Enjoy these wraps anytime, and share them with friends and family!

![- 3 medium zucchinis, thinly sliced - 1 cup corn kernels (fresh, frozen, or canned) - 1 cup cherry tomatoes, halved - 1 cup shredded cheddar cheese - 1 cup shredded Monterey Jack cheese - 1 medium onion, diced - 2 cloves garlic, minced - 3 large eggs - 1 cup milk (dairy or non-dairy) - 1 teaspoon dried oregano - 1 teaspoon paprika - Salt and black pepper to taste - Olive oil for greasing In this recipe, zucchini shines as the main ingredient. It adds a fresh taste and soft texture. The Monterey Jack cheese provides a creamy melt that perfectly blends with the other veggies. I love how the corn adds a sweet crunch, while the tomatoes burst with juiciness. - 1 cup cooked quinoa or rice (for added texture, optional) - Different cheese options like feta or gouda If you want to add more texture, quinoa or rice works great. They make the dish heartier and more filling. You can also switch out the cheese. Try feta for a tangy kick or gouda for a smoky flavor. Each option adds something unique to the casserole. - Dairy-free alternatives using almond or oat milk - Gluten-free options with quinoa instead of rice You can easily adapt this dish for different diets. For dairy-free options, use almond or oat milk and dairy-free cheese. If you need it to be gluten-free, just swap rice for quinoa. This way, everyone can enjoy this yummy meal without worry! 1. Preheat the oven and grease the dish: Start by setting your oven to 375°F (190°C). This step is key to ensure even baking. Use olive oil to grease a 9x13 inch casserole dish. This helps the casserole come out easily after baking. 2. Sautéing garlic and onion: In a large skillet, pour a tablespoon of olive oil. Heat it over medium heat. Once hot, add the diced onion and minced garlic. Sauté them for about 5 minutes. You want the onion to be soft and clear. 1. Combining vegetables and seasonings: In a big mixing bowl, add the sliced zucchini, corn, and halved cherry tomatoes. Toss in the sautéed onion and garlic. If you are using quinoa or rice, add it now. Sprinkle in the dried oregano, paprika, salt, and black pepper. Mix everything well. This ensures all flavors blend nicely. 2. Preparing the egg and cheese mixture: In another bowl, whisk together the eggs and milk until smooth. Then, fold in half of the shredded cheddar and Monterey Jack cheese. This will make the egg mix creamy and rich. 1. Layering the ingredients: Pour half of the veggie mix into the greased dish. Next, take half of the egg and cheese mixture and pour it over the veggies. Repeat with the rest of the vegetable and egg mixtures. This layering builds great flavor. 2. Adding cheese on top: Finish by sprinkling the remaining cheddar and Monterey Jack cheese on top. This creates a cheesy crust that everyone will love. Now, your casserole is ready to bake. For the full recipe, check out the details provided earlier. To avoid sogginess in your Easy Zucchini Jack Casserole, make sure to salt the zucchini first. This draws out excess water. Let it sit for about 10 minutes, then pat it dry with a paper towel. This simple step helps keep the casserole firm. Adjusting the cooking time is important too. If you add more vegetables or grains, the casserole may need extra time in the oven. Keep an eye on it. Look for a golden top and a firm center as signs that it’s done. If you want to swap the cheese, consider using feta or goat cheese. Both add a unique flavor. You can also try vegan cheese for a dairy-free version. For vegetable variations, you can add bell peppers or spinach. These options add color and nutrients to your dish. Don't be afraid to mix and match your favorite veggies! Garnishing your casserole can make it pop. Fresh herbs like basil or parsley add color and flavor. You can add a sprinkle of red pepper flakes for a bit of heat. Pair your casserole with a fresh side salad. This adds crunch and balances the meal. A simple green salad or coleslaw works great. For something heartier, serve it with crusty bread or garlic knots. For the full recipe, check out the [Full Recipe]. {{image_4}} You can easily make this casserole vegetarian or vegan. For vegetarians, just keep the eggs and dairy. If you want a vegan dish, replace the eggs with flaxseed meal or a chia seed mix. Mix 1 tablespoon of flaxseed meal or chia seeds with 2.5 tablespoons of water. Let it sit for 5 minutes to thicken before adding it to your mix. Adding plant-based proteins is also a great idea. Consider using lentils or chickpeas. They boost protein and add texture to your casserole. You can mix them with the veggies before baking. Cheese lovers can experiment with flavors. Instead of Monterey Jack, use sharp cheddar or spicy pepper jack. They add a nice kick to your dish. You can also explore other melting cheeses like Gouda or Gruyère. Each cheese gives the casserole a unique taste. Just make sure to mix and match to find your favorite combo. To elevate the flavor, add spices and herbs. Consider garlic powder, cumin, or basil. These give your casserole a nice twist. You can also incorporate proteins like chicken or beans. Shredded chicken adds heartiness, while black beans provide fiber. Mix them in with the veggies for a satisfying meal. For the full recipe, check out the [Full Recipe]. After you make your Easy Zucchini Jack Casserole, let it cool completely. Place it in an airtight container or cover it with plastic wrap. Store it in the fridge for up to 3-5 days. When reheating, use the oven for the best results. Preheat the oven to 350°F (175°C) and heat for about 15-20 minutes. This will keep it warm and tasty. If you want to keep the casserole longer, freezing is a great option. First, let it cool completely. Cut it into portions and wrap each piece tightly in plastic wrap. Then, place the wrapped pieces in a freezer-safe bag or container. This will help keep the flavors fresh. You can freeze it for up to 2-3 months. To thaw, move it to the fridge overnight. Reheat in the oven the same way, at 350°F (175°C) for 15-20 minutes. In the fridge, your casserole lasts for about 3-5 days. Look for signs of spoilage before eating. If you see any mold or smell something off, it’s best to toss it. A fresh casserole should smell cheesy and inviting. If it looks dry or hard, it may be time to say goodbye. Enjoy your casserole while it tastes its best! You can find the full recipe to make it again later. To make this casserole, start by preheating your oven to 375°F (190°C). Grease a 9x13 inch dish with olive oil. Next, sauté diced onion and minced garlic in olive oil until soft. In a large bowl, mix sliced zucchini, corn, cherry tomatoes, and the sautéed onion and garlic. If you want, add cooked quinoa or rice. Sprinkle in dried oregano, paprika, salt, and pepper, and mix well. In another bowl, whisk together eggs and milk. Fold in half of the shredded cheddar and Monterey jack cheese. In your greased dish, layer half the veggie mix, then pour on half the egg mixture. Repeat these layers with the remaining ingredients. Top with the rest of the cheese. Bake for 35-40 minutes until golden brown and set. Let it cool for 5-10 minutes before serving. You can find the full recipe details above. Yes, you can prepare the casserole ahead of time. Simply assemble it up to the baking step. Cover it with plastic wrap or foil and store it in the fridge overnight. When you are ready to eat, just bake it straight from the fridge. You may need to add a few extra minutes to the baking time. If you want to store leftovers, allow the casserole to cool completely. Then, cover it and keep it in the fridge for up to 3 days. To reheat, pop it back in the oven at 350°F (175°C) until warmed through. This casserole pairs well with a variety of side dishes. A fresh garden salad adds a nice crunch. You might also serve it with garlic bread or a simple pasta dish. If you want something heartier, consider grilled chicken or roasted veggies. For a fun twist, try serving it with salsa or hot sauce for some extra flavor. Feel free to mix and match sides to fit your meal! In this post, we explored the easy way to make a tasty Zucchini Jack Casserole. You learned about key ingredients, step-by-step instructions, and helpful tips to ensure success. We also shared ideas for dietary needs and creative variations. Remember, cooking is fun and allows you to experiment. Enjoy making this dish your own and sharing it with loved ones. Happy cooking!](https://fastmealmate.com/wp-content/uploads/2025/07/8604bb3f-9fea-4d3d-b4ff-32cbded89348-768x768.webp)