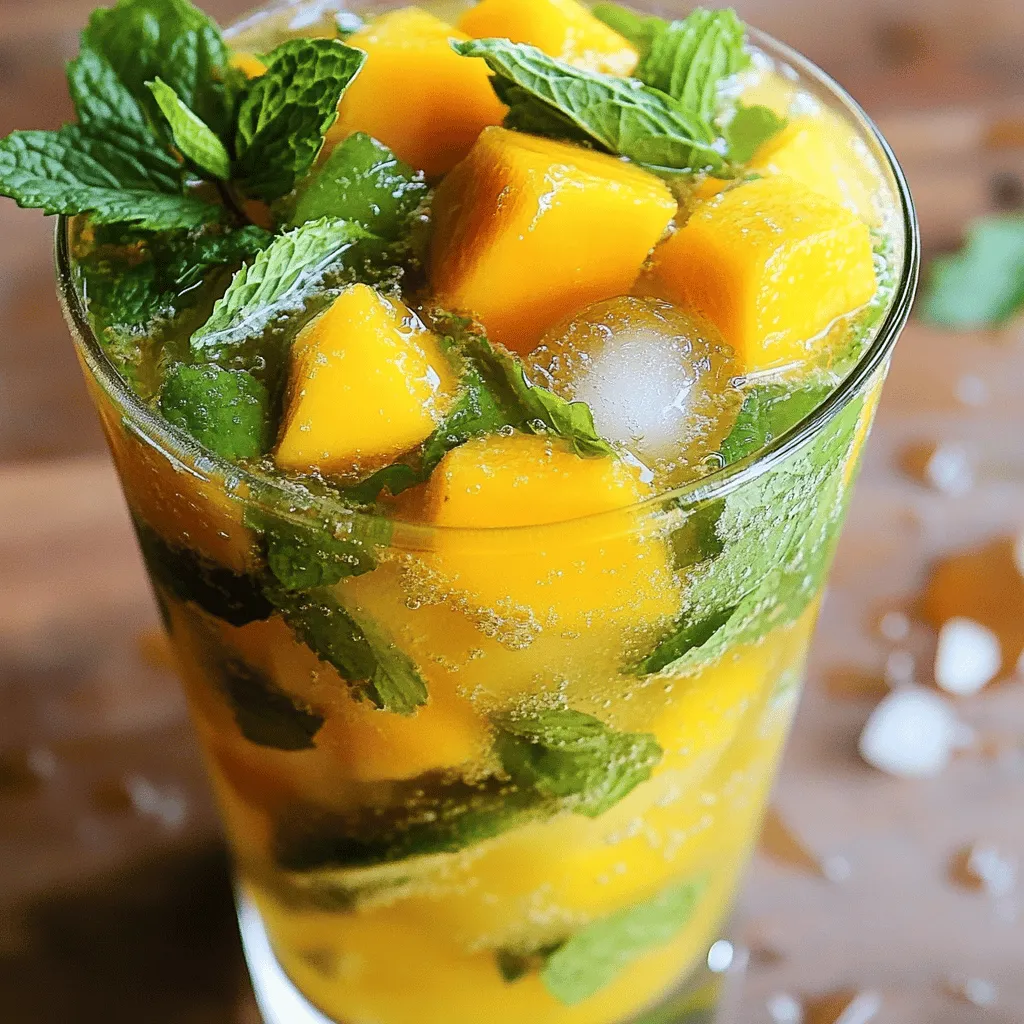
Mango Mojito Refreshing Drink for Summer Fun

Summer is here, and there’s no better way to cool down than with a refreshing Mango Mojito! This tropical twist on the classic drink is packed with fruity flavors and fresh mint. You’ll love how easy it is to make and how perfect it is for your summer parties. Let’s dive into the simple ingredients and steps to create your own delicious Mango Mojito that will impress your friends and keep you cool all season long!
Ingredients
To make a tasty Mango Mojito, gather these simple ingredients:
– Ripe mango
– Fresh mint leaves
– Fresh lime juice
– Honey or agave syrup
– Sparkling water or club soda
– Ice cubes
– Lime slices for garnish
Each ingredient plays a key role in creating the perfect balance of flavors. The ripe mango gives a sweet and juicy base, while fresh mint adds a cool touch. Fresh lime juice provides a zesty kick. You can sweeten your drink with honey or agave syrup, depending on your taste.
Sparkling water or club soda adds fizz, making it refreshing. Ice cubes keep your drink chilled, perfect for hot summer days. Finally, lime slices not only look pretty but also enhance the drink’s aroma.
Ready to mix?
Step-by-Step Instructions
Preparation Steps
– Muddling the mango and mint
Start by taking your ripe mango. Peel and cut it into small chunks. Place the mango pieces in a sturdy glass or cocktail shaker. Add ten fresh mint leaves. Use a muddler or the back of a spoon. Press down gently to crush the mint and mango. This helps release their juices.
– Adding lime juice and sweetener
Next, pour in two tablespoons of fresh lime juice. This adds a bright, zesty flavor. Then, add one tablespoon of honey or agave syrup. Stir everything gently with a spoon. Make sure the sweetener dissolves completely.
– Filling the glass with ice
Now, fill the glass with ice cubes. You want it packed but still leave room for your drink. This keeps your Mango Mojito cold and refreshing.
– Mixing in the sparkling water
Slowly pour in one cup of sparkling water or club soda. The bubbles will mix nicely with your muddled ingredients. Enjoy the fizzle as it combines.
– Garnishing the drink
Finally, give your drink a gentle stir using a spoon or straw. For a lovely touch, garnish with extra mint sprigs and a slice of lime on top. This makes your drink look inviting and fresh.
Now you are ready to sip on your delightful Mango Mojito Bliss!
Tips & Tricks
Tips for Perfecting Your Mango Mojito
– Choosing ripe mangoes for optimal flavor
Pick a mango that feels soft when you gently squeeze it. A ripe mango has a sweet smell, too. This is key for a tasty drink.
– Adjusting sweetness to taste
Start with one tablespoon of honey or agave syrup. Taste it and add more if you like it sweeter. Everyone enjoys a different level of sweetness.
– Ensuring proper muddling technique
Muddle gently but firmly. You want to release the mint oils and mango juice. Avoid over-muddling, as this can make the drink bitter.
Serving Suggestions
– Best glassware for presentation
Use a tall glass to show off the vibrant colors. A clear glass lets your friends see the layers of mango and mint.
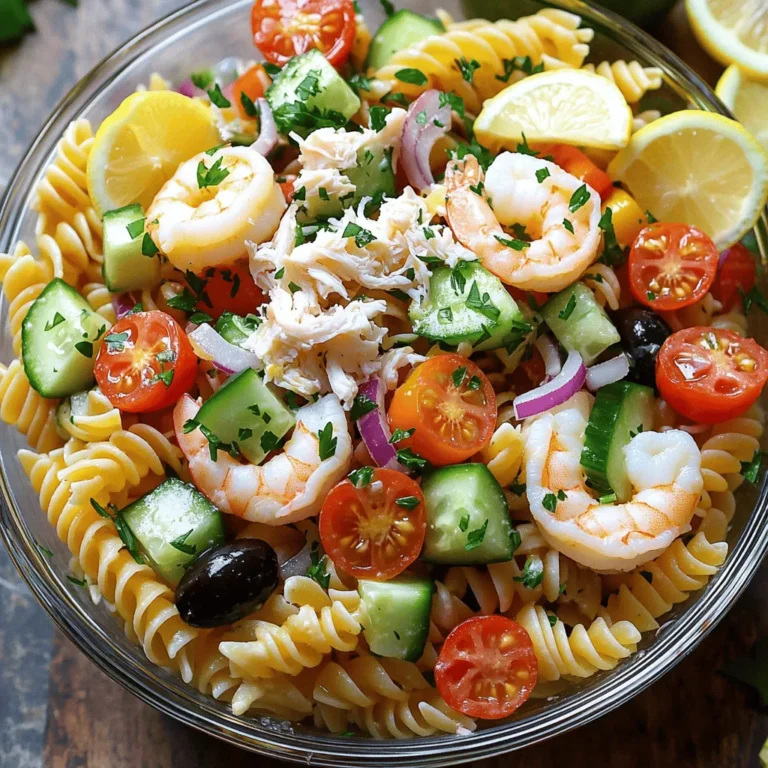
– Pairing with appetizers or dishes
Serve your Mango Mojito with fresh shrimp tacos or a light salad. The drink’s sweetness pairs well with savory flavors. Enjoying it with snacks makes for a fun summer gathering!
Variations
Different Ways to Enjoy Mango Mojitos
You can change your Mango Mojito in many fun ways. Here are some ideas:
– Adding other fruits: You can add strawberries or pineapple to your drink. These fruits pair well with mango and mint. Just chop them up and muddle them with the mango. This adds extra flavor and color!
– Alcohol variations: If you want a kick, add rum to your Mojito. Use light rum for a smooth taste. Just mix in one ounce of rum after muddling the ingredients. This makes it perfect for summer parties!
– Non-alcoholic version options: You can enjoy a Mango Mojito without alcohol too! Simply skip the rum and add more sparkling water. You can also try using coconut water for a tropical twist. This way, everyone can enjoy this refreshing drink!
Feel free to get creative with your Mango Mojito!
Storage Info
How to Store Leftover Ingredients
– Storing fresh mint leaves: Keep mint in a glass of water. Cover it with a plastic bag. Store it in the fridge. This keeps it fresh for about a week.
– Preserving leftover mango: Place unused mango in an airtight container. Add a squeeze of lime juice. This helps prevent browning and keeps it fresh for up to two days.
– Tips for prepared Mojito leftovers: If you have extra Mango Mojito, store it in the fridge. Use a sealed jar or container. Enjoy it within 24 hours for the best taste. If it gets flat, add more sparkling water before serving.
FAQs
Common Questions About Mango Mojitos
Can I use frozen mango for this recipe?
Yes, you can use frozen mango. Just let it thaw a bit first. This helps it blend better with the mint. Frozen mango will add a nice chill to your drink, too.
What if I don’t have mint leaves?
If you lack fresh mint leaves, try using basil. Basil gives a different taste but still tastes great. You can also skip the herbs and just enjoy the mango and lime flavors.
How can I make a low-calorie version of a Mango Mojito?
To lower the calories, use less honey or agave syrup. You can also swap sparkling water for a diet soda. This keeps the drink fizzy without extra calories. For a fresher taste, skip the sweetener altogether if your mango is very ripe.
This blog post outlined how to make a refreshing mango mojito. We covered the key ingredients, the step-by-step process, and helpful tips to elevate your drink. I highlighted fun variations, storage tips, and answered common questions.
Mango mojitos offer a delightful blend of flavors that anyone can enjoy. Try different fruits or adjust the sweetness to find your perfect sip. Enjoy creating and sharing this drink with friends and family!


![- 1 lb ground beef - 1 cup shredded cheddar cheese - 1 cup shredded mozzarella cheese - 1/2 cup grated Parmesan cheese - 1 tablespoon minced garlic - 1 teaspoon onion powder - 1 teaspoon garlic powder - 1/2 teaspoon salt - 1/2 teaspoon black pepper - 1 package (16 oz) refrigerated pizza dough - 1/2 cup unsalted butter, melted - 2 tablespoons fresh parsley, chopped (for garnish) I recommend using fresh ground beef for the best flavor and texture. Look for good-quality cheeses. A mix of sharp cheddar and creamy mozzarella works wonders. For the Parmesan, choose a block and grate it yourself. Fresh garlic adds a punch that garlic powder cannot match. Always opt for unsalted butter to control the saltiness in your dish. Each serving contains approximately: - Calories: 250 - Protein: 15g - Carbohydrates: 20g - Fat: 14g - Fiber: 1g - Sugar: 1g This dish packs flavor and comfort in each bomb. Enjoy the satisfaction of creating these tasty bites. For the full recipe, check the section above. First, preheat your oven to 375°F (190°C). This ensures the bombs bake evenly. While the oven warms up, grab a large mixing bowl. In this bowl, mix together the ground beef, shredded cheddar, mozzarella, and grated Parmesan cheese. Add minced garlic, onion powder, garlic powder, salt, and black pepper. Stir until all the ingredients blend well. This mixture is the heart of your cheeseburger bombs. Next, you need to handle the pizza dough. Lightly flour a clean surface to prevent sticking. Roll out the pizza dough into a large rectangle. Use a pizza cutter or knife to slice the dough into 12 equal squares. Each square should measure about 3 inches by 3 inches. For each square, place a generous spoonful of the cheeseburger filling right in the center. Now, fold the corners of each dough square over the filling. Pinch them tightly to create a seal. Place the sealed bombs seam-side down on your prepared baking sheet. Now it’s time to bake. Brush the tops of each bomb with melted butter. This gives them a nice, golden finish. Bake these tasty treats in the preheated oven for 18-20 minutes. They should puff up and turn a beautiful golden brown. After baking, let them cool for a few minutes on the baking sheet. This step helps enhance the flavors. For a fresh touch, sprinkle chopped parsley on top just before serving. For the full recipe, check the earlier section. Enjoy your Garlic Parmesan Cheeseburger Bombs! To make your Garlic Parmesan Cheeseburger Bombs pop with flavor, use quality spices. Fresh garlic adds a strong taste. Minced garlic blends well with the beef. Garlic powder boosts the garlic flavor. Onion powder adds depth and sweetness. The mix of cheddar, mozzarella, and Parmesan gives a rich, creamy texture. Try using sharp cheddar for a bolder taste. Always taste the mixture before sealing the bombs. Adjust the salt and pepper to your liking. A perfect golden crust makes your bombs look and taste great. Start by brushing the tops with melted butter. This adds flavor and helps with browning. Bake at 375°F for 18-20 minutes. Keep an eye on them as they bake. If they are not golden yet, let them bake a few more minutes. The crust should be puffed and golden brown. For a stunning display, use a large platter. Place the bombs in a circle, and sprinkle fresh parsley on top. This adds a nice pop of color. Serve with dipping sauces like ketchup or ranch for extra fun. You can also add a side of pickles or a fresh salad. This makes a great snack or meal for any gathering. Enjoy each tasty bite from your Garlic Parmesan Cheeseburger Bombs! For the complete recipe, click [Full Recipe]. {{image_4}} You can change the filling for your Garlic Parmesan Cheeseburger Bombs. For a vegetarian option, swap ground beef for cooked lentils or black beans. Add some diced bell peppers and chopped onions for flavor. If you want a spicy kick, mix in jalapeños or hot sauce. You can even use spicy sausage for a meaty twist. This way, everyone can enjoy these tasty bombs. If you need a gluten-free option, use gluten-free pizza dough. Many stores sell this now. If you feel adventurous, you can make homemade dough. Combine almond flour, coconut flour, and eggs for a gluten-free base. This change keeps the bombs delicious and safe for those with gluten issues. Experiment with different types of dough to find your favorite. Toppings can take your bombs to a new level. After baking, try adding melted cheese on top. You can also sprinkle some crispy bacon bits for extra flavor. Fresh herbs like chives or cilantro can add a burst of color and taste. Consider serving with a side of garlic butter for dipping. These creative touches make your Garlic Parmesan Cheeseburger Bombs truly special. For detailed steps, check the Full Recipe. After you enjoy your Garlic Parmesan Cheeseburger Bombs, store any leftovers right away. Let them cool to room temperature first. Then, place them in an airtight container. This keeps them fresh and tasty. You can also wrap them tightly in plastic wrap. Store them in the fridge for up to three days. If you want to keep them longer, freezing is a great option. When it’s time to eat those leftover bombs, reheating them properly is key. Preheat your oven to 350°F (175°C). Place the bombs on a baking sheet. Heat for about 10-15 minutes. This helps them regain their crispiness. You can also use a microwave. Heat them for about 30-45 seconds. However, the oven method is best for keeping that nice texture. If you want to freeze your Garlic Parmesan Cheeseburger Bombs, do it before baking. After shaping the bombs, place them on a baking sheet. Freeze them for about an hour until solid. Then, transfer them to a freezer-safe bag. They can last up to three months in the freezer. When you’re ready to bake, just add a few extra minutes to the cooking time. Enjoy the fresh taste anytime with this simple method! You can still enjoy these bombs without specific cheese. Use any cheese you like. Try gouda, pepper jack, or even cream cheese. Just make sure the cheese melts well. This keeps the bombs gooey and tasty. Yes, you can prepare these bombs ahead of time. Make the filling and fill the dough squares. Place them on a baking sheet. Cover and store them in the fridge. Bake them fresh when you are ready to eat. This saves time for your busy days. Dipping sauces make these bombs even better. Ketchup is a classic choice. Ranch dressing or garlic aioli adds a nice touch. You can also try spicy mustard or BBQ sauce. Each sauce brings a new flavor and fun to your meal. This blog post covered all you need for Garlic Parmesan Cheeseburger Bombs. I shared the key ingredients, step-by-step instructions, and handy tips to enhance flavor. You also learned about great variations to try and how to store your tasty treats. In my final thoughts, remember to have fun while cooking. Experiment with flavors and enjoy every bite of your creations. Happy cooking!](https://fastmealmate.com/wp-content/uploads/2025/06/70ca770e-dfd2-457a-a57a-f773e5b0e22d-768x768.webp)